Installing A Kitchen Tile Splashback – The Basics

by

03 October 2017

Home & Garden

kitchen-2619008_960_720

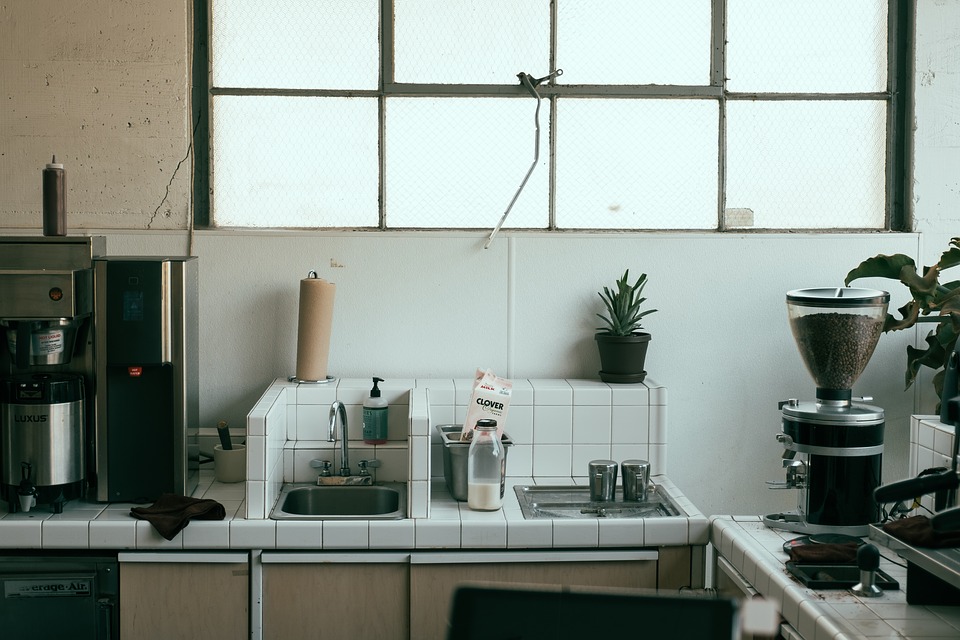
Adding wall tiles to a backsplash can be a really simple and effective way to spruce up your kitchen sink area, as well as protecting the surface as well. Here we look at the basics.

Home improvements needn’t be expensive, all it takes is a little research and time and you can make a significant difference to the house you live in. Choosing tiles for a kitchen splashback can be a really simple and effective way to spruce up your kitchen sink area, as well as protecting the surface as well. For a project like this, you are likely to need little more than a couple of days to complete it, and a minimal amount of money to achieve a great result, depending on the equipment you already have.

Before You Start

Prepare The Wall

Before you start, clear everything out of the way that may obstruct the job and/ or get broken or damaged while you work. You should also check that the wall is good for tiling as well – chances are you will choose porcelain tiles, which are heavier than more traditional ceramic tiles so the walls need to be up to support their weight. If there is any level of condensation you must wait for the wall to completely naturally dry out before you begin tiling. If the drywall you’re working with isn’t sound, you must repair it before you do any tiling.

Plan The Design

You’ll need to plan your design before you can purchase your equipment or begin the project. Measure how high you want the backsplash to be from the countertop and consider the type of tiles you would like to use. If you are unsure, take a look at sites like Pinterest for inspiration.

Get Your Equipment

When buying your equipment, especially your wall tiles, try to start with more than you need. With porcelain floor tiles or wall tiles, it is always good to have extras in case some get damaged during the job or even years after and you need a replacement tile that matches. In order to determine how much tile requires you need to measure the length and width of the area, you are putting a backsplash on. Simply multiply the length by the width to get your desired wall tile amount. If you don’t know what type of equipment you need for the job, speak to an advisor at the shop or warehouse and they will be able to advise you on the best tools for the job.

Read also: Close Look At Top 5 Roofing Materials – Pros And Cons

Install

Once you have done all the correct preparation, it’s time for you to install your backsplash.

Safety First

The first thing you need to do is make the area you are working in safe. All electrical appliances nearby should be either turned off if they are permanent fixtures, or moved away if they are temporary.

Read also: Making Your Office Safer For Workers

Clean The Area

Using a clean cloth, gently wipe the area with warm water and let it dry naturally.

Apply The Adhesive

Using the manufacturer’s instructions, apply your tile adhesive using a tile trowel. Make sure the adhesive is spread thinly and only apply enough adhesive for the area you are tiling, or it will dry before you have applied all the tiles.

Lay The Tiles

Place the first tile at the bottom of the backsplash in the middle. Firmly push the tile on to encourage it to settle into the adhesive and use a level to make sure it isn’t wonky. Use a spacer or piece of cardboard on each corner of the tile and push them into the adhesive well. Continue to lay the tile’s row by row, taking care to remove any adhesive that pushes up through the tile gaps. Ensure you are leaving enough room for grout and checking constantly that the tiles are level.

Cut Tiles Away In A Separate Area

Depending on the equipment you are using, you need to ensure you follow all safety procedures to ensure you are working safely. Ensure you only score tiles where the scored section won’t be showing, and only score tiles when you need to, as the measurements needed may change as the job progresses.

Wipe

Once all the tiles have been laid you can wipe away any adhesive that has seeped out using a clean, damp cloth.

Leave The Tiles To Dry

You must leave the tiles to dry according to the time stated by the adhesive manufacturer. Trying to skip this process will result in an uneven backsplash and tiles that will not remain stable.

Grout

When mixing grout you should be wearing appropriate safety equipment such as gloves, goggles and a mouth mark. Grout the tiles precisely and carefully, taking care to wipe away any excess once it becomes firm. Once the grout has dried, you can then wipe the tiles off completely.

Well Done!

You should now have a fancy new backsplash to enjoy in your kitchen! Remember, if you take the time to do the job right, you should end up with a well-done backsplash that will look fantastic and last for years to come.

Content Rally wrapped around an online publication where you can publish your own intellectuals. It is a publishing platform designed to make great stories by content creators. This is your era, your place to be online. So come forward share your views, thoughts and ideas via Content Rally.

View all posts

Leave a Reply

Your email address will not be published. Required fields are marked *

Related

Trailing Indoor Plants

10 Best Trailing Indoor Plants To Buy In 2022

Your dream house needs some ornaments and decorations to stand out as the queen of all houses in your neighborhood. With trailing indoor plants, you can add the green your beautiful home was missing all this time. For the urban dwellers, it is almost impossible to live inside the greenery. But, using indoor trailing plants, you can bring the green into your house. Indoor plants are the lively jewelry of your home decoration, and it is no secret. It is only with the green plants that the brick walls and your house's concrete get the touch of life. Hanging a few vines here and there from the pots can add the touch of the goddess of green vines to your home. You can keep a trail of the indoor plants on the railing of the staircase. You can hang some of them from the porch ceiling of your house. Maybe you can keep one or two containing some low-light plants for the interior? As you start to live with the green, you add extra life and vivacity to your life. So now, if I have got you even a little bit interested in the indoor trailing plants, allow me to introduce you to the best trailing indoor plants that you can decorate your house with. 10 Best Trailing Indoor Plants You can invite the wild indoors with these incredibly pretty green trailing indoor plants mentioned in this article. 1. Trailing Indoor Plants: Golden Pothos Golden pothos is just as beautiful as healthy for your surrounding environment. Not only can they thrive in the low light, but they also keep the air around you pure and refreshed. They help eliminate odors and cleanse the air within your home with formaldehyde, benzene, and carbon monoxide. If you have to stare at the computer screen all day long, you can look at them to reduce the irritation. As for decorating the interior, it is one of the most beautiful trailing indoor plants that you can hang from the ceiling of your room or the balcony. Read More: Grow these flowering plants in your home garden 2. Trailing Indoor Plants: Satin Pothos Scindapsus pictus' Exotica' or satin pothos is another vine you can keep within your home. It grows slowly, and the beautiful green leaves are splashed with silver color. This plant takes only a little water to grow within low light. When 2 cm of the compost goes dry, you can water them. Even NASA recommends these plants for the refinement of indoor air. The satin pothos are easy to propagate, and they are low maintenance. Many people keep them as good luck charms. If you have a flower vase with a stand in the drawing-room, you can place one of these plants there. 3. Trailing Indoor Plants: String Of Pearls One of my favorites, Senecio Rowleyanus, or String of pearls, is another pretty member that you can add to your drawing room. The skinny stems of this plant grow green bubbles as if they are green pearls. During winter, tiny white flowers grow out of the String of pearls plants. These are cascading plants, and they can be the attraction of your home decor. It is a pretty trailing indoor plant that grows in low light and dry air. I will suggest you make a trail of these indoor green pearls. You can hang them from baskets or use a shelf to arrange a trail of baskets containing the String of pearls. 4. Trailing Indoor Plants: Burro's Trail You can easily grow, propagate, and maintain the Burro's trails. However, if you are worried about your children and pets, then allow me to assure you that these trailing indoor plants pose no harm to them. They are nonpoisonous plants and are easy to grow and maintain. You can lay them on top of a pot full of compost and grow them quickly within a few days' notice. The plant also requires minimal watering. You can water them when the 2 cm of the compost is dry. You can decorate the interior with a few small baskets of the Burro's tail hanging from the ceiling. Or, you can also keep them on top of the tables in the dining room. You May Like To Read: 4 Essential Tools Needed to Maintain Your Garden in the Winter 5. Trailing Indoor Plants: Red Herringbone Plant Maranta leuconeura, Red herringbone plant, also known as the prayer plant, is another beauty to decorate your interior. The attractive patterns of this plant will amaze you both during the day and at night. Growing this plant may take a little experience. They require only a little water, but you need to water these plants when the pot is dry. The prayer plant is one of the most common trailing indoor plants, which you can place on the table. 6. Trailing Indoor Plants: String Of Hearts Also known as the Chain of hearts, sweet vines, rosary vines, String of hearts is another pretty indoor trailing plant. These are easy to grow and propagate. They have tiny leaves with pink and purple shades, making your interior look prettier as they grow and thrive across your balcony. In addition, they create the best contrastive combination with a white wall or ceiling. If you are a beginner and not much of a career giver, the String of hearts will bear with you. This plant grows within low light and requires minimum water. 7. Trailing Indoor Plants: Boston Fern Do you want to keep a vase full of green and lively ferns on the tea table? If your need is something similar, you can consider giving the Boston ferns someplace within your house. You can hang them from the ceiling or shelves. But unlike the other plants here, they are attention seekers. They need your daily care; from ample lights, humidity and regular watering are a must. Do you have space beside your window? If you do, you can put them there. They shed dead leaves, so you also need to groom them occasionally. They are also excellent givers. And they keep the interior air fresh and maintain the moisture within the house. 8. Trailing Indoor Plants: Chain Of Cactus Rhipsalis paradoxa minor, or the Chain of cactus, grows pretty-looking white flowers during the spring. However, the winter stimulates the growth of these pretty flowers. These trailing interior plants are rich in antioxidants and vitamin C. These are best for big hanging pots. You can keep a wide vase full of the Chain of cactus and let them grow wildly. They require minimum water and light, although you need to be a little experienced to grow them properly. You May Also Like This: Best Material for Garden Sheds: A Guide for Everyone 9. Trailing Indoor Plants: Grape Ivy These trailing indoor plants are pretty underrated. The grape ivy is a good air purifier; they require moderate or low light to thrive within your interior. They also have antioxidant and anti-inflammatory benefits. You can hang one or two baskets of the grape ivy inside and be amazed as they keep shining while getting older. 10. Trailing Indoor Plants: Maidenhair Fern The cousin of the Boston ferns, not too distant from its relative, the maidenhair ferns take after the qualities of the Boston ferns. They also require lots of care, ample light, and regular watering. They indeed maintain the various hues of greenkeeping a dazzling look within the interior of your house. These trailing indoor plants possess anti-thyroidal, anti-diabetic, antifungal, wound healing, and anti-hair loss properties. So not only are they pretty, but they are quite beneficial for your health as well. Let The Trailing Indoor Plants Decorate Your Home Most of these plants only take a little care and light to grow healthy within the interior of your house. You can go from little pots of green plants to large vases full of them to decorate your interior wildly. These plants have some health benefits like refreshing the interior air or cleansing it. They are also good at keeping the air humid. If you are looking for such plants, I suggest you choose from any of these vines, pothos, cactuses, and ferns. Also, if you think that we have missed out on any valuable plant, you can let us know through the comment. Read Also: Garden Edging for Beginners How To Arrive At The Perfect Choice Of A Potting Bench For Your Gardening How To Install Artificial Grass In Your Garden – Installation Guide Step By Step

READ MOREDetails
gm36x60

How Activity Mirrors Add Value to Exercise Place!

The most important thing in anybody’s life is to get to know the best things around and to let it be in the right place. If you are going to win over a place and that too for a better reason for scope and action then think of making a positive change. It is right in front of different sorts of approaches that you can find a fair deal. You can provide a trendy look to your gym or the training center with Activity/Gym Mirror. At the same time, you can find a better reason for scope and action. You need to see the best sorts of things and that too for better exposure and reasons. The display is Very Important for Proper Ambiance You see things are going all well with the best sorts of things and reasons to explore for best products. It is just too important to look for the best sorts of deals and that too in a proper way of course. If anyone wants an exotic presentation at the gym with mirrors then you need to find the best sources, and how to look for the great opportunities around. Creating a proper display buzz for your best attitudes is a way out of different sorts of marketing tactics that you need to look for the best kinds of clientele. You need to see what kinds of things really matter and required as per marketing gimmicks are advertised. People are Getting Health Conscious Every Single Day The way of life is all too busy and it becomes more of a necessity to keep you all active and healthy. You are doing a typical 9 to 5 job, and then it’s all sitting and working. So, it is best if you join a proper job and do little exercise that is good for you. It is healthy and keeps blood circulation all moving. Eventually, it is all going to be the best way to look for the best kinds of options. If anyone enters any exercise arena with the purpose of regular joining then he will definitely look at the typical machines as well as the overall environment. Here keeping gym wall mirrors display all around is too good. [gallery columns="1" size="full" ids="1109"]   How to Purchase Great Quality Wall Mirrors Well, the range of wall mirrors is not limited and it varies from client to client. It is a need-based requirement and for bathrooms, there are different sizes. If someone wants to display it for beautification at an entrance then different sorts of designs and sizes are required. Here clients are going to look for their own preferences, and then gym mirrors will be best available through online stores. It is easy to select, pay and gets home delivery, without moving a single foot out of your exercise center. The sizes of gym mirrors are subject to walls, and how much a client requires and it will work great for sure.  It is an easy and effective method as technology develops and online shopping is paying off for sure.

READ MOREDetails

Turn your attic into a living space

When purchasing a home, people have some projection of the future. However, it is hard to predict everything. This is why we like getting a place with the room for improvement and expansion. The attic is probably one of the first choices for home expansion of growing families. It often seems miraculous the way an empty, or a storage room turns into a comfortable living space. The purpose : The purpose of your loft-conversion is an important element of project planning. Some of the most convenient and usual purposes are a playroom, an office, an entertainment room, or a bedroom. Decide the most convenient purpose depending on what you lack space for. Perhaps this can give your children enough space to play when they are indoors, or finally give you the master bedroom you’ve always wanted. The purpose will determine the layout, the amenities, and the type of access. The access : Perhaps you are used to using the attic ladder, however, when this becomes a room you use every day, the ladder is no longer acceptable. First of all, consider the space you have. Is there anything on the floor below which will make fitting a staircase difficult? Perhaps in certain scenarios, it could block one of the doors into one of the rooms. Hire a professional to make a plan for the stairs, unless you are a professional, or truly experienced. Safety should be your priority. Also if your loft is meant to be a playroom, you should definitely get a banister and safety get at the top and the bottom. The style : Does your attic currently have enough space for your purpose? Is the ceiling high enough? Do you have enough windows? Check your local regulations, get the required licenses and choose the style of the conversion. There are three common styles of the loft conversion, mansard, dormer, and roof light. The roof light is probably the most convenient one as it does not require major alterations to your roof. This is the reason why there is usually no need for planning permits.  The other two styles, however, involve creating more space and offer a better choice of windows. You can get more daylight and a possibility of installing shutters and other window treatments greater energy-efficiency. Electricity/Plumbing/HVAC : Hire a licensed electrician to establish whether your current system can handle the increase in the electrical load required for the new room. Let them do the wiring. Look for the main stack and plan your bathroom in that area. A professional plumber should have no trouble setting it up. Finally, the last contractor you will need for this type of project is an HVAC specialist. They will tell you if the current system can support another room and set it up. Insulation : Insulation is another essential part of the conversion. Perhaps even the most important one. Without it, the room would be impossible to live in due to extreme temperatures. It protects a room from the weather elements and increasing energy efficiency. Hang drywall once you are done insulating. Flooring : The floor insulation is not so much for the sake of warmth, but for the sake of noise. Installing floorboards requires an excellent subfloor to reduce the squeakiness. Also, a carpet may be a good choice as it absorbs a lot of noise. While you are at it, carpet tiles are excellent for a playroom. They are not slippery, they absorb sound and they are easily removed and replaced. The room now fulfills all standards to be lived in. All you are now left with are the finishing touches. You need to select the colors, the furniture, and decor.  Do so according to the purpose of the room and your taste. Bio: David Koller is a freelance blogger passionately interested in minor house fixes and home décor. Read More : Natural Ways To Get Rid Of Flea In Your Lawn Leather Furniture Is An Essential Improvement For Any Home Or Office Ten Tips To Make Most Out Of Your Outdoor Space

READ MOREDetails