Tips For Planting And Maintaining Greenery On Garden Fences

Published on: 30 March 2023 Last Updated on: 20 September 2023
Garden Fences

Garden fences are an essential part of any outdoor space, providing privacy, security, and aesthetic appeal. One way to enhance the look of your garden fence is to plant greenery on it. 

Not only does it add visual interest, but it can also provide shade and habitat for birds and other wildlife. However, planting and maintaining greenery on decorative garden fences can be challenging. 

How To Maintain Greenery On Garden Fences?

Maintaining greenery on decorative garden fences addition is a beautiful and natural touch to your outdoor space. When it comes to maintaining greenery on garden fences, consider the versatility of custom window boxes. These personalized window boxes can enhance your garden’s aesthetic and provide a perfect space for your favorite plants.

Without proper care theses, the beautiful natural touch can look like a small wild bush. More than installing the fence panels, regular maintenance is required to ensure the long life of the fences. Check out cedarmountainfence.com for fencing repair and maintenance ideas.

Maintain Greenery On Garden Fences

Let’s see the easy caring tips that do not require expert help. You can apply these tips on your own by using small and readily available tools.

1. Choosing The Right Plants For Your Garden Fence

The first step in planting greenery on your garden fence is to choose the right plants. When selecting plants, consider the amount of sunlight your fence receives and the soil quality. 

Some plants, such as ivy and jasmine, are ideal for shady areas, while others, like clematis and morning glories, prefer sunny spots. You should also choose plants well-suited to your soil type and moisture levels.

It’s also important to choose garden fences and plants that will complement your existing landscaping and the style of your garden fence. Consider planting wildflowers or climbing roses if you have a rustic wooden fence. You might opt for succulents or grasses if you have a more modern fence.

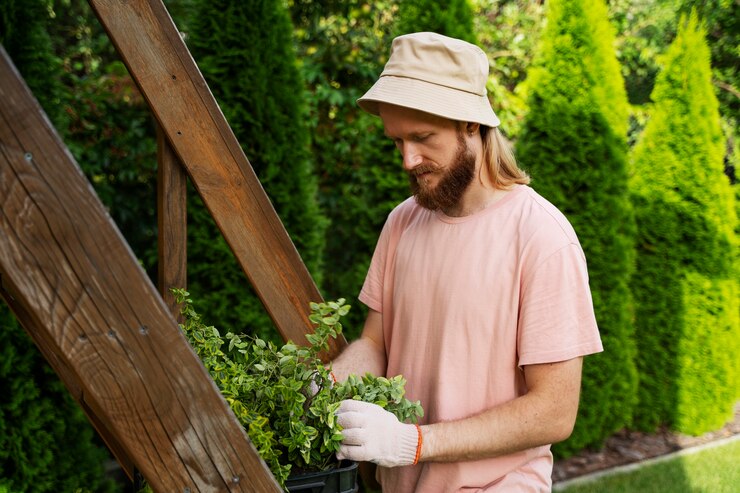
2. Planting Your Greenery

Once you’ve chosen the right plants for your garden fences, it’s time to start planting. Before you begin, be sure to prepare the soil. Clear any present debris or weeds from the area, and amend the soil with compost or other organic matter to improve drainage and fertility.

When planting your greenery, be sure to follow the specific planting instructions for each plant. Some plants, such as climbing roses or ivy, may require a trellis or other support structure to climb up the big or small garden fences. Other plants, like clematis, may require regular pruning to keep them from becoming too heavy and damaging the fence.

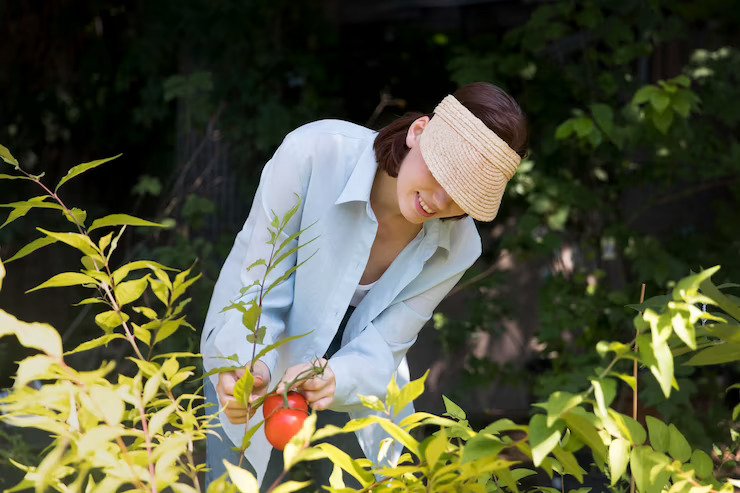
3. Caring For Your Greenery

Proper care is essential for the health and longevity of your greenery. Be sure you are watering your plants daily, especially during hot and dry periods. Fertilize your plants as needed, following the specific instructions for each plant.

Regular pruning is also important to keep your greenery healthy and well-maintained. Be sure to remove any dead or diseased branches and prune back any overgrown areas that are crowding out other plants or obstructing your view.

4. Protecting Your Garden Fence

While planting greenery on your garden fences can be a beautiful and eco-friendly solution, it’s important to protect your fence from damage. Be sure to use plant ties or other support structures to prevent your plants from pulling down or damaging your fence.

You should also be aware of any potential pests or diseases that could harm your greenery or your fence. Be sure to monitor your plants regularly and take action if you notice any signs of infestation or disease.

5. Provide A Sufficient Amount Of Water And Nutrients

Make sure your plants receive enough water and nutrients to thrive. Consider using a slow-release fertilizer or compost to give your plants the necessary nutrients.

Regular pruning helps your plants to maintain their shape. And regular pruning also prevents them from becoming overgrown or damaged. Prune away dead or diseased branches, and remove any growth encroaching on other plants or structures.

Keep your eye out for pests and diseases which can damage your plants. Using the natural pest control methods, like companion planting or organic pesticides, keeps your plants healthy.

Conclusion

Planting greenery on your garden fence is a great way to add beauty and interest to your outdoor space. If you are concerned about deer damaging your garden, installing a deer fence from https://www.critterfence.com/hemp-drying-mesh by a professional can provide the protection you need while adding value to your property.

By choosing the right plants, planting them properly, and providing proper care and maintenance, you can create healthy and thriving garden fences that will enhance the look and feel of your outdoor space for years to come.

Read Also:

Abdul Aziz Mondol is a professional blogger who is having a colossal interest in writing blogs and other jones of calligraphies. In terms of his professional commitments, he loves to share content related to business, finance, technology, and the gaming niche.

View all posts

Leave a Reply

Your email address will not be published. Required fields are marked *

Related

how to harvest dill

How to Harvest and Preserve Dill for Year-Round Use?

The tender, fern-like leaves of dill almost beg to be touched. If you want to cook them, trim the fresh dill foliage and gather the seeds for pickling. Or you can chop the feathery leaves and yellow umbels for attractive bouquets of homegrown flowers. In addition, black swallowtail caterpillars love to feed on it. Its tiny yellow blooms are great at drawing in a wide range of pollinators. Dill grows as an annual for summer harvests in USDA Hardiness Zones 2–8. In other parts, it may self-seed and is hardy in the winter in Zones 9–11. Here is everything you need to know about how to harvest dill. Keep reading for a comprehensive guide. How to Harvest Dill? Fresh dill clips easily, but it soon starts to droop. Sounds familiar to Cilantro, right? Its flower umbels may look lovely in a mixed bouquet, but after a few hours, don't be shocked if they start to wilt. When harvesting dill for recipes, use it as soon as possible because its flavor starts to fade after a few days. Cut off the flower stalks of dill after the yellow blooms have faded but before the seeds start to ripen and come away from the umbel. Cover the entire flower head with a small paper bag that has a few tiny holes for ventilation. Hang the plant upside down in a cool, dry place. Watch for the seeds to fall and collect them in the bag's bottom. The seeds should be kept in a cool, dry, and dark area in an airtight glass container. When and How to Plant Dill? Dill grows best outside and is simple to start from seed. Plant the seeds directly into the ground, 1/4 inch deep and spaced 1 to 2 inches apart, in the springtime following the last frost. If you want the dill plants to be able to self-sow, plant the seeds in tufts so the seeds can fall and sprout the following year. Or you can plant them in rows spaced about 6 inches apart. You might want to think about succession planting if you want a reliable supply of dill. During the growing season, start by planting a small number of seeds from the packet at a time and then a few more every week. Typically, seeds take 7 to 14 days to germinate. Also, dill can be grown from transplants grown in nurseries planted in the ground or in containers in spring. You can plant dill outside a few weeks before the last predicted spring frost because it can withstand light frost. To achieve lush growth and stop crowded seedlings from producing seed heads, which stops the production of foliage, thinning is essential. Every 12 to 24 inches, reduce the number of seedlings to just the strongest one once they reach 3 or 4 inches in height. As they get bigger, some start to flop. Plants can be kept upright by placing a stake or a sturdy twig in the ground close to the plant's base. To loosely secure the plant to the stake, use garden twine. You can start the dill seeds indoors four to six weeks prior to the last frost. And you can move the seedlings to the ground once the risk of frost has passed. Transplanting mature dill does not work well, so plant your seedlings where they will be able to grow and thrive. Where To Plant Dill? Dill should be planted in a spot with well-drained soil and at least 6 to 8 hours of daily full, direct sunlight. Particularly for cottage gardens, the delicate foliage gives garden beds and borders textural interest. Choose a location for your dill that will shield it from the wind if possible. Just like spinach, high winds can easily damage its stalks if you do not stake the dill. You can plant dill's fragrant foliage in perennial garden container plantings. Or you can plant them alongside other herbs or vegetables in a traditional kitchen garden. In an edible garden, cruciferous vegetables such as Brussels sprouts, collard greens, broccoli, and cabbage are good companion plants for dill. Dill draws beneficial insects like ladybugs and bees and drives away common brassica pests like loopers and cabbage worms. But avoid planting dill close to carrots. Carrots can be stunted by dill, and because they are closely related, dill can cross-pollinate with carrots to produce inferior hybrid plants. Planting dill close to tomatoes is also not recommended. Mature dill will probably stunt your tomatoes' growth, even though some studies have indicated that tomatoes and dill can be beneficial companions when they are young. How to Propagate Dill? Seed is the most effective method of dill propagation. Cuttings can also propagate Dill, though this isn't as dependable. Seed: Direct sow the dill seeds in early spring at a depth of 1/4 inch in a prepared garden bed. Dill does not tolerate transplanting well. Thin the seedlings so they are 12–24 inches apart when they are 3–4 inches tall. Cuttings: Using shears or scissors, cut off the stem with at least 3 to 4 inches of new growth to take a dill cutting. Place the cutting in a water-filled container, making sure to remove any leaves below the water's surface, and allow the roots to grow for two to three weeks. Fertilizer and rooting hormones are not required. Plant the dill in a container or on the ground once the roots are 2 to 3 inches long. Is Dill a Type of Weed? No, I am not talking about WEED weed (read: marijuana). Although dill isn't technically a weed, some individuals and spice companies call the plant dill weed, possibly due to its feathery leaves. Dill weed is a dried or fresh foliage plant. Flower umbels are yellow and used to make dill seeds. How Should Dill Be Stored for Optimal Quality? You can keep fresh dill in the fridge by wrapping its leaves in a moist paper towel. Or you can tuck its stems into a container of water. Fresh dill can be frozen by submerging it in water in ice cube trays. Place the cubes in cooked dishes that have enough moisture to withstand them. Dill seeds and leaves can also be easily dried for later use, though the flavor is a lot more muted. Water and Soil Sow dill in soil that is moist but well-drained. If there is a lot of clay in your soil, add organic matter to the top few inches to aid in drainage. If you have trouble with poor soil drainage, plant this herb in raised beds or containers. Growing dill requires proper irrigation. As the seeds germinate, keep the soil evenly moist. Dill plants require one to two inches of rain or extra water each week once they begin to grow. Humidity and Temperature Dill tolerates temperatures as low as 25ºF, but 70ºF is the ideal temperature for it. Dill often bolts, sending up flower stalks to set seeds when temperatures rise. This annual herb dies after it flowers and produces seeds. Get rid of the flowers to prolong the plant's growing season. Apply Fertilizer While most herbs, including dill, don't require extra fertilizer, you can give them once or twice during the growing season by applying a balanced 10-10-10 fertilizer. When planting, either mix a liquid fertilizer with water or etch a time-release fertilizer into the soil. Refer to the product label for instructions on how much to use. Trimming Dill should be pruned early in the growing season to prevent limb bending. Cut off the top leaves of the plant to promote more growth of the lower leaves. Food preparation and cooking can be done with anything that has been pruned. Repotting and Potting You can grow dill in pots on a sunny balcony or deck, even if you don't have an outdoor garden. Due to the deep taproot that dill plants have, choose a container that is at least 12 inches deep. Because clay and terracotta pots don't retain as much moisture as plastic or glazed ceramic pots. They are ideal for growing dill. Make sure the container you select has good drainage and is big enough to allow you to space your plants 12 to 24 inches apart. It is best to start over in a new, larger container. Especially if your dill plant outgrows its current one because it does not take well to transplant. If the temperature where you are planting is not too high, you can keep planting seeds into the summer. Types of Dill Dills can be of many types with each of their distinct looks and flavors. Here are the three different types of dill you can grow in your kitchen or backyard. Long Island Mammoth Also known as Long Island Mammoth this one is an old-time favorite. Its fern-like leaves can be dried and stored for a long time, or they can be harvested fresh. It produces big clusters of yellow flowers with flat tops. They turn into brown seed heads, and they can reach a height of five feet. Fernleaf Grown to a height of only 18 inches, Anethum graveolens, or Fernleaf, is a highly productive dwarf variety. It works well in container gardens or small in-ground beds. Its feathery, delicate foliage has a great flavor of dill. From midsummer into fall, it blossoms. Bouquet The 'Bouquet' cultivar produces plants up to thirty inches tall with fine bluish-green foliage. The enormous, six-inch-diameter yellow flower heads are ideal for drying, creating an enduring arrangement. Or you could chop them for fresh floral arrangements. How to Keep New Dill Fresh? Dill weed quickly wilts after harvesting and gradually loses its distinctive flavor and aroma. If you know how to store your freshly harvested dill, this shouldn't be a problem. Here are two straightforward techniques that you can use: Put It in the Crisper Drawer of the Refrigerator Loosely wrap the recently cut and cleaned leaves in damp kitchen towels before putting them in a container or sealed bag. Put the container in the crisper drawer of the refrigerator, which has a lower humidity than the other sections of the appliance. Utilize the herbs before they begin to wilt and dry out, which should happen in a few days. Put It in Water To make this method function, when harvesting the herb, you must cut off the entire stem. After gathering the stems, put them in a glass of water and seal the opening with a plastic bag. Every day, change the water. Unlike potatoes, dill leaves can remain fresh for up to a week when stored in this manner. How to Freeze Fresh Dill? Freezing is the best way to preserve extra dill for later use if you've harvested more than you can use at once or in a few days. Dill freezes most effectively when chopped into smaller pieces and added to ice cube trays with just enough water to cover the freshly minced dill. This allows the herbs to be kept for four months or longer. This will ensure you always have dill on hand for when a recipe calls for it. How to Dry Fresh Dill? Dried fresh dill is a popular method if you're searching for another way to store dill for a long time. The herb has many uses, even though it won't have as much flavor as when it's fresh or frozen. All year long, you can use it as a herb in cooked dishes or to make tea. Stick to hang-drying if you don't want much of the flavor to be lost. This is a very easy method to use. All you must do is gather a few dill leaves and then bind them with a string. Later, place them in an area with adequate ventilation upside down.  Place them in an airtight container once they're crumbling and dry. Even though fresh dill is always preferable, make sure to save some for later use. Particularly if you don't have a year-round indoor herb and spice garden. Wrapping Up Growing dill is a great way to add flavor to fish and seafood dishes. A little goes a long way because fresh dill leaves have a strong licorice flavor. It is best that you add dill toward the end of cooking, in salads, or as a garnish for soups. Because once cooked, it tends to lose its flavor. If you have thoughts to share or questions to ask about how to harvest dill, please leave a comment below. We would love to hear from you! Read Also: Asparagus 101: When, How, And How Often To Harvest? How To Harvest Sunflower Seeds: A Fun And Easy Activity For The Whole Family How TO Harvest Lemongrass: Tips AND Tricks FOR Growing AND Using This Versatile Herb

READ MOREDetails
Unveiling Littleton's Best Lawn Care Services

Uncovering Littleton’s Best Lawn Care Services

Regarding lawn care, Littleton's best services take a strategic and scientifically grounded approach that results in lush, healthy, and beautiful lawns. These lawns become the envy of neighbourhoods, stand out in the summer sun, and sparkle in the winter frost. One may wonder, "What's the secret to such beautiful lawns?" The answer lies in various lawn care strategies, including weed control & fertilisation, liquid aeration, overseed, revive, winter mite control, and weed kill in rock/mulch beds. Weed Control & Fertilization The Importance Of Weed Control & Fertilization Weeds are often the bane of any lawn owner's existence. They are hardy, pervasive, and can quickly overtake a lawn if not adequately controlled. Littleton lawn care services understand that effective weed control combines preventative measures and targeted treatments. Preventative Measures One of the keys to weed control is prevention. Instead of waiting for weeds to sprout and then trying to eliminate them, the best lawn care services take proactive steps to prevent weed growth in the first place. They do this by maintaining the right balance of nutrients in the soil and ensuring that the lawn is thick and healthy to crowd out any potential weed invaders. Targeted Treatments When weeds infiltrate a lawn, targeted treatments eradicate them without damaging the surrounding grass. This is where expert knowledge comes into play. Different weeds require different treatment strategies, and understanding this is crucial to effective weed control. Fertilisation Fertilisation goes hand in hand with weed control. It's all about providing your lawn with the necessary nutrients to thrive. Keeping your property well-fed makes it more resistant to disease, drought, and weed invasions. The best lawn care services understand that a proper fertilisation schedule is critical to maintaining a lush and healthy lawn. Why Liquid Aeration Is Essential Aeration is a technique that helps alleviate soil compaction, allowing your lawn to breathe, absorb nutrients and water more effectively. Traditional aeration methods can be labour-intensive and involve creating physical holes in the yard. However, Littleton's best lawn care services have adopted a more modern, less invasive approach: liquid aeration. Understanding Liquid Aeration Liquid aeration involves the application of a liquid solution that breaks up the soil at a molecular level. This process improves the soil structure and allows grass roots to penetrate deeper. The result is a stronger, healthier lawn with improved drought resistance. Overseed The Art And Science Of Oversee Overseeding is a technique used to fill in bare patches in a lawn and improve its overall density and colour. Overseeding can bring life back to a tired, worn-out lawn by sowing new grass seed over existing properties. Timing And Technique Matter When it comes to overseeding, timing and technique are crucial. The best times to overseed are usually in the spring and fall, when temperatures are moderate, and the new grass has the best chance of survival. The best lawn care services understand this, know the right amount of seed, and the best techniques for spreading it to ensure even growth. Revive Revive: A Rescue Operation Revive is a lawn care technique designed to bring back the vigour and health of a lawn under stress. This could be due to extreme weather conditions, disease, pests, or simple neglect. A Tailored Approach Revive operations must be tailored specifically to the condition of each lawn in Littleton. Littleton's top lawn care services excel at diagnosing issues plaguing properties and creating an effective revitalisation strategy; this might involve altering watering practices, changing mowing methods or applying specific treatments that address disease or pest issues. Winter Mite Control Battling The Invisible Foe Winter mites are an increasingly prevalent lawn pest in Littleton and can significantly damage during the cooler months. Feeding on grass, these tiny predators feed off it resulting in discoloured, thinner properties come spring. Preventing And Treating Infestations Winter mite control involves both prevention and treatment. Lawns can be treated with products designed to deter mites, while watering practices may also be adjusted to make lawns less inviting to these pests. Should an infestation develop, targeted treatments can be utilised to get it under control quickly. Weed Kill In Rock/Mulch Beds Maintaining The Beauty Of Rock/Mulch Beds Rock and mulch beds can be a beautiful addition to a landscape but can also become a haven for weeds. However, the usual weed control methods used for lawns aren't always suitable for these beds. Tailored Weed Control Strategies Littleton's best lawn care services have tailored strategies for weed control in rock/mulch beds. This might involve careful hand-weeding, using landscape fabric to deter weed growth, or the targeted use of weed-killing products that won't harm the desired plants. Conclusion: In conclusion, the secret to a beautiful lawn is professional knowledge, careful technique, and targeted treatments. By understanding and employing strategies like weed control & fertilisation, liquid aeration, overseed, revive, winter mite control, and weed kill in rock/mulch beds, the best lawn care services in Littleton can maintain and create lawns that are indeed a sight to behold. read Also: 5 Reasons Why You Absolutely Must Have Houseplants In Your Life How To Plant Grass Seed On Hard Dirt? – Latest Update 2022 10 Best Bedroom Plants To Buy In 2022

READ MOREDetails
Advantages of Autumn Weather To Replace Your Windows In Etobicoke

5 Advantages Of Autumn Weather To Replace Your Windows In Etobicoke

Ontario's need for windows and doors services from Vinyl Light are growing yearly. A great number of requests are coming for window replacement Etobicoke area. Etobicoke and its surroundings often need new window installation for newly built houses and older homes with poorly maintained windows. Government rebates for energy-efficient home improvements, such as vinyl windows and sliding door replacements, may also affect the windows and doors market. Homeowners are often more inclined to invest in these renovations when there are such financial incentives available. Autumn in Etobicoke may be the ideal time of the year to replace windows for a variety of reasons, such as: Autumn Brings Increased Energy Efficiency  New windows have the potential to significantly improve your home's energy efficiency by sealing off air leaks and drafts. Replacing your windows in autumn can better prepare you for the harsh winter months. As a result, your family may be more comfortable and you may spend less on heating. Increased Coziness In Autumn Replacing your windows in autumn can increase the comfort of your house by eliminating drafts and ensuring a consistent interior temperature. You'll immediately notice the difference and be better prepared for the winter. Extended-Term Strategy Replacing your windows in the fall will help prepare your home for the impending winter. You'll feel better knowing that your Vinyl Light windows are well-maintained and ready to survive the harsh Canadian winters. Autumn Window Replacement In Etobicoke Will Have An Improved Curb Appeal Your house can appear more appealing from the outside with new windows. You can prepare your Etobicoke home for the holidays and ensure that it looks good for visitors and potential buyers should you ever decide to sell it in autumn. Autumn Availability And Installation Scheduling Fall is a slightly slower time of year for window replacement companies because it occurs in between the busiest months of the year, which are summer and winter. This makes it more likely that you will be able to discover an installation date that fits within your timetable. Here are even more reasons why to replace your windows in fall: Autumn UV Protection Role Sun in autumn can still be rather intense, and new windows can provide better protection from UV rays. This keeps your furniture and floors from deteriorating and also improves the indoor air quality. Increased Coziness In Autumn Replacing your windows in the autumn can increase the comfort of your house by eliminating drafts and ensuring a consistent interior temperature. You'll immediately notice the difference and be better prepared for the winter. Learn More About: Additional Ways to Keep Your Home Warm 5 Tips to Safeguard Your Home From Intruders How To Install Artificial Grass In Your Garden – Installation Guide Step By Step

READ MOREDetails