Tips For Planting And Maintaining Greenery On Garden Fences

Published on: 30 March 2023 Last Updated on: 20 September 2023
Garden Fences

Garden fences are an essential part of any outdoor space, providing privacy, security, and aesthetic appeal. One way to enhance the look of your garden fence is to plant greenery on it. 

Not only does it add visual interest, but it can also provide shade and habitat for birds and other wildlife. However, planting and maintaining greenery on decorative garden fences can be challenging. 

How To Maintain Greenery On Garden Fences?

Maintaining greenery on decorative garden fences addition is a beautiful and natural touch to your outdoor space. When it comes to maintaining greenery on garden fences, consider the versatility of custom window boxes. These personalized window boxes can enhance your garden’s aesthetic and provide a perfect space for your favorite plants.

Without proper care theses, the beautiful natural touch can look like a small wild bush. More than installing the fence panels, regular maintenance is required to ensure the long life of the fences. Check out cedarmountainfence.com for fencing repair and maintenance ideas.
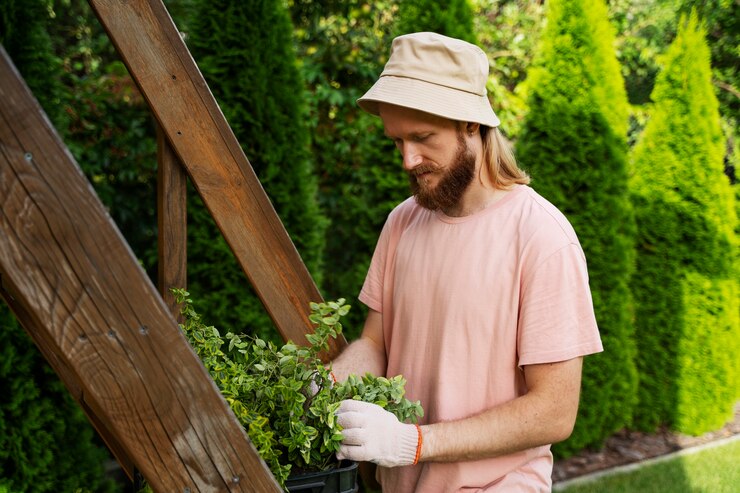
Maintain Greenery On Garden Fences

Let’s see the easy caring tips that do not require expert help. You can apply these tips on your own by using small and readily available tools.

1. Choosing The Right Plants For Your Garden Fence

The first step in planting greenery on your garden fence is to choose the right plants. When selecting plants, consider the amount of sunlight your fence receives and the soil quality. 

Some plants, such as ivy and jasmine, are ideal for shady areas, while others, like clematis and morning glories, prefer sunny spots. You should also choose plants well-suited to your soil type and moisture levels.

It’s also important to choose garden fences and plants that will complement your existing landscaping and the style of your garden fence. Consider planting wildflowers or climbing roses if you have a rustic wooden fence. You might opt for succulents or grasses if you have a more modern fence.

2. Planting Your Greenery

Once you’ve chosen the right plants for your garden fences, it’s time to start planting. Before you begin, be sure to prepare the soil. Clear any present debris or weeds from the area, and amend the soil with compost or other organic matter to improve drainage and fertility.

When planting your greenery, be sure to follow the specific planting instructions for each plant. Some plants, such as climbing roses or ivy, may require a trellis or other support structure to climb up the big or small garden fences. Other plants, like clematis, may require regular pruning to keep them from becoming too heavy and damaging the fence.

3. Caring For Your Greenery

Proper care is essential for the health and longevity of your greenery. Be sure you are watering your plants daily, especially during hot and dry periods. Fertilize your plants as needed, following the specific instructions for each plant.

Regular pruning is also important to keep your greenery healthy and well-maintained. Be sure to remove any dead or diseased branches and prune back any overgrown areas that are crowding out other plants or obstructing your view.

4. Protecting Your Garden Fence

While planting greenery on your garden fences can be a beautiful and eco-friendly solution, it’s important to protect your fence from damage. Be sure to use plant ties or other support structures to prevent your plants from pulling down or damaging your fence.

You should also be aware of any potential pests or diseases that could harm your greenery or your fence. Be sure to monitor your plants regularly and take action if you notice any signs of infestation or disease.

5. Provide A Sufficient Amount Of Water And Nutrients

Make sure your plants receive enough water and nutrients to thrive. Consider using a slow-release fertilizer or compost to give your plants the necessary nutrients.

Regular pruning helps your plants to maintain their shape. And regular pruning also prevents them from becoming overgrown or damaged. Prune away dead or diseased branches, and remove any growth encroaching on other plants or structures.

Keep your eye out for pests and diseases which can damage your plants. Using the natural pest control methods, like companion planting or organic pesticides, keeps your plants healthy.

Conclusion

Planting greenery on your garden fence is a great way to add beauty and interest to your outdoor space. If you are concerned about deer damaging your garden, installing a deer fence from https://www.critterfence.com/hemp-drying-mesh by a professional can provide the protection you need while adding value to your property.

By choosing the right plants, planting them properly, and providing proper care and maintenance, you can create healthy and thriving garden fences that will enhance the look and feel of your outdoor space for years to come.

Read Also:

Abdul Aziz Mondol is a professional blogger who is having a colossal interest in writing blogs and other jones of calligraphies. In terms of his professional commitments, he loves to share content related to business, finance, technology, and the gaming niche.

View all posts

Leave a Reply

Your email address will not be published. Required fields are marked *

Related

carrot

Can We Grow Carrots All Year Around?

Carrots are root vegetables. They vary from purple to red in color but most commonly found are bright orange ones. The orange color of carrot is due to its high content of beta-carotene. This helps suffice our body with necessary levels of vitamin A, which is required for proper functioning of our immune system. Yes, we can grow carrots all year round! Also, you may grow it anywhere, even in our small kitchen garden or as a potted plant. You must know how to grow and harvest carrot before you start the procedure of producing carrots yourself. I conducted various kinds of research including reading online resources and talking to farmers in my town before going ahead with carrots plantation. This is so because carrots are a low-acid plant and can catch contamination easily, which may make it inappropriate for human consumption. When can we Grow Carrots? Carrots are biennial plants that are they grow twice in a season. However, the seeds and flowers grow only in cold season. They take ten to twelve weeks to reach their full growth. They can be sowed in spring just before two weeks of the last frost date. In cold climate, we can continue to plant them every three weeks till mid-summer. Then again they can be sowed in summer for winter products that are due in next ten to twelve weeks. Preparing the soil First, you need to judge the solid where you want to plant your carrots. If the soil is sandy or clay soil, then it is not appropriate for growing carrots. Sandy soil and clay soil cannot retain nutrients and lacks good soil structure, which makes them inappropriate for growing carrots. Salty and loam soil is the best kind of soil for growing any vegetables. There is another variety of soil that is chalky soil. This is also not appropriate for growing carrots due to its alkaline nature. Read also: Does Organic Gardening Improve Soil Quality? Sowing Carrots Before sowing carrots, you need to dig in the soil well to about twelve to fifteen inches. Once done, you can introduce some earthworms and crawling critters who make the soil appropriate for growing carrots. Earthworms consume the organics from the soil and then scatter it throughout the soil to make the soil more fertile. Similarly, crawling critters would keep the bugs and insects away from the soil from harming the crop. You should be cautious about using chemicals to kill insects as they also take away the good part of the soil. Always organic gardening is recommended for the growth of any crop as organic gardening improves soil, its overall structure and gets it ready for next cycle as well. You can sow your carrot seeds into the sowing beds created three inches apart. The carrot seeds are very small so to distribute them evenly; you can mix them up with the sand and then sprinkle them into the sowing Cover the field with some warm blanket or a shield to avoid the tiny creatures from ruining your crop. This should be kept covered for at least three weeks to let the healthy growth of the crop. Carrot Sprouts While you decide to plant carrots, you should also be aware of how a carrot sprout looks like to differentiate it from other sprouts or just weed. The sprout is breaking out of the soil may be of cabbage or potato or some grass. Well, then how does carrot sprouts look like? You can very easily identify them. From the perspective of their appearance, they look like ferns or palm leaves. Well if that’s not all for you, then you can take the leave in your palm and crush it with your nails. Now smell the crush, and it will be like one of carrot. That’s how you can very easily identify the carrot sprouts from other growing vegetables and weeds in your kitchen garden. Harvesting Carrots You can judge the growth of the carrots by looking at their roots. The size of the roots is a good indicator of the growth of your carrots. You can pull them out in three weeks to enjoy baby carrots of wait for next ten to twelve weeks for fully grown carrots. Storing Carrots Now is the question of how to store carrots for prolonged use. You can seal the carrots in a polythene bag and store them in the coolest part of your refrigerator. One should never wash carrots until they need to be used as added moisture ruins carrot structure earlier. You can also store carrot in a box and cover it with a layer of sand. This will also help you preserve carrots for long. You can very well enjoy your garden-fresh carrots all year round once you know how to sow and harvest them. You can use them in a variety of ways in your kitchen like caramelize then with sugar syrup or bake a carrot cheesecake or eat them raw as part your daily salads. We have a lot of questions making rounds by our readers; therefore, in case, you have any further questions on how to grow carrots, or anything related to sowing or harvesting or storing them, then please comment below. Read also: Lawn Care Maintenance Services And Tips Smart Fun Gardening: How To Take Care Of A Money Tree

READ MOREDetails
Mold Damage

How to Prevent Mold Damage In a Building

Healthy living requires a clean and safe environment, but with the prevalence of many microorganisms such as mold damage, this can be challenging. This is because they are invisible to the naked eye and release spores into the air, which cause major health problems when inhaled. Mold is a fungus that grows in the form of hyphae, which are multicellular threads. It is composed of microorganisms that can be found almost anywhere. They are useful outside for breaking down garbage and composite materials, but when found indoors, they are extremely detrimental to human health. Mold damage produces allergic reactions or irritation and must be removed as soon as possible. To stop it from spreading, early detection and removal are essential. Mold remediation or removal is not something just anyone can do. To achieve a proper sanitization of the entire building to avoid the existence of mold, you will need to contact professionals or follow the complete guide about damp wall treatment procedures. This way, you will be sure that your home or office will be properly treated. Finding a good remediation service is not always a stroll in the park, especially if you have not worked with one before. However, with the right guide handy, you can easily find a professional company that will properly clean and sanitize your building. If you do not know how to find a good company, and you need recommendations on reputable companies to work with, you can visit the Long Beach mold removal company for help. Types of Molds Damage: Here are some common types: Aspergillus This type does not need much ventilation and can be found in attics, textiles, walls, dry food, and basements. It has a powdery appearance and may be white, green, or gray in color, with dark dots. It has several carcinogenic forms, but when detected within the home, it causes serious respiratory problems. Cladosporium This can be found in both warm and cold places. It can also be found on carpets, clothes, wood, and heating and cooling ducts, among other things. The color is usually black, or green. Alternaria This fungus has a white background with black dots and can be found near windows, in fabrics, bathrooms, kitchens, air conditioning units, and wallpapers. However, it is commonly found outdoors. Trichoderma This fungus is commonly creamy-white in appearance, but as it releases spores, it becomes green. Windows, baths, kitchens, and wood are among its favorite areas. Penicillium This type is fuzzy and comes in a variety of colors, including blue, green, and yellow. Basements, insulation, and carpets are all common places to find them. It is usually present anywhere a water-damaged structure is found. Penicillin, an antibiotic, is derived from it. You can learn more about penicillin by reading this article. Key Materials for Mold Removal Mold damage removal requires a variety of tools, depending on the size of the fungus and the type of surface to be cleaned. There are natural cleaning methods that may be utilized to get rid of it as well. Plastic Sheet A plastic sheet is used to separate the infected region from the rest of the room, preventing spores from spreading. It is used to block openings to air vents, doorways, and the rest of the building. Biocide It is critical to use a high-quality cleaning product for removing mold damage. The fungus will only be hidden if you use poor or regular household bleach or cleaning agent. Biocide is particularly effective at killing and inhibiting this bacterium's growth. Vinegar  Despite its strength, it is quite effective against fungus. Baking soda, hydrogen peroxide, and lemon juice can all be added to it. Wear safety clothing such as goggles, gloves, and a breathing mask when using it. To remove the mixture, wipe the area with a clean moist cloth. Sodium Bicarbonate  Baking soda, or sodium bicarbonate, has a wide range of applications, including the removal of fungus. It should be sprayed on the damaged surface after being combined with vinegar or water. After spraying, scrub the area with a brush, rinse, and then spray again. Dehumidifier This gets rid of the moisture and prevents future growth. It is best used after the cleaning procedure to air the place and remove any remaining moisture, but it can also be used as a preventative strategy. As a solution, a portable one can be stored in a room with an infestation. If you need tips on how to use a dehumidifier, you can check here: https://www.wikihow.com/Use-a-Dehumidifier Lemon Juice This natural cleanser is efficient, non-toxic, and has a pleasant scent. Before spraying it, clean the surface with soap and water. It can also be applied daily to keep fungus at bay. It is an excellent choice because it is both environmentally and pet-friendly. How to Keep Mold Damage at Bay Here are some methods to guide you: Regular Checks They can be found in open regions, but they can also grow in secret spots. This means that regular inspections of damp, dark areas like basements should be carried out to detect the infestation early before it worsens. Repair any Leaks If there is a leak from pipes or faucets, fix it immediately and dry the area. Also, inspect drains and pipelines on a regular basis. Liquid storage areas should also be checked because they can leak from their bottles. Make Use of Cleaners While it is necessary to deep clean your home on a regular basis, you should do so with a mold-prevention agent. Natural cleaners such as natural lemon, white vinegar, baking soda, as well as other citrus-based treatments are recommended. In addition to keeping fungi at bay, these solutions leave a fresh smell around the building. Allow Sunshine In Mold does not thrive in natural light and fresh air. This means that you have to open the windows and curtains to allow sunshine in. You can also turn on your ceiling fan to prevent the survival of mildew. Keep in mind that mold damage is detrimental to human health and this should guide you in taking the right steps to prevent its growth and survival. You can read articles explaining how mold affects human health for more information. Wrap Up Mold growth can pose a danger to human health; therefore, it should be nipped in the bud. Always inspect the bathroom, roof, pipes, and foundation for cracks, leaks, or damages. Delaying treatment as soon as the condition is discovered can worsen the condition and increase the cost of treatment, especially if toxic or black mold is present. This article outlined tips to help you prevent mold damage in a building. Feel free to check them out. Read Also: We Buy Houses Companies Saving Homeowners From Foreclosure Cleaning Your Home with Pets – The Most Common Problems Hosted Mail Service That Runs on the Cloud

READ MOREDetails
Repairing Your Roof

Repairing Your Roof – How Should You Get Started?

Your house's roof is its ultimate defense against harsh weather, pesky creatures, and infestations.  If your roof is not in top condition, your entire house is at risk. It's crucial to schedule roof repair as soon as you notice a leak, even if it's small, as it can cause significant damage.  Repairing your roof is more cost-effective than replacing it entirely and is vital to maintain its integrity.  Left unaddressed, roof leaks can cost you tens of thousands of dollars.  This article will discuss the basics of roof repair, what you need, and how to do it. Ensuring your roof is in top condition is essential to protect your home from the elements and ensure its longevity. Steps For Repairing Your Roof Given below are the steps that will guide you in the process of roof repairing at your home— 1. Examine The Damage Following a systematic approach is vital when searching for a leak in your roof. Begin by surveying the visible damage to your roof, including shingles, gutters, and roof edges.  It's essential to start with the most obvious issues and progress to less apparent ones. Once you've assessed the exterior, examine the interior for signs of water damage.  Look for indications of water stains, dripping water, sagging, pooled water, and dampness. Inspect during rainy weather, as some leaks are intermittent and only occur when there is enough rain.  Access the attic using a flashlight to locate the water source through the roof deck. Check around all rafters for indications of water.  Water can travel through the roof decking and rafters due to the force of gravity, which may result in dripping in different areas. If you observe water dripping, trace it back to its origin. 2. Find A Reliable Contractor After a thorough inspection of your roofing system by a professional roofing consultant, you will receive an accurate and detailed bid or estimate.  The estimate will be based on the materials you choose for your roofing projects. Moreover, you must consider the unique measurements of your roof.  The roofing consultant will also consider any special conditions that may affect the cost. This can include the complexity of the roof design or any existing damage that needs repairing. Once you receive the bid or estimate, your roofing contractor should provide a written contract outlining the details.  This contract should include a comprehensive breakdown of the costs, the expected timeline for completion, and any warranties or guarantees included.  Therefore, you must carefully review and understand the contract before agreeing to any work to ensure everything is clear and fair for both parties. 3. Select The Suitable Material  It's crucial to have a complete set of roofing tools when undertaking any repair project. These hand tools have various uses throughout the house. They include the following: Roofing hammer. Pry bar. Nail puller. Utility knife. Shears. Tin snips. Handbrake. Tape measure. Chalk box. Roofing nails (also known as roofers). Speed squares. A pencil for notes or markings. A 10 oz clay gun. Choosing the right roofing sealant depends on the roofer's needs, but any kind will suffice.  While shingles are optional, matching them is optional. For flashing work, it's recommended to use aluminum coil stock, which is available in various colors at most box stores. A tape measure is recommended for all measurements and layout work, and a chalk box is ideal for snapping reference lines and general layout work.  Roofing nails, or "roofers," are recommended for their durability. The materials used for the roofing sealant, shingles, and aluminum coil stock are also essential. 4. Ensure That All Cracks Are Sealed Using an uncomplicated roofing sealant is important to seal any cracks on your roof.  To apply a sealant, you must pierce a thin aluminum membrane with the tube, allowing the sealant to flow.  Next, load the sealant into a caulk gun and aim it at the crack or hole to seal it.  The sealant will dry in a few hours and be set entirely in 24 hours without intervention.  Finally, you can cover the hole with shingles or flashing and move on to other projects. Ensuring that the roof sealant is compatible with your caulk gun is crucial. This is because some construction materials come in 28-ounce tubes that won't fit a standard 10-ounce gun. 5. Ensure The roof Is Insulated When planning to replace your roof, it's also a good opportunity to consider upgrading your insulation.  However, if you opt for new blown-in insulation, your roofing contractor will install it while they remove the decking.  This insulation process requires running a hose through the exposed roof and into your attic. It allows the insulation to be installed quickly and easily without causing any damage to your walls or ceilings.  Therefore, with the new insulation, you can enjoy improved energy efficiency and a more comfortable indoor environment. 6. Leave It Clean After the roofing crew installs your new roof, they should clean up any debris around your home. This includes loose shingles and nails and leaves them in their original condition.  They should also haul away old roofing materials for proper disposal. Additionally, you must ensure not to dispose of in landfills, which can contribute to pollution. The roofing expert must inspect the final product to ensure it meets all industry standards and building codes.  They should also check for potential leaks or damage and address any concerns. It is important to address any concerns and take steps to correct any issues. Therefore, ensure you’re completely satisfied with the new roof and its reliable protection for years. Can You Repair Your Roof Yourself? Understandably, as a homeowner, you may want to save money. Therefore, taking care of some home maintenance tasks can help you save a lot.  However, it is important to know your limits when it comes to your roof.  You may be capable of handling minor tasks such as replacing caulking or cleaning gutters. On the other hand, leaving any roofing projects to the professionals is highly recommended.  Moreover, roofing maintenance requires specific skills, knowledge, and equipment that only experienced and trained professionals possess.  Even a seeming DIY project can quickly spiral into a much bigger roof repair if something goes wrong.  Therefore, it's always wise to prioritize the safety of your home and family. Look for an efficient roofing service provider and explain the damage. You can get your roof cost-effectively repaired under expert supervision! Read Also: How Often Do You Need A Roof Inspection? Elevate Your Roof’s Health With Aerial Roof Inspections Choosing A Siding And Roofing Companies In Delaware

READ MOREDetails