The Importance Of Proper Rubbish Disposal In Sydney

Published on: 07 April 2023 Last Updated on: 22 November 2025
Rubbish Disposal

Rubbish disposal is a crucial issue to address. Its proper implementation can control pollution, conserve natural resources and prevent diseases.

There are several different methods of waste disposal, including incineration and landfill. However, each method has its own drawbacks. For example, incineration releases harmful greenhouse gases into the environment.

What Are The Importance Of Proper Rubbish Disposal?

Importance Of Proper Rubbish Disposal

Rubbish disposal often causes unbelieving harm to nature. So for keeping the city safe for any living beings. Every industry should maintain proper guidelines for rubbish disposal.

Hazardous Materials

Hazardous waste is any material that, when improperly managed, could pose a threat to human health or the environment. It can take the form of solids, liquids, or sludges.

Hazardous waste is usually produced from industrial manufacturing processes but may also come from other sources. Some hazardous rubbish disposal is toxic, flammable, or explosive. Others are reactive or corrosive.

Products such as paints, oils, batteries, pesticides, and cleaners can be dangerous when disposed of wrongly. They can leak, explode, irritate the skin or lungs, cause fires, poison the water supply, and pollute the air. This is why it is important to make sure these items end up disposed of properly.

Some leftover products that are flammable, explosive, or toxic may be classified as household hazardous waste (HHW). Many communities have year-round HHW collection programs to reduce the risk of exposure to these chemicals.

The materials must be separated from non-hazardous wastes and placed in specialized landfills designed for these hazardous substances. This is to protect garbage collection workers and the surrounding community from exposure to hazardous waste.

In most cases, contaminated HHW is unrecyclable.

Health Hazards

When it comes to rubbish disposal, there are several health hazards that can be associated with the waste. These include infections, respiratory problems, neurological disorders, and cancers.

Symptoms of exposure to hazardous waste can range from a mild headache, dizziness, or stomach discomfort to unconsciousness and death. Although most symptoms are short-term and won’t last, it is important to take precautions to prevent these conditions from occurring.

There are many different types of waste that may be a health hazard, including pharmaceuticals, medical equipment, radioactive materials, and household chemicals. All of these should be collected separately and safely.

A comprehensive review of the literature on health effects from residential exposure to waste sites reported that the evidence is limited for cancers and overall congenital anomalies.

The evidence to conclude different exposure in the oil industry releasing high concentrations of hydrogen sulfide waste in highly crowded illegal dumping sites. These illegal dumpings are often associated with general acute symptoms such as lung diseases, skin and digestive system complaints, and neurological symptoms.

Hazardous waste is a complex mixture of contaminants that can have several effects on human health, depending on the type and level of exposure. This is particularly true for air pollutants and pesticides that can cause respiratory diseases or other health problems, such as cancer, heart disease, and neurological disorders. You can visit this site to learn more about neurological disorders.

It is therefore important to understand the health hazard associated with particular kinds of rubbish disposal, as this will help you choose the best way to dispose of it. It is also a good idea to follow the recommendations of your local government and/or environmental agency, as these can help you determine whether it is safe to dispose of certain types of rubbish in your area.

Environmental Hazards

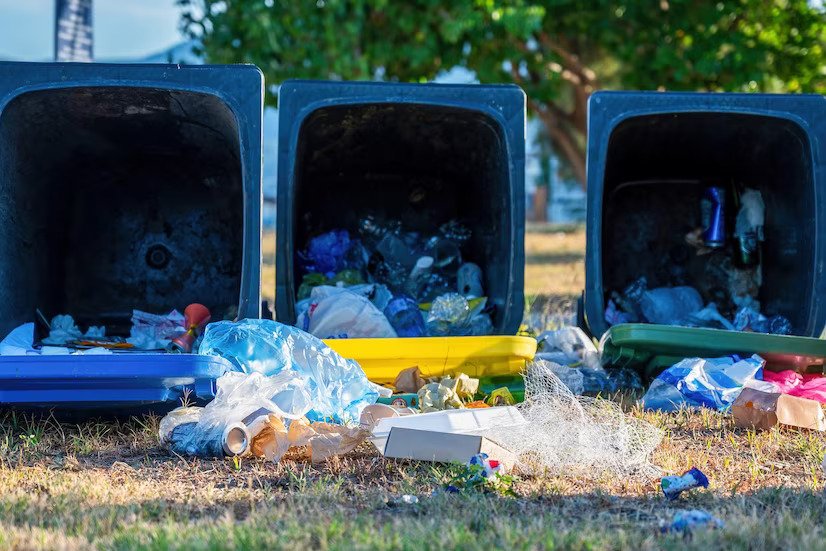
Household waste is a major source of pollution because it contains harmful chemicals, toxic substances, and pollutants that can be leached into waterways. This can lead to health problems for residents of areas where garbage is disposed of in open drains.

In addition, waste that is buried in landfills can produce methane gas which has been linked to climate change. Landfills also attract vermin and cause litter.

It can also harm the health of waste collection workers, who exposed to hazardous materials found in the rubbish they collect. This leads to accidents and musculoskeletal disorders.

The health hazards associated with rubbish disposal can be reduced through better recycling practices and the use of alternative waste management methods. This will not only help protect the environment but will reduce the amount of waste that needs to be thrown away in the first place.

People who handle hazardous waste may become infected with hepatitis B or hepatitis C and other diseases that are transmitted through contact with contaminated waste. These diseases can be fatal if they are not treated properly.

Another hazard is the release of nitric oxide and nitrogen dioxide gas into the atmosphere. These gases are dangerous for human health and can affect plants, animals, water, and air quality.

Moreover, the emissions of these gases can be a source of respiratory infections and bronchitis for people who live near rubbish dumps or landfills that are leaking these gases into the atmosphere.

Poor waste management, ranging from non-existing collection systems to ineffective disposal, has significant impacts on air, water, and soil pollution. This can lead to serious environmental problems, such as air and water contamination, disease outbreaks, and the loss of biodiversity and habitats.

Recycling

Recycling is the process of breaking down waste into reusable materials, such as metals and plastics, which can then be used to manufacture new products. It saves natural resources, energy, and water while reducing pollution.

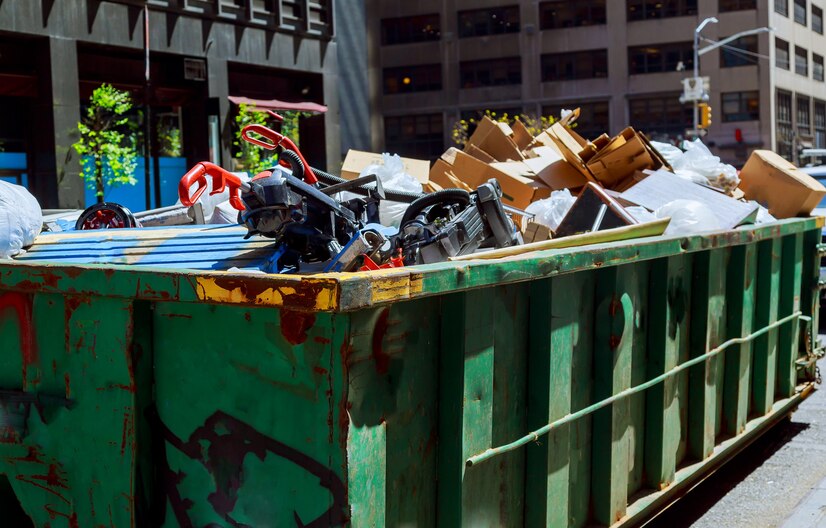
It reduces the amount of rubbish sent to landfill sites. It also prevents waste from going into incineration plants, which release a lot of harmful air and greenhouse gases.

Recyclable materials include paper, glass, metals, plastics, textiles, and tires. These are often collected from homes or businesses and then delivered to a recycling facility, where they’re sorted, cleaned, and reprocessed into new raw materials for making products.

Most recycling facilities are designed to sort through the recyclables using various technology. These processes include rotating trommels that filter out unwanted materials, vacuums, and magnets. But some rubbish disposal, such as polystyrene and contaminated materials, cannot be recycled.

Some recycling plants also accept biodegradable waste, which can be made into compost. But this is a complex process because it’s hard to determine the chemical makeup of organic materials.

The best way to make sure your rubbish disposal goes to a good place is to practice good recycling habits. You can do this by separating your waste into bins, containers, or bags that are labeled for recycling and disposing of them according to the proper guidelines.

If you’re unsure about what goes where check with your local government. They should have a list of what they accept and may even have a searchable database.

You can also call a recycling company and ask them to pick up your waste. They’ll be happy to take your trash off your hands for you, but they might charge a fee.

Most cities and towns have a list of what they accept for recycling, which you can use to learn what can go in your green or blue bins. However, certain items are not accepted because they can get tangled in machinery or because they are too contaminated to be processed.

Bottomline: Create A Better Green World!!!!

Practicing good recycling habits is not hard and can be beneficial to the environment and our communities. There are many ways to make the recycling process more efficient and reduce the amount of waste that goes into landfills.

Rubbish needs to be disposed of in the best and safest method in order to ensure the health of humans, animals, and the planet. 

Read Also:

Arnab is a professional blogger, having an enormous interest in writing blogs and other jones of calligraphies. In terms of his professional commitments, He carries out sharing sentient blogs.

View all posts

Leave a Reply

Your email address will not be published. Required fields are marked *

Related

Aerial Roof Inspections

Elevate Your Roof’s Health With Aerial Roof Inspections

In the realm of property ownership, maintaining the health of your roof is paramount. Aerial roof inspections emerge as a game-changer, providing a unique perspective that goes beyond traditional methods. In this comprehensive guide, we will be discussing what aerial roof inspection is all about and how it benefits. So, what are we waiting for?  Let's delve into the world of aerial inspections and discover how they can revolutionize your roof maintenance routine. What Is Aerial Roof Inspection? Automated aerial systems or vehicles that work remotely generally do not need human intervention. But, most often, the inspector has to take control of his devices to ensure safety. With the advancement of technology, aerial roof inspection came into being.  The drone is helpful in reducing risks because it provides a 360-degree view of the roofs. Moreover, it can trace even the smallest faults at the earliest. In the next section of the article, we will be discovering the advantages of inspecting roofs aerially. How Does A Typical Aerial Roof Inspection Process Look Like?  A general roof inspection is a bit different. Here, the contractors and building professionals make use of off-the-shelf drones accompanied by software applications. Other steps included in the roof inspection procedure are as follows: The pilot, operator, or estimator uses the application to make a flight plan. It is possible to do this either on-site or within the workplace. Furthermore, it includes building address specifications and defining the roof’s perimeter.  After the plan is ready, the pilot confirms the proper order of everything. They make use of the mobile app or controller to control and launch the drone.  Next, the drone follows the path automatically along with collecting images and other relevant information. This basically depends on the inspection’s cause and the sensors.  After 10 minutes, the drone automatically lands as per the program and transfers the data to other devices.  What Are The Benefits Of Aerial Roof Inspection? Roof inspection plays a critical role in ensuring the longevity and durability of your house. Conventionally, these inspections are a bit expensive. But even after the price factor, there are some advantages of aerial roof inspection. Check them out here: Unlocking Precision with Aerial Insights Aerial roof inspections leverage cutting-edge technology to scrutinize every inch of yourroof with unmatched precision. Drones equipped with high-resolution cameras soarabove, capturing detailed imagery that might be easily missed during groundinspections. This method ensures a thorough examination, leaving no room foroversight. Bolstering Structural Integrity One of the key advantages of aerial roof inspections is their ability to detect structural vulnerabilities early on. By identifying potential issues such as cracks, leaks, or weakened areas, proactive measures can be taken to address these concerns promptly. This not only safeguards your property but also prevents costly repairs down the line. Time and Cost-Efficiency at Its Finest Traditional roof inspections often involve time-consuming processes and extensivemanpower. Aerial inspections, on the other hand, streamline this operation. The swift deployment of drones reduces the time required for a comprehensive assessment, translating to cost savings for property owners. Embracing Sustainability in Maintenance Practices In an era where sustainability is paramount, aerial roof inspections align seamlesslywith eco-friendly practices. The minimized need for physical access to the roof reducesthe carbon footprint associated with maintenance activities. Property owners cancontribute to environmental conservation while ensuring the longevity of their roofs. Supporting Innovation and Progress As we navigate the realms of modern technology, embracing innovative solutionsbecomes imperative. Aerial roof inspections showcase a commitment to progress andefficiency in property maintenance. Property owners adopting this method not onlyenhance their roof health but also position themselves at the forefront oftechnological advancements in the real estate landscape. Transitioning to Aerial Excellence In conclusion, aerial roof inspections stand as a beacon of progress in the realm ofproperty maintenance. From precision to efficiency and sustainability, this method ticksall the boxes for an optimal roof care strategy. Elevate your roof asset management by embracing the power of aerial insights – your roof deserves nothing less. Remember, a well-maintained roof is not just an investment in your property; it's aninvestment in peace of mind. Read Also: How Often Do You Need A Roof Inspection? Choosing A Siding And Roofing Companies In Delaware Why You Must Use A Residential Roofing Company For Your Home

READ MOREDetails
Maintain Garden

4 Essential Tools Needed to Maintain Your Garden in the Winter

You may not expect that it is necessary to do yard work in the winter, but it is more important than you think. Properly preparing your lawn in the beginning months of cold weather and even though snowy conditions will ensure you have the best-looking lawn come springtime. These four tools are essential in maintaining a healthy yard during the winter. 4 Essential Tools For Maintaining Your Winter Garden When you love to spend your leisure time in front of your lawn. The maintains of your garden is quite an important task to preserve the beauty of your favorite garden. Every time seeking professional help is costly so better look at how you can maintain a garden in winter using some simple tools. However, you need to understand that maintaining your garden during winter can be a tough affair. Not only will freezing temperatures deter you from engaging in outdoor work, but the tools and machines can become non-operational. This is why a good idea would be to engage an expert to do the needful. Tree Service Round Rock can maintain your garden during the winters and ensure that you stay safely and cozily within the warm confines of your home. Here are the names of four tools to maintain a garden in the winter season. 1. Aerator: Cool-season grass, which is the most common type, should be aerated in the early spring and late fall. For those of you that may not be familiar with this machine, it digs small plug-like holes out of the ground. This helps the grassroots have access to more water, nutrients, and air. The point of this is to make the roots deeper and healthier so the grass has a stronger foundation to grow. Use this equipment on a day that the ground is slightly moist, maybe the day after rain, for the best results. It will relieve the soil from compaction that causes the roots to be starved and suffocated. Making sure your grass gets all the nutrients it needs before it is covered in snow will help it grow back better when the weather warms up. 2. Chainsaw: Pruning your trees and bushes during the wintertime is an essential part of a healthy yard. Plants will waste too much energy trying to send nourishment to dead limbs which affect the living ones. Investing in a chainsaw would be beneficial so that you can cut down the dead branches. If you are a seasoned expert, you will know to not only trim dead branches but also cut any that are rubbing together. Damage to the tree from the rubbing can create an entry for bugs to get inside. When it comes to finding a good quality chainsaw, get this it works! The better the quality of equipment, the less risk when it comes to the safety and wellbeing of your yard. 3. Drop Spreader: Fertilizer is the basis for giving your lawn what it needs to look its best for next year. There are winterizing products that slowly release nitrogen during the offseason. Using a spreader makes this task time-efficient and well done. It allows you to evenly distribute the fertilizer throughout the lawn, maximizing the benefits of this product. Putting grass seed down at the beginning of the winter can help maintain your yard as well. You will use the same drop spreader to put this down, but you’ll want to make sure you set the amount it is releasing slightly less than recommended. In doing this, you can overlap your passes, so nothing is missed, and you still have enough to do the whole yard. As a pro tip, it is encouraged to spread a thin layer of compost before laying the seed. Combining the seed and the compost keeps your grass moist and germinated during dry and cold weather. 4. Rake: Before a snowfall, it is crucial to clear your yard of any leaves, branches, or debris. When this waste sits on your grass all winter it will cause these patches to brown or die. Simply raking every once in a while will prevent dead spots and inconsistency in height and color. Raking will also help mix in any seed or fertilizer you have laid down in the soil previously. Something to keep in mind is to make sure you are not raking when the ground is frozen. The protective layer in the frozen blades of grass gets destroyed from the pressure of footsteps. While this will not kill the grass, it may cause it to be brown when it grows back in. Get a leg up on those who do not know to still maintain during the winter months. Investing in these tools will ensure you have the lushest green grass on the block come spring and summertime. Wrapping It Up: Maintain Garden is simple when you are already having the essential tools to do the job. But the professional touch every time required. When you already have these tools your hard work related to garden maintains in the winter is becoming a much easier process. So what is your opinion? Are you going to maintain your garden on your own? Or do you seek professional help? Do not forget to share your opinion with us. Read Also: 5 Summer Garden Maintenance Tips And Tactics You Have To Know 5 Essential Tips To Designing A Beautiful Front Yard Garden

READ MOREDetails
how to harvest cilantro

The Best Time and Method to Harvest Cilantro for Maximum Flavor and Aroma

One of the most used herbs in the world, cilantro, is also referred to as Chinese parsley or Coriandrum sativum. Fresh and zesty, cilantro gives your recipes a flavor boost. Mexican, Middle Eastern, Indian, Mediterranean, Chinese, African, and even Scandinavian cuisines use it extensively. Even cilantro microgreens are grown from it! Since cilantro itself doesn't keep well and loses aroma and flavor once dried, most people prefer to use it fresh. To have cilantro on hand, you should also have a few plants in the garden. You can harvest the plant for its flavorful cilantro seeds, also known as coriander, even if you don't use the leaves in your recipes. The leaves of the cilantro plants come throughout the spring and summer. Allow them to go to seed at that time since they grow easily in the garden! You must know how to harvest cilantro properly if you want to have a steady supply. Keep reading to find out all you need to know about harvesting cilantro. Harvesting Cilantro: Overview Most people either love or hate the flavor of cilantro leaves. However, you should still think about cultivating a few coriander plants in your garden and saving the seeds for a range of culinary uses. Most people in the US grow this delicious herb for its leaves. But the tasty coriander seeds are also worth harvesting. They have a distinct flavor from cilantro leaves. This fragrant herb of the cool season, cilantro, quickly goes to seed in the long, sweltering summer months. As the plant reaches higher in the sky, its rounded, lobed leaves become feathery. Pretty clusters of tiny white blossoms quickly emerge. Many pollinators are drawn to these nectar- and pollen-rich blossoms, particularly syrphid flies and honeybees. Little round coriander seeds with a kelly green color emerge as the blossoms start to fade. What To Expect from Cilantro? The distinctive flavor of coriander is citrusy and slightly nutty. It goes incredibly well with rice, beans, lentils, and roasted or grilled veggies. You can pick the seeds while they are still young and vibrant green. Or you can wait until they start to turn brown. Since green coriander seed is only found in gardens, it is better to harvest them when they are still green because of their stronger, more distinct flavor. You will not find them in the farmers’ market or the grocery store. If the seeds are kept in a glass container with a lid, then they can be refrigerated for several weeks and frozen effectively as well. Wait until most of the seed turns brown if you want to harvest the mature brown seed for winter grinding or planting next year. Next, trim off a few inches of stalk and the seed heads, then hang them upside down in a brown paper bag. The seeds will drop out of the heads and land in the bag's bottom once they are completely dry. The dry seed should be kept in a dry, cool place in a glass jar with a lid. For optimal flavor, grind it just before using. The flavor difference between freshly ground coriander seed and the pre-ground variety typically found in stores will astound you. Try adding green coriander seeds to dressings and marinades. Frequently adding an equal amount of ground coriander to recipes that call for cumin makes the flavors of the two go particularly well together. How to Harvest Cilantro? The most exciting aspect of growing plants is undoubtedly harvesting. Pick individual cilantro leaves if you plan to use a small amount. It is best to leave at least 1-2 inches of stem above the soil's surface when harvesting larger quantities of cilantro. It is preferable to leave a few lower leaves on the plant to support the herbs until they grow back. To cut the stems cleanly, use harvesting snips, long reach harvesting snips, or sharp, sterilized garden shears. To guarantee that your herbs regrow, it is best to remove only a small portion of the plant at a time. Furthermore, when the cilantro plant blooms and sets seed, the herb may start to taste bitter. So, when wondering how to harvest cilantro, it is preferable to harvest before the plant bolts because the leaves will be less appetizing at that point. When is The Best Time to Harvest Cilantro? When the morning dew has cleared and the sun hasn't set, it's the ideal time of day to harvest a variety of fruits, vegetables, and herbs, including cilantro. This way you can lessen the stress on your cilantro plant and give the fresh stock cuts enough time to dry before dusk, which lowers the risk of illness. Before it bolts, harvest cilantro when it is 6 to 8 inches tall. The flavor of cilantro leaves significantly decreases after they have bolted. The lifespan of the cilantro plants can be increased by careful and routine harvesting. It is crucial, though, to wait for your plant to become established before beginning to harvest. The plant develops numerous long, thin stems as it grows. They are ready to be harvested when the stems are long, and the leaves have a lacy appearance. The cilantro herbs are about ten to twelve inches tall at this point. Gather your cilantro in the spring and into the first part of the summer. Your plants may bolt to seed if summertime full sun conditions prove to be too hot for them. The best time to harvest cilantro is early morning. You can either choose to harvest it once a week or source just individual leaves whenever you need them. Most of the time, it takes about 2-3 weeks for regrowth, so you must harvest accordingly. You must remember that regular cut-and-come-again harvesting is the most ideal while the plant keeps producing foliage. How To Store Fresh Cilantro? Part of knowing how to harvest cilantro is also knowing how to store them. It's best to know how much you should take from the garden before you harvest. You will need to learn how to store cilantro if you do not intend to use the leaves right away to extend its shelf life. There are several approaches to try. Storing Cilantro in Water To keep the cilantro leaves dry, wait to wash them after harvesting. For storage purposes, store the stem ends in a glass or jar with 1 to 1.5 inches of water and refrigerate for a few days. At a minimum, change the water once a day. Use a plastic bag to cover the top loosely to preserve the humidity surrounding the herbs. Storing Cilantro in The Freezer Freezing cilantro is another low-maintenance way to store it. Shake off any extra moisture and rinse the leaves to get rid of any garden soil. Tear the leaves into small pieces and stuff them into ice cube trays, covering the herb with just enough water to barely cover. You can pre-measure if you'd like to ensure that you know precisely how much is in each cube for recipes in the future. After the cubes are completely frozen, place them in a freezer bag. Add as needed to marinade, smoothies, soups, and sauces. You can freeze cilantro for up to six or eight months. Read More: Everything You Need To Know About Harvesting Basil How To Dry Cilantro? There are two methods for drying cilantro. You can use the oven to dry cilantro. Since hot air can greatly affect the flavor of the finished and dried herb, you might want to avoid using heat if you want to enjoy flavorful dried cilantro. Air drying or hanging drying is a better way to dry cilantro. Gather the stems of the herbs into a small bunch and secure them with a string. Place the bunch in a dark, well-ventilated area and hang it upside down. Alternatively, you can wrap the bunch in a brown paper bag to keep the cilantro from getting dusty. After the bunch has been hanging for about a week, begin to check its level of dryness every day or two. It's ready to be crushed or powdered and stored for later use when it crumbles when touched. Cure the cilantro ahead of time to reduce the possibility of mold growth. Put the dried cilantro in a glass mason jar to cure. Open the jar and give it a good shake every day to let fresh air into it and mix the contents. This will assist in achieving moisture content parity. If you'd like, you can also include a moisture-absorbing packet. How To Harvest Cilantro Seeds? You can harvest the coriander seeds even if you don't like cilantro leaves. The plant can grow to 20 inches when it flowers. This requires temperatures above 75 degrees. Pods will form once they have flowered, and the flowers will fade. Before being harvested, these should be green to brown in color. These pods release the mature seed when it's ready. Tie the stems with the seed pods still attached into a bunch. Next, hang them upside down in a paper bag in a cool, dry place to harvest the seeds. With time, the seeds will sprout and drop into the bag. Store your seeds in a dry, cool place in an airtight jar. Unground dried seeds can be kept for three to four years in storage. Before using dried seeds in your recipes, grind them for the best flavor. How To Harvest Cilantro So It Keeps Growing? If you sow cilantro seeds every two weeks from spring until late summer, you can be sure to always have fresh leaves available. We advise chopping them up and firmly packing them into an ice cube tray filled with water. Then, just place the tray in the freezer. These can then be added directly to hot pans when preparing soups or sauces. Or they can be dropped into hot or cold water for cooking or drinking. What To Do If Cilantro Bolts? It's time to collect and preserve your own coriander seeds once your plant produces seeds. Picture each of those tiny white blossoms turning into a flavorful spice for your cooking or seeds for the following year! In addition to being aesthetically pleasing and tasty, cilantro flowers are also excellent pollinators.  There is a short window of time when the growing seasons of cilantro and tomatoes coincide. This proves they go well together. It usually happens that my tomato and pepper plants are just starting to take off when my cilantro plants bolt, sending forth gorgeous white flowers. To maximize the amount of fruit your plants produce for you, beneficial insects that are feeding on your cilantro flowers will collide with your fruiting plants, vibrate their leaves, and assist in pollination. Ladybugs, butterflies, and bees all love cilantro flowers. It truly is a win-win! Choose Slow Bolt Seeds Seek out seed packets labeled "long-standing" or "slow bolt cilantro," as these varieties have been cultivated to endure longer in the garden. You can find your go-to slow bolt seeds that are 100% certified organic from Seeds of Change. Finding a local seed producer is another smart move. Buying local seeds means you'll be growing a climate-adapted variety of cilantro, which increases the likelihood that you'll keep it longer. Harvest Cilantro Regularly Regularly chop your cilantro leaves. This preserves the health of the plant and guarantees that the leaves of this herb are fresh when you use them. Your cilantro will continue to produce new leaves from the center of the plant if you regularly harvest it by chopping off the older outer leaves. Additionally, your chances of cutting off those immature flower stalks increase with the amount of cilantro you harvest. This will aid in postponing any bolting.  Since cilantro is incredibly obstinate, you can delay as long as you can. Cut that thick center stalk as soon as possible. After that, the plant will start to send outside shoots, giving you a little extra cilantro before it eventually bolts completely. For sun protection, surround your cilantro with tall plants. Plant Taller Plants Around Cilantro for Sun Protection Encircle your cilantro with large warm-season plants (like tomato or pepper plants) so that the taller plants can shade your herbs slightly and help keep the soil cooler as the temperatures rise. After all, four to six hours of sun is sufficient for cilantro to grow. To increase the lifespan of your cilantro in the garden, interplant it with larger plants. Wrapping Up You will need to have patience if you want to collect the seeds for your cilantro. Before seeds can be harvested, cilantro needs to blossom. Before harvesting, the resulting seed heads need to be allowed to dry on the plant for a while. Harvesting the seeds is then as simple as shaking them into a paper bag or chopping off the entire seedhead and placing it inside the bag. If you have thoughts to share or questions to ask about how to harvest cilantro, please leave a comment below. We would love to hear from you! Read Also: Asparagus 101: When, How, And How Often To Harvest? Some Facts You Need to Know About Rainwater Harvesting How to Harvest Lettuce: A Step-by-Step Guide for Fresh and Crispy Salads

READ MOREDetails