How to Use a Soldering Iron

Published on: 03 September 2018 Last Updated on: 29 January 2022
Soldering Iron

Of all techniques and methods used to join surfaces, metal sheets, Iron, and other objects together, soldering is highly preferred because it does not cause any type of damage to the items being joined together. This is because the solder used to stick them together has a lower melting point than most metals and it offers durable yet reversible bonds between the items. In addition to that, although there are a few key differences between the two types of soldering gear used, they share a similar trait and they’re both easily operable, which we will discover more in this article

What Is Soldering?

There are several types of soldering using different filler metals called solder, but, they all use the same concept which is heating a filler metal between two items so that it melts and fills the seam between the two items.

Soldering is done using either individually bought soldering gear, which allows you to choose the type of tool that is most suitable for the project you are planning to work on, or a soldering station which usually is a standard combination of a soldering iron and a power supply.

Soldering Iron 

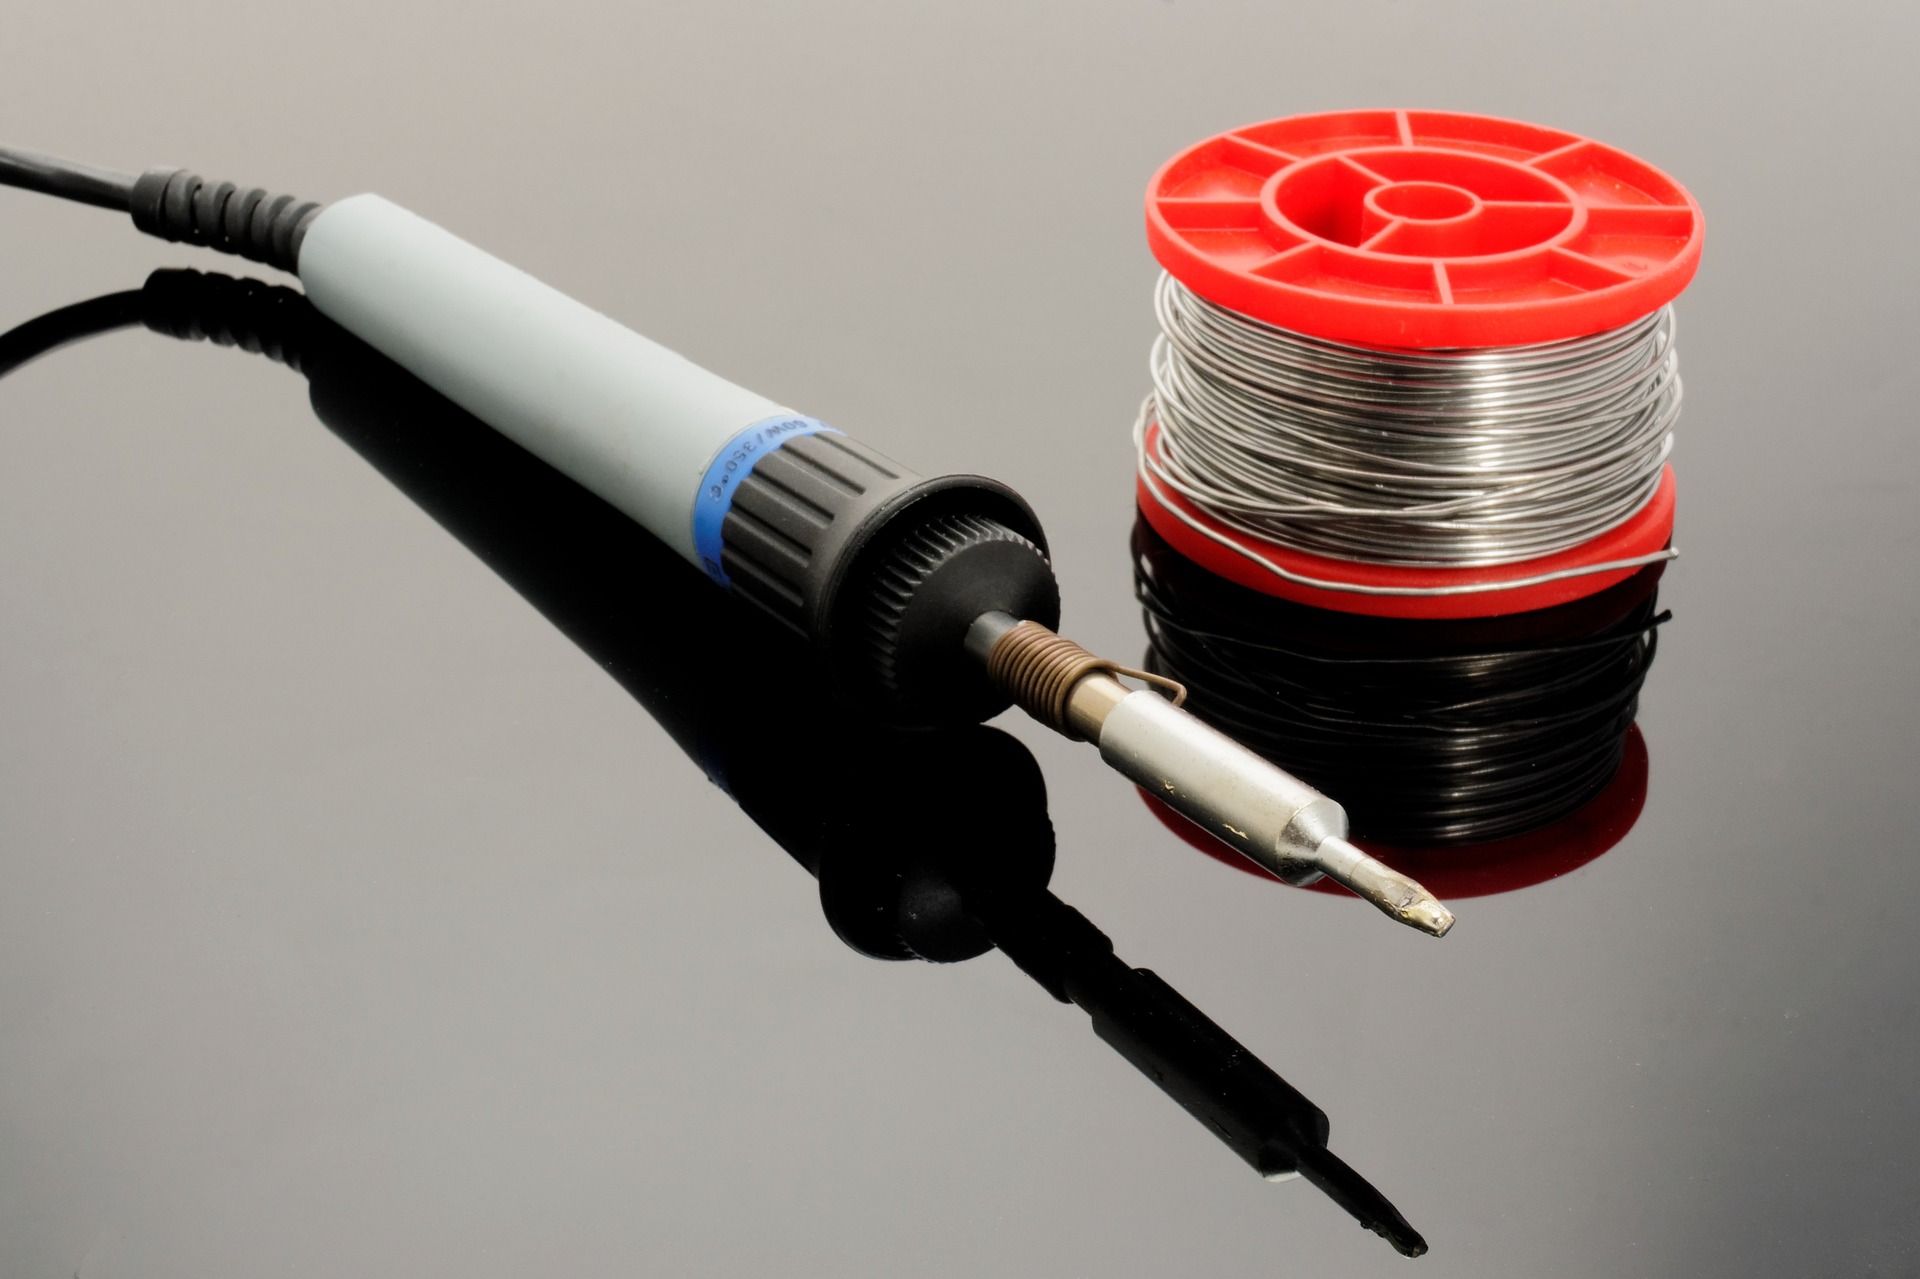
In order to learn how to use a soldering iron, one must first know its basic parts and the science behind its mode of operation.

It is simply a tool that connects to a power supply, it consists of a handle that doesn’t conduct heat and a tip that heats up very quickly to high temperatures so it can melt the solder, it also cools down fast.

To Be More Specific, The Main Parts Of Soldering Iron Are:

  • Soldering tip: All soldering irons contain iron tips which are the only part that heats up; it doesn’t ooze out the solder as most people think, it simply heats the metals being joined so that when the solder is applied, it melts, but more often than not, the solder would stick on the tip. Luckily, most tips are interchangeable so, you can replace your tip in case of damage or in case you need a specialized tip to suit your uses; bear in mind that tips vary in size and shape, thus, they vary in their uses as well.
  • Wand: The wand is the handheld part of the iron that the tip is attached to. It can be made from a large number of materials that poorly conduct heat or isolate it completely so as to prevent heat from the tip from transferring to the part where the wand makes contact with the skin. Inside the wand, there are wires and metal contacts that conduct and convert the electricity from the power outlet to heat. The contradicting functions of a wand are the reason why most people prefer to buy high-quality wands from renowned brands.

Of course, there are other extras and accessories like brass sponges, cradles, and tip tinner which can be purchased individually or found in soldering stations which is actually one of the advantages of soldering stations; but, the two main parts will always remain the tip and the wand.

Step 1: Safety

First of all, before using a soldering iron, you must be familiar with standard safety precautions since the iron tends to get really hot; not to mention the fact that solder is literally molten metal. So, it would be smart of you to wear protective gear such as; safety goggles and protective gloves, because your fingers are most likely to come into contact with the tip during the first few times. You also should keep in mind to tie your hair and avoid wearing loose-fitting clothes. Moreover, it is preferable to work in a well-ventilated area since some types of solder contain lead which produces toxic fumes, it is also important to thoroughly clean your hands after handling lead-based material.

Step 2: Preparing The Tip

The tip should be regularly cleaned of any old solder because when old solder solidifies, it turns into a heat isolator due to oxidization resulting in a totally inefficient and highly wasteful soldering process. Not only that but also, slow heating means that you will have to hold the iron to the items being joined for a longer time; it would be highly inconvenient for you and very damaging for sensitive objects like PCBs.

So, when the iron is fully heated, softly drag the tip against a sponge to remove old solder. You want to aim for a shiny tip. After cleaning the tip, you should “tin” the tip; to make it last longer and conduct heat better through newfound layers of solder. Same as above, on a fully heated iron, apply a little piece of solder and lightly coat the tip with tinner; then, immediately start soldering while cleaning and tinning the tip between every couple of joints for maximum conductivity and efficiency.

Step 3: Actual soldering

With your dominant hand holding the iron and the other holding a piece of solder, touch the area where the object comes into contact with the solder and hold it there for about a second then slide the solder underneath the tip while pushing the solder rod further according to how much solder you need.

Then, make sure to pull back the solder first while holding the tip in position until all the solder melts; it usually takes about five seconds or less. Solder cools down fast so, you will not need to blow on the joint since it will only lead to a weak joint which can be identified by its oxidized, unclear, and grainy appearance. What you want to get is a smooth connection, not a lump.

Finishing touches :

After you’ve had enough soldering for the day, clean and in the tip again before you put it into storage, it helps increase its lifespan.

As you may have noticed, soldering is not that hard of a task, it only requires soldering gear, steady hands, and concentration. So, go ahead, start soldering, and don’t be afraid to get creative.

Read Also:

Content Rally wrapped around an online publication where you can publish your own intellectuals. It is a publishing platform designed to make great stories by content creators. This is your era, your place to be online. So come forward share your views, thoughts and ideas via Content Rally.

View all posts

Leave a Reply

Your email address will not be published. Required fields are marked *

Related

Camera

How to Pick the Best Trail Camera 2019 “Best Guide for the Users

Is it possible to buy a device without knowing its perfections and imperfections? Well, I guess no. Because if you are not aware of the things that you need to consider before buying any device. Then you will not be able to buy the best one for you. And the same goes for a trail camera. Yes, there are some things that you need to take care of before buying the best device for you. So that you can make the right decision to buy the best device for you. Because the end number of choices are available on the market. And choosing the best one is not that easy. Every company produces the best products in their own way. But some top brands produce even better. So the question that arises is How To Pick The Best Trail Camera 2019. So to help you guys today I am here to tell you the things that you need to take care of before buying a game camera. Once you will get aware of it, then you will be able to choose the best device for you. Well, everyone wants that their device should be the best of all. Their product should capture all those moments which they expect. If you are a wildlife photographer then you would obviously want that every breathtaking moment of wildlife should be captured. If you want to use your wifi game camera as a security camera then you would expect that every single movement around it should be recorded. Well, these are some of the things which come across our mind whenever we think to buy the best game camera. And so to fulfill all your expectations you must buy a device which can work according to your needs. And all these things can be done only by the best trail camera. As I said above that today I am here to tell you how to choose the best device for you. And for this, you would need to know about How To Pick The Best Trail Camera 2019. So let's just have a look at them. How To Pick The Best Trail Camera 2019 Price:  The very first thing that you need to take care of before buying not only a trail cam but any device it the price. Whenever you think to buy any device then the first thing you have to do is set your budget. You need to set your budget so that you will not get confused at what price you have to choose the product. There are thousands of game cams in the market. And some are affordable and some are not. So once you will set your budget then all you need to do is take into options only those products which you think you can afford. This is how you will not get confused by the different products available at different prices. Because price plays the most important role in buying anything. If you can afford the costly products then nothing would be better than that. But if you can't afford them and want some cheap products then set your budget under which you can afford them. So that you will have limited options. And choosing the gadget among fewer options available will become easy for you. So this was our first advice to you guys for How To Pick The Best Trail Camera 2019. And now we will move forward to have a look at the second one. Brand:  Well, readers, you all know that the products which are produced by the top brands are the best one. Obviously, those brands are on top because the quality of their products is just amazing. Top brands produce the best quality products. And that is why you would need to take care of the company of the product you are thinking to buy. Well, I will not say that the brands other than the top one do not produce good quality products. Or their features are not as much impressive. If you will explore our site then you will find that we have reviewed all kind of models to you guys. And they are really very impressive. But let me tell you, one thing readers, that the products which are produced by the top brands will give you the best after-sale service. Rather than those which are produced by some other local brands. And it is quite normal that if you are investing your money in any product then you would want the best service from the company so that if in case you will face any problem. Then you can contact them and get your problems solved. And apart from the problems, you would obviously want that your product must be able to work for a longer period of time. And let me tell you, readers, though you may get amazing features in the local products also. But there is no guarantee that will last for long. You will get this guarantee only in the top brand's products. That is why I want you guys to buy a top-quality product. Comparison: It may happen that you get confused about different products. I mean to say is that there are chances that you select two-three products and then get confused about which one to buy and which one to leave. So to make your task easy, you need to compare them. The first thing you must check is their prices. As I said above that you have to set your budget under which you need to buy any device. So check the price of the products which you have selected for yourself. Then check their brands. Because as I said above that the top quality products are produced by the top brands only. So select the one which is produced by a well-known company. And now the most important thing that you need to check is their reviews and ratings. Compare the reviews and ratings of all the selected options. The product which has a high number of ratings and positive reviews will be the best one. Because the customers who have used them can explain better whether that product will give the best results or not. Rather than the one who has not used them. And also compare their features also to see which product supports better feature and which doesn't. So after comparing all these things, I am sure that you will be able to pick the best trail camera 2019. Final Verdicts About How To Pick The Best Trail Camera 2019 So, readers, these were some of the points which can help you to pick the best wifi game camera for you. I hope after reading this article, you will be able to choose the best product easily. Well, I hope I was able to help you guys. Because I have mentioned all those things which will surely help you to decide the best model for you. And if you will follow these tips then trust me, folks, you will not face any kind of inconvenience and will be able to buy the best wireless game cam for you. All we want is that our readers should not face any problem. And without facing any inconvenience he/she should be able to buy the best gadget for them. That is why we give you the best tips which you must follow. Well, I would again say that if you were really confused about How To Pick The Best Trail Camera 2019. Then after reading this article thoroughly, you will not face any inconvenience anymore. And now I would like to end up my article here. But if you are left with any queries then you can feel free to ask us. We will surely help you and will advise you the best. Thank You. Read Also : What Is A CMOS Camera?

READ MOREDetails
Real Camera

5 Reasons You Absolutely Need A Real Camera

Unless you've been living under a rock, you might have heard or know what a camera is. The camera is one of the greatest inventions of the human race. Initially, it was quite big and occupied a lot of space but now it's the opposite case. You can use different cameras that are considered small and occupy less space than a traditional camera.  In addition, now you get colored images of the pictures you take and you can click as many photos as you like because of the large storage of the camera. Now we have pocket-size cameras that can click detailed pictures. In addition, they come with various lenses that you can use to improve the resolution and image quality. Moreover, you can buy lenses online, camera accessories, and much more. Cameras have become an essential part of the 21st century. You can't imagine going on a vacation and not capturing memories. If you want to know more about why you should have a camera-keep reading. 1. Capture Memories Whether you want to go hiking, on a vacation, or on an adventure, you need to take a camera with you. Cameras help you capture beautiful moments that you can cherish later in life. Unlike smartphone cameras, digital cameras have a long battery and storage capacity. It makes sure you don't face any inconvenience that you do with smartphone cameras. Moreover, unlike a traditional camera, a digital camera can be carried easily when you're traveling. 2. Quality Pictures You must think that if you have a smartphone with a camera then why should you invest in a real camera? The answer is smartphone cameras are meant to be all-purpose workhorses, but when it comes to zoom and macro they're terrible. You need an optical zoom that uses moving lenses to create magnification. This is not possible with a smartphone.  So buying a real camera can save your time and effort to get quality pictures and make them memorable for you. 3. Battery life Unlike smartphones and traditional cameras, advanced cameras have long battery life. It helps You capture pictures and make videos for hours. Smartphones are meant to be all-purpose workhorses. You use them to text, call, using social media, and whatnot. Therefore, its battery is never fully charged, and most likely within a few minutes of photography or videography, it would drain. That's exactly why you need a real camera that doesn't ditch you when you need it most. A real camera is designed to only take photos and videos with a long battery to ensure you don't miss out on life moments. 4. Great Storage Unlike smartphones and traditional cameras, advanced cameras have great storage space. Smartphones usually come with limited storage that is used for multiple things. You want to save office files, documents, and much more to your smartphone. As a result, you run out of space when it comes to taking pictures and videos. However, that is not the case with a real camera. A real camera gives you a great storage space that is solely used for pictures and videos. In this way, you never run out of an opportunity to capture memories on the go. 5. Low Light And Underwater Photography Smartphones do the job when it comes to photos and videos but in low light it is terrible. In addition, water and smartphones are never a good combination, so you can not use your smartphone for underwater photography. However, a dedicated camera has a bigger sensor due to which it is a perfect fit for low light and underwater photography or other types of outdoor photography. Read Also: 10 Must-Haves for Travel Photography 6 Tips to Shoot Hyperlapses Quickly and Easily Using a Camera Gimbal

READ MOREDetails
Lego

How to store your Lego

Lego is very beautiful playing items to engage a child while parents are busy with their home works. Additionally, Lego gives mental refreshment to your child and it will also improve your child mental health. Children play with Lego and work to make some beautiful playing items then this child’s efficiency and effectiveness of works also improve. So, Lego is very important to engage our child. But after playing if we fail to arrange and organize it properly, we may lose the valuable parts of the Lego. So, you need to buy Lego storage systems to store your Lego properly. There are different types of storage systems available in the market. Among all types of Lego storage systems, you need to purchase the right one to fit your needs.  Now I am going to show you different l Lego storage systems for. How to store your Lego: 1. storage bags: Lego storage bags are the most common Lego storage system because Lego storage bags are easy to carry and handle. You can easily store your Lego on this bag. And you can easily keep this bag in a safe place. The Lego storage bags will not take a large storage space. If you have a bed with free underground storage, you can easily keep your Lego storage bags under the bed. 2. Lego storage Table: Lego Storage Table is also a popular form of Lego storage ideas. Your child can play with this on this table. After ending the playing, your child can store the Lego in the drawer of the Lego storage table.  So, these types of storage Tables will serve both purposes. 3.  storage Open bin: You can also buy the Lego storage Open bin from the market. It will allow you to store and display your Lego. It is best for storing built Lego sets. You can also store non-built set here. But the problem is that you have to give some space to place this storage Open bin. 4.  storage Container: Lego storage Container is the easiest ways to store your Lego. But it is very difficult to sort and store the Lego here as you cannot separate and store your Lego. 5.  storage brick: Lego storage brick is one of the best Lego storage products that Lego storage manufacturer ever made. This product is designed like a brick but has a good storage capacity with a removable cover. You can easily buy this item storage brick to store the Lego. 6.  storage Shelves: Storage Shelves is used mainly to store toys. But you cannot store non-built of this item to set here. You can store and display the Lego-built set here. 7.  storage Drawers: Its storage drawers are also popular forms of storage ideas. You need to build some drawers on the side of the wall or you should go to purchase a cabinet with storage drawers. Conclusion: In a nutshell, you have to choose the best storage ideas for you from here based on your personal choice and your home condition. So, hopefully, you and your child will be happy with your Legos. Read Also: 8 Best Shopping Apps For 2019 DIY: How To Clean A Leather Handbag

READ MOREDetails