Top 10 Best Sewing Machines for Beginners

Published on: 03 April 2018 Last Updated on: 24 July 2024
Best Sewing Machines

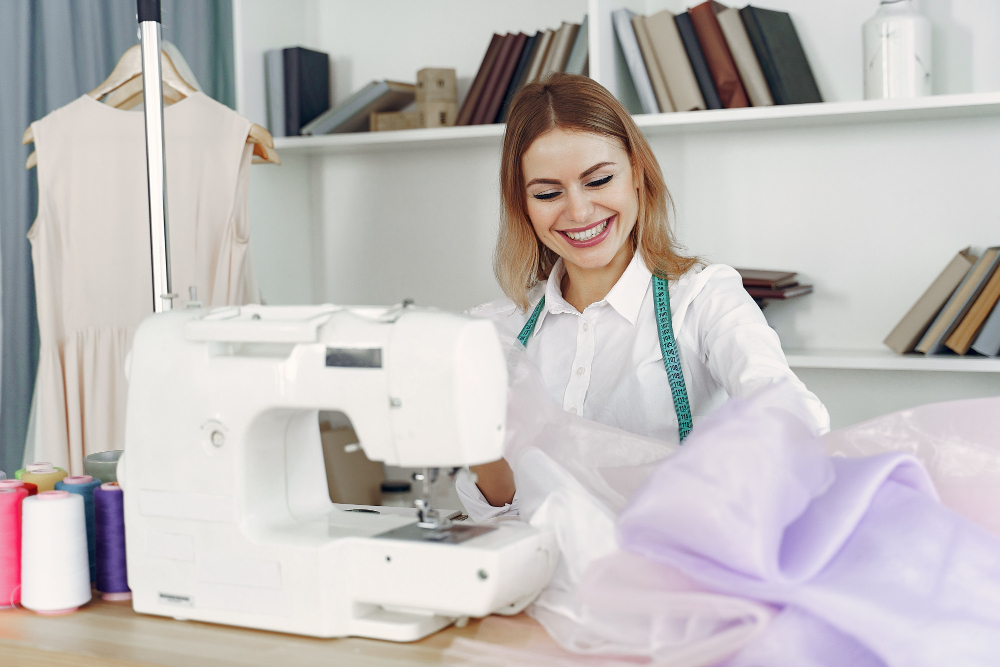
Learning how to sew is one of the most amazing moments in life. Maybe you want to return some of the skills you lost early in life or you are learning the art of sewing for the first time in life. One challenge you could be having is how to choose the Best Sewing Machines for Beginners. The truth of the matter is that the market as a long list of machines that beginners can use. This can cause more confusion but an ideal machine will depend on what you wish to make. Maybe you want to whip up quilts or cushions. This article gives you the best recommendations from leading home sewers all over the world. These machines match the needs or beginners in the sewing industry.

10 Best Sewing Machines for Beginners:

 1. Bernina B215 :

This is among the most affordable sewing machines from the Bernina brand. In fact, it is among the easiest computerized machines that you can find in the market. You simply have to press that is adjacent to your desired stitch and you are good to go. It has almost all the features of the machines that we are going to review in this article. However, this brand does not come with the start and stop button. You can also personalize it with vinyl ‘skins’ and you can do this on your own. With the LCD screen, you can view the snap-on presser foot you need to use. The additional accessories and machine feet can be quite expensive but it is worth the investment for any determined sewer.

2. Brother JK4000 :

This machine is normally marketed to individuals who possess intermediate sewing skills but I know of people who started by buying this fully computerized sewing model. In fact, it is one of the best sewing machines for beginners you can think about. The good thing with this sewing machine is that you will be able to grow with it. Therefore, you will not have to buy another sewing machine as your skills advance. It has a long list of features including the start and stops button and automatic foot release. This model really gives you the value for your money. You can easily use the LCD screen and dial to select stitches.

3. Brother Innovis NV15 Electronic :

This model can really change your mind whenever you are prompted to think about computerized devices. You may think that its features are confusing to beginners but you will discover that it has an intuitive interface upon trial. It has sixteen stitching options that include stretch stitches and you have a simple jog dial for selecting. The device has all the essential electronics like the start and stops button, needle threader, speed limiter, and the needle up and down control. Threading on this machine is east and it will even pull the bobbin thread up on your behalf.

4. Brother cs6000i :

This is a sixty-stitch sewing machine that is fully computerized. The model has the ability to satisfy both veterans and beginners alike. It is more valuable to buy this machine because it has more features in comparison to what other beginner devices that are in the same price range offer. Apart from the impressive 60-stitches, you will also find nine presser feet, LCD screen, quilting foot, and walking foot that is mostly found on more expensive devices. Its convenience and ease of use make it fall among the best sewing machines for beginners.

5. Janome DC3050 :

This is another computerized machine that is easy to understand. The good thing with this model is that you will not outgrow it quickly. It has a total of 47 pre-programmed stitches and 3 one-step buttonhole styles to select from. The machine is a genuine workhorse with its capacity to handle a broad range of fabrics with a lot of ease. It can even accommodate the slippery silks and thick coating that most basic machines can’t accommodate. Therefore, it is among the best sewing machines for quilting.  The machine does not have several features like other sewing machines in this price range but it will give you real value for your money.

6. Singer 7258 :

This 100-stitch computerized sewing machine is ideal for beginners who have some experience and are looking for a machine that they can grow with. The easy to use features and advanced options in this machine blend quite well. This also includes

the six one-step buttonholes and ten presser feet. It is appropriate for any sewer who is gaining confidence and wishes to experiment with a more advanced machine.

7. Janome 7025 :

This sewing machine is quite similar to the Janome 525 that is used on The Great British Sewing Bee. However, this model is more affordable and ticks all the boxes. It has three dials for selecting the width, length, and type of the stitch. It has an automatic one-step buttonhole with an easy loading bobbin that has a clear cover. Janome 7025 sewing machine has more metallic parts in comparison to other brands and this makes it feel weightier for the price range. Any person who has done some form or sewing will find its set up to be quite easy.

8. Singer 4424 :

This is an extra-high-speed heavy duty sewing machine. The machine is tougher and speedier in comparison to the other sewing machines in the market. It can make 1100 stitches each minute due to its motor that is stronger than usual. The machine has 23 inbuilt stitches with a one-step buttonhole and four presser feet. Some of the features you will find on the Singer 4424 include dial controls, top-loading bobbin, needle threader, adjustable thread length, and a clear case for travel or storage. It’s the best option if you wish to work on thick or rugged fabrics like upholstery.

9. Singer 4411 Heavy Duty :

This sewing machine is specially designed to handle those heavy upholstery fabrics, vinyl, leather, and denim like a dream. It has smooth stitches and you can still use it for lightweight and delicate fabrics. One thing that may put off beginners is that this machine sews at some speed. Beginners may find it quite challenging to sink their teeth in some intricate projects. The ease of use and stitch quality will surely exceed your expectations. You can operate this machine for several days with no struggles at all.

10. John Lewis JL110 :

Are you on a budget and in the process of dipping the toe in the home sewing waters? This brand will offer the best service to you. It has 14 stitching options that can allow you to work on most of the projects. The machine also has a classic setup that allows you to saw at a fairly fast speed by just reading the manual. However, any person who wished to use stretch fabrics for sewing may lose control of the stitch width. The bobbin is also concealed behind a front door and you can really find it tricky to access it once you get a tangle. The beauty of it is that this machine is sturdy and you can find it in a broad range of colors. It is one of the best sewing machines for home use.

Summary :

With all this knowledge, you now have all it takes to pick the best sewing machines for beginners. The most important thing is to pick a gadget that can handle the kind of work you wish to undertake.

Read Also :

I enjoy writing and I write quality guest posts on topics of my interest and passion. I have been doing this since my college days. My special interests are in health, fitness, food and following the latest trends in these areas. I am an editor at Content Rally.

View all posts

Leave a Reply

Your email address will not be published. Required fields are marked *

Related

Messy Store Room

6 Smart Organizing Tips for a Messy Store Room

Imagine going into your bedroom wardrobe and not finding a spot to display your clothing or finding shelves or cabinets to wrap your folded garments, clothes, and accessories away? This won't be easy to keep the clothing sorted without the framework and storage structures in place. The same laws extend to warehouses! This often appears that the best thing about storerooms is their weakness: they always become a blank canvas. These become open space or closet deficient in organizing, sometimes resulting in being a drop zone and landing area for bins and things to build up over time. When it causes you a headache when you try to search and grab it, it might be time to arrange your storeroom and unpack it. Here are some of the tips you can consider to organize your storeroom. 6 Smart Organizing Tips for a Messy Store Room: 1. Categorize and De-clutter the area You want to arrange similar things together, close to having sorted in certain parts of your house. This physical activity can help you see just what you possess, how much of it, and what to consider when determining when to go in the garage. Gather your childhood mementos, gather your holiday decor, take out your luggage and travel supplies, dig out service pieces, etc. Categorize the things that you don't need anymore. While making the area clean, do not forget to spray a Responsible Pest & Scorpion Control medicine to make your storeroom pests free. 2. Widen the vertical space Don't confine yourself to a room on the board. Usually, the storerooms have relatively high ceilings, so step up. The more things that you can push into more upper shelving or shelves, the more floor room you can open up and bring in your work workers, which is also a bonus. 3. Make adjustable shelves They are perfect for tiny rooms because you can change the shelves' heights to match different storage requirements and wishes. Make some storage unit shelves to get things placed easily. This will give the room a more approachable and organized look. 4. Place the most important things in front When putting something, you need it more frequently in front of you, and you would be able to get to them faster. Often, moving boxes or objects further would then be needless to enter the purpose you seek. It does away with unnecessary confusion and discomfort. 5. Make Labels The trick to an efficient storage room has to learn where each object is. It's possible to lose track of where they are, no matter how beautiful the memory can be. Making labels for your room's storage choices allows it more accessible to easily find items and recognize where to place new products when you buy them. 6. Keep checking and Clearing your storeroom To stop the hoarding of products, periodically visit your storeroom to give away outdated goods or give away things that have not been used for more than half a year. It will keep the items from collecting in the storage room, which will motivate you to tidy up more effectively. Read Also: Small Kitchen Storage Ideas How to Decorate a Room with no Cost 5 Innovative Ideas To Lend Your Bedroom With More Space

READ MOREDetails
Tree Grates

How to Expand Tree Grates

Trees are an essential component of any great urban landscape. They not only add a touch of beauty to a property but also help urban dwellers by providing cleaner air, cool down buildings and their surroundings, and providing a natural carbon sink. Trees can affect both the micro and the microclimates of an urban area, making them an integral part of any city’s transformational plan. If you want to transform your urban property into an enduring beauty, it’s time to start planting the best trees. However, while trees will work great for your landscape, they have to endure a harsh environment that can cause lasting damage. Trees have to withstand car accidents and vandalism, increasing microclimate temperatures, paved surroundings, exposure to de-icing salt, wind, and the reflecting glare from buildings. This is where tree grates come in handy. If you have an urban area or property you would like to landscape, this article explores the role of tree grating, types of grates, and how to expand these installations. Introducing Tree Grating in Urban Landscaping A tree grate is a ubiquitous feature in most cities but most people don’t give these landscaping features a lot of thought. This is despite the fact these installations play a critical role in protecting trees from abrasion caused by bustling urban life. The landscaping installation protects roots that would otherwise become exposed and vulnerable to damage. The grating provides an ideal pit where roots can thrive without any dangers from pedestrians, exposure to glare, de-icing salt, and other harmful materials. Tree grilles create a greater surface area for natural or supplemental irrigation. These root coverings also facilitate better air circulation within the covered space. Tree grating protects the soil, the rooting system, and sometimes the trunk. If trees are left to grow without this physical protection, they might not withstand the harsh urban environment. While most people enjoy the beautiful landscaping, they don’t make any efforts to protect these trees. Other reasons to install tree gratings include: Enhanced aesthetics: You can choose a tree grate that increases the visual appeal of your landscape. Most of the products on the market are visually appealing and are designed to improve curb appeal. These installations are easy to customize to suit your landscaping needs. Improving safety: Grates also protect pedestrians against injuries that would be caused by exposed roots. Landscaping maintenance: Maintaining a green landscape is not easy due to litter build-up from trees. However, grates help by preventing weed build-up around the tree and also make it easier to maintain the area around the trees. Diverse styling options: You can choose grates in multiple sizes, shapes, materials, and designs. This makes it easier to find that perfect grating system that suits your landscape. Flexibility: The best grates for your trees should accommodate the tree’s growth. Expanding the tree grates is an important step in maintaining your green landscape. This gives room to your trees to thrive at their different stages of growth. You can choose grates for your trees from different materials including cast iron tree grates, natural stone, steel, recycled plastic, concrete tree grates, and other materials. When choosing any tree grilles, consider: The durability of the material Theft and vandal-resistance ADA (Americans with disabilities act) compliance Ease of customization Eco-friendly materials Ease of installation and expansion The versatility of the tree grills for different tree species. Steps to Expand a Tree Grate When designing and installing a tree grate, it’s important to appreciate that the tree will continue growing. This necessitates changes to the tree grille to accommodate such growth. If a tree grate is not expandable, it might cause more harm than good to the tree. For this reason, always assess how expandable any tree grille is before you buy it. The best tree grills are easy to expand by removing the inner center rings. This means you can continue expanding the grates as the tree continues to grow. When shopping for a grate, look for one designed for expansion. Here are the steps for expanding a tree grate: Check the rate of the tree’s growth and identify the grate rings you should cut.  Depending on the material, use a portable hard wheel grinder with an abrasive wheel (aluminum oxide) to cut off the marked rings.  Cut through with the wheel on thin areas of the grate casting For thicker areas of the grating, (including casting edges or areas with heavy support ribs) cut halfway through the casting with the grinder. Use a heavy hammer to remove the marked areas and they should break at the core line. Before applying the sharp blow, ensure there’s sufficient support behind the casting.  Continue the process for all the grates and leave enough room for the tree trunk to grow. Final Thoughts Using trees for landscaping has both functional and aesthetical purposes. Tree grates are crucial for green landscaping as they protect your trees against physical damage. These installations fuse aesthetics with function to add visual appeal to an area while also protecting tree roots, managing floodwater and maintaining beautiful, neat and safe sidewalks. With time, you should expand these grates to allow more room for tree trunks’ growth. Read Also: How to Safely Prune Your Trees Create A Stunning Outdoor Space With These Residential Landscape Lighting Tips 5 Essential Tips to Designing a Beautiful Front Yard Garden

READ MOREDetails
how to harvest asparagus-

Asparagus 101: When, How, And How Often To Harvest?

If you are a gardener like me, you must have thought about harvesting greens that you eat at restaurants at your house. One of these days, I was with my friends from my university, and we were discussing the importance of eating veggies for staying healthy. And they could not figure out the best ways to effectively do so. Reading my previous blog about cilantro, Laila asked me, “how to grow and harvest asparagus?” Well, surely asparagus is one of the most delicious and nutritious vegetables you can grow in your garden. But what a lot of people do not know is that it's also one of the easiest once you know how to harvest asparagus properly. In this article, I will cover everything you need to know about harvesting asparagus, from when to start, how to cut, and how often to do it. Additionally, I will also share some tips on how to store and freeze asparagus, as well as the benefits of eating this green wonder. So, keep on reading till the end to learn more...  How Does Asparagus Grow? Before I dive into the seemingly difficult process of how to harvest asparagus, let me help you grow it.  Asparagus is a perennial plant that grows from a crown of roots that can live for up to 20 years. The crown produces spears, which are the edible part of the plant, every spring. The spears grow rapidly, sometimes up to an inch per day, and can reach a height of 6 to 10 inches. The spears are harvested before they open into fern-like leaves, which are edible and tough. Asparagus grows best in well-drained, sandy soil with a pH of 6.5 to 7.5. It prefers full sun and moderate temperatures and needs regular watering and fertilizing. Asparagus can be grown from seeds or crowns, but crowns are easier and faster to establish. Crowns are planted in trenches about 12 to 18 inches apart and covered with 2 to 3 inches of soil. As the spears emerge, more soil is added until the trench is filled Benefits of Asparagus  https://giphy.com/gifs/food-asparagus-taylor-lee-nicholson-pejh5q5BBXxi2m4PgF Asparagus is not only tasty, but also healthy. It's low in calories and high in fiber, vitamins, minerals, and antioxidants just like spinach. It can help lower blood pressure, regulate blood sugar, support digestion, and prevent urinary tract infections. Asparagus also contains a compound called asparagine, which is a natural diuretic that helps flush out excess fluids and salts from the body. Asparagus is also a good source of folate, which is essential for pregnant women and fetal development When to Harvest Asparagus? The first year after planting, you should not harvest any asparagus spears, as they need to grow and strengthen the root system. The second year, you can harvest a few spears for a short period, about two to three weeks. The third year and beyond, you can harvest asparagus for a longer period, up to eight weeks, depending on the climate and the health of the plants. The best time to harvest asparagus is in the early morning when the spears are crisp and tender. You should harvest asparagus when the spears are about 6 to 10 inches tall, and before the tips start to open up. If you wait too long, the spears will become woody and bitter. How to Plant and Care for Asparagus? Asparagus is a long-term investment that can reward you with years of delicious harvests. However, it requires some planning and preparation before planting.   Here are some steps to follow to plant and care for asparagus:  Choose the Day  Choose a sunny and well-drained spot in your garden, preferably with sandy or loamy soil. Avoid areas where water tends to pool or where weeds are hard to control. Asparagus also needs plenty of space, so make sure you have at least 4 to 5 feet between rows and 12 to 18 inches between plants. Prepare the Soil  Prepare the soil by adding organic matter, such as compost or manure, and adjusting the pH to 6.5 to 7.5. You can use a soil test kit to check the pH and nutrient levels of your soil. You may also need to add some fertilizer, such as 10-10-10 or 10-20-10, to boost the phosphorus and potassium content. Dig it Deep Dig a trench about 8 to 12 inches deep and 12 to 18 inches wide. You can make the trench longer or shorter depending on how many asparagus crowns you have. Asparagus crowns are the dormant roots of the plant that you can buy from nurseries or online. They usually have one-year-old or two-year-old crowns, which are more reliable and productive than seeds. Fertilize Spread some fertilizer along the bottom of the trench, about 2 pounds per 100 square feet. Then, cover the fertilizer with 2 to 3 inches of soil, forming a ridge in the center of the trench. Placing the Plant Place the asparagus crowns on top of the ridge, about 12 to 18 inches apart, with the buds facing up. The crowns should be slightly below the soil surface, about 1 to 2 inches deep. Do not bury them too deep, as this will delay the emergence of the spears. Focus on the Crown Cover the crowns with another 2 to 3 inches of soil, and water well. As the spears grow, gradually fill in the trench with more soil, until it is level with the ground. This will help protect the crowns from frost and weeds. Add Mulch  Mulch the bed with straw, leaves, or wood chips, to conserve moisture and prevent weeds. You can also add some organic fertilizer, such as fish emulsion or seaweed extract, every few weeks during the growing season, to encourage healthy growth. Keep in Mind Do not harvest any asparagus spears in the first year, as they need to establish a strong root system. In the second year, you can harvest a few spears for a short period, about two to three weeks. In the third year and beyond, you can harvest asparagus for a longer period, up to eight weeks, depending on the climate and the health of the plants. How to Harvest Asparagus? Now, coming to the most important part that you wanted to know about. Let us talk about the ways to harvest asparagus! To harvest asparagus, you need a sharp knife or a pair of scissors. You should cut the spears at the base, about an inch below the soil surface. Be careful not to damage the crown or the emerging spears. You should also avoid cutting too many spears from one plant, as this will weaken the plant and reduce the yield. A good rule of thumb is to leave at least one-third of the spears on each plant. You should harvest asparagus every day or every other day, depending on how fast the spears grow. You should stop harvesting asparagus when the spears become thinner than a pencil, as this indicates that the plant is running out of energy. You should then let the spears grow into ferns, which will replenish the crown and prepare it for the next season. How to Store and Freeze Asparagus? Unlike lettuce, which you can store for more than a week, asparagus is best eaten fresh, as it loses its flavor and texture quickly. If you can't eat it right away, you should store it in the refrigerator for up to a week. To keep it fresh, you should trim the ends of the spears and stand them upright in a glass of water or wrap them in a damp paper towel and put them in a plastic bag. If you want to preserve asparagus for longer, you can freeze it. To freeze asparagus, you should first wash and trim the spears, and then blanch them in boiling water for two to three minutes, depending on the thickness.  Blanching is a process of briefly cooking and cooling the vegetables to stop the enzyme activity that causes them to spoil.  After blanching, you should drain and cool the spears, and then pack them in freezer bags or containers, leaving some space for expansion. You can freeze asparagus for up to a year, and use it in soups, casseroles, or stir-fries. How to Prevent and Treat Asparagus Pests and Diseases?  Asparagus is generally a hardy and resilient plant, but it can still suffer from some pests and diseases that can affect its growth and quality. Here are some of the most common problems that affect asparagus plants, and how to prevent or treat them: Asparagus beetles These are small, black or red beetles that feed on the spears and the ferns, causing them to wilt and turn brown. They can also lay eggs on the spears, which hatch into larvae that chew on the stems and leaves. To prevent asparagus beetles, you should keep the area around the plants clean and weed-free, and remove any old or damaged spears. To treat asparagus beetles, you can hand-pick them and their eggs, or spray them with insecticidal soap or neem oil. Fusarium wilt This is a fungal disease that infects the roots and the crowns of the plants, causing them to rot and die. It can also cause the spears to become yellow, twisted, and stunted. Fusarium wilt is more likely to occur in poorly drained, acidic, or infested soil.   To prevent fusarium wilt, you should plant disease-resistant varieties, rotate crops, and avoid overwatering or injuring the plants. To treat fusarium wilt, you should remove and destroy any infected plants, and apply fungicides to the soil. Rust This is another fungal disease that affects the ferns, causing them to develop orange or brown spots and pustules. Rust can reduce the vigor and yield of the plants, and make them more susceptible to other diseases. Rust is more likely to occur in humid, wet, or shady conditions.   To prevent rust, you should plant resistant varieties, space the plants well, and prune any excess or infected ferns. To treat rust, you should apply fungicides to the ferns, and avoid watering them from above. Crown rot This is a bacterial disease that causes the crowns and the bases of the spears to become soft, mushy, and foul-smelling. Crown rot can spread quickly and kill the plants. Crown rot is more likely to occur in wet, compacted, or poorly drained soil. To prevent crown rot, you should plant healthy crowns, improve the drainage and aeration of the soil, and avoid overwatering or injuring the plants. To treat crown rot, you should remove and destroy any infected plants, and disinfect the tools and the soil. Bonus: How to Cook and Enjoy Asparagus?  There are many ways to cook and enjoy asparagus, from steaming, boiling, roasting, grilling, to sautéing. The key is not to overcook it, as it will become mushy and lose its flavor. You should cook asparagus until it is bright green and crisp-tender, which usually takes about 5 to 10 minutes, depending on the method and the thickness of the spears. You can season asparagus with salt, pepper, butter, lemon juice, garlic, herbs, cheese, or any other condiments you like. You can also pair asparagus with eggs, bacon, ham, chicken, fish, pasta, rice, or salad. Asparagus is a versatile and delicious vegetable that can complement any meal. Wrapping It Up! Asparagus is a wonderful vegetable that you can grow and harvest in your own garden. It's easy to care for, once you know how to harvest asparagus properly. You should harvest asparagus when the spears are about 6 to 10 inches tall and before the tips start to open up. You should cut the spears at the base and leave some on the plant to grow into ferns. It would be best to store asparagus in the refrigerator for later use. And yes, you should also enjoy the many benefits and flavors of asparagus, by cooking it in various ways and pairing it with different dishes. Asparagus is a springtime delight that you don't want to miss. Learn More About: Planting & Harvesting Mint 7 Health Benefits of Black Seed Oil Spirulina: The Complete Plant Based Protein Source | Health Benefits

READ MOREDetails