5 Best Type of Plumbing Pipe

Published on: 30 April 2019 Last Updated on: 12 September 2024
Plumbing Pipe

Because all plumbing jobs have different risks and requirements, pipe manufacturers make a variety of products for specific maintenance and repair situations. If you select a proper pipe, you’ll less likely experience leaks, flooding, and other plumbing problems after all of your fixtures are operational. Make use of the best plumbing pipe that can work well in your favor. At local hardware stores, you’ll find many plumbing pipes that can distribute water and process waste. However, if you’re looking for the best option for a bathroom or kitchen, there are five pipes that are worth considering.

PEX Pipes:

PEX Pipes

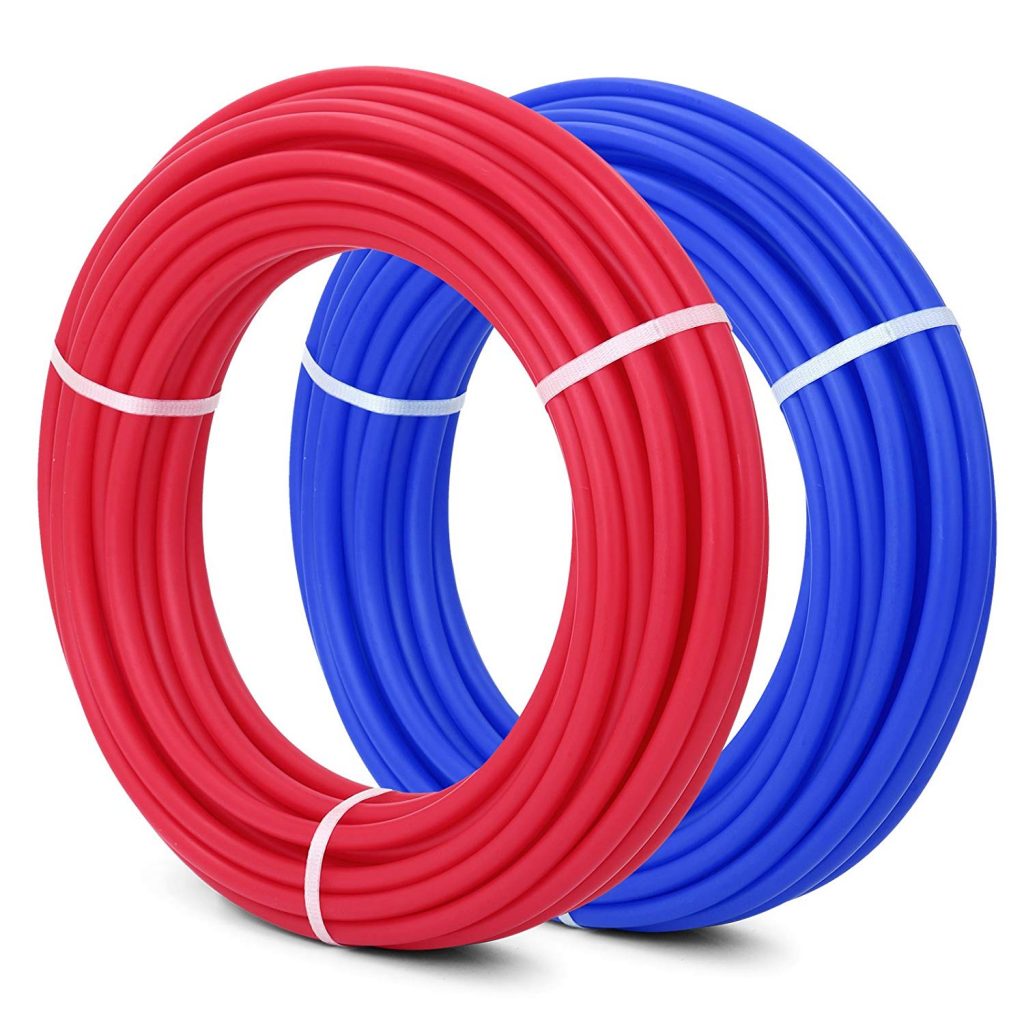
PEX piping is one of the most popular options for traditional jobs. They can supply water to various fixtures around a home or building. The housing is very rigid and strong, so these pipes can handle intense pressure from a water supply. It is one of the best plumbing pipe to make things easier for you. It is one of the best plumbing pipe that you can look for.

Pros:

Thanks to the color-coded designs, you can easily identify pipes for hot and cold water. The cold pipes are blue, and the hot water pipes are red.

Every PEX pipe is easy to cut during installation jobs. If a pipe doesn’t fit, you can make adjustments by taking advantage of its 90-degree curves.

Cons:

You can’t use PEX pipes with push-fit fittings because leaking may occur. When a pipe breaks and leaks, you can’t recycle it.

PVC Pipes:

PVC Pipes

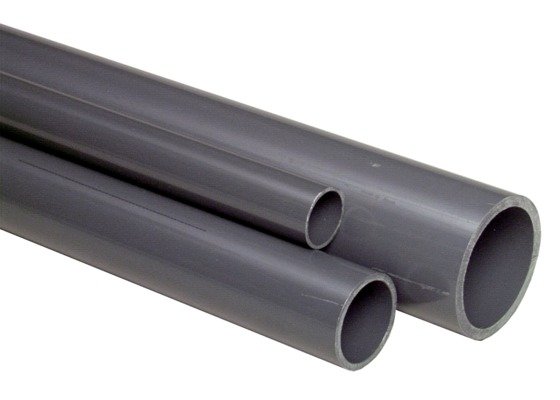
PVC pipes are built for drainage and venting jobs. Many plumbers work with these pipes because they’re light and simple to use. The big advantage is that PVC piping is easy to cut. You can slice through the product quickly with a hacksaw. Whenever you need to secure PVC pipes together to extend the lines, you can connect them using solvents.

Pros:

All PVC pipes are inexpensive, and they’re great cost-efficient options for irrigation projects. If you ever need to bend a pipe, you can arch its flexible housing.

Cons:

PVC pipes are only great for simple jobs because they have fragile housing. You can’t apply glue on PVC pipes since water may leak through the seal.

Ridged Copper Pipes:

Ridged Copper Pipes

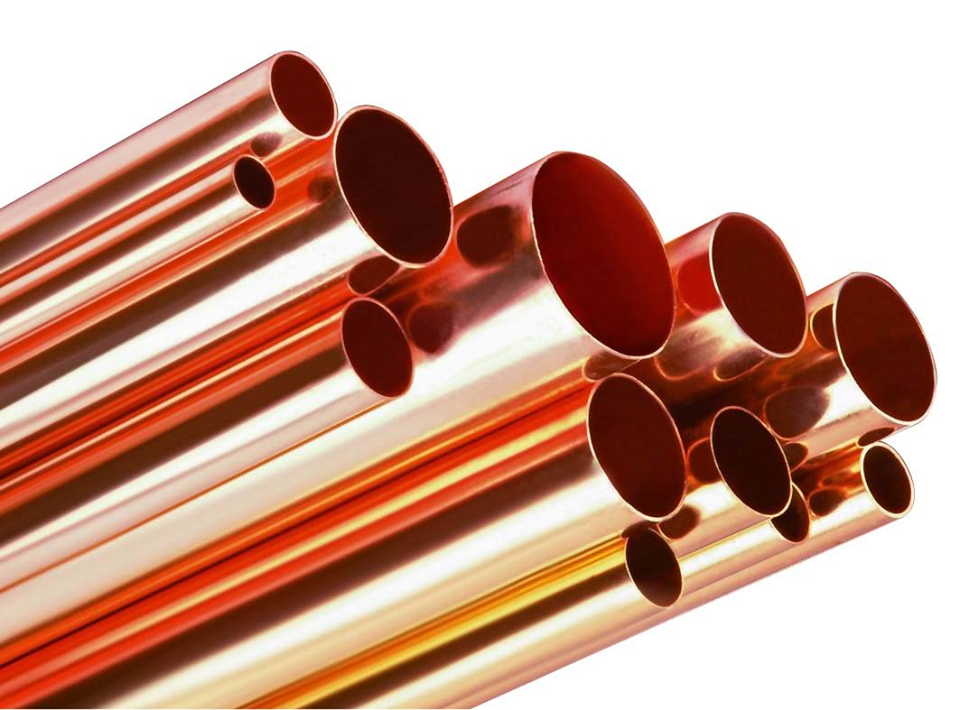
Ridged copper pipes are also made for water supply in a home, and you can also cut them using a hacksaw. In order to connect a riged copper pipe, you’ll need to use a soldering device. Many home builders and commercial building contractors rely on these particular pipes when they design plumbing systems because copper distributes drinking water without contaminating it.

Pros:

A ridged copper pipe can handle high heat well. It can also withstand intense water pressure. When you no longer need a riged copper pipe, you can easily recycle it.

Cons:

If you don’t have great plumbing skills, the process of connecting ridged pipes with soldering equipment may be challenging. Also, you’ll need to set aside plenty of cash to buy ridged pipes since they’re expensive.

ABS Pipes:

ABS Pipes

ABS pipes are commonly used during jobs that involve drains and vents. These pipes and PVC pipes have similar characteristics. However, the big difference is that ABS pipes have a black housing that’s somewhat softer.

Pros:

If you need great pipes for underground plumbing systems, ABS pipes are ideal options since they’re durable and strong. When the temperature drops outdoors, ABS pipes won’t break because their housing is engineered for cold weather.

Cons:

You’ll need to use ABS pipes in some locations wisely according to the building code. Also, you must pick the installation zones strategically since high temperatures can cause warping.

Flexible Copper Pipes:

Flexible Copper Pipes

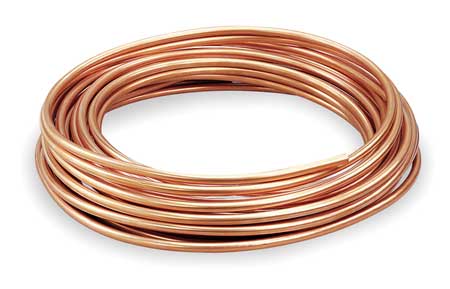
These pipes are built for sinks, fridges, and water heaters. You can bend them to establish a secure connection during installation jobs, and you can cut them very easily with a sharp hacksaw.

Pros:

Flexible copper pipes will fit snugly in tight spaces. They can also handle high heat that builds up in confined areas. It is one of the best plumbing pipe that you can look for at your end.

Cons:

You must handle flexible copper pipes with care to avoid breaking them. Another disadvantage is that the pipes are expensive.

Winter Protection Strategies for the Best Plumbing Pipe:

After you have proper pipes for a job, you’ll need to implement procedures to protect them. Winter is a time when most pipes are damaged. As water freezes in a line, pressure builds up, and the intensity of the expanding ice can crack or break a pipe that isn’t properly protected. By following a few simple steps, you’ll maintain and protect your pipes whenever the temperature dramatically drops in your neighborhood.

Insulation can create a barrier that blocks icy air around your pipes. When applying insulation onto thick or thin pipes, ensure that there are no gaps because air can seep through any opening. Plastic pipes are more vulnerable than copper pipes, so they will need extra protection before a harsh winter storm.

Indoor pipes will also need protection against cold weather. You can keep arctic air away from vulnerable pipes underneath kitchen and bathroom fixtures by sealing cracks around your home. Caulking and spray foam is the best sealants for large cracks around doors and windows.

Heaters, furnaces, and other heat sources can protect vulnerable indoor pipes as well. To achieve the best results, use indoor heat sources throughout the night because the coldest temperatures occur long after the sun sets.

These five piping materials are great options for general residential and commercial projects, and you can protect each product using insulation, sealants, and heat sources throughout the winter. However, along the way, you may need professional help with an installation or maintenance routine. When this happens, always work with a professional plumbing company, such as Conrad Martens Plumbing.

Read Also:

Content Rally wrapped around an online publication where you can publish your own intellectuals. It is a publishing platform designed to make great stories by content creators. This is your era, your place to be online. So come forward share your views, thoughts and ideas via Content Rally.

View all posts

Leave a Reply

Your email address will not be published. Required fields are marked *

Related

flat roof

Does Your Flat Roof Need To Be Replaced? Spot The Warning Signs

Most homeowners with flat roofs know that summer is the perfect time to inspect flat roof membranes to ensure there are no tears, rips, or punctures. But if you don’t have a lot of experience with membranes, it isn’t always easy to know what damage looks like.  Understanding the warning signs that your roof may need to be replaced is essential for all homeowners, but especially for those whose houses include areas of flat roof: while flat roofs have many distinct advantages, they do wear out more quickly, so being able to monitor the state they are in is important.  4 Warning Signs Of The Problematic Repair Need Roof  Needless to say, if you are experiencing ceiling leaks, the spread of mold, or other internal issues related to the roof, you should call an expert in flat roof repairs to address the problem immediately. But if you want to be proactive about your roof, here are some things you can look for: Check out the four signs, which are quite serious clear signs for repairing your flat roof. You should not neglect the repair work if you are finding any of these signs. 1. Ponding Water The first warning sign that repairs will soon be needed is drainage issues. If water stays on your roof for days after it rains, then your roof is probably in trouble.  Flat roofs are designed to channel water through internal and external drains quickly, and if you have noticed little ponds forming on the roof deck, you’ll want to get the problem looked at.  The main reason for the ponding water is the uneven surface of the roof and mismanagement of the drainage system. So to prevent it, always pay attention to smooth out the surface of the roof. And if your roof is showing these types of ponding problems. Start the repairing process as soon as possible. You may also like: Top Roofing Tips 2. Wrinkles In The Membrane One of the most common types of roofing membrane is EPDM rubber. These membranes are meant to adhere tightly to the roof deck, but over time they can grow loose in certain areas, leading to wrinkles or bubbles.  While these problems do not pose an immediate threat, they do indicate that your membrane will soon need to be replaced. These types of cracks are very hard to find, especially with your naked eyes. For finding the cracks and the damaged parts, water is the best medium. If you find small bubbles in certain areas of the flat roof in the rainwater. Pay immediate attention to solve the issues. Because from here the problems are going to start. 3. Flashing Separating From Roof In places where your roof abuts a wall or parapet, it is common to reinforce the seam using metal flashing. While this flashing is designed to last for decades before it needs to be replaced, it can start to separate from the roof over time, opening a gap that can lead to leaks.  If you have noticed problems with your flashing, you should call a flat roof repair company for a professional inspection.  You may also like: Roof Repair: Should You Hire Roofers or DIY? 4. Open Seams Most roofing membranes are applied in strips with overlapping seams that are closed using a sealant. But in cities like Toronto that see major seasonal shifts in temperature, these seams can open over time.  Even a small open or torn seam poses an immediate risk, so if you’ve noticed this problem on your roof, call flat roof repair Toronto experts who can help you reseal the hole or replace the damaged section. Flat roofs have many advantages over pitched roofs — they’re cheaper, more efficient, and easier to replace. But they also require more regular maintenance, especially in spring and fall.  Conclusion: You should inspect your flat roof regularly, and if you notice any of the problems above, get in touch with a professional roofing company for a professional consultation to see whether or not the time has come for it to be replaced. Once you start repairing in time, your entire house repairing cost is going to reduce in seconds. Small cracks are repairable. But the big gaps are challenging. So it is better to start repairs in time. Read Also: Roofing Painting Contractor Leads: Ask Before Hiring One 5 Myths about Roofing Services to Avoid Foundation Moisture Maintenance: 6 Tips for Home Repair

READ MOREDetails
Install Cabling

Practical Guide to Install Cabling in Your New House

Cable installation is a complex process that requires a licensed contractor for successful completion. Doing it yourself is risky, as it may lead to faulty wiring. Proper planning will save you extra work, money, and time. Use the guide below to comfortably install cabling in your house. 1. Prepare high-quality cable products Before cable installation can commence, you need to source cable products. Currently, numerous companies make cables for sale. However, if you want the best quality cables, you need to consider Infinity Cable Products. These cable products are durable and contain more copper and material compared to others. 2. Contact a reliable company When installing cables in your new house, efficiency is critical. Cables supply communication services and vital electrical power, hence requiring great attention and time from the contractor. Ensure you contact a highly reputable company that is well-equipped with the necessary tools for installation. This will increase the accuracy, reliability, and durability of the cables. 3. Draw a wiring diagram It is crucial to have a plan for the cable installation process. Draw a wiring diagram that shows a clear and practical path of the cables to all outlets. The design will provide a reference point for the contractor as they work. 4. Install conduits Be sure to have the contractor install cable conduits in every place that may require wires. Cable conduits will allow you to run video cable, speaker wire, and network cable in the house. The best way to avoid wasting conduits is by running the longest wires in the walls first even if you don’t expect to use them immediately. Each wire should be set from upstairs and pulled through to the basement. This way you will avoid using a ladder to push the cables up between floors. An experienced contractor will know to leave at least a foot of extra wire to make it easier for you in case you want to change your house arrangement later. 5. Determine your outlet count Identify how many switches and outlets will extend to each circuit. This will aid in purchasing sufficient Infinity cable products for your new home. It is advisable to have six outlets per 110-voltage circuit in the living area. However, the kitchen has appliances with more wattage; hence requires not more than two outlets per circuit. 6. Drill cable holes Ensure you know what is on the other side before drilling through a wall to avoid damaging water pipes, ductwork, or more. The drilled holes provide a path that the cables will travel for connectivity throughout the house. Remember that more outlets provide for a safer home. 7. Pull the cables to the outlets Once the holes are drilled pull the cables to the outlets in the house. When attaching wires to outlets, use wire strippers to cut out the outer plastic coating. Infinity cable products come with instructions to help make the process easier. Are you prepared to install cabling in your new house? Now that you have read through the guide on how best to install cables in your house, you can begin the process. Remember to have the job tested after completion of the installation to ensure it is done to perfection. We wish you well as you convert your house into a comfortable home. Read Also: What’s a Good USB Cable? What is type c cable, and is it worth buying How Fiber Optic Cables Are Used

READ MOREDetails
Bedroom Makeover

3 Tips on How To Plan The Best Cheap and Fabulous DIY Bedroom Makeover

Tired of the current look of your room but don’t have a budget for renovations? It’s time for you to take a breather and read this guide for a thrifty chic’s way in achieving a bedroom makeover! No girl would want to keep the same look for her room in ages. And from time to time a girl would need to change their style. From the all pink room to modern and mature, but it is not an easy process at all. Changing a whole room setting will take time and a lot of brainstorming. Read also: Kitchen Renovations Must Be Done At Regular Intervals Choose What You Like In choosing your desired style, there is a number of choices. The color choices may range from neutral color styles to a preppy college girl’s choice. But sticking to your interest is the best call, and from there you can start planning which theme you desire the most. Do you want your room to have a bigger bed? Or maybe a bigger space? New closet? The planning is really up to you. After that, you can start thinking of what bedroom furniture do you want to buy, keep and throw away. Changing your bedroom style is best when you are cleaning up. You can easily clear spaces as you segregate your stuff and that spare space could be for decorating the room. Read also: Avoid These 4 Mistakes During Multi Family Housing Renovation Don’t Throw It All A basic rule when doing any home makeover is not to throw things away for they can still be of use to you. Well, of course, you would first need to clean up the clutter in your room and carefully assess if your trinkets, furniture, clothes, papers, and other stuff can help your room’s “new look” or not. The reason why you are not advised to throw anything away is that of DIY (Do-It-Yourself) projects that would need recycled materials. DIY has become popular with millennials today as it can show a person's creativity. But if you lack the artistic talent for such, DIY projects also have tutorials and are easy to do. Other than that, DIY projects cost less. Take Control Another tricky part of doing a bedroom makeover is taking control. Well, of course, you have control on which furniture will be at the best place, but other than that you have to take control of mixing and matching. Mixing and matching the patterns and colors is important for a mismatch of colors and stuff can bring disaster to your room. Don't make it too floral or colorful because it would look suffocating and stuffy. Instead, you should pick a maximum of three color tones that creates harmony when combined. The pillow population also matters, because even though it is cute to have a lot of pillows on your bed, it shouldn’t take half your bed space only. Two sets of the right size of bed pillows and a body pillow or a neck roll are all you need. Don't forget to consider your room lighting too. It can be in any shade of your liking. The lighting may be a bit dark, medium light or too light. Takeaway Doing makeovers is fun. Doing it for your room is exciting because it can be all about you. Remember not to be afraid when doing redecoration and renovations because freestyling for your room is not a  crime as long as you are comfortable with it.

READ MOREDetails