Can We Grow Carrots All Year Around?

carrot

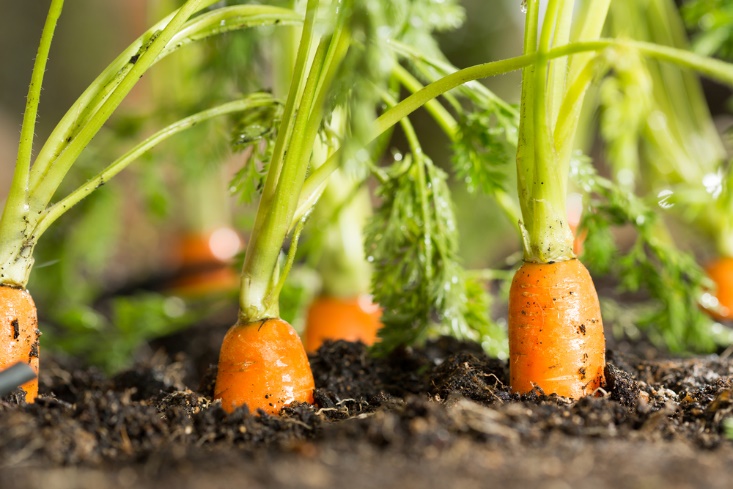
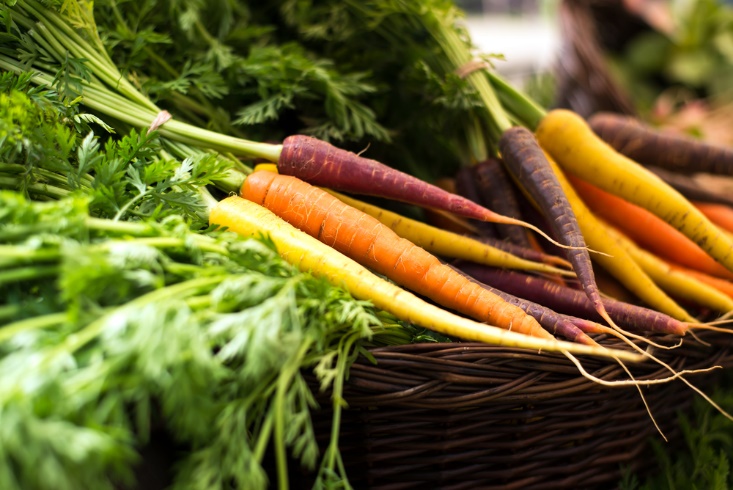
Carrots are root vegetables. They vary from purple to red in color but most commonly found are bright orange ones. The orange color of carrot is due to its high content of beta-carotene. This helps suffice our body with necessary levels of vitamin A, which is required for proper functioning of our immune system.

Yes, we can grow carrots all year round! Also, you may grow it anywhere, even in our small kitchen garden or as a potted plant.

You must know how to grow and harvest carrot before you start the procedure of producing carrots yourself. I conducted various kinds of research including reading online resources and talking to farmers in my town before going ahead with carrots plantation. This is so because carrots are a low-acid plant and can catch contamination easily, which may make it inappropriate for human consumption.

Read alsoGardening Tips To Improve Outdoor Space

When can we Grow Carrots?

image001

Carrots are biennial plants that are they grow twice in a season. However, the seeds and flowers grow only in cold season. They take ten to twelve weeks to reach their full growth. They can be sowed in spring just before two weeks of the last frost date.

In cold climate, we can continue to plant them every three weeks till mid-summer. Then again they can be sowed in summer for winter products that are due in next ten to twelve weeks.

Preparing the soil

image003

First, you need to judge the solid where you want to plant your carrots. If the soil is sandy or clay soil, then it is not appropriate for growing carrots. Sandy soil and clay soil cannot retain nutrients and lacks good soil structure, which makes them inappropriate for growing carrots. Salty and loam soil is the best kind of soil for growing any vegetables. There is another variety of soil that is chalky soil. This is also not appropriate for growing carrots due to its alkaline nature.

Read also: Does Organic Gardening Improve Soil Quality?

Sowing Carrots

image005

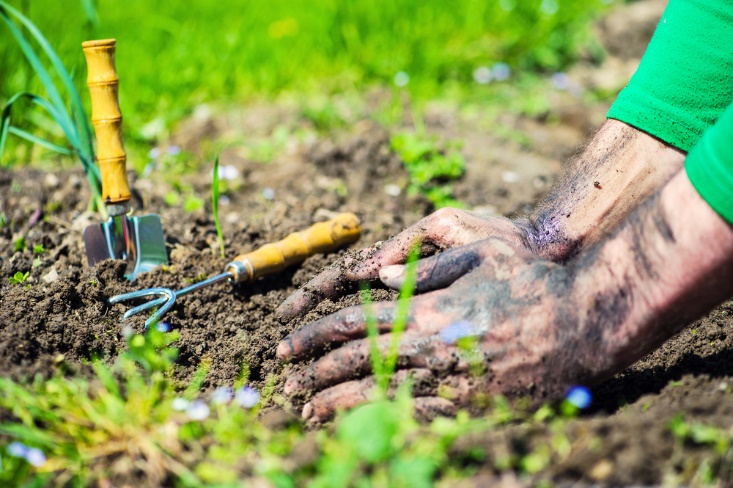
Before sowing carrots, you need to dig in the soil well to about twelve to fifteen inches. Once done, you can introduce some earthworms and crawling critters who make the soil appropriate for growing carrots.

Earthworms consume the organics from the soil and then scatter it throughout the soil to make the soil more fertile. Similarly, crawling critters would keep the bugs and insects away from the soil from harming the crop. You should be cautious about using chemicals to kill insects as they also take away the good part of the soil. Always organic gardening is recommended for the growth of any crop as organic gardening improves soil, its overall structure and gets it ready for next cycle as well.

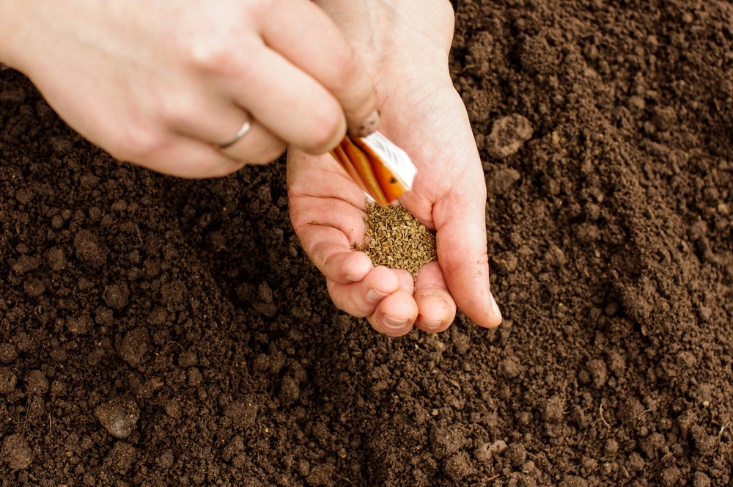
  • You can sow your carrot seeds into the sowing beds created three inches apart.
  • The carrot seeds are very small so to distribute them evenly; you can mix them up with the sand and then sprinkle them into the sowing
  • Cover the field with some warm blanket or a shield to avoid the tiny creatures from ruining your crop.
  • This should be kept covered for at least three weeks to let the healthy growth of the crop.

Carrot Sprouts

image007

While you decide to plant carrots, you should also be aware of how a carrot sprout looks like to differentiate it from other sprouts or just weed. The sprout is breaking out of the soil may be of cabbage or potato or some grass. Well, then how does carrot sprouts look like? You can very easily identify them. From the perspective of their appearance, they look like ferns or palm leaves.

Well if that’s not all for you, then you can take the leave in your palm and crush it with your nails. Now smell the crush, and it will be like one of carrot. That’s how you can very easily identify the carrot sprouts from other growing vegetables and weeds in your kitchen garden.

Harvesting Carrots

image009

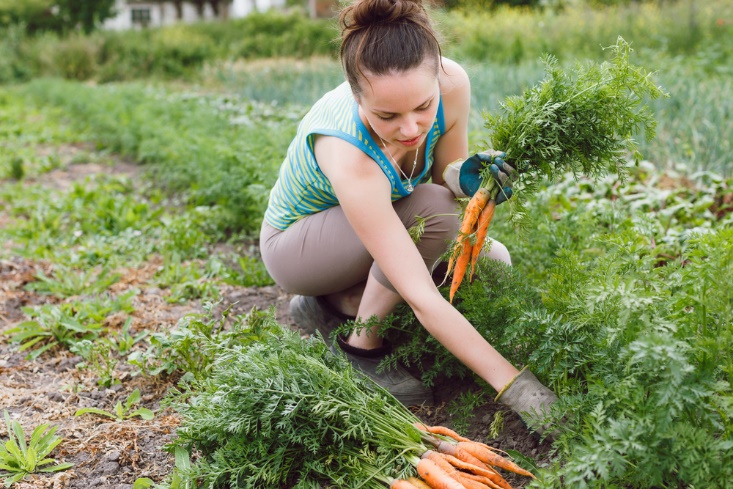
You can judge the growth of the carrots by looking at their roots. The size of the roots is a good indicator of the growth of your carrots. You can pull them out in three weeks to enjoy baby carrots of wait for next ten to twelve weeks for fully grown carrots.

Storing Carrots

image011

Now is the question of how to store carrots for prolonged use. You can seal the carrots in a polythene bag and store them in the coolest part of your refrigerator. One should never wash carrots until they need to be used as added moisture ruins carrot structure earlier. You can also store carrot in a box and cover it with a layer of sand. This will also help you preserve carrots for long.

You can very well enjoy your garden-fresh carrots all year round once you know how to sow and harvest them. You can use them in a variety of ways in your kitchen like caramelize then with sugar syrup or bake a carrot cheesecake or eat them raw as part your daily salads.

We have a lot of questions making rounds by our readers; therefore, in case, you have any further questions on how to grow carrots, or anything related to sowing or harvesting or storing them, then please comment below.

Read also:

Content Rally wrapped around an online publication where you can publish your own intellectuals. It is a publishing platform designed to make great stories by content creators. This is your era, your place to be online. So come forward share your views, thoughts and ideas via Content Rally.

View all posts

Leave a Reply

Your email address will not be published. Required fields are marked *

Related

aesthetic plants

10 Best Aesthetic Plants To Buy In 2022

Making a home habitable is all about decorating it with the right elements. The decoration needs to please your senses to make you feel comfortable with the proper sense of aesthetic decorum; above all, it needs to make you feel at home. There is no better way of decorating your home than the touch of green. Many indoor plants help you decorate the house just the way you need. They restore the life the brick and woods of your house were missing. Aesthetic plants are amazing because of their looks, but they also help you with several health benefits like refreshing the air indoors. You can decorate your aesthetic bedroom with plants and bring nature home for a healthier, happier, and merrier life indoors. So, if you are interested in making your indoors look incredible, you need to bring some indoor plants home and decorate the indoors more beautifully. This article has talked about several aesthetic plants that will help you do just that. 10 Best Aesthetic Plants When I said aesthetic plants, I meant nothing but aesthetic. These plants look elegant in their beauty and versatility, and they are perfect for decorating your home properly. Here are some of the best plants for aesthetic home decoration. 1. Alocasia Silver Dragon Alocasia silver dragon is a beautiful aesthetic plant that adorns your home with its thick veined leaves. They are a famous variety of the Alocasia Baginda plant. The light to dark green leaves is just as pretty as aesthetic in looks. If you plan to keep one of them on the table, you are making a good decision. You are going to love how good they look indoors. They require minimum sunlight, so you won't have much to worry about keeping them indoors. Read More: Looking for a Gardener: 8 Questions to Ask Before Hiring a Professional 2. Bird Of Paradise According to many, the Bird of Paradise is the queen of all indoor plants. The large and upright plant adds a glossy and clean feel to your indoors. This aesthetic plant will decorate your drawing room indoors and refresh the air indoors. You can grow the Bird of Paradise in the low light, but they won't grow faster that way. So, I recommend keeping it somewhere the plant gets maximum sunlight through the window. You need to water the plant when the soil in the pot gets dry by fifty percent. 3. Foliage Houseplants The decorative foliage is another aesthetic houseplant you can keep at home. Tropical foliage, calcium, and several other foliage aesthetic plants are incredibly pretty for decorating the indoors of your house. Having one or two of these plants in your drawing room will add more decoration and beauty to your house. These plants need a medium amount of sunlight. So it would help if you kept in mind to put them somewhere the sunlight reaches them. Also, since the foliage plants are tropical, it would be better to keep the potting soil wet most of the time. You May Like To Read This: Garden Edging for Beginners 4. Parlor Palm NASA uses the Parlor palm plant as one of the most effective air cleansing plants. They are the ideal aesthetic plants for decorating the indoors of your house. Their size remains perfect even when you are growing them indoors. They grow around 2.5 ft in height. The way the leaves of the parlor palm trees grow is a sight to look at. They are decorative and keep the indoor environment healthy at all times. When keeping one of these plants indoors, you need to keep in mind to make a good drainage system and keep the potting soil mildly wet. 5. Lemon Tree This might sound like the craziest idea ever, but a lemon tree can also take the indoors and make it look more appealing to the spectators' eyes. Of course, many aesthetic plants may appeal more to you than a lemon tree, but a lemon tree will surely have the upper hand in giving the house the refreshment it deserves. Your lemon tree needs an ample amount of sunlight and regular watering. Also, it would help if you remembered to let the soil dry out before you water it. 6. Rubber Plant Rubber plants or Ficus Elastica are incredible for derating your indoors. Once you get one of these aesthetic plants for your indoors, you will understand how amazing they are in refreshing the indoors while also decorating the indoors properly. When growing a rubber plant, you will need a minimum amount of sunlight (even indirect sunlight will do). There is no specific humidity level required. It would help if you watered them once or twice every week; also, let the soil dry before watering. The rubber plant is a low-maintenance aesthetic house plant, so if you were looking for one such plant, we recommend buying them. 7. Calathea Aesthetic Plant For a tabletop decoration, you can indeed choose the Calathea plant. The dual tones of the plant make your indoors look gorgeous with a dignified look. It is a low-light plant so you can keep it inside without any problem. They also don't require lots of watering, and they are pet-friendly. 8. Boston Ferns Ferns can be the pretty, perky, and adorable green aesthetic indoor plant you have been looking for. There is no match for a pot of fern on your table for indoor decoration. The green color of the ferns will look incredible in your house if you keep them for decoration. If you want to use ferns indoors, you can opt for Boston Ferns. They need very little light so that they will be just fine indoors. But you need to regularly water the pot so that the soil remains moist. 9. Money Plant A small aesthetic plant indoors that brings luck, fortune, money, and wealth in your life is the money plant. According to popular opinion, the money plant is an aesthetic plant that helps restore wealth, luck, and fortune if you keep them indoors. As an indoor plant, the money plant requires lots of sunlight and regular water, so you need to be careful about them if you are growing any at home. 10. Heart Leaf Philodendron Heartleaf Philodendron requires bright and healthy light and needs regular care if you want to grow them. However, these are excellent choices for decorating your indoors because of their beautiful-looking leaves and flowers.  It is important to provide them with the proper amount of moisture in the soil, regular pruning, and the required amount of fertilizers. There is plenty of caregiving that your heart leaf philodendron needs. Conclusion Aesthetic plants are an excellent addition to your home decor, and they add incredible value, beauty, and health benefits to your home. However, if you want to decorate your indoors with full potential, you need to consider keeping them in your home. Here, in this article, We have provided the names of a few of them to help you buy the right one. Read Also: DIY Ways to Control Pests in Your Garden What Is the Fastest Growing Plant On Earth? 5 Tips to Keeping Animals Away From Your Garden

READ MOREDetails
Artificial Grass

How To Install Artificial Grass In Your Garden – Installation Guide Step By Step

Artificial grass or fake grass is more popular than ever. The best part is you don’t have to hire a professional to install artificial grass in your garden. With the help of this article, you can do it by yourself with the help of your friends or family members.   With proper installation, you don’t have to maintain your artificial grass in the long run. You just have to keep it neat and clean with a spray. On the other hand, maintaining real grass seeds is very difficult and may not be possible for busy individuals who don’t get enough time to maintain the same. If you still love natural grasses and want to play games on grass, you can consider growing them that may give you a real feeling of natural grasses.  What Is Artificial Grass? Artificial grass is basically a material made up of artificial, human-made fibers that seem like real grass, but in reality, it is not! This saves you both money and time in the long run.  This fake grass was first installed in the multipurpose sports stadium. This grass has made leaps and looks real. On the other hand, this type of grass is designed for those individuals who don’t have enough time to plant grass seeds. Why Should You Consider Artificial Grass? Artificial grass may have various benefits for consumers. It saves you both time and money and is regarded as an excellent landscaping option.  The best part about artificial grass is that it does not require any water and includes less maintenance. You can also consider centipede grass seed for this because it also requires low maintenance and can grow in any condition.  Real grass can die, but artificial turf can last for more years. Moreover, you don’t have to buy any fertilizers or pesticides to maintain your fake grass. However, there are various pros and cons of artificial grass that you need to consider before buying. You can buy good quality artificial turf with the help of turf near me feature on EasyTurf to make it last for a longer time. How To Install Artificial Grass In Your Garden – Step By Step Guide Installing artificial turf is not as easy as it seems. To do this work, you need a good amount of time and hard work. Also, be prepared to get your hands dirty to install the fake grass on your lawn. Now, there are four elements to almost every installation that can reduce the cost of installing fake grass are: Tools used Seaming system Material waste Subbase material Here are the major steps to follow in order to install artificial grass in your garden in 2021. 1. Measure Your Area It is obvious that the area of the garden will differ for everyone. First, you need to measure the length and width of the area that you want to install with the artificial grass. Thus, measuring the area is an important factor that you need to consider at the earliest. 2. Gather Tools And Equipment The second step to install artificial grass in your garden is to gather vital tools and equipment for the same. You cannot complete the task without the use of a Stanley knife, geotextile weed killer, a turf cutter, and accessories such as tape and glue.   3. Remove The Existing Surface Now, it’s time to remove the existing surface with your hand if the area is small. However, you need to use a turf cutter if the lawn is very big. You can also plan this before removing the existing surface. 4. Compact The Ground Another step to install artificial turf in your garden is to compact the ground. You can take the help of a roller or a vibrating plate to meet your objectives. You need to follow this step again later.  5. Place Grass Edging Down Placing this is not mandatory but optional. If you have a desire to use timber or other edgings, you can follow this step. However, you need to ensure that your final grass line should not be smaller than edging. This is generally done to enable water to run off the turf.  6. Lay Your Sand Or Stone Base Another step to install fake grass in your backyard is to lay your sand or stone base, and this is one of the most vital factors that you need to consider. Place at least 40mm of compact sand and add more wet sand if the sand is dry. Then, you need to compact the ground again.  7. Roll Out Your Underlay And Grass Now, roll out your underlay grass first. By keeping in mind not to disturb the weed-killing underlay, roll out the artificial grass on top of that. In this step, you need to do it very carefully.  8. Let The Grass Settle One of the most vital things to do while installing your artificial turf is to let your grass settle after you have completed the above steps. This is generally done to stop the grass from creasing or wrinkling. 9. Trim The Edges After completing the above steps, you have successfully installed artificial grass. Trimming is the only thing left now. Trim and cut the artificial grass from the edges neatly. You can use a sharp Stanley knife for trimming. 10. Brush The Grass Up And Relax! Before brushing up the artificial grass, you need to pin it down using landscape pins. You need to brush up again to bring the fibers of the artificial turf upright. Now, it’s time to sit back and relax and enjoy the artificial grass in the garden.  The Final Thoughts  The best part about artificial grass is that it saves you lots of time and effort that you can spend on other important projects. Once you lay your artificial grass in your garden, it will always be green without any maintenance. Isn’t this amazing? Let me know your views about this in the comment section below. Reference: https://www.buzzgrass.com/how-to-install-artificial-grass/ More Resources: 5 Best Vegetables You Should Try Growing In Your Garden 7 Secrets to keeping your Lawn Tidy and Green All You Need To Know About Resurrection Plant and its Facts

READ MOREDetails
Pool in the Fall

8 Reasons to Build Your Pool in the Fall

When you start thinking about buying and installing a nice swimming pool, of course, you want to make sure that the installation process goes right. That means accounting for things like temperature and how busy the construction season is. Summer is pool season, so many homeowners opt to try for a spring installation. But our pool builders in south Florida would caution homeowners that fall is actually the best time for a pool install. 8 Reasons to Build Your Pool in the Fall You may be thinking that fall seems like an odd time to install a pool, but there are a few good reasons why it is a perfect time. Let’s take a look at 8 of them. 1. Construction Season Spring and summer are the busiest seasons for construction workers and contractors, including pool companies. By waiting until fall, you are likely to enjoy a much shorter install time. With fewer jobs to bounce between, your pool installers are more likely to be able to devote their full attention to your build. 2. Temperature Fall temperatures are mild and make it easier to work outside. This is especially true in places like Florida where summer temperatures can be scorching hot. In the fall, your pool construction team will be able to concentrate on the task at hand, rather than feeling overheated or worried about how long they have left in the day. 3. Landscaping Think about what sort of weather you want to be working outside in. Once your pool is installed, you will likely want to do some landscaping, maybe place some furniture, or do some planting. Why not take advantage of the cooler temperatures and enjoy fall in your backyard with your new pool? 4. Pricing At the end of the summer season – which is the height of pool season – you may be able to negotiate a better price on materials and labor. Often, pool companies have overstocked items or discontinued inventory that is less expensive. You may also be able to check out pre-owned items. 5. Weather Conditions Pool construction during spring is often thwarted by rapidly changing weather conditions. This can mean delays in your pool installation. If you are hoping to have your pool installed by a certain month or date, spring storms can be a very real concern. Related Reads: Swimming Pool Cleaning and Maintenance: Cheap Online Pool Supplies 6. Ready-made Summer Fun By installing your pool in the fall, you can start enjoying your pool as soon as the temperatures are warm enough for your liking. Or, any time of year if you opt for a heated pool. In Florida, temperatures start to warm up in early spring, and by having your pool installed the previous fall, you have more time to enjoy the warm weather and pool fun. 7. Why Not Add a Hot Tub? Have you considered adding a hot tub to your pool installation? If so, think about how much you will enjoy the cooler fall and winter evenings in your new hot tub with the view of your new pool. 8. Tax Considerations A pool is a major purchase and is considered a home improvement. It can also increase your property value. Home improvements like adding a pool can be claimed on your taxes. If you install your pool in the fall, you will be able to claim it on the taxes you file in early spring the following year. Imagine relaxing by your new pool enjoying the sun and the knowledge that you got tax benefits from your installation. Of course, not everyone wants to miss this pool season in order to do a fall pool install. But these eight considerations are certainly worth considering before you hire your pool contractors. The best way to decide when is the best time is to contact a pool builder in your area. Read Also: What is the Right Age to Start Swimming Lessons? All You Need to Know About Pool Maintenance Services Risks of Imbalanced Swimming Pool Chemistry

READ MOREDetails