












Window Glass Buying Guide: How To Choose The Best Glass?

Published on: 12 April 2021 Last Updated on: 27 December 2024
Window Glass

Windowpanes are important parts of your house that contribute to aesthetics as well as energy efficiency. Good quality window glass allows light to enter your home and blocks the heat.

Also, it prevents the cooling of your air conditioning system from escaping from your house to improve its energy efficiency. A window glass should be strong enough to tolerate strong winds and extreme temperatures without getting cracked or damaged.

However, there are many types of glass available in the market. It can be challenging for some people to choose the right glass for their windows.

Whether you want to install window glass or want a glass window replacement, this post shares some tips for choosing the best window glass for your home. Hence, to learn more, read on to the end of the article.

Different Types Of Window Glass Options
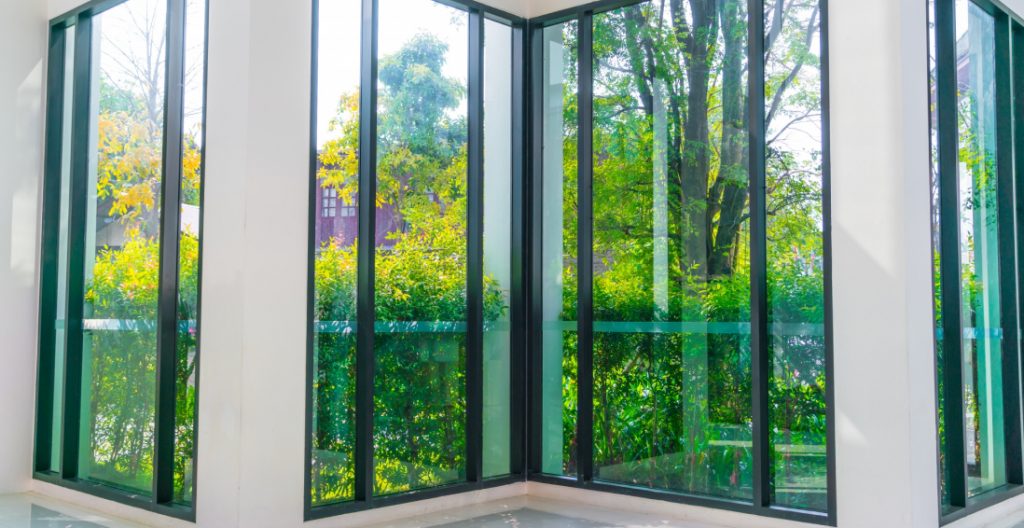
Different Types Of Window Glass Options

The following are some of the major window glass options you must consider for your home:

1. Clear Float Glass Or Annealed Glass:

Float glass is formed by floating the molten glass on the molten tin to produce thin glass panels. The clear float glass allows 100 percent penetration of natural light into the house and offers viewing clarity to see the outdoors.

However, it is not good for heat and sound insulation. If natural light and outdoor views are your priority, you can install clear float glass on your windows. These glasses are quite affordable and a good option for people who want to design their windows on a low budget.

2. Toughened Glass:

As the name suggests, the toughened glass is made strong to withstand strong winds and extreme temperatures. It is more expensive than clear float glass and is available in reflective, clear, and tinted forms. You can get them in green, blue, grey, and bronze colors.

When a toughened glass is broken, it usually splits into small fragments that are harmless. Window glasses made of toughened glass are excellent for French windows and front doors as they offer enhanced safety and enhance the aesthetics of your entrance.

3. Tinted and Reflective Glass:

Tinted glasses are formed by adding metal oxides to glass. Reflected glasses are made by applying a metallic coating on the glass. If you want tinted light and outdoor views, you can use tinted glass, but it is not very energy efficient.

If energy efficiency is your goal, you can use reflective glass as they reflect most of the heat back into the outdoors, keeping your interiors cool.

Stained glass is also an option if protection from harmful ultraviolet rays is a priority for the owner or his family. The common standard is to use tinted glass in skylights, vehicles, or decorative panels, but you can also use them for outdoor windows.

4. Obscured Glass:

Obscured glass refers to any glass that allows light to pass through, but the material is not completely transparent like normal glass. The customized options include a design in which a gaze can see more than the shadow behind the fuzzy glass window.

This property makes it an ideal choice for bathroom windows or shower doors that require privacy. It can also be used to bring more natural light into the home.

5. Double Or Triple-Glazing Windows:

Residential window glass is a thing of the past. With energy efficiency being the primary concern of home builders and homeowners today, most windows now have at least double glazing – meaning that each window has two glass panels connected by a spacer, with space between the two. The space between them is filled with an insulating gas.

Window glasses can also have triple glazing – in other words, an additional glass is added to the window. Triple-glazed glasses are costlier than double-glazed glasses and offer you a significant return on your investment, whether you want to sell your house or save on utility bills.

6. Tempered Glass

These are also called safety glasses. Actually, manufacturers heat and cold them simultaneously to perform the process quickly. Hence, this makes tempered glass four times stronger than untreated glass.

Aussie Aluminum Enterprise offers a variety of aluminum doors and windows in Australia. They have been offering aluminum doors and windows for more than 20 years in Australia. If you have a property in Australia, you can hire them for the installation of windows at your home or office.

How To Choose Window Glass For Your Home?

How To Choose Window Glass For Your Home

When you choose the best window glass for your home, the following are some of the major factors to consider:

1. Noise Reduction

Choose a window glass that is thicker and can help you reduce noise. For instance, you can use laminated or double-pane windows with thicker glass.

2. UV-Ray Protection

If you want your window glasses to block harmful UV rays from the sun, you can choose low-E glass. This is a great option if you live in an area with hot weather.

3. Energy Efficiency

The best glass for energy efficiency is insulated glass. Generally, these have two layers of glass with an inert gas in between.

4. Safety

To ensure safety, you must use tempered glass. These glasses are four times stronger than untreated glass.

5. Privacy

Tinted glass is the best option if you want privacy. However, it allows natural light during the day.

6. Complying With Building Codes

Find out what the building codes in your area are. Depending on the coeds, you have to choose your type of window and performance.

Frequently Asked Questions (FAQs) On Window Glass

The following are some of the most common questions you will find about window glass:

What Is The Cost Of A Window Glass?

The cost of window glass replacement ranges from $180 to $409. Here, the average cost of replacement is $279. However, depending on your location, type of glass, and size of the glass, the price can change.

What Is The Best Quality Window Glass?

Generally, toughened glass or tempered glass are some of the best quality glasses you can buy for your windows.

Which Glasses Are The Best For Windows?

Toughened laminated Glass is the best option for house windows. This is because they not only reduce the risk of injuries, but they are also shatterproof. Moreover, they offer additional sound insulation and UV protection.

Final Words:

These are the major options to choose window glass for residential and commercial properties. The first step is to analyze your requirements and budget to choose the best available option.

For example, double or triple-glazed windows are best for energy efficiency. Float glass windows are best for natural light and outdoor views. Once you come to know your requirements, it will be convenient to choose the right window glass for your property.

Do you have more suggestions on how to choose window glass for homes? Please share your ideas and opinions in the comments section below.
Read Also:


A passionate writer and an avid reader, Soumava is academically inclined and loves writing on topics requiring deep research. Having 3+ years of experience, Soumava also loves writing blogs in other domains, including digital marketing, business, technology, travel, and sports.

View all posts

Leave a Reply

Your email address will not be published. Required fields are marked *

Related

Home DIY Decorating Tips

9 Home DIY Decorating Tips

For new homeowners, there is nothing more exciting than the prospect of owning your first home. This is a place that you can share with your family and make memories in. Of course, for your home to truly feel special you need to do the work to make it look as stunning as it possibly can, so not only do you get to impress your neighbors, but you will be able to give your family a feeling of warmth and belonging by manipulating the aesthetics to suit their tastes. If you don't want to spend money by hiring a professional interior designer at the moment, here are some quick ways for you to decorate your home! 1.  It All Starts At the Facade The facade is the first thing that your guests see when they enter your home. It is fair to say that the facade will create a more lasting first impression compared to the other parts of your home. One thing that you can do to make your home feel inviting is by giving your front door a nice playful hue, perhaps one of the primary colors of red, blue, or yellow. This gives your house a very impressive aesthetic, which many of your guests will surely appreciate. In fact, it is actually a very popular tradition to paint the front door red as a sign of welcome, which is something that started in the early days of the United States but is something that is still practiced today. 2.  Keep Everything Light and Subtle So this approach is a little different from your front door, but you should keep the colors of the interior of your home very light and very subtle. Remember, you want to tickle the senses with the color of your front door, but you want to calm them down with the color of your walls and furniture. The reason why is simple: the colors of the interior surround you and your guests, from all sides. That is why having a very profound color indoors has the potential of absolutely overwhelming your guests. Light-colored walls of white or gray particularly go well with natural light. 3.  You Can’t Get Enough Natural Light Speaking of natural light, you should make sure that you maximize it within your home by removing any obstructions from the outside or from within that could obstruct it. Natural light is beautiful and it can easily improve the aesthetic of your home. 4.  Mirrors, A Must Have For Every Room Of course, if your home is not situated in an area that permits too much natural light, there is a little secret that you can so that you can recreate the effect of having tons of natural light in your home. That is, of course, with the careful and creative use of mirrors. You should have a mirror hung in every room because it can bounce light around to give your home better brightness and artificially create the feeling of having tons of light from coming from the outside. 5.  Make Good Use Of Art The oldest trick in the book when it comes to making your home look fancier and more luxurious is to buy art and carefully choose the right areas of your home to feature them in. You have to remember that art is very subjective, so you shouldn’t feel the need to buy pieces that are too expensive to enhance the aura of your living room. It is purely visual, there are tons of paintings out there that you can buy for under $50 that would look great on your wall. To the untrained eye, which accounts for most eyes, the difference between those pieces of art and the most expensive ones will be completely negligible. If it looks good and fits the color scheme of your home, buys it! 6.  Add An Electric Fireplace Earlier we talked about the home being the perfect place to make your loved ones feel nice, loved, and warm. There is no better way to recreate this warmth in your home than to feature an electric fireplace with mantle. Not only are electric fireplaces very practical for people who live in colder states, but they are very symbolic and traditional as well; an ideal setting for having deep conversations and telling fun stories in the presence of the people you care about. Not only are electric fireplaces very practical for people who live in colder states, but they are very symbolic and traditional as well; an ideal setting for having deep conversations and telling fun stories in the presence of the people you care about. You can also consider in using bio ethanol burners, powered by clean and renewable bioethanol fuel, offer an eco-friendly and versatile solution for adding warmth and ambiance to any space without the need for a chimney or vent. 7.  Lighting that Matches the Room This tip is a little bit more technical but it can be very powerful if you use it correctly. You should have different types of lighting in your home and you should match with the room it is in. There is ambient lighting that exists purely for the purpose of illumination, which would work great in the living room. There is also such a thing as accent lighting, which provides very decorative and very pleasing highlights. These types of lights are perfect for places where you entertain like the dining room. 8.  Don’t Forget to Declutter This is probably something that you hear time and time again from people that are interested in home decorating, less is definitely more. Having that said, you have to constantly look at the parts of your home that you feel may look a little overwhelming and find ways to declutter. Maybe your bookshelf has too many books, or maybe your furniture is too closely packed together. 9. Low Ceiling? No Problem One of the first things that realtors talk about when they are trying to sell an expensive home is high ceilings, they are just magnificent to behold and they can give the home a very grandiose appearance. Of course, if these types of homes are not exactly within your budget, there are some visual tricks that you can try to artificially reproduce this look. Using custom drapes, using large mirrors, and using design elements that feature vertical stripes will all make your ceiling look higher. Styling a Stunning Home So those are some of the simple ways you can make your home look great in a way that does not break the bank. Always remember, however, that design may give you a beautiful looking house, but it is the people in it that truly turn it into a home. Read Also: How to Improve Your Living Conditions in a Small Living Space 5 Tech Items You Can Display as Decor Home Improvement Hacks to Add to Your Space

READ MOREDetails
Drywall

Elevate Your Home With Unique Ceiling Textures

Drywalls are those construction materials that are used to create walls and ceilings in your home. Not all that, but drywalls also come in handy if you want to create design features like eaves, arches, or any mind-blowing architectural requirements!!! Do you know the best part about drywalls? These are super easy to install, highly durable, and only require simple repairs when damaged. So, drywall is a flat component composed of calcium sulfate dihydrate, typically between thick sheets of backer paper, and facer, used to construct interior ceilings. Let’s talk about the ceiling textures and the drywall options you can choose for your home!!! The Ceiling Textures And Your Drywall Options Decorating your home can be a real challenge for many !!! Therefore, choosing the right drywall finish or texture can prove to be a hard nut to crack. And it’s very natural to get in a state of indecision if you are handpicking it for your new home or renovation project. There are so many options that it feels like you are “searching for a pearl in an ocean.” Making up your mind about whether or not to go texturing your ceiling can be a tough job. And even if you choose to texture your ceilings, there are chances you’ll be confused about which one to go for!!!! And remember, getting the drywall right is the first step of tiling projects?”. But No Need to Worry!! This article will guide you in choosing the perfect texture and drywall option for your ceilings to look more elegant than ever!! 1. Sheetrock Texture: Old Is Gold Sheetrock ceiling texture is a drywall ceiling texture that has been famous since 1917. The reason this drywall texture is so awesomely renowned is because of the artistic look that it gives to your ceiling And the best part is you don’t need to use any sort of spray paint in this case. You can achieve this texture by using your artistic hand technique and without using any special brushes. This texture is perfect for any room. There are no restrictions on the use of this ceiling texture. 2. Stipple Brush Texture: A Test Of Your Skill This texture is not as easy as it seems. You need skills to create this texture. To create this texture, you need a roller and slap brush. The fascinating fact about this texture is it can cover the bumps and holes on your ceiling. And if you have the skills, then this texture can surely make your ceiling look gorgeous than ever!! 3. Swirl Texture: Creativity Taken To A New Level To achieve this texture, you need either a roller or sprayer. You can also do this by using a technique called “the basic swirl” method. But one thing that you need to keep in mind is while creating this texture, you’ll need a lot of patience to get the best result. And the difficult part is you need to create the pattern before the mud dries. So, make sure to have a helping hand by your side. Overall, the texture can really give that awesome look on your ceilings if you do it in the right way!!! 4. Orange Peel Texture: A Color Of Choice The name suggests all the colors of orange skin, but sometimes it’s also called “an eggshell” ceiling texture. If you really love this color, then this can be on the top of your favorite lists. To create this texture, you need to apply thin mud to the ceiling using a spray gun set at very high pressure. The more artistic mind you have, the more artistic look it has got!!!! 5. Smooth Textures: Choice Of Many If you are someone who wants the best at a cheap cost, then this texture is just the right choice for you. Moreover, you don’t need to have many skills to create this texture design. The look of this texture is just mind-blowing, and if you are someone who likes things to be consistently gorgeous, then this is the texture you can have for your ceiling. This texture is effortless to remove and is also perfectly suited for any room. 6. Tree Bark Texture: Beauty Of Nature If you are someone who loves nature and wants to bring the reflection of nature inside your home, then this textured style is just the option you can have. This ceiling has the look of a tree. You can create this texture just by using a heavy roller. The texture might look simply, but it’s very artistic and can surely catch the eyes of many. If you have a farmhouse, then this texture will double the beauty!!!!! 7. Slap Brush Texture: Slap The Beauty Out Artistic, gorgeous, beautiful, and elegant are the nicknames you can give to this texture. A complete package of beauty!!!! To get this texture, you’ll need a brush with very stiff bristles and thin mud. Firstly, you have to cover your ceiling with mud using a roller, then take the brush and slap the ceiling from the edge. This can be a hard nut to crack because if you don’t get it right on the first shot, the whole ceiling might end up looking messy. 8. Popcorn Texture: Cottage Cheese This texture, also known as the “cottage cheese” or “acoustic” ceiling texture, is probably one of the most famous ceiling textures ever!!! If you look closely, you’ll see it’s kind of a look-alike of “popcorn.” That’s why it’s called “popcorn texture.” To achieve the correct texture, you need to use a sprayer to apply to your ceiling. This contains Styrofoam with mud which gives that puffy effect. But it will require you to have a lot of skill to achieve this effect. That’s because the “popcorn texture” is both challenging to apply and remove. I hope this article will help you to know about the needs of ceiling textures and drywall options. And now I believe you’ll be able to get yourself the perfect texture for your ceilings. How Can I Remove Old Ceiling Textures Safely? Removing old ceiling textures can be a big job, but it doesn’t have to be intimidating! If you want to update your ceiling and get rid of that outdated texture, I’m here to help. No matter if you have popcorn, stipple, or another type of texture, this process takes a little bit of care, but don’t worry! Here’s a step-by-step guide on how to remove an old ceiling texture without breaking your back or the bank. Step 1: Test For Asbestos Before you get out any tools…safety first!  Remember, many older ceilings (especially those with popcorn texture installed prior to 1980) contain asbestos. Before doing anything else, have your ceiling tested for asbestos. You can hire a pro to test the ceiling or buy a self-test kit. If asbestos is present, halt all work and consult pros immediately. Asbestos removal is not a do-it-yourself job because it poses serious health risks if mishandled. Step 2: Clear The Room If there’s no asbestos present, it’s time to get the room ready. Cover all the furniture. You’d be amazed at how far a fine mist of water, compound, and paint can travel! Also, plastic should be removed from the floors, and tape should be around any ceiling fans or lights that are not being removed. I can personally tell you we didn’t do this. We found dried white dust on our bedspread when we were stripping the wallpaper in our bedroom, and we had to clean up all the residual dust a little too late. It was wild! Step 3: Soften The Texture For Better Finish Here’s where the fun starts! To make that texture easier to remove, you’ll need to soften it. Fill a spray bottle with warm water and mist the ceiling. You don’t want to drench it. If you put too much water on the ceiling, it could end up damaging the drywall underneath. Allow the water to sit for about 15–20 minutes or so, giving it time to penetrate and loosen up that texture material. Don’t rush this step. It’ll only cause more work for you in the long run. Step 4: Clean Your Work Grab a wide putty knife or scraper and start scraping off the texture. Do small sections at a time, and scrape at a shallow angle so that you don’t gouge the drywall underneath. If it’s not coming off well, spray some more with the water bottle and let it sit for a little longer. This step can be kind of messy and time-consuming, but have patience because, in the end, you will have a nice smooth ceiling. Step 5: Patch & Sand Once the texture is gone, you may notice a few dings or dents in the ceiling. Don’t worry! Just fill them with some joint compound, sand it smooth, wipe away any dust and you’re ready for a new ceiling. And that’s it! A fresh, smooth ceiling in no time! Read Also: Here’s How to Turn Your Garage into a Bedroom on a Budget! Turn your attic into a living space

READ MOREDetails
Home Remodeling

Home Remodeling Tips

It is never too early or too late to give your home a fresh no look. This especially important at times like these where we spend most of our day inside and use our home to work, rest, and play. Change is healthy every now and then, and even a minor detail you alter can make you feel better, and every practical improvement is always welcome. I finally decided to do something about my apartment so I decided to ask pros for help, and KIC Restoration explained to me what I should consider before opting for a home remodeling of any scale. Budget When you finally decide to put your dreams into reality, first you must put them on paper. The initial step you need to take is to sit down and thoroughly investigate the amount of cash you are willing or able to spend. You have to address this issue so that you can, at least, get some of the stuff you’d considered, done. It is important to investigate prices in your local area, prices of materials and labor, and then adjust your plans accordingly. Make a Plan When your budget has been created, the next thing to think about is what is most necessary and urgent to address. You need to make a list of things that have to be done and things that you’d like to do, determine priority, and create a plan accordingly. It is worth noting that not everything can be completed simultaneously and that certain operations require more time and resources than others. When you take into consideration the price, the time needed and how occupied your home is going to be, you can then draw a timetable of activities so that you’d use your free time and money in the most efficient manner possible. Priority Over Desires Similarly to creating a budget, you need to decide what new items it is best to invest in, and what exactly are you going to need most. You shouldn’t cut costs on important items that provide a frequent and necessary service like a new table, set of chairs or a cupboard. It doesn’t need to be furniture at all. Any items that improve the quality of life of you and your family should be prioritized. Pick Ahead as Much as Possible As the subheading suggests it is vital to plan ahead as much as possible and pick several alternatives for the most important aspect of your home remodeling. If you do that in advance, before the start of the work, you are going to stumble upon a lot fewer issues when the actual work commences. You should leave as little room for improvisation and compromise as possible. This homework is essential for an efficient and successful home renovation. Worth the Effort? Sometimes certain alterations of your home might cause much more work and headache than you wanted. Before you decide to change something you should consider whether it’s even worth the effort, the time, and the money? Sometimes it is best to leave something as it is. For example, water pipes or electrical wiring, yet some parts of your home might be so outdated that it just has to be done, even if you didn’t plan to do it initially. Be Patient and Optimistic Home remodeling is not a small task. Even if you’d planned everything to the smallest detail, certain unexpected issues can always show up, or certain events you can’t control might shake up the original plans. It is important to stay positive at all times and focus on finishing the task at hand. You should know that your home is not going to be as comfortable during the works, and you’d just have to endure those few days and look forward to the results you so intensely worked for. Read Also: Top 3 Home Renovation Considerations for this Spring How To Increase The Value Of Your Home

READ MOREDetails