Published on: 14 October 2017
Last Updated on: 16 August 2019
When you are renovating your home or building a new one, it’s easy to visualize the big details, like the color of the roof and the walls. Something you may not necessarily be thinking of immediately is the color of your window frames, and yet this is such an important color to consider. It may help to think of them as something similar to the frame on a painting — it adds a finishing touch to the artwork, or in this case, the house. If you are not sure how to choose a color, here are some tips that may help you in your choice.
Choose a color palette: It helps to include the color of your window frames in the complete color palette you choose for your home. If the amount of color choices is overwhelming, keep it simple by choosing either a warm or a cool palette.
Pick a color that highlights or hides: If you are repainting your home, you can highlight your beautiful window frames by painting them a color that makes them stand out. Conversely, if they are ugly as sin, paint them a boring white, or any color that makes them blend in with the walls.
Select a color that complements your home’s exterior: Your walls should have a big say in what color you paint your window frames. If you have exposed brick walls, you should choose a bright contrasting color, and avoid warm browns and dark colors. For painted wood siding, it could work well to pick a darker accent color that complements the rest of the color palette of your home.
Consider neutral colors: Neutral colors are trendy again. The current variety is a far cry from boring beige, so you don’t have to fear to have a sterile hospital look. The new generation of beiges and grays are soulful and colorful, and they will prove to be timeless at the same time. No need to be embarrassed about bright lime or electric pink, or any such garish eyesores in a few years from now.
Choose a color that fits the style of your home: It is very important to choose a color that is appropriate to the style of your house. Certain colors go well with certain types of architecture. A red brick building already imposes a limit on the color palette due to the characteristic hue of the walls. A historic manor would benefit from modest colors that fit in with the time period in which the house was built. If the architecture is more modern, choose colors that enhance that particular style. But if it’s just your typical family home without any noteworthy architectural provenance, you are free to choose colors that match your personality and sense of style. It should be something that you like, and feel comfortable looking at every day.
Use bold colors wisely: For most people who doubt their stylishness, it would be best to stick to neutral colors. But if you are brave and daring, and you are sure you can pull it off, bold colors can add an unexpected twist to your decor.
Apex Window Werks is home and Commercial Window Repair Company with the headquarters in Chicago, IL. If you are looking for a reliable and experienced contractor to get the fog out of your windows, replace broken glass or repair rotten wood window frames, then AWW is your expedient choice. Feel free to give them a call to leave a message.
I enjoy writing and I write quality guest posts on topics of my interest and passion. I have been doing this since my college days. My special interests are in health, fitness, food and following the latest trends in these areas. I am an editor at Content Rally.
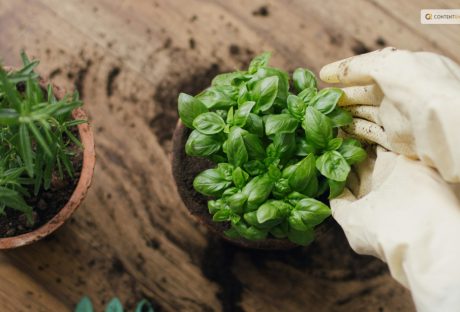
Basil is one of the most popular and versatile herbs you can grow in your garden or indoors. It has a fresh and aromatic flavor that can enhance any dish, from salads and soups to pizzas and pastas. Basil is also rich in vitamins, minerals, and antioxidants just like cilantro. It can benefit your health and well-being. But how do you harvest basil properly so that it keeps growing and producing more leaves?
If these are some of the things you want to know, I have you covered! In this article, I will answer all these questions and more and give you everything you need to know about harvesting basil! So, keep on reading this blog till the end to learn more…
How to Harvest Basil Leaves?
The first thing you need to know about harvesting basil is when to do it. The best time to harvest basil leaves is in the morning when the plant is still fresh and moist. Avoid harvesting basil in the afternoon or evening when the plant is dry and wilted. Also, avoid harvesting basil when it is raining or wet, as this can cause the leaves to rot or mold.
Steps to Harvest Basil Leaves
To harvest basil leaves, you will need a pair of scissors or a sharp knife and a basket or a bowl to collect the leaves. You can also use your fingers to pinch off the leaves, but be careful not to damage the stem or the plant. Here are the steps to follow:
Start from the top of the plant, and look for the stems with leaf clusters. These are called the terminal buds, and they are where the basil flowers will grow. You want to remove these buds, as they will make the plant stop producing new leaves and focus on flowering and seeding. This will reduce the flavor and quality of the basil leaves.
Cut or pinch off the stem just below the terminal bud, leaving about a quarter of an inch of stem above the next pair of leaves. This will encourage the plant to grow two new stems from the leaf nodes and produce more leaves. You can also cut or pinch off any other stems that are too long or leggy and leave about four to six pairs of leaves on each stem.
Repeat this process for all the stems that have terminal buds, and collect the leaves in your basket or bowl. You can also harvest some of the lower leaves but leave enough leaves on the plant to allow it to photosynthesize and grow. You should not harvest more than a third of the plant at a time, as this can stress the plant and reduce its growth and health.
After harvesting, rinse the leaves with water and pat them dry with a paper towel. You can use them fresh or store them for later use.
How to Harvest Basil So It Keeps Growing
One of the benefits of harvesting basil is that it stimulates the plant to grow more leaves and branches and prevents it from flowering and seeding.
However, you need to harvest basil regularly and correctly, so that it keeps growing and producing more leaves.
Here are some tips to follow. For instance, you must harvest basil:
At least once every two weeks, or more often if you see the terminal buds forming. This will keep the plant bushy and compact and prevent it from becoming woody and bitter.
From different parts of the plant, and not always from the same spot. This will ensure that the plant grows evenly and does not become lopsided or uneven.
Before it flowers. This is because the flowers will reduce the flavor and quality of the leaves. If you see any flowers forming, remove them as soon as possible. You can also pinch off the flowers and use them as edible garnishes or decorations, as they have a mild and sweet flavor.
Before the frost, as the cold weather will kill the plant. You can either harvest the whole plant and store it for later use, or bring it indoors and keep it in a sunny and warm spot. You can also propagate the plant by taking cuttings and rooting them in water or soil and grow new plants for the next season.
How to Harvest Basil Without Killing The Plant?
Harvesting basil is different from harvesting lettuce or other plants. The process is good for the plant and you, as you can enjoy the fresh and aromatic leaves in your dishes.
However, you need to be careful not to harvest too much or too often, as this can harm and kill the plant.
Here are some dos and don'ts of harvesting basil without killing it:
Do harvest basil from the top of the plant, not the bottom or the middle. This will allow the plant to grow stems and leaves from the lower nodes and maintain its shape and structure.
Don't harvest basil from the main stem or cut it too close to the ground. This will damage the plant and prevent it from growing new stems and leaves. Leave at least four to six pairs of leaves on each stem and about an inch of stem above the ground.
Do harvest basil gently and carefully, and not roughly or forcefully. This will avoid injuring the plant and exposing it to diseases or pests. Use a sharp and clean tool, such as scissors or a knife, and make clean and smooth cuts. You can also use your fingers to pinch off the leaves but be gentle and precise.
Don't harvest basil when it is stressed or unhealthy, such as when it is wilting, yellowing, or diseased. This will weaken the plant and make it more susceptible to further damage. Wait until the plant recovers and looks healthy and green before harvesting. You can also water and fertilize the plant to help it grow and thrive.
Do harvest basil when it is young and tender, not old and tough. This will ensure the leaves are fresh, flavorful, and not bitter or woody. Harvest basil when the leaves are about two to three inches long before they curl or turn brown.
How to Pick Basil Leaves?
Picking basil leaves is another way to harvest and use the leaves in your dishes. You can pick basil leaves with your fingers or with a pair of tweezers, depending on your preference and convenience. Here are some tips on how to pick basil leaves. For instance, you can pick it:
From the top of the plant, not the bottom or the middle. This will allow the plant to grow stems and leaves from the lower nodes and maintain its shape and structure.
From the stems that have terminal buds, not from those that have none. This will prevent the plant from flowering and seeding and producing more leaves. You can also pick some of the lower leaves but leave enough leaves on the plant to allow it to photosynthesize and grow.
Gently and carefully, and not roughly or forcefully. This will avoid injuring the plant and exposing it to diseases or pests. Use your fingers to pinch off the leaves or a pair of tweezers to pluck them off. Be gentle and precise, and do not pull or tug on the leaves or the stems.
When they are young and tender and not when they are old and tough, this will ensure the leaves are fresh, flavorful, and not bitter or woody. Pick basil when the leaves are about two to three inches long before they curl or turn brown.
How to Store Basil Leaves?
Storing basil leaves is a great way to preserve and enjoy them for later use. You can store basil leaves in different ways, depending on how long you want to keep them and how you want to use them. Here are some of the best ways to store basil leaves:
Refrigerate Them
You can refrigerate basil leaves for up to a week, by wrapping them in a damp paper towel and placing them in a resealable plastic bag or an airtight container. This will keep them moist and fresh, and prevent them from wilting or drying out. However, you should not wash them.
Freeze Them
You can freeze basil leaves for up to six months, by blanching them in boiling water for a few seconds, and then plunging them in ice water to stop the cooking process. This will preserve their color and flavor, and prevent them from browning or oxidizing. Then, pat them dry with a paper towel, and place them in a resealable plastic bag or an airtight container. You can also chop them and mix them with some olive oil, and freeze them in ice cube trays. This will make it easier to use them in soups, sauces, or dressings.
Dry Them
You can dry basil leaves for up to a year, by hanging them upside down in a warm and dry place, such as a closet or a pantry. This will dehydrate them and concentrate their flavor, and make them last longer. However, you should avoid drying them in direct sunlight, as this can bleach them and reduce their quality. You can also dry them in an oven or a microwave, but be careful not to burn them or overcook them. Once they are dry, you can store them in a glass jar or a spice container, and crush them or grind them before using them.
Make Pesto
You can make pesto with basil leaves, by blending them with some garlic, pine nuts, parmesan cheese, and olive oil. This will create a delicious and versatile sauce that you can use for pasta, sandwiches, salads, or dips. You can store pesto in the refrigerator for up to a week, or in the freezer for up to six months. You can also customize pesto by adding other herbs, nuts, cheeses, or spices, according to your taste and preference.
How to Cut Basil?
Cutting basil is a simple and easy way to harvest and use the leaves in your dishes. You can cut basil with scissors, a knife, or your fingers, depending on your preference and convenience.
Here are some tips on how to cut basil:
Wash and dry the basil leaves before cutting them to remove any dirt or insects. You can rinse them under running water or soak them in a water bowl with a few drops of vinegar. Then, pat them dry with a paper towel or spin them in a salad spinner.
Cut the basil leaves just before using them, to preserve their flavor and aroma. If you cut them too early, they will lose their freshness and wilt. You can also bruise or damage the leaves if you cut them too roughly or with a dull tool.
Cut the basil leaves according to the size and shape that you need for your recipe. You can either leave them whole or chop them finely or coarsely. You can also cut them into ribbons or strips, by stacking several leaves together, rolling them up, and slicing them thinly. This is called the chiffonade technique, and it creates a beautiful and elegant garnish.
Cut the basil leaves with a sharp and clean tool, such as scissors or a knife, and not with a blender or a food processor. This will avoid bruising or crushing the leaves and releasing their oils and juices. You can also use your fingers to tear or pinch off the leaves but be gentle and careful.
How to Use Basil Leaves?
Using basil leaves is a fun and easy way to add flavor and aroma to your dishes. You can use basil leaves in different ways, depending on your mood and occasion. Here are some of the best ways to use basil leaves:
Fresh
You can use fresh basil leaves to garnish and enhance your dishes, such as salads, soups, pizzas, and pastas. Also you can use fresh basil leaves to make salads, such as caprese salad with tomatoes, mozzarella cheese, and basil, or Greek salad with cucumbers, feta cheese, and basil. You can also use fresh basil leaves to make drinks, such as lemonade, tea, or cocktails, with basil, lemon, sugar, and water.
Cooked
You can use cooked basil leaves to flavor and season your dishes, such as sauces, stews, curries, and casseroles. Also you can use cooked basil leaves to make dishes, such as tomato sauce with basil, garlic, and onion, or chicken with basil, cream, and mushrooms. You can also use cooked basil leaves to make breads, such as focaccia with basil, olive oil, and salt, or muffins with basil, cheese, and eggs.
Preserved
You can use preserved basil leaves to store and enjoy them for later use, such as freezing, drying, or making pesto. Also you can use preserved basil leaves to make dishes, such as pesto pasta with basil, garlic, pine nuts, and parmesan cheese, or roasted vegetables with basil, olive oil, and salt. You can also use preserved basil leaves to make snacks, such as crackers with basil, cheese, and honey, or popcorn with basil, butter, and salt.
Wrapping It Up!
Basil is a wonderful herb that you can grow and harvest in your garden or indoors. It has a fresh and aromatic flavor that can enhance any dish, and a rich and nutritious profile that can benefit your health and well-being. By following the tips and tricks in this article, you can learn how to harvest basil properly, so that it keeps growing and producing more leaves, how to cut basil, pick basil leaves, and store them for later use, and how to use basil leaves in different and delicious ways.
Read Also:
Some Facts You Need to Know About Rainwater Harvesting
Asparagus 101: When, How, And How Often To Harvest?
Exploring Ideas For A Biophilic Home Design
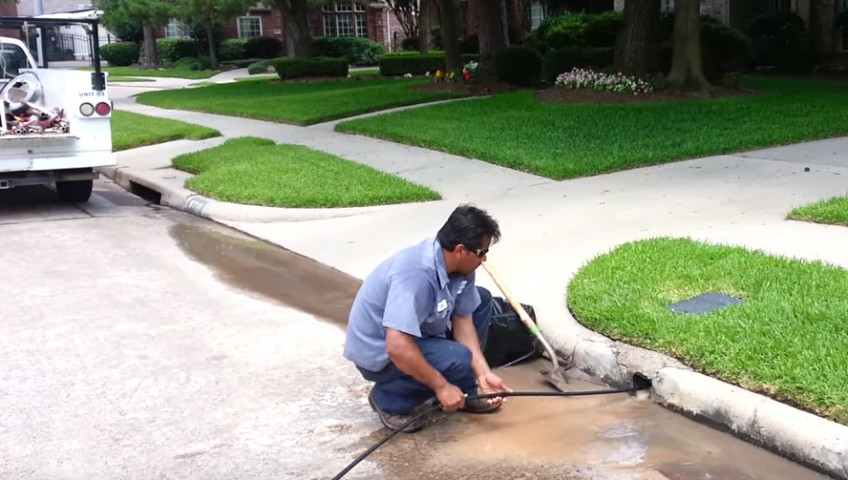
It may be a challenging task to remove fleas from your lawn. This can drive somebody crazy, sick and tired of spending a huge sum of money to buy chemicals with a view to expelling fleas for good. All efforts go up in smoke due to wrong methods. Is there any right, natural way to make their dream come true? Yes, here is the answer that is proven for green pest control in Minnetonka.
Natural ways to kill fleas in your lawn :
source
Spray thoroughly your whole lawn with natural ingredients: Nowadays, many industrial products are available for your choice, yet they can be harmful to your health. Why don’t you make use of fewer but multifunctional things right in your kitchen? Vinegar or lemon is accepted. As for vinegar, mix ½ vinegar with ½ fresh water. As for lemon, slice them and boil in at least 20 minutes. Either vinegar or lemon, you also end up pouring the combined water into a spray bottle in order to sprinkle your lawn. This handmade flea killer is friendly to the environment, hence you can utilize it day in and day out.
Flood your lawn: After spraying, don’t rush to flood right away. Take some time, about at least 2 hours, to kill the adults. So, what about larvae and eggs? Just flood your lawn slightly to soak up and eradicate them. Maintain the flood in a couple of minutes, and drain your lawn as fast as possible.
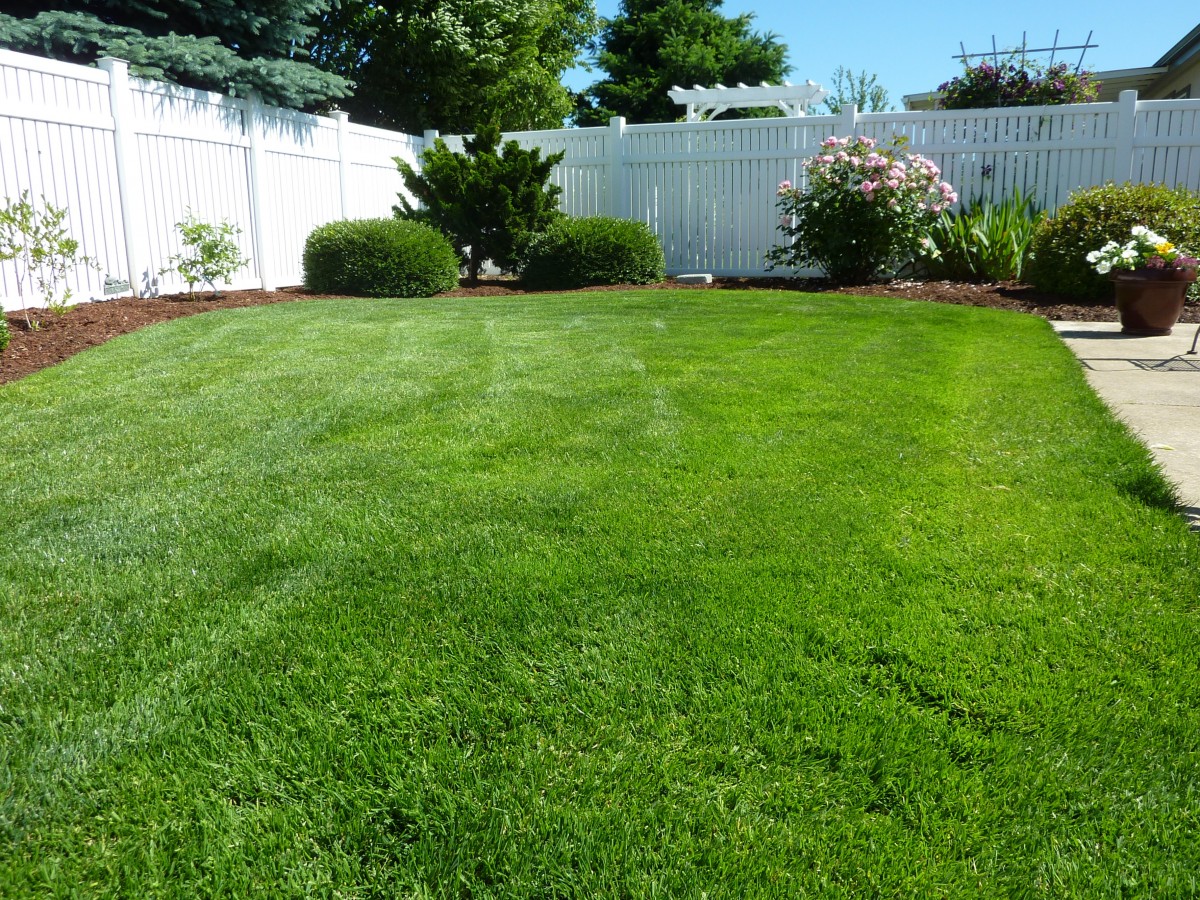
Natural ways to prevent fleas re-infesting :
Source
Rake your lawn to get rid of all shrubs, littered pots, trash and leaves: In fact, this step is indispensable in the whole process of getting rid of tenacious pests. Many people are wondering why they treat flea inside their home and in their pets already, but flea infestation does not decrease or boom just after a short period. Simply it is because of your uncompleted treatment, and you have skipped one of the most potential areas, your lawn. Fleas can live outdoors until they find a good chance to jump into your house or your pets, and their favorite environment is a moist, dark place. They can find it easier to escape from your “checking-radar” if hiding under a bottle or rotten leaves. After raking all useless items, don’t pile them up. Instead, clear up and throw away as soon as possible. The cleaner your lawn is, the lower the percentage of being infestation is.
Mow your lawn: Mowing is one of the most useful methods to remove flea in the lawn. It can be understandable because to let your lawn long also means to create “an ideal shield” for fleas’ larvae and eggs. In addition, short lawn also allows sunlight to deeply penetrate into while fleas really hate daylight. Nonetheless, don’t try to cut your lawn as short as possible as the too-short, on the contrary, can make your lawn weaker and more attractive to fleas and even other animals like ants.
Don’t overwater: As aforementioned, fleas prefer moist, as a result, you should prepare for an appropriate watering schedule and leave your lawn to dry. Moreover, a good drainage system is enormously useful.
Minimize other animals’ contact to your lawn: Outside your fence may be a huge potential to be infested by fleas, coming from wildlife animals. Build up a fence around your lawn to protect your lawn and your house as well.
Sound simple, right? In fact, it really is. All the mentioned methods are so cost-effective and practical. They are really worth a try.
Read More :
Grow These Flowering Plants In Your Home Garden To Remove Vastu Related Problems
How To Choose The Right Containers For Your Container Garden
Does Organic Gardening Improve Soil Quality?
featured image Source: https://pxhere.com/en/photo/994438
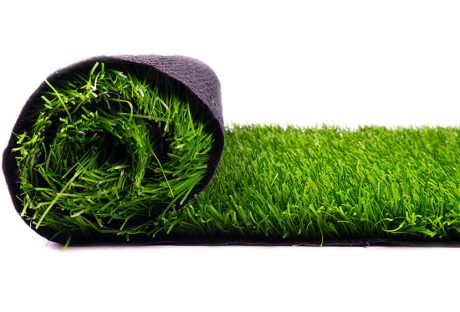
Artificial grass or fake grass is more popular than ever. The best part is you don’t have to hire a professional to install artificial grass in your garden. With the help of this article, you can do it by yourself with the help of your friends or family members.
With proper installation, you don’t have to maintain your artificial grass in the long run. You just have to keep it neat and clean with a spray. On the other hand, maintaining real grass seeds is very difficult and may not be possible for busy individuals who don’t get enough time to maintain the same. If you still love natural grasses and want to play games on grass, you can consider growing them that may give you a real feeling of natural grasses.
What Is Artificial Grass?
Artificial grass is basically a material made up of artificial, human-made fibers that seem like real grass, but in reality, it is not! This saves you both money and time in the long run.
This fake grass was first installed in the multipurpose sports stadium. This grass has made leaps and looks real. On the other hand, this type of grass is designed for those individuals who don’t have enough time to plant grass seeds.
Why Should You Consider Artificial Grass?
Artificial grass may have various benefits for consumers. It saves you both time and money and is regarded as an excellent landscaping option.
The best part about artificial grass is that it does not require any water and includes less maintenance. You can also consider centipede grass seed for this because it also requires low maintenance and can grow in any condition.
Real grass can die, but artificial turf can last for more years. Moreover, you don’t have to buy any fertilizers or pesticides to maintain your fake grass. However, there are various pros and cons of artificial grass that you need to consider before buying. You can buy good quality artificial turf with the help of turf near me feature on EasyTurf to make it last for a longer time.
How To Install Artificial Grass In Your Garden – Step By Step Guide
Installing artificial turf is not as easy as it seems. To do this work, you need a good amount of time and hard work. Also, be prepared to get your hands dirty to install the fake grass on your lawn. Now, there are four elements to almost every installation that can reduce the cost of installing fake grass are:
Tools used
Seaming system
Material waste
Subbase material
Here are the major steps to follow in order to install artificial grass in your garden in 2021.
1. Measure Your Area
It is obvious that the area of the garden will differ for everyone. First, you need to measure the length and width of the area that you want to install with the artificial grass. Thus, measuring the area is an important factor that you need to consider at the earliest.
2. Gather Tools And Equipment
The second step to install artificial grass in your garden is to gather vital tools and equipment for the same. You cannot complete the task without the use of a Stanley knife, geotextile weed killer, a turf cutter, and accessories such as tape and glue.
3. Remove The Existing Surface
Now, it’s time to remove the existing surface with your hand if the area is small. However, you need to use a turf cutter if the lawn is very big. You can also plan this before removing the existing surface.
4. Compact The Ground
Another step to install artificial turf in your garden is to compact the ground. You can take the help of a roller or a vibrating plate to meet your objectives. You need to follow this step again later.
5. Place Grass Edging Down
Placing this is not mandatory but optional. If you have a desire to use timber or other edgings, you can follow this step. However, you need to ensure that your final grass line should not be smaller than edging. This is generally done to enable water to run off the turf.
6. Lay Your Sand Or Stone Base
Another step to install fake grass in your backyard is to lay your sand or stone base, and this is one of the most vital factors that you need to consider. Place at least 40mm of compact sand and add more wet sand if the sand is dry. Then, you need to compact the ground again.
7. Roll Out Your Underlay And Grass
Now, roll out your underlay grass first. By keeping in mind not to disturb the weed-killing underlay, roll out the artificial grass on top of that. In this step, you need to do it very carefully.
8. Let The Grass Settle
One of the most vital things to do while installing your artificial turf is to let your grass settle after you have completed the above steps. This is generally done to stop the grass from creasing or wrinkling.
9. Trim The Edges
After completing the above steps, you have successfully installed artificial grass. Trimming is the only thing left now. Trim and cut the artificial grass from the edges neatly. You can use a sharp Stanley knife for trimming.
10. Brush The Grass Up And Relax!
Before brushing up the artificial grass, you need to pin it down using landscape pins. You need to brush up again to bring the fibers of the artificial turf upright. Now, it’s time to sit back and relax and enjoy the artificial grass in the garden.
The Final Thoughts
The best part about artificial grass is that it saves you lots of time and effort that you can spend on other important projects. Once you lay your artificial grass in your garden, it will always be green without any maintenance. Isn’t this amazing? Let me know your views about this in the comment section below.
Reference: https://www.buzzgrass.com/how-to-install-artificial-grass/
More Resources:
5 Best Vegetables You Should Try Growing In Your Garden
7 Secrets to keeping your Lawn Tidy and Green
All You Need To Know About Resurrection Plant and its Facts