Close Look at Top 5 Roofing Materials – Pros and Cons

Published on: 12 December 2016 Last Updated on: 19 August 2019
Roofing- Pros and Cons

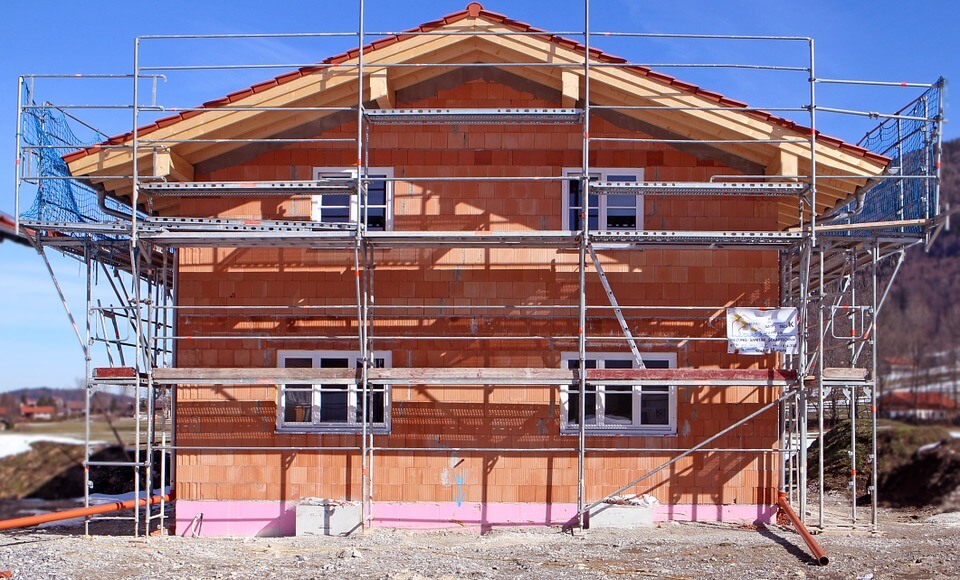
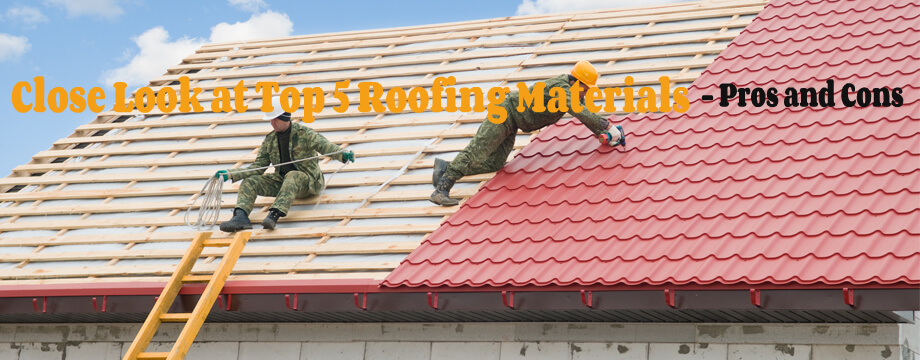
There’s no dearth of options for those mulling a new roof installation. Choosing the correct roof for your home is imperative to ensure that you get full functionality and lifespan. The final decision should be taken after considering different factors such as the owner’s location, the roof’s weight, and the cost, warranty, and lifetime of the product. This blog post discusses, five popular roofing options for homeowners taking time to look at their advantages and shortcomings:

1. Asphalt shingles

Asphalt shingles are unarguably the most common roofing option for homeowners in US, all thanks to their affordable nature and ease of installation. Moreover, many roofers also follow the practice of reinforcing shingles with organic materials or fiberglass, which has a positive impact on their durability and moisture resistance.

Pros

Asphalt shingles come in different sizes, shapes, and colors. They are easily available and the most economical roofing option available on the market.

Cons

Asphalt has a short lifespan when compared to other materials, and also incapable of providing proper insulation.

Best suited house styles: Traditional sub-urban houses

Cost: The cost of installing asphalt shingles can be anywhere between $70 to $120/sq.ft. and they can last for 20-25 years with proper maintenance.

2. Clay and concrete tiles

The use of clay adds to the roof’s texture and elegance, enhancing its aesthetic appeal. Clay and concrete tiles are heavy roofing materials and should be installed by professionals to avoid accidents and damage to property.

Pros

Clay and concrete tiles are highly durable and fire-resistant. They are also known for their energy efficiency. Installing a concrete roof can, therefore, help you lower energy costs.

Cons

Both clay and concrete are heavier than other roofing materials and usually require additional framing to function smoothly. The materials are also expensive and you may have to shell out a considerable amount of money to install clay/concrete tiles.

 Best suited house styles: Mediterranean, Southwestern, and Spanish-style homes.

Cost: Prices fluctuate in the range of $300-$500/sq.ft. Concrete tiles have a lifespan of 40-50 years provided you follow maintenance schedules without fail.

3. Metal roof

Metal roofs are available in two types, panels, and shingles. Some of the common metals used by roofers who specialize in metal roofing are aluminum, copper, stainless steel, and zinc. If you’re considering a metal roof, it is advisable that you first consult your provider on the type of metal you should use after considering all the important factors.

Read also: Avoid these 4 Mistakes during Multi Family Housing Renovation

Pros

Metal roofs are highly resistant to temperature fluctuations and also offer better protection against solar radiation. They are also long-lasting and recyclable.

Cons

Installing a metal roof can be a costly decision and you may have to shell out anywhere between $100-$800/sq.ft. to install a metal roof.

Best suited house styles: bungalows, cabins, and contemporary and cottage-style homes.

Effective life: With proper maintenance, metal roofs can last anywhere between 40-75 years.

4. Slate

Opting for a slate roof is a prudent decision if you need to avail a variety of designing options. Slate roofing comes in different colors like black, green, grey, red, and purple. It lends a touch of style and elegance to your roofing.

Pros

Slate roofs are durable and equipped with fire-resistance properties. You can also recycle slate to reduce costs and save the environment.

Cons

Apart from being expensive, slate is also heavy, making any plans for a DIY approach strongly inadvisable. Moreover, the quality of the materials can vary if you plan to use imported slate.

Cost: $600/sq.ft. And above. The effective life of slate roofs can extend up to 100 years and more.

5. Wood shingles and shake

Wood shingles are handmade and available in attractive shades of gray. When opting for wood roofing make sure the material is class a certified and includes shingles with a fire-resistant coating.

Pros

The use of wood shingles lends a rough yet artistic look to your roof. The shingles are made from natural materials like cedar, and redwood and are environment-friendly.

Cons

There are high chances of the roof sustaining significant damage when exposed to moisture, high temperatures, and rainfall. Moreover, fire codes in some states may prohibit the use of these materials.

Best suited house styles: Cape Cod, cottage, Craftsman and Tudor-style homes.

Cost: $100-$150/ sq.ft. You can expect the roofing to last around 25-30 years.

The blog discusses five popular roofing choices available to homeowners. You should, however, not limit yourself to these choices. Consider exploring other options before making a final decision. Consult your contractor and ask them to share their thoughts on your choice. You must also factor-in the maintenance costs and schedules associated with each option before you.

Content Rally wrapped around an online publication where you can publish your own intellectuals. It is a publishing platform designed to make great stories by content creators. This is your era, your place to be online. So come forward share your views, thoughts and ideas via Content Rally.

View all posts

Leave a Reply

Your email address will not be published. Required fields are marked *

Related

Clothes Dryer Maintenance

9 Clothes Dryer Maintenance Tips

Taking care of your appliances is the key to saving money, time, and effort. The clothes dryer maintenance is among essential major assistants in your household. While it works, you don’t notice it. When it breaks down, you face a disaster. The life expectancy of an average dryer is about 13 years. However, the majority of these appliances last much less. The reason is the lack of proper operation and maintenance. It’s not enough to plug the unit in and forget about it. If the only thing you do for your dryer is clean the lint filter, your appliance is likely to demand repair in just a few years. In this article, we’ll share top clothes dryer maintenance tips to keep your dryer working for as long as possible. Here are the 9 Clothes Dryer Maintenance Tips: 1. Run Full Loads Only The more you run your dryer the faster it will give out. It’s as easy as that. Since you are unlikely to limit the number of times you do laundry, you can at least add some efficiency to the process. By ensuring you only run full loads, you don’t just extend the lifespan of your clothes dryer, you save energy as well. Don’t rush to do laundry when you have free time. Wait until a full load is available. On the other hand, don’t overload the dryer. In the rush to finish laundry quicker, many homeowners overload washers and dryers. As a result, the motor strains, dryer becomes misbalanced and eventually stops functioning. 2. Opt for Professional Installation With numerous DIY videos overwhelming the Internet, homeowners often opt for DIY appliance installation to save money. Even though installing a dryer may appear straightforward, it’s not as easy as it sounds. You may not notice the mistakes you make during the process. They’ll become obvious after several uses. By that time, your dryer could already be damaged. Proper venting is highly important for a clothes dryer. You would need to select the right material and size for the venting tube and install it properly. Meanwhile, you should make sure the appliance is perfectly balanced. It’s especially important if you are placing it on top of the washer. 3. Clean the Dryer Vent The dryer vent is the most important part of your appliance. It needs regular maintenance. Ideally, you should hire professional technicians to check and clean the vent at least once a year. However, some owners do it on their own. Cleaning the vent involves disconnecting it from the dryer. After that, you would need to use a long-handled attachment to ensure penetrability. Special dryer vent cleaning brushes exist to remove clogs. Be careful about reinstalling the duct properly after the cleaning is done. If you fail to do it, the dryer won’t function. Consider hiring professional dryer vent cleaners to avoid mistakes. According to experts from Jacksonville appliance repair services, if ducts aren’t cleaned regularly, the dryer’s motor can burn out leading to costly repairs. 4. Limit the Number of Dryer Sheets While dryer sheets are an excellent way to keep your clothes static-free and soft, they aren’t harmless. These products have a wax layer that melts when the dryer heats up. If you use too many of them, the wax settles on the appliance’s interior walls and clogs the venting system and the lint trap. Removing this layer may be tough. No matter how many dryer sheets you use, it’s important to clean your dryer once a week even if you don’t see any dirt inside. Failure to clean the dryer regularly is the top cause of dryer-related fires in households. 5. Clear the Lint Trap Lint trap is one of the most important parts of your clothes dryer maintenance tips. Cleaning it regularly is the key to the appliance’s longevity. Wipe the lint filter clean after EACH load. Even if you are planning to do two loads in a row, clean the trap between them. At least once a week, remove the lint screen and vacuum the trap. You can use a brush to loosen the residue. Every one or two months, remove the lint filter and soak it in warm soapy water for about an hour or so. This can help remove wax, which appears after using dryer sheets and residue that settles after using a fabric softener. 6. Inspect the Appliance Weekly A visual inspection of the dryer can help prevent damages. Make sure no moisture is trapped around the door seal. If there is any, wipe it off gently. In fact, you can wipe the door after each load is done to prevent mold formation and bacteria growth. When checking the appliance, pay special attention to the doors seals. If they are cracked, ripped or damaged, the dryer is struggling to maintain the right temperatures. It may be straining the motor and overusing electricity. Replacing door seals is much easier and cheaper than repairing the motor. 7. Listen to it Work One of the first signs of dryer problems is the change in its operating noise. If you hear that something seems off, turn the appliance off immediately and check what’s happening inside. The reason for the change of sound could be overstuffing dryer with clothing or a sleeve caught up in an improperly installed lint trap. If everything seems to be in order, but the dryer continues to make strange noises, call professional technicians. 8. Check Exterior Vents Every month or so inspect the exterior vent of your dryer. While the appliance is working, go outside and check if the air is flowing freely through the vent. If something seems wrong, the pipe may be clogged. If you have a plastic vent, consider replacing it with a metal one. A plastic vent is a fire hazard. 9. Find a Professional Repair Service Some clothes dryer maintenance tasks require an expert’s assistance. Spend some time looking for a reliable repair service before anything breaks down. Knowing whom to call in case of an emergency could prevent further damage to your dryer. Start following the above clothes dryer maintenance tips today, and your dryer will serve you for at least a decade. Read Also: How to cut down your home decor costs? Read here Knowing Your Vehicle: 5 Maintenance Tips for Porsche Owners Tips on How to Avoid Hoarding and Get Rid of Clutter

READ MOREDetails
Lightning Arrestor

Top Reasons To Install A Lightning Arrestor Today

If you are considering installing a lightning arrestor or conducting rod then you should speak to a qualified electrician in Sydney first. This will ensure that the arrestor is fitted properly and is effective. After all, there is no point going to the trouble to fit it and then finding it is ineffective as it hasn’t been done properly. What Is A Lightning Arrestor A lightning arrestor is a piece of metal attached to your house. It is usually situated at the top of the house, making it the highest point. This ensures the lightning hits it before it hits the house. The metal rod is attached to a cable that goes down your home and into the ground. It effectively completes the circuit. When the lightning hits the rod the electrical current is sent straight into the ground, rendering it harmless. There are several reasons why you may choose to fit a lightning arrestor. Protect Electrical Appliances Lightning happens when freezing water in the atmosphere starts to fall to earth and rubs against other small particles of ice. This creates a negative charge, much like static electricity. However, the rising warm air associated with storms also creates positive energy higher in the clouds. The result is an electrical charge that moves between the two points, creating a lightning bolt. If it is close enough to your house it will hit and surge through your electronics as it finds the shortest route to the ground. This surge is usually enough to damage any item plugged in. Although you should unplug items when not using them, if you are not there and unable to unplug the items they can easily be fried. An arrestor prevents this by directing the electrical charge away from your home. Reduce Likelihood of Damage To Your property Lightning doesn’t just pass through your electronics and damage them. It can also hit the roof of your house. The lightning bolt hits with a considerable shockwave, potentially causing a significant amount of damage to your home. It can destroy roof tiles, be hot enough to ignite wood underneath or simply blast a hole straight through your roof, which causes you spent much expenditure on roofing materials again. You’ll then be facing a sizeable repair bill and the rain that accompanies a thunder and lightning storm. Avoid Power Outages The lightning strike won’t just damage your adorable electronics, which you might buy from any online store with great eagerness. It can pass through the supply wires and find another route to the ground. Unfortunately, the high voltage charge will overcome the supply charge but the resistance can damage the supply lines. This can then leave you without power. How long it takes to repair will depend on the amount of damage the storm has caused. The damage caused can be significant yet installing a lightning arrestor is very simple and surprisingly low budget. It’s a worthwhile investment and something you should be talking to the specialists about today. After all, you never know when the next storm will hit, the meteorology department doesn’t often know either! Read Also: Things You Can Do to Your Apartment to Raise Its Value Foundation Moisture Maintenance: 6 Tips for Home Repair

READ MOREDetails
Welding Projects

Supplies That Are Needed For Welding Projects

Welding is a fulfilling and challenging job, requiring expert knowledge, a steady hand, and, most importantly, the right tools. If you’re starting up a welding business or just want to make sure you’re kitted out for your at-home welding projects, you’ll need to ensure you’ve got the right supplies and tools from a store similar to weldingsuppliesfromioc.com. We’ll provide you with the essential shortlist of supplies you’ll need for your next welding project. A Welding Machine Of course, you need a welder to do any welding. A welder is, in essence, a piece of machinery that uses heat to combine two or more metal parts. There are a variety of welding machines out there that use different combination methods to get the job done. One may be preferable over another, depending on the welding project you are doing. Stick welders, MIG welders, and TIG welders are just a few examples, each with its own unique methodology. No welding machine kit is complete without a welding electrode, torch, filler material, and shielding gas. These are all essential to the function of a welder and imperative for safety while operating the equipment. Always ensure that your welding equipment is high-quality before you start projects, either for work or for a hobby. Welding is dangerous, and choosing a welder you’re unfamiliar with can be downright dangerous. Soldering Helmet The most recognizable tool of any welder, the helmet keeps your face, especially your eyes, safe while you weld. It also helps to keep your skin protected from the intense heat. Soldering without a helmet is foolhardy and incurs a much greater risk of injury, so this essential piece of equipment should always be in your workshop. Shop around to find a helmet that fits you comfortably and lets you see what you’re working on. Welding Jacket The jacket does for your body what the helmet does for your face; these are made from fire-resistant materials to protect welders from the extreme heat that a welding torch generates. The last thing you want is a piece of molten metal landing on your arm, so choose a suitably high-quality jacket to protect your skin. Protective Gloves The last of the holy trinity of heat protection, the welding gloves serve to protect your hands from injury while you work. As you weld, you’re working closely with hot metal and a dangerous welding tool, regardless of what type of welding you’re using. Heavy welding gloves, in particular, allow you to pick up hot metal objects for a few seconds without being burned, which can be helpful for beginners getting started in MIG welding. On the other hand, thinner gloves allow more precise control over welding. Precision is paramount in some types of welding—TIG welding, for example, which relies on meticulous lines to create a clean, finished look. Choose a glove that represents your experience level, but always prioritize safety. Reinforced Boots Your feet are susceptible to injury as you weld, and it’s better not to tempt fate by playing hopscotch with raining molten metal. Welding boots should be tough and durable, with thick leather and steel-reinforced toes. These will give you some staunch protection against wayward molten metal and some degree of protection against other heavy objects that could otherwise fall and crush your feet. An Apron A welding apron protects your lower body from the sparks and heat welding produces. Generally, they feature adjustable straps so that you can tighten them to your comfort. Welding aprons are made from the same material as a welding jacket, providing additional protection for the legs and underlying clothing. Magnets Next, you’ll want to put some consideration into workplace efficiency. One underutilized but valuable tool you can use is a welding magnet. These helpful magnets allow you to pin components in place, rotate them, and secure your workpiece. You can get different welding magnets for different sizes of projects, but the bottom line is that it allows you a much easier time working with hot metal confidently and efficiently. Welding Cart Another essential item for welding projects is a cart. Just as with any project that requires heavy and cumbersome equipment, welding tends to require lots of clothing, tools, and components. A welding cart offers a lightweight solution to this problem, giving you space to store your welder and welding accessories regardless of where you work. If you’re on the go with your welding projects, then this is definitely an item you’ll want to invest in for your long-term success. Workstation Table Every welder needs a surface to work on, and, as you might guess, not just any table will do. A welding table is a customized workbench made from metal or other heat-resistant materials. These tables feature built-in holes that you can use to clamp down a workpiece and hold metal parts in place while you are in the process of welding. Chipping Hammer A chipping hammer is a specialty tool welders use to remove impurities from the surface of the welded metal, often called slag. The hammer contains a sharp, chisel-like tip that can knock off slag from the surface of a workpiece. Angle Grinder An angle grinder is a tool for preparing the metal surface for welding using abrasive force. The rotating disc smooths the surface, removing imperfections that may contaminate the workpiece and giving the welder a clean surface to work on. Wire Brush A wire brush also helps clean the surface of the metal before welding. They come in different shapes and sizes depending on the size of your workpiece, some with long handles for access to crevices and others with shorter handles for easier control. The bristles need to be abrasive to clean the surface of the metal effectively. The Bottom Line Every welder needs these essential tools before they start working. Some of these supplies are necessary to begin welding in the first place, while others are important for human safety or for work efficiency. Kit yourself out with these essentials, and you’ll be all set to tackle beginner welding projects immediately. Read Also: Welding As A Career Choice Is Metal Fabrications A Good Career Path In 2021? Simple Ways To Automate Your Small Business Processes

READ MOREDetails