Does Vinegar Harm Gun Bluing?

Published on: 27 June 2022 Last Updated on: 19 February 2025
Gun Bluing

Gun safety and maintenance are at the forefront of most gun owners’ minds.  We want to be able to clean our firearms without worrying about damaging them. 

If you’ve looked at online forums at any point, you may have seen some people recommending using vinegar in cleaning.

Is this safe, though?  Well, I’ll explain to you why it’s probably not the best thing to use in this article.  There are better alternatives that can clean it without any risk of corroding the metal – especially something like aluminum.

Cleaning our Weapons

As I mentioned above, if you look at any forums like this one, there is a hot debate on how to properly clean our weapons.  A variety of methods are suggested.  It’s important to remember that bluing on our guns is a vital part of it.

fixer upper frozen

You see, it protects the metal beneath from oxidation, usually known as rust.  Besides being ugly, it can negatively impact its integrity of it.  If there is already rust, though, you might need to scrape it away.  This can remove some of the bluings.

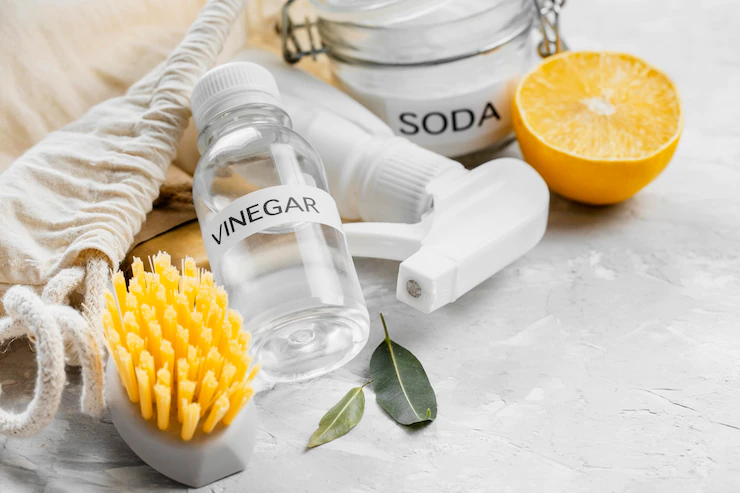
How can you clean them, then?  Some recommend vinegar or a combination of that and other materials such as peroxide.  Unfortunately, this can damage it.  Acids and other corrosives probably are not a good idea.

What Should We Use Instead?

There are a few ways that we can go about this.  You are probably wondering what the best rust remover for guns is, so I’ll discuss a few options here.  The first thing I will cover is prevention.

If you store your firearm in a cool and dry place, it will most likely not oxidize at all.  This is a good way to keep this problem from happening in the first place.  However, if rust does occur, you can go on to the next methods.

You could try a battery charger.  For this, though, you will need a few other things.  This will probably only work for one made of something like aluminum or copper, as well.   Locate some baking soda, a battery charger, a steel rod, and a plastic container.

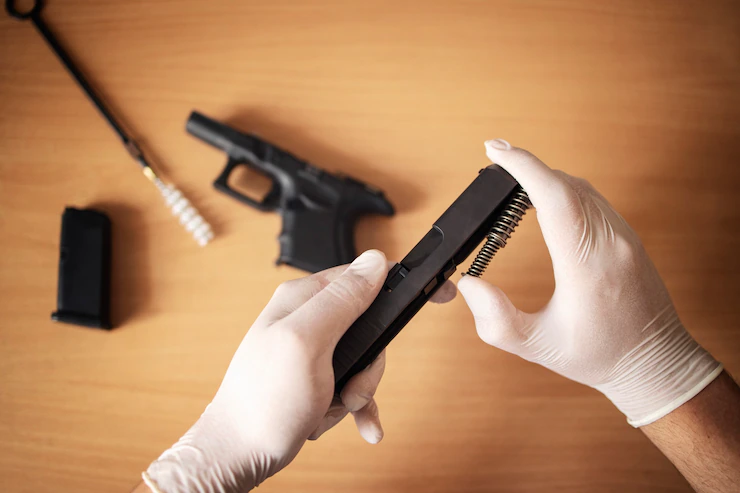
No matter which way you are cleaning, make sure the gun is not loaded.  This is for your own safety as well as everyone else around you.  You should look in the barrel and double-check, maybe even triple-check, that there is no ammunition within.

vinegar alternative

Next, you might try a traditional cleaning kit.  You can get them at most retailers that sell weapons like this.  This might be a slightly pricey option, but because the products are designed for this purpose, they are safe.  There is a low chance of damaging the bluing.

Of course, you could also use steel wool and some oil.  If you use a form of lubricating oil before going in with the abrasive surface of the steel wool, you will most likely be able to remove the rust without causing any damage.  You need to have a careful and methodical process.

As you go about the process of your choice, you will want to keep in mind some essential parts of cleaning your gun.  As you disassemble it, you should only do it in the way that the creator of it tells you to.  Otherwise, you may be risking your own safety.

Wherever you decide to do it, it should not be a closed space.  Having proper ventilation is critical so that you do not inhale anything toxic.  Some firearms use lead in them or ammunition.  Breathing this in is not something you will want to do.

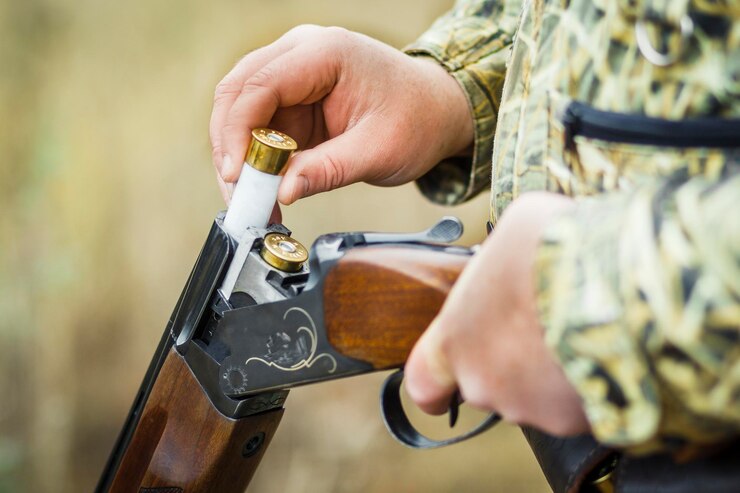
If you didn’t know, it is recommended to care for your weapon after each time you use it.  Whether you go hunting or to the shooting range, getting rid of the residue is a part of being a responsible owner.  What you use for this might vary depending on the type you own.

For example, rifle users may want to get a barrel snake.  This probably is not necessary for pistols or other smaller barreled guns, though.  My recommendation is to do your research on what to use for your specific weapon, and you probably should not use vinegar.

Additionals:

Content Rally wrapped around an online publication where you can publish your own intellectuals. It is a publishing platform designed to make great stories by content creators. This is your era, your place to be online. So come forward share your views, thoughts and ideas via Content Rally.

View all posts

Leave a Reply

Your email address will not be published. Required fields are marked *

Related

lenovo ideapad 330-15 amd

Should You Buy The Lenovo Ideapad 330-15 AMD? All Details Here

Are you in search of an affordable laptop? If your answer is a YES, then you probably have heard about Lenovo Ideapad 330-15 AMD. In case you are searching for more about this product, you have reached the right place. A much popular and budget-friendly laptop, this gadget comes with a variety of options when it is related to battery life and storage. In this article, I will be talking about the product in detail and point out how the Lenovo Ideapad 330-15 AMD can be of help to you. So, if you have been searching for its reviews and other information about this laptop, you do not have to look any further. Keep reading this article till the end to learn more… Lenovo Ideapad 330-15 AMD   Lenovo IdeaPad 330 is a cheap laptop with a comfortable keyboard and enough processing power for daily computing needs. This 15.6-inch laptop has a sturdy design and features that are uncommon for budget laptops. It even features a DVD drive, which is unusual to find on laptops these days. Sadly, a subpar display, limited battery life, and average performance ruin the fun, so we advise spending a little more on a more effective device, such as the Acer Aspire E 15. It remains one of the greatest laptops available for around $300. The product's starting price is $275, making it a cheap laptop (as of August 2021 when I published this review). Unfortunately, the Lenovo IdeaPad 330 has some drawbacks, just like most budget laptops. Keep reading this blog till the end to learn more about the same… Design And Looks   Lenovo IdeaPad 330 is an attractive low-cost laptop, and there is no doubt about that. The color palette is Platinum Grey. This color scheme is ideal for a laptop used for school or the workplace because it is on the cool side of the color spectrum. Plastic is used to make the laptop. However, the color scheme gives the impression that the keyboard deck and palm rest are made of aluminum. Like the IdeaPad 320 before it, even the horizontal Lenovo logo on the lid follows the brand's standard aesthetic. Lenovo IdeaPad 330 is a 15.6-inch display panel with two resolution options included with the IdeaPad 330. Either the HD (1366 x 768) or FHD (1920 x 1080) screen resolution is available for the laptop. The IdeaPad 330 is one of the few inexpensive laptops with a larger display than the typical 13-inch size offered by low-cost laptops. The 15.5-inch display screen of the laptop of the Lenovo IdeaPad 330 that I tested had an HD (1366 x 768) screen resolution. Lenovo IdeaPad 330 is a rectangle with rounded corners and a silver lid on which is imprinted the Chrome logo. The silver laptop lid and the dark-gray undercarriage are composed of durable plastic, and the IdeaPad's chassis is neither bulky nor heavy nor thin. Features   Now that you know a little about the gadget, it is time for you to learn about its features. Here are some of the many features of Lenovo Ideapad 330-15 AMD that you need to take a look at: 1. Productivity    Upgrade to AMD Ryzen for industry-leading graphics (on some models). The most recent AMD Ryzen CPUs were developed over the course of more than 4 years and 2 million engineering hours. The AMD Ryzen Accelerated Processing Unit was produced by AMD using that technology along with the most eagerly anticipated graphics engines. Your power, performance, and speed will be optimized whether you're working or playing. 2. Storage    You can customize the storage on your Ideapad 330 so that you only pay for the things you require. Choose a SATA HDD up to 2 TB to store thousands of files, videos, and photos. A rapid SATA SSD with a capacity of up to 256 GB offers quicker data transfer rates and quicker boot-up times. Additionally, you can create hybrid storage by combining a 128 GB SATA SSD with a 1 TB SATA HDD to get the best of both worlds. 3. Rapid Charge   Are you short on time and low on battery? The Ideapad 330 has a battery life of up to 6 hours and features Rapid Charge, which gives you up to 2 hours of use after only 15 minutes of plugged-in time. Utilize it as best you can. 4. Windows 10   With the help of Lenovo Ideapad 330-15 AMD, you can take advantage of Windows 10's best features with a brand-new update. To tell your story in video, the powerfully redesigned Photos app makes it easier and more fun: add a soundtrack, use changes, send 3D impacts, and from there, the sky's the limit. Furthermore, sharing is faster than at any other time, with instinctive settings that make it more straightforward to in a split second associate with individuals you care about most. 5. High Resolution And Sound Quality    The Ideapad 330 provides powerful visuals while on the go thanks to its 15.6-inch display with up to FHD resolution. The 330 delivers a significantly enhanced entertainment experience when paired with Dolby AudioTM. You will hear every detail if you turn up the volume without causing distortion. Specifications   ProcessorUp to AMD Ryzen™ 7 2700U Mobile Processor with Radeon™ RX Vega 10 GraphicsUp to 7th Generation AMD A9-9425 APUOS Operating systemWindows 10GraphicsUp to AMD Radeon™ 540*AMD IntegratedDisplay15.6” FHD (1920 x 1080)15.6” HD (1366 x 768)Memory16 GB onboard DDR4*4 GB onboard DDR4 + 8 GB DIMM*4 GB onboard DDR4 + 4 GB DIMM*4 GB onboard DDR4 + 2 GB DIMM*16 GB DIMM4 GB onboard DDR4*8 GB onboard DDR44 GB onboard DDR4Storage128 GB SATA SSD256 GB SATA SSD500 GB SATA HDD1 TB SATA HDD2 TB SATA HDD128 GB SATA SSD + 1 TB SATA HDDAudio2 x 2 W speakers with Dolby AudioBatteryUp to 4.5 hours*; Rapid ChargeDimensions (W*D*H)378 mm x 260 mm x 22.9 mm / 14.1" x 10.2" x 0.9"Weight2.2 kg / 4.85 lbs (starting weight)ColorPlatinum GrayBlizzard WhiteMidnight BlueChocolateOnyx BlackWiFi Bluetooth1 x 1 AC WiFi + Bluetooth 4.1PortsUSB Type-C 3.1*2 x USB 3.0 (one charging)**HDMI4-in-1 card reader (SD, SDHC, SDXC, MMC)Audio jack Wrapping It Up!   In case you were searching about the Lenovo Ideapad 330-15 AMD reviews and other specifications about the same, I hope that this review blog has been of help to you. If there are any other queries related to the same, feel free to let me know. All that you need to do is scroll down till you reach the bottom of the page. Then leave your doubts and suggestions in the comment box below. And I will be there to answer them all for you! More Resources: How to Unlock HP Laptop if you Forgot Login password? Factory Refurbished Laptops: Why Would You Buy New?

READ MOREDetails
aeropress machine

How to Make Coffee with Aeropress Machine

 The Aero press is one of the most straightforward gadgets that you can use to make your morning coffee faster. Invented in 2009 by Engineer Allan Adler, the Aeropress machine has gained popularity due to its small size, high portability and efficient speed in brewing coffee. Due to its portability, you can carry the device to your camping escapade, fishing, or any sporting coffee. With the Aeropress machine, you can have your coffee anywhere at any time. How to assemble an Aeropress machine Remember, you can buy your Aeropress coffee maker from a trustworthy place. Some of the accessories that come with the coffee machine include: The Aeropress device which is a plastic plunger Cap that should get placed at the end of the AeroPress device The fillers which should be used alongside the cap A scoop that should be used to measure the coffee A funnel to put the beans and neatly organize them in the chamber Paddle to be used in stirring the coffee Once you have acquired all the accessories of the AeroPress machine, here is how to assemble the machine: Step 1: Push the plunger of the machine out of the chamber Step2: Remove the filter and put it in the filter cap Step3: By twisting the filter cap, put it into the chamber Step4:  Put the chamber on top of a stand. Put the chamber on a sturdy mug and ensure it stands firmly. Put the ground coffee in the chamber. Step5: Share properly to ensure the coffee is leveled correctly. Step 6:  Add water to the chamber. Ensure the water fill up to level 1. At this point, you are ready to brew the coffee. If you want hot coffee, use hot water, but if you need cold coffee, use cold water. Remember, with the AeroPress machine, the coffee taste is determined purely by the water's temperature. If you use boiling water, it will make your coffee bitter. The manufacturer's recommendation is to use water at 175 degrees. Though it is not practical to achieve the exact temperature, you can boil the water and allow it to cool down before using it. Also, ensure that you use high-quality coffee bean; preferably, coffee beans that have been ground recently. The coffee bean should be finely ground. How to brew coffee If you have everything in place, the process of brewing coffee should take less than two minutes. There are two ways to make coffee using the AeroPress machine; the inverted way, and the usual way. Both methods make delicious coffee, but one is faster. Equipment required Electric stove and kettle The AeroPress machine; stirrer, funnel, and scoop A coffee grinder Small pitcher, or a mug Timer Original method Start by boiling the water. Remember, boil the water and let it cool for a minute since the coffee maker works best at a temperature of 175 degrees. Grind your beans. Depending on the amount of coffee that you want to make, grind the beans accordingly. For the two cups, grind at least two spoonfuls of coffee. Remember, you must grind the coffee until its fine. Ensure the filter is wet. After assembling the Aeropress machine, put paper filler inside the cap. Place the device on top of a mug and dab the filter with warm water. Place the warm funnel on top of a mug and dispense the coffee. After pouring the coffee, remove the funnel. Add warm water. Ensure you add the water until it gets to the marked line in the machine. Remember, the water should be recently boiled and cooled. Using a spoon or a paddle stirrer, stir the coffee until it dissolves. Insert the plunger by pressing it down till a hiss is heard. If you fill any resistance, pause briefly. Push the plunger gently until it reaches the ground. 8. Remove filler cap while pushing the plunger. This should eject the used coffee while rinsing the seal. Dilute and taste your coffee. Depending on how you want your coffee to taste, add more water. The Aeropress machine makes concentrated coffee. Thus you can split the concentrated coffee and make more cups. Reverse method Reverse method is similar to the standard process but with few adjustments. Here is the method: Start by assembling the Aeropress machine. Remember, in this method, and the machine must get assembled in an upside-down manner. Put the plunger in the chamber, flip the device upside-down, and don't put the cap and the filter. Put the funnel and pour the ground coffee. Use fine coffee grits enough for the amount of coffee needed. Next, add boiled water until you fill the filter. Remember, you should boil the water and let it cool for a few minutes. using a spoon or a paddle, stir the coffee gently. Steep the coffee for at least one minute. Place the paper cap and tightly screw it into the chamber Carefully, flip over the machine. Remember, this should get done accurately and quickly. After flipping, place the device on a mug Taste the coffee and dilute as desired. Remember, both ways make concentrated coffee, thus add water until you get the desired coffee. The Aeropress machine features as the most resourceful and most efficient coffee maker. It is less fussy and makes minimum noise; hence, you can use in places that require minimum noise. The machine is also highly affordable, with some brand costing less than twenty dollars on amazon. It is light and highly durable; thus, it can last long and give you value for money. It is easy to assemble and clean, even if you don't have any technical knowledge. The only downside of this machine is that you can only make two cups of coffee. Thus, if you are hosting a party, or your household has more than two people, then you will be forced to make the coffee several times. How to make coffee: [embed]https://www.youtube.com/watch?v=jlCUYNe9pes&t=100s[/embed] Read Also: 10 Best Coffee Places In The US How You Can Create A Coffee House Experience In Your Own Home 7 Fantastically Unusual Uses Of Old Coffee Beans Monthly Best Coffee Subscription

READ MOREDetails
Never Keep a Loaded Gun

5 Must need Accessories for a Firearm Owner

When the talk is about guns and firearms, it is highly recommended that you stay careful and protective. Here are five awesome must need accessories that a firearm owner should keep ensuring safety. These are inexpensive and add extra value to your firearm. To know 5 must need accessories for your firearm, keep reading. 5 Must need Accessories for a Firearm Owner 1. Sling: When it comes to firearms, a sling means a form of strap or harness specifically designed to allow a user to carry his gun comfortably with his body. There are different types of slings for a gun available in the market such as a traditional two-point sling, ching sling, three-point sling, single-point sling, etc. Different types of slings offer different advantages and disadvantages. So, before buying, know your and your firearm’s needs and buy accordingly. 2. Gun case: While it is an open secret that owning a firearm is quite an expensive hobby, so you would surely want to keep your gun safe so that you can use it for a lifetime. A gun case is a container or box which provides your gun with an extra layer of security from unauthorized access, spillage, scratch, or dropping. It also safeguards your firearm from dust and dirt and maintains its finish. Before buying a gun case, make sure it suits your gun model and the quality remains optimum. 3. Gun cleaning kit: Gun cleaning kit is something essential to keep your gun in good health. A gun cleaning kit is a box that contains a set of tools to be used for different purposes. You can clean your gun after a few uses or oil it regularly so that it holds its functionality to the optimum level for years. Apart from that, with a single cleaning kit, you can take good care of your multiple firearms. Before buying a gun cleaning kit, do not forget to check what tools it offers. 4. Trigger guard: Trigger guards are small and custom-fit pieces that slip over on the trigger to safeguard your gun from any unintended discharge. In general, trigger guards come with a paracord lanyard to help it remove quickly and safely. As trigger guards totally cover your gun’s trigger and nicely attach with your firearm, so it is a very good option for pocket carry. Using it is also very simple; attach the lanyard with your belt loop or belt and when necessary, just press the lanyard to snap off the trigger guard. Adding to that, these trigger guards come with different colors to add some extra coolness to your firearm. 5. Empty-chamber indicator: Empty-chamber indicators are brightly colored plastics that indicates whether your firearm is loaded or unloaded. The indicators slide into the chamber and make the firearm unworkable. While you are on the range and place your firearm on the bench, these empty-chamber indicators let other shooters know that your weapon is unloaded and harmless. These are a great and helpful tool while kids are around your firearm. Read Also: 6 Tips for Keeping Your Home Clean (With Pets and Kids) How Gun and Security Gear Advanced through the Years

READ MOREDetails