The best free software for data recovery

Published on: 09 November 2018 Last Updated on: 24 February 2020
data recovery

It has happened to us all on more than one occasion, we have lost important data on our computer. Whether we removed them by accident, a malware attack or you formatted your computer without having backed up the information, among other causes, the truth is that it is an exasperating situation that makes us have a hard time.

Quiet! This is not a catastrophe as it may seem, in a situation like the ones described above, it is necessary to have data recovery software that allows us to have those documents that we so desire.

It is well known that there are many programs that offer to recover deleted files, however none like the one offered by EaseUS – the best program to recover deleted data from any situation is accidental or intentional. This day I want to talk to you about a unique program that offers several options to recover deleted information, I mean EaseUS Data Recovery Wizard Free.

This is a wonderful data recovery software that impresses any computer expert given its enormous advantages.

What does EaseUS Data Recovery Wizard Free offer?

EaseUs Data Recovery Wizard Free allows you to recover deleted files, even if you have emptied the Recycle Bin or deleted them directly.

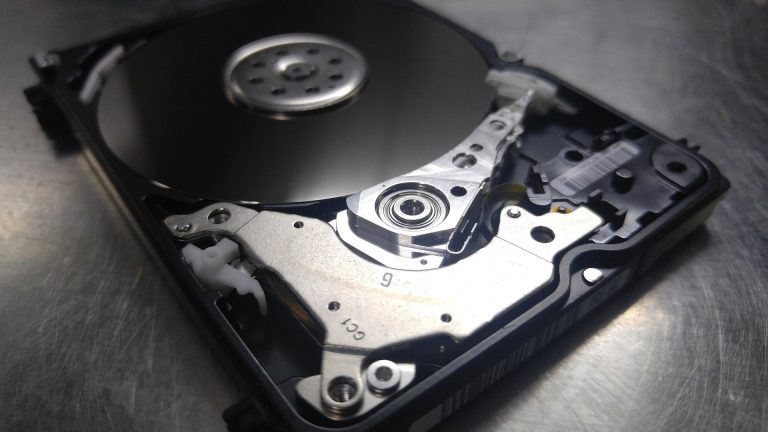
You can retrieve data from the USB flash drives, hard drives, SD memories, and other storage devices. It supports dynamic disks and all Windows file operating systems, from FAT to EXT and NTFS, and can bypass defective sectors automatically for the faster scanning process.

EaseUS Data Recovery Wizard Free is a fully functional software with a recovery limit of 2 GB that serves as proof for a paid update that is really worth it if you appreciate the value of a deleted file.

EaseUS Data Recovery Wizard Free is a data recovery software essential in case of data loss.

This free data recovery software guarantees a safe and accurate format and eliminates recovery from numerous threats such as formatted or damaged drives, critical file system structures, file deletion, application blocking, computer viruses, partition or boot issues, damage due to a power failure or current increase, etc. When a data loss disaster occurs, it is then that EaseUS Data Recovery Wizard Free does its incredible work.

As if that were not enough, it allows you to recover more than 1000 file formats of different types: documents, videos, images, audio, among others.

What devices does it support?

EaseUS Data Recovery Wizard Free supports a large number of devices including Hard Drives, Pendrives, External Disks, Cameras, SSD and many more.

What operating systems are compatible?

The systems in which you can use this fabulous software are from Windows XP to Windows 10 and also in the versions of Windows Server since 2003.

Do you use Mac? Do not worry EaseUS Data Recovery Wizard Free also has a version for Mac users. As I mentioned before, it supports various file systems among which I can mention: FAT (FAT12, FAT16, FAT32), exFAT, NTFS, NTFS5.

Is EaseUS Data Recovery Wizard Free for me?

If you are in the uncomfortable situation of having lost valuable information that you want to recover as soon as possible, this software is the ideal one for you. You can recover your deleted data easily with the help of EaseUS recovery software, regardless of the circumstance in which you have lost them.

There is no better software available today that offers everything that EaseUS Data Recovery Wizard Free has, so do not hesitate and download it now and recover your all data with the help of this file recovery software.

Read Also:

Content Rally wrapped around an online publication where you can publish your own intellectuals. It is a publishing platform designed to make great stories by content creators. This is your era, your place to be online. So come forward share your views, thoughts and ideas via Content Rally.

View all posts

Leave a Reply

Your email address will not be published. Required fields are marked *

Related

Power Packs

What You Need to Know about Mini Power Packs

One of the more commonly used hydraulic power packs is the mini version. This is the smaller and less powerful iteration of power packs intended for applications that don’t require the same capabilities and size provided by standard units. They can be regarded as the mid-size hydraulic units useful in different settings. A good example of the mini-unit is the HPM mini pack. It is a good representation of the mid-size version of the standard hydraulic units. Learn about its general features, capabilities, and applications below. Essential Things To Know About Mini Power Packs    There are several factors that you need to take care off while you want to make use of the mini power packs for your gear pump. Features and specifications: You can find many mini power packs that have an aluminium casting at the centre, which securely connects the drive motor to the gear pump. In this setup, the liquid flowing through the gear pump is directed to a relief valve, check valve, and multiple directional control valves. The pumps are driven by 12V or 24V motors with power ratings ranging from 500 watts to 3 kilowatts. The pump sizes can be from 0.25cc to 9.8cc. The tanks, on the other hand, can hold 1 litre to 55 litres of liquid. Mini power packs can be in AC or DC variants. The AC version comes in 1 PH and 3 PH packs that are suitable for scissor lifts, dock levellers, car lifts, and the control of security barriers. They can handle a flow rate of 30 litres per minute and pressure of up to 250 bar. The DC version, on the other hand, has 12V and 24V variants with single and double acting valves. They are commonly used for stacker trucks, trailers, tailifts, and tippers. Applications: Mini power packs are intended for mobile, marine, and industrial applications. These include the use in security equipment, access control systems, tipping trucks, plant trailers, and scissor lifts. The mini packs are versatile enough for use in different settings. Some units equipped with 3-kilowatt 24-volt motors are commonly utilised in the ramps of plant trailers. There are those with 500-watt DC motors which are useful in the operation of step lifts. There are also light and compact power packs designed to be portable, so they can be brought to, and used, wherever they are needed. Again, as mentioned, the details presented here are centred on the mini hydraulic power packs created by Hydra Products. Other companies may use other terms and different sets of technical specs. However, for the most part, the features and applications are similar. If you get a comparable mid-size power pack from a different company, you will likely be able to use it for the same applications. You just need to remember that you have to scrutinise your power pack options carefully. Read the technical information to find out if what you are getting is the right unit to choose for your needs. You can consult the seller of the power pack system for guidance, or you can consult others who have the experience in using hydraulic packs, for informed insights. Read Also: Why Sensors Are Essential In Machine Automation Add Accuracy To Your Testing With The Help Of Multimeter

READ MOREDetails
Scan

How To Scan From Printer To Computer?

Even been assigned the task to edit a file and scan it back? You might have wondered how exactly you would do that. The question of how to scan from a printer to PC can be tricky and you might need a little assistance in this aspect. Scanning a file from a printer to your PC can be an easy task for you if you follow the instructions given below. The following are the steps you need to follow to easily scan a document from your printer to your PC or laptop. Multifunction Color Laser Printers are the best when it comes to printing colorful images. Connect your computer to the scanner: First of all, you need to make sure that your PC or laptop is connected to the scanner. If it is not connected, then connect the scanner to your computer. Both the machines should be connected to a cord, as well as both of them, should be connected to your WiFi. Place the file on the scanner: Now you have to place the document, which you wish to scan, face-down on the scanner. Once you have properly placed the intended document, close the lid of the scanner. Open ‘Fax and Scan’ on your computer: Now, using your PC or laptop, select ‘Start’. You can find the ‘Select’ option on the lower-left corner of your screen. Now navigate to desktop apps and open ‘Fax and Scan.’ You can also open ‘Fax and Scan’ by typing this name on the search bar. Checking if the printer is correct or not: Once you have opened the ‘Fax and Scan,’ navigate to the ‘New Scan’ tab and click it. You can find the ‘New Scan’ tab on the upper left corner of the screen of your PC or laptop. A new window will be opened when you will click on the ‘New Scan’ tab. Now you need to make sure that the printer is correct. Navigate to the upper left corner of the newly opened window and check whether the printer is correct or not. If the printer is not correct, click on the ‘Change’ option, and choose the correct printer you want to use. Picking the right settings: Now, you need to pick up the right settings before scanning your file. Firstly, select the right type of file. You can choose the file type in the ‘Profile’ section. Now choose whether you want to print a ‘black and white’ document or a ‘colored’ one. Now choose the type of file you want your file to be saved as such as the PDF or JPEG format. Now, you can adjust other settings such as brightness, resolution, and contrast etcetera, if you want to. Scan the document: After you have picked the right settings, make sure that you preview the file before scanning it. If something does not look right, you can adjust it now. If you want to make any changes right now, you need to repeat the process to ensure that the document is completely right before you scan it. Finally, click on the ‘Scan’ option and your document will be scanned. If you want to find the scanned document, open file explorer, and navigate to the Documents folder. You will find the Scanned Documents folder in the Documents folder. Read also: Paper Authority: Basic Tips in Purchasing a Printer 7 Ways To Stop Spending So Much On Printing In Your Business Advance Copier: Printing Quality Business Cards On Your Own Computer

READ MOREDetails
Camera Gimbal

6 Tips to Shoot Hyperlapses Quickly and Easily Using a Camera Gimbal

Hyperlapses are generally eye-catching. Traditionally, shooting a Hyperlapse video required you to attach your camera to a tripod as you carefully marked the ground distance. The ground was supposed to be an even one. However, this approach was slower and tiresome. Today, you don’t need a tripod. All you need is a DSLR camera gimbal or any handheld stabilizer that will work with your camera. The gimbal will allow you to shoot the Hyperlapses fast and easily. To achieve this, you need to observe the following 6 tips. 1. Set Your Camera Right: You start by fitting the camera firmly on the gimbal. This will enable you to shoot the Hyperlapses in a stable way. Then, you should adjust the digital camera to shoot either 4K videos or short-interval shots. Thee 4K setting is better since it allows you to add the ramping speed afterward. Lastly, If the footages are not stable, erase the tracking points. 2. Walk Cautiously When Shooting: Shooting with a gimbal doesn’t give you the freedom to walk unsteadily and fast during the production. You need to walk uniformly and slowly to ensure that the quality of the Hyperlapses is not compromised. Once you press record, you should walk towards your target with the gimbal level well-maintained. A handheld gimbal will deliver stable Hyperlapses provided that you don’t hurry the shots. 3. Shoot Longer than Necessary: For the sake of post-production editing, it’s important to shoot the Hyperlapses longer. You have to remember that Hyperlapses are often unpredictable. With longer footages, it becomes easy to omit the unstable parts and keep the stable ones. Moreover, the editing is fast-achieved. 4. Always Focus on a Fixed Point: You can do this by switching to the lock mode. The mode allows you to shoot the Hyperlapses easily and not to lose the focus. You shouldn’t lose your target as this may cause the gimbal to fail you. You just need to prioritize on achieving a better view during the entire shooting path. 5. Enhance Motion Blur with ND Filters: People in motion and blinking cars may interfere with your Hyperlapses by limiting your exposure. To enjoy longer exposures during a daytime shooting, you should enhance the motion blur. The best way to do it is to use the ND filters. While encouraging longer exposures, the filters enable you to shoot amazing still images that are good in quality and balanced. 6. Create Parallax By adjusting the Gimbal Settings: Finally, it’s important to create parallax if you want a different motion dimension in your shots. To create parallax, you should: Open the gimbal assistant software to access the control panel feature. Click on it and adjust the shutter speed to the lowest value possible (one second). Once you are done, you can press record and start to shoot. Put simply, a handheld gimbal can help you shoot quality and stable footages. The experience is enjoyable but you have to do it right. With the above 6 top tips, you can be able to shoot Hyperlapses comfortably with the stabilizer. This ensures that the post-production is also done seamlessly. Read Also: How To Pick The Best Trail Camera 2019 “Best Guide For The Users” What Is A CMOS Camera?

READ MOREDetails