The Beginners Guide To Dealing With Website Downtime

by

26 September 2019

Technology

Website Downtime

According to recent research, the average website is down for about three hours per month as a result of downtime to web hosting servers. The 99.9% uptime guarantee and refund policies offered by most to hosting provider, won’t matter if you have lost traffic as a result of downtime. On average businesses can lose $10.6 million a year as a result of website downtime. 

What Are The Major Causes Of Website Downtime? 

Website downtime occur for reasons,some of them include: 

Website code issues: poor programming can cause heavy loads on servers which leads to database error then eventually, makes the site unresponsive 

Hacker attacks: a website can be brought down by attack from hackers in various ways – the server can be overloaded with DOS attacks, or malicious code is injected to steal security credentials – either way, the website owners are often forced to shut down the site in order to resolve the problem. 

Data Centre issues: downtime can be caused by the hosting company itself. In this instance, uptime monitoring tools come in handy because they allow you to track the reliability of your web hosting company

Increased traffic: increased traffic is probably one of the leading causes of website downtime. The only way to keep your site up and running even when there is a traffic surge is to engage the services of a reliable web hosting provider – a fully functional optimized website would be useless if your web host is unreliable. 

How To Protect Your Website From Downtime 

It’s been established, website downtime can negatively impact an online business bottom line, therefore it is important to have protective measures in place to safeguard your business. Some of these methods include: 

DNS management: is a service that automatically reroutes traffic from the affected server to a secondary server. 

Backup recovery: setting up a secondary hosting account with a different hosting provider on a different server is a great backup option, that makes it easy for you to get your website online if your primary server experiences downtime 

CDN: this network will basically store and deliver all cached content from your website and will protect it, in the occurrence of any short time downtime. 

The combination of DNS management, a content delivery network (CDN) and a backup host- backup listing will go a long way in protecting your website from experiencing short or long-term downtime. 

How To Avoid Prolonged Downtime With A Great Website Recovery Plan 

Website downtime is unavoidable -site updates, extreme weather or equipment upgrade can cause website downtime. A website recovery plan and backup are are important to keep unplanned downtime from adversely affecting your business. Before setting up a website backup and recovery plan, you would need to put up – website monitoring systems in place to track website uptime. These monitoring tools provide vital information regarding website performance and availability. 

With these tools, you can create a different test (checks on your website), to accurately narrow down the root cause of the problem and take adequate steps to correct it. These checks have to be set up outside of the basic HTTPS check the include-checking against known databases of virus and malware sources, record changes to DNS records and so on. 

Set up a downtime page 

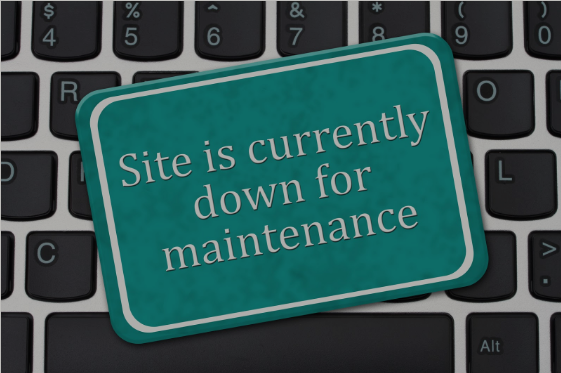
The best time to set up a downtime page is when you still have access to your website. It comes in handy when there unplanned downtime or planned downtime. This page informs your visitor that you are on top of the situation. Putting up a ‘service unavailable’ or a ‘website undergoing maintenance’ message on a page is a great way to keep credibility and show that you have control of the situation. 

How To Handle Website Downtime 

1. Confirm site downtime: before taking any major step, you need to verify that your website is really down – that is, make sure it isn’t a problem with your Internet connection or browser. To be extra certain, use a different computer to test out your website. 

2. Find the cause: you should try to ascertain what caused the downtime -hardware issues, a programming error, expired domain or a DNS problem? 

3. Get in touch with IT support: get in touch with the support of your web host and get assistance for the issue. if you choose a great web host, you should have ready support available. 

4. Inform your website users about the downtime: it is imperative that your website visitors are not left in the dark. Put out messages on your social media account to keep your customers informed about what is going on and that your business is taking steps to address the problem. If it is a planned all downtime, it is good practice to send out a warning message detailing the date and time of site maintenance.

5. Check-in with IT: communicate regularly with IT and offer any information they may need regarding the web server or your website. You should also get an estimate of how long it would take for the problem to be solved. 

6. Remain calm: this is tough to do but it is important to remember that website downtime can affect anyone and it is not the end of the world. Keeping calm is a great way to stay on top of the situation and resolve it quickly. 

In Conclusion 

A website is an integral part of a business’s online success. Because of the great number of website downtime, it is imperative that downtime is dealt with swiftly to avoid long-term repercussions -loss of clients loyalty, the revenue. 

Thankfully, major search engine websites like Google have put measures in place to help website owners mitigate SEO ranking damage by providing a way out.

Read Also:

Content Rally wrapped around an online publication where you can publish your own intellectuals. It is a publishing platform designed to make great stories by content creators. This is your era, your place to be online. So come forward share your views, thoughts and ideas via Content Rally.

View all posts

Leave a Reply

Your email address will not be published. Required fields are marked *

Related

Paper Shredding

Paper Shredding is Nothing Like in Hollywood Movies

How many times in Hollywood movies have you seen somebody frantically feeding papers into a shredder before the authorities arrive on the scene? It may be a common trope, but this doesn’t resemble how people use professional shredders today. Everybody has sensitive documents which could cause a devastating data breach if they got into the wrong hands. Having such information is an inevitable part of being a citizen — it doesn’t mean you have something to hide. Please keep reading to learn more about how professional shredding works in the real world. Home Shredding: Every day people are targeted by scammers who try to piece together whatever personal information about strangers they can get their hands on. People hire a paper shredding company every day to ensure that their home is free of data liabilities that could come back to bite them later. Here are a few of the items professional shredders commonly need to destroy: Tax documents Banking information Contracts Pages with passwords and usernames Especially with more people than ever working remotely, having sensitive information at home is more common than ever. If you have these or other such documents at home, the safest thing to do is get them professionally shredded. Commercial Shredding: It’s impossible to do business for any length of time without generating paperwork. From the smallest business to the largest corporation, there’ll be an endless procession of things like receipts, HR documents, contracts and agreements, and other paper documents which corporate saboteurs or identity thieves would love to possess. Just as with home shredding, professional shredders can destroy your sensitive documents on-site or remotely. For example, if you are located in California, you can look for shredding services in San Francisco to dispose of your documents securely. Even if they aren’t connected to the internet, electronics are a common source of data leaks, and these devices need to be eliminated with the same thoroughness as paper documents. Professional shredders will destroy the microchips on the device, so it’s impossible for a data thief to retrieve information. Do you have old phones, computers, or other electronics that you used for work? Obsolete technology might not be useful in your day-to-day life, but a corporate saboteur would love to find it! Call a professional shredder to get rid of electronics that are no longer useful safely. While some such devices like computers and phones are an obvious vector for identity theft, other devices that you may not think of also contain very sensitive information. If your office or home office contains an old photocopier or printer memory card, calling a professional shredder to eliminate it is the safest course of action you can take. People in all walks of life need to be careful that their personal and professional information doesn’t fall into the wrong hands. While the most prominent victims of identity theft get the bulk of the news coverage, it’s an issue that can affect anyone. Call professionals to help you steer clear of all risks associated with data theft. Read Also: High Technology Devices for Better Life Get The Best Assistive Technology: A Telecare Equipment

READ MOREDetails
Alternatives to Mega Upload

Top Five Alternatives to MegaUpload in 2016

Hello Friends, as per the BBC News one of the largest file sharing site MegaUpload has been shut down by federal prosecuters in virginia. The Founder Kim Dotcom and three others were arrested in New Zealand at the request of the US authorities.The Site was accused for illegal pirated stuff uploading from all over the world and it was shuted down.Its a very Bad news for the Uploaders and bloggers which used Megaupload for sharing their files and if you had a purchased a premium account there than your money is gone too.But We will have to accept the fact that its now gone and maybe its gone forever.So today i thought to present the list of Five best alternatives of MegaUpload. Top Five Alternatives OF MegaUpload 1. Rapidshare After the shutdown of megaupload, The next File sharing website that came into my mind was Rapidshare because it too allows you to upload large files and send link to your friends / readers to download them. First register at Rapidshare and then after doing that you can upload large files and keep them stored for as much time you want. After your file has been uploaded you get a short URL that you can send to your friends so that they can download it from any part of the world. The Rapidshare also gives a RapidPro membership option ($13/ month to $130/ year) in that your files will never expire and your files will be encrypted and you will be able to download your files instantly without waiting. 2. Mediafire Mediafire offers one of the most simplest methods of uploading files , just drag and drop.They offer unlimited file storage but you are limited to upload files no longer than 200MB at a time (With Free Account). Your files will be active for a short period of time (usually a month). But if you can buy a Mediafire Pro account ($9/month) Than you can upload files upto 2GB at a time and they will never expire, They will be ad-free and Mediafire Pro also allows your Readers/ Friends to upload files for you so that you can review them later. Also Read:Tips to Choose the Best Inventory Management Software] 3. YouSendIt You Send it offers users a very fast way to send Large Files to each other without filling the inboxes of each other.You can sign up for a free service but the free users have to deal with ads,But You get 2GB of storage and you can upload files no larger than 50MB at a time.After Uploading you can share them with anyone and send them as email too by attaching the YousendIt link of your file. Yousendit also allows you to download or upload files via your mobile devices too.They Provide two premium plans. 4. Minus Initially Minus only provided image sharing facility to the users but then turned into one of the finest file-sharing site providing users with easy drag and drop facility and send short URLs to your friends for downloading those files.Just sign up for an account there and you will get 50GB of Storage and upload files up to 2GB at a time without worrying about there validity. Minus also provides there users with the facility of Mobile apps and browser extension to make sharing and Downloading Easy. Also Read:Rock the Ball – A challenging Brain Teaser] 5. Google sites Surprised..? Yes, Google Sites too can be used as a file-sharing site. In fact, I am using Google sites only for sharing files on this blog. They provide a very convenient method of uploading and sharing your files and the most amazing thing about it is that it is free. just make an account at google sites and make a site. There’s no need for customizing the site. When your google site is setup. Go to your site dashboard and then in the left sidebar click on upload and then start uploading. That's it, once you have successfully uploaded your file you can send it to your friends, attach in the mails, or whatever you want to do with that.i, will explain the whole method in more detail in my next article…stay tuned. Read More:  The Importance Of SEO Based Digital Marketing Services Avoid These 5 Mistakes Before Starting An SEO Improve Your Local SEO Via Content Marketing

READ MOREDetails
Avast UI failed to load

Top Easy Way To Fix Avast UI Failed To Load Error In 2024

Avast Antivirus is the most famous Antivirus in the world. It is so popular among PC users because it offers both a Free Version and a Premium Version, which can be used in computers such as desktops and laptops. There is an Android version of this application as well. If you are not so tech-savvy, let me first tell you in short what Antivirus is. An antivirus is software that protects your system from viruses, malware, and Spyware. Ever since the Windows 10 update, people have been reporting that they are getting an error message saying Avast UI failed to load. Windows is infamous for providing buggy updates. The same thing was reported in Windows 7 as well as Windows 8. It's quite sad to see that Windows, even after becoming the most used Operating System on the planet, has failed to achieve proper security, and adding to that, most of their updates are quite buggy.  However, they fix the bugs in later updates. But the avast UI failed to load has been bothering people for quite some time now. In this article, we will suggest a few troubleshooting methods, following which you can sort out the issue.  What Causes Avast UI Failed To Load? Here are some of the root reasons listed below for this error. There is a good chance that this error pops up because of some error in the configuration of Windows.  Another reason for showing Avast UI Failed to Load pop up is that you might be using more than one antivirus simultaneously on the same device. The last reason we could think of is if there is any problem with your system's Remote Desktop Services. How Can You Fix Avast UI Failed To Load Issue? In order to fix the "Avast UI Failed to Load" issue, you need to check a few things first. Make sure that you have exited the Antivirus. Restart Avast Antivirus. But still, if the issue is not fixed, you can follow these procedures to say bye-bye to this issue.  Procedure 1: Turn On The Remote Desktop Services What you need to do is press the Windows key and R simultaneously. This will open up the RUN box.  After having that box on your screen, you have to type 'services.msc' in that box and press the enter key. Now check for the Service Page. After finding the Service Page, you have to search for Remote Desktop Services. After you have found the remote desktop services, what you need to do is right-click on it and then select the option of 'Properties.' After clicking on properties, you have to double-click on the button that says start and set the startup type to automatic. After you have done that, click on 'OK" to confirm the changes you have made. Now, you have to close the services page and manually restart your PC, laptop, or whatever you are using. It will complete the process. If you are still facing Avast's problem, UI failed to load, then kindly follow the next procedure closely.    Procedure 2: Try Repairing The Avast Antivirus Software Kindly follow this procedure closely to repair. You have to go to the Control Panel Section. You can find the Control Panel in the settings section of your computer. If you do not know how to open the control panel. Click on the start button and type the control panel. After opening the Control Panel, search for the Program & Features option, find it, click on it, and look for Avast Antivirus software. Now, you need to right-click on Avast; you will get the option to uninstall/change.  Be very careful while doing this, as a single mistake can uninstall Avast from your PC. Select the option to repair after having clicked on change. Now, you need to wait for Avast to repair itself, and after Avast completes its repair, reboot your PC. If the error of avast UI failed to load persists, kindly follow the next procedure. Procedure 3: Uninstall And Reinstall Avast Antivirus Software  If any of the above methods did not work for you, then you try to uninstall Avast Antivirus. To uninstall Avast Antivirus Software, you need to open the Control Panel. You can open Control Panel by merely typing Control Panel in the Run dialog box; another way to open Control Panel is by searching the control panel after clicking on the Start button.  After opening the Control Panel, go to the programs and features section and find the Avast Antivirus software. Right-click on it and select uninstall this time instead of selecting change as you did in the previous procedure.  Please wait for some minutes for Avast Antivirus Software to completely uninstall itself from your computer. Reboot your computer as the final step of the process. Switch back on your computer, download Avast from the official website, and install it again as a whole new software. Make sure you do not do anything else on your computer while Avast Antivirus is being installed, as it puts extra pressure on the computer's RAM. After the installation process, open Avast and check if the Avast UI failed to load the error persists. If it does, kindly follow the next procedure.  Procedure 4: Get The Recognition Issue Fixed If the error of Avast UI failed to load persists, you could follow the last and final procedure.You need to look up from the Avast icon on your desktop and Open the shield's control. In shields control, right-click on the Disable to disable the shields. You will get the option to disable it for 10 minutes to an hour. Disable it for 10 minutes, wait for 10 minutes, and check if the 'avast ui failed to load' issue persists. If the error is still showing, then try out some other methods. Press the Windows Button and R buttons simultaneously. It will open up the Run dialog box. Type cmd in that box so that it opens the Windows Command Prompt Box. Type 'winmgmt/verifyrepository' on the search field and hit the enter button.  If it shows the status as inconsistency, you need to type 'winmgmt/salvagerepository' in the search field and press the enter key to finish the process. If the result shows that the Windows management instrument was consistent, you need to type 'winmgmt /resetrepository.'  After doing that, Windows will send you a message showing that the WMI repository has been rebuilt successfully. Finally, you need to reboot the system and start Avast antivirus, and hopefully, it will not show the error of Avast UI failing to load. We are sure that after trying all these steps, your Avast Antivirus will run just fine. But still, if the error exists, we suggest you contact Avast Customer Care as soon as possible. Procedure 5: Update Your Avast Software Most of the time, what can fix such an error message is a simple update. Fortunately, you can update the app without the hassle of having to re-download the app. Redownloading can be a viable option if you cannot access the interface at all. Here is how you can update Avast Antivirus as well as other Avast applications that offer easy updates to its users. Press the Windows+X keys at the same time, then select the app and features from the context menu. Find the Avast Antivirus or any other app that is causing you to see the UI failure arrow. Click on it, and from teh options that unfold, choose Uninstall. Click the Update button and wait for the software to locate any new updates that might be ready to download. It will automatically install the latest version, which will take quite a bit of time, depending on the configuration of your system. When the repair process is complete, launch the Avast app that you were having trouble with. This should get your app up and running. It is possible that updating the Avast app the way mentioned above will fix the internal corruptions or missing files, thereby restoring the UI. But if you are still facing the same issue, try speaking to Avast Customer Support. Conclusion Avast is one of the best antiviruses in the market. The story of avast goes way back to 1995. Initially, it did not offer the best of services, but they have been improving their services year by year. It's one of the few antiviruses that offer a premium version and a free version as well.  Do not think that the free version has limitations like other antivirus software because it's not so. The free version provides a few premium features, which include a WIFI inspector and ad blocker, etc. However the recent trend of Avast showing that the Avast UI failed to load is not what users are expecting. Whether it's the fault of Avast or Windows 10 is yet to be found out. Rest assured, you can try the above procedures to get rid of the issue. You May Also Like: Is InterServer The Best Web Hosting Platform What Are The Things You Need To Know While Choosing Antivirus Software? How To Allow Chrome To Access The Network In Your Firewall Or Antivirus Settings?

READ MOREDetails