Why Hairdressers Love Rose Gold Colour

Published on: 25 April 2019 Last Updated on: 12 September 2024
Rose Gold

Grey hair, pastel, and balayage are all daring hair colour trends and are in fashion today. Now the beauty that caught our attention is ‘Rose gold’. The good news is that dreamy shade is still on trend in 2019 for those who want a subtler version of pink hair. And so many girls decided to try this special colour shade.

Bellisimos hair is one of the best hair salons in Cardiff, known as Cardiff hairdressers, here you have a consultation to decide what you want and what is the best for you.

Important tips and information that you wish to know:

If you’re scared of a permanent change, talk to your hairdresser, because they know exactly what they’re doing and really can reassure you.

Here is also an option to apply demi-permanent pink toners over the top. It’s meant to change the colour but isn’t permanent and will eventually fade (after approx. 10-20 washes).

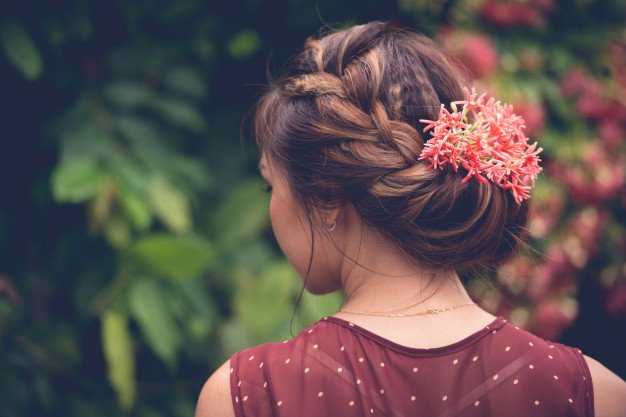
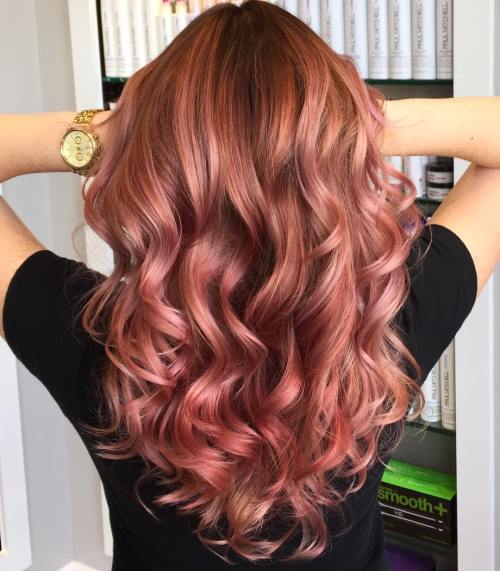
Your hair colour will look different depending on the light. In natural light, it may look bright, golden pink, but in a darker light, it can be a strawberry blonde tone.

How to Choose Rose gold colour Shades and Style?

Almost all colour variations of rose gold are attractive. However, there is an off chance that some variations might suit some people better than others.

  • Peaches and Warm Gold Colour Shade:

When it comes to rose gold, as a shade in itself, it tends to evoke warm emotions. Think summers and yellows. This shade of rose gold is perfect for girls who are blessed with bright skin colour.

  • Lavender and Ash Blonde:

Unlike peaches and warm gold that is ideal for warm skin undertones, lavender and ash shades are a dream shade for girls who are blessed with cool undertones. If you have a hair type that has natural shades of ash, a purple-pink hair colour combination is the ideal match for you.

  • Balayage Highlights:

This look is trending hotly in 2019. If you want to set examples and be a diva role model, the balayage is for you. This beautifully blends into the look and is more natural than even an ombre shade. However, most importantly, the balayage is safe for your hair roots and the scalp.

Getting Rose gold at a Salon:

All the equipment needed a for your hairdresser to provide you perfect rose gold colour shades. Here is a list below:

  • A kit for hair bleaching.
  • A gentle Toner
  • A brush for colouring the hair
  • A Bowl for cleaning
  • A disposable old towel
  • Some Rubber gloves to apply the mix
  • Proper Sectioning clips
  • The main ingredient- a dye of rose gold
  • Washing off Shampoo
  • A conditioner that is colour safe.

Romantic Rose gold colour ideas:

Rose Gold (Blush and Lemon):

One of the most striking hair colours that you will ever see. One way to make it even more enticing is to add some streaks of pink, yellow and some other bright colours. These shades will complement each other beautifully and give you the desired look.

Rose Gold (Shadow):

If you are not in the mood to play it safe, why not go for an all-out punk rocker look with the rose gold shadow option. This is a dark and bright glossy shade. You can use this and ask your hair stylist to create a shadowy effect towards the tips. If you want to sport hair that is edgy, then this is your look.

Rose Gold (Muted):

If you want to shift towards a colour shade that has 70% gold elements and 30% rose elements then this shade is the best. Gold is the dominating colour. However, if done beautifully, the gentle rose tint comes out wonderfully well.

Rose Gold Sombre:

These days are gone of ombre with its visibly defined colours and blunt contrast. Because it can provide you with a natural look.

Strawberry Rose Gold:

Nothing can beat an unbiased tone that showcases an elegant and matured vibe.

How to Maintain the Rose gold Colour:

The beauty of the shade depends on how well you care for it. We suggest you follow the below-mentioned tips religiously-

  • A safe shampoo (sulfate free) will help you maintain the natural brightness of the hair colour for a very long time.
  • It is best advisable to shampoo as less as possible so that you are able to maintain your look for a longer period. If your hair gets messy, it is advisable to use dry shampoo, just to cleanse the greasiness.
  • One old trick is to mask your hair with coconut oil, as it helps in extra nourishment and enriches the hair follicles.
  • The biggest mistake is to use heat-styling products on your sensitive hair regularly. We advise that even if you have to use them, please stick to just warm blow-drying.
  • Also, avoid chlorinated swimming pools that use heavy amounts of chlorine. If you have to step in, please wear a swimming cap

Summary:

Rose gold is one of the most compelling hair trends to hit social media nowadays, which comes in various shades due to blending blonde with reds and pinks to create a shimmering shade. It is lovely for the spring and summer months in particular. As it is now on trend and has many advantages to make your hair more attractive, so hairdressers love it so much too.

Read Also:

Content Rally wrapped around an online publication where you can publish your own intellectuals. It is a publishing platform designed to make great stories by content creators. This is your era, your place to be online. So come forward share your views, thoughts and ideas via Content Rally.

View all posts

Leave a Reply

Your email address will not be published. Required fields are marked *

Related

Fashion Designing Courses

Types of Fashion Designing Courses You Should Know

“You can have anything you want in life if you dress for it,” said the famous American costume designer, Edith Head. The professionals responsible for influencing people’s dressing choices are the coveted fashion designers we all love to draw inspiration from. However, the fashion industry has come a long way – no longer is it dominated by fashion designers. If you’re also looking to enter this industry, you can opt for different fashion design courses based on your unique sensibilities, as discussed below. Fashion designing In short, the art of designing beautiful clothes and relevant fashion accessories comes under fashion designing. Looking at the work of famous fashion designers, students of these courses are given a thorough understanding of designing clothes that meet the cultural needs of their time and are at the same time, in line with the latest trends. Under fashion design short course from reputed institutes like the Pearl Academy, students learn a whole lot about the different technical aspects of fashion designing such as freehand and digital sketching, color palettes, mixing and matching styles, knowledge of different textiles and how each drapes on the human body, history and evolution of fashion, trends within the industry, secrets of top fashion designers, and more. Using a fashion design course, students can make a successful career as a fashion designer or other products' designer, such as footwear, headwear, jewelry, and other accessories. Visual merchandising Where fashion designing courses teach students the art of designing original and influential designs, visual merchandising courses offer deep insights on making these designs attractive in the eyes of the brand's target audience via various brand promotional strategies. These courses provide students knowledge on implementing different creative marketing strategies, strategic store displays, window signs, and even interior product placement, source and manage inventory on a budget, and more. From brand managers to retail buyers and even visual merchandising bloggers, the career prospects for those having pursued this course are far and wide. These professionals are hired by marketing agencies, fashion stores, theatre companies, jewelry stores, and more. Textile designing Textile designing is a highly technical field wherein students are taught the art of creating designs for all kinds of fabrics – printed, woven, knitted, or surface ornamented fabrics, along with dying and embroidery. Students of this course will learn how to design fabrics based on their type and use. These designs can be for a certain body or space, and while textile designers are free to allow their imaginations to run wild, they still need to stay within the technical boundaries set by trends, culture, and of course, demand. Textile designing courses offer students a good eye for color, texture, and fabric patterns as well as different techniques of processing textiles. Textile designers are often in high demand among garment and textile export houses, branded fashion showrooms, boutiques, retail outlets, textile manufacturing units, among others.  Fashion photography Belonging to the umbrella of fashion communication, fashion photography is an exclusive genre of photography that deals with the display of clothing items and other accessories such as jewellery, headwear, even nail art, makeup, and hairstyles. Easy as it may appear, this field is all about showing the clothes and fashion accessories in such a manner that the particular brand’s products appear to be enticing to its target audience. Fashion photography students learn more than creative photography; they learn how to balance creativity with the brand’s business goals for promotional purposes. Fashion photography is a highly lucrative career option involving different sub-niches such as catalog photography, editorial photography, high-end and street fashion photography, and more. The world of fashion is advancing at an unparalleled rate. And where once only fashion designers reigned supreme in the industry, the fashion design industry has opened its doors wide for other successful fields worth exploring. Read Also: Fashion Style Every Modern Woman Must Know 5 Perfect Fashion Clothing Choices for Petite Women

READ MOREDetails
running with flat feet

A Quick but Helpful Guide to Running With Flat Feet

Maybe your doctor's told you running just isn't in your cards. But you really don't believe that. You see the open road or the winding trails and your heart wants to soar. But every time you try, your feet just hurt too much. About 20% of us have flat feet. And doctors are often too quick to dismiss us as invalids. The truth is, you can run with flat feet. Some of the top athletes in the world have flat feet. It just takes some strength work and adaptation. Here's our quick guide to running with flat feet. 1. What Makes a Flat Foot? Flat feet makes it sound like you have platypus feet. This isn't the case. People with flat feet have what we call "fallen arches" or pes planus. Your feet aren't just flapping around like two sheets of paper. We have three arches in each foot. Two on either side of the foot, the inside arch being the most prominent general, and in the very center of the foot. These arches act as natural shock absorbers. When you run, they absorb some of the energy and then spring back, helping you move. When the ligaments and muscles in these arches lose strength, they quit working properly. Sometimes this loss of strength is due to injury sometimes it's hereditary. Either way, collapsing arches aren't how feet are supposed to work. 2. Over-Pronation: If you've been in the running field for very long, you'll have heard two terms: over-pronation and under-pronation. Often, running shoe sites will ask you about your pronation when helping you choose a shoe. Most people with flat feet over-pronate. This means their feet and leg turns inward when they impact the ground. If your quads and posterior tibialis aren't strong enough, you could cause a number of injuries after a time. Ignoring over-pronation could eventually end a running career. 3. Do I Need Arch Support for Flat Feet? The answer to this question is case-based. It probably wouldn't hurt to support the arches in your flat feet. Especially if you're running long miles like a marathoner or ultramarathoner, your feet will get tired and you'll want that extra arch support. But whether you "need" to support your arches really depends on how strong your feet and legs are. You could have a strong tibialis that's just lengthened. This means you still have no arch, but can handle neutral shoes. But that's probably not the case for most people. Unless you're specifically strengthening the right muscles, and you should see a physical therapist to figure out which ones, you're not going to be strong enough for neutral shoes. This means you should wear stability or motion control shoes. These shoes include a bost in the medial arch of dense foam. When you contact the ground, it essentially forces your foot into a natural arch position preventing overpronation. Running With Flat Feet is Totally Possible: If your doctor says that running with flat feet is impossible, get another doctor or see a sports doc. You're going to just lose out on your runner's high if you don't. What have you found to work with flat feet? Let us know in the comments below. Read Also: Top 6 Formal Shoes Under $100 Opt For Comfortable Pair Of Cross Training Shoes For Men Furniture In Utica: Benefits Of Buying Locally-Made Products

READ MOREDetails
what is builder gel

What Is This Magic Product Salons Are Using? What is Builder Gel?

What is builder gel? It could be your whole personality right now. I mean, that’s the prime function of beauty, though. Most importantly, it can change your nails big time. I just felt everyone should get to know more about it. So, here I am with the details!  Firstly, it is a magic product, no doubt. Most licensed nail teachers and professional salon experts say this viscose polish strengthens your nails. The nails can grow without breaking. In technical terms, we call this- building your apex. Some refer to builder gel extensions as adding structure or creating structured overlays.  What is an apex? You now know what builder gel is. But what is an apex? In the terminology of nail care, the apex is the highest point of nail extensions. It is added to your nail to give it strength and balance it simultaneously.  To understand an apex better, you can think of it as the arch or dream curve of the nail. It is the thickest segment of your nail and the most challenging part of your nail palette. Once you get the apex right, you can pull off any of the nail designs 2024. How Do You Apply Builder Gel? Don't confuse it with the application of nail polish. Firstly, we apply nail polish in vertical strokes. However, builder gel is much more viscose. Hence, we use horizontal strokes while applying it.  As a result, the policy expands across the whole nail. There are three types of builder gel. These are hard, medium, and soft gels. If you’re using the hard gel, then use a separate brush for the same.  Let's clarify another confusion here. Some builder gels need you to apply a base coat first and then apply the gel on the top. However, builder gels manufactured by brands like Halo need nothing.  Once applied correctly, the hard gel helps you keep your manicure safe for a long span. However, some experts say using a rubber-based base coat is always better. It helps you to achieve the correct adhesion and take good care of your nails.  Why does builder gel lift? There are many reasons why the builder gel coating can lift from the nail top. Firstly, you must know that it is not as flexible as the natural nail. Therefore, the gel coat may lift at any time. The same may happen when you don’t apply a base coat to make the natural nail more adhesive.  Generally, we call the lifting of gel- “pocket lifting.” The center of the enhanced nail lifts away from your natural nail. Well, we understand that the builder gel coat may ward off any time.  But we apply it to give our nails strength, shape, and safety. So, we must know why the nail coating comes off. Otherwise, our builder gel treatments would be in vain. Here are some of the main reasons I’ve noticed over the years:  Inaccurate nail preparation You can’t achieve proper adhesion if you don’t remove your ail cuticle debris; moreover, not buffing the surface properly leads to the same outcome. Therefore, I suggest using a hydrator properly and avoiding such outcomes especially if you’re into French manicure acrylic nail ideas. Imperfect application I’ve always suggested visiting experienced nail experts. They know the proper application techniques. Frail treatments like builder gel applications may go wrong if you don’t know the accurate application technique.  However, the exact flaws that amateurs make are not properly curing the portions between the layers. The process takes time and patience.  Poor products  Are you using cheap or non-compatible gel primer? Even poor topcoats can also cause poor adhesion. Hence, the builder gel coat can be lifted easily.  Quality of natural nails  Often, your nails are naturally damaged. Some of the people have fragile natural nail layers. In that case, the nail additions can easily ward off. So, you must apply a good hard gel and a base coat of the right consistency. The same is also important for ombre nail designs 2024. Poor Curing Quality Did you use weak UV to cure the gel? It may be one reason your builder gel came off before time. When you don’t apply the UV for long, it makes the polymerization process weaker. As a result, it leads to easy lifting.  Benefits of Using Builder Gel There are many benefits to using builder gels. By now, you know what builder gel is and its uses. Now, it is time to find out what are the most expected benefits of the builder gel application: a. strengthening natural nails if your nails are skinny and weak  b. The nails can grow long, giving your fingers a premium finish  c. The thickness of your nails also improves when you apply a builder gel finish  d. Lastly, the builder gel nails become more durable. It can resist weathering, especially during severe winters.  Builder gels make your nails chip-resistant and much longer lasting. However, you have to make the application right. Remember the tricks I mentioned, and you can enjoy builder gel nails for a long time.  Application Process The application process is easy. It suits even beginners well. I suggest just following the steps below and having a safe and durable coat of builder gel. Start with preparing your nails for application. Do that by cleaning your nails and removing any existing polish or debris. After that, you have to do your nail buffing clinically.  Start with buffing the surface gently. After that, ensure you’ve achieved the right rough texture to help the gel sediment on your nails.  Thirdly, you have to apply builder gel. This is the most critical stop that we were all looking for. First, use only a thin layer of gel on each nail.  Remember, the gel is much thicker than regular nail paint or nail polish. So, don’t use the builder gel in very high concentrations. At the same time, know about the proper application strokes.  When you apply builder gel, the strokes go horizontally. However, the nail polish strokes are vertical. Lastly, use a sculpting form to extend it evenly across the edges, too.  Done the primary step? Now, think about increasing the life of your builder gel nails. You must cure your nails with a UV/LED lamp. It will harden the builder gel layer. To finish off, cover the tips of your nails with a short nail polish layer.  Always remember you must use a clean brush to remove the remains of the polishes applied beforehand. There might be small traces of polish inside the cuticles. Or on the sidewalls. So, use the brush well. Clean up and then layer the builder gel.  Maintenance and Removal Maintaining a builder gel is not challenging. Shrug off the terrors experts may be giving you. You can now easily keep your builder gel nails with some simple tricks:  1. don’t use any harsh chemicals on the nails.  2. Most importantly, don’t soak your nails in water for a prolonged time. It is enough to ward off adhesion. At least avoid doing that for the first 3 days after application.  3. Don’t forget cuticle oil. You must regularly apply cuticle oil to keep the nails hydrated for a long time. In the meantime, the same also keeps your nails healthy. At the same time, cuticle oil can help avoid hangnails or dry and choppy nails. Most importantly, it helps you to avoid cracked cuticles, too.  The removal of the builder gel coat is equally easy. Just soak the nails in an acetone remover. However, you can also remove the layer manually with a nail file and a cuticle pusher. This is, in fact, a gentler method. Hence it helps you to keep the health of your natural nails intact. Read Also: Fashion Style Every Modern Woman Must Know Types of Fashion Designing Courses You Should Know

READ MOREDetails