How to Choose the Right Kitchen Cabinet Materials for Your Project?

Published on: 06 March 2020 Last Updated on: 22 April 2026
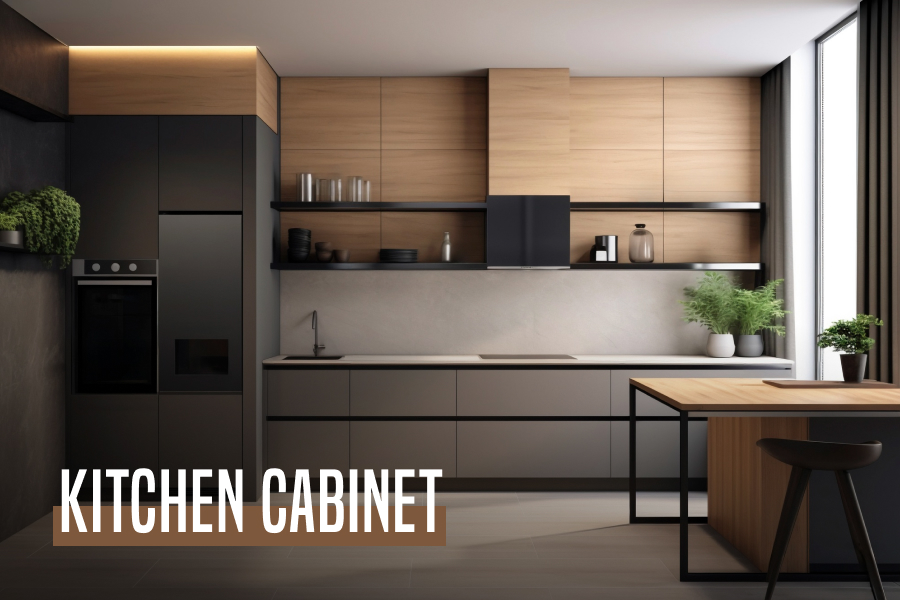
kitchen cabinet

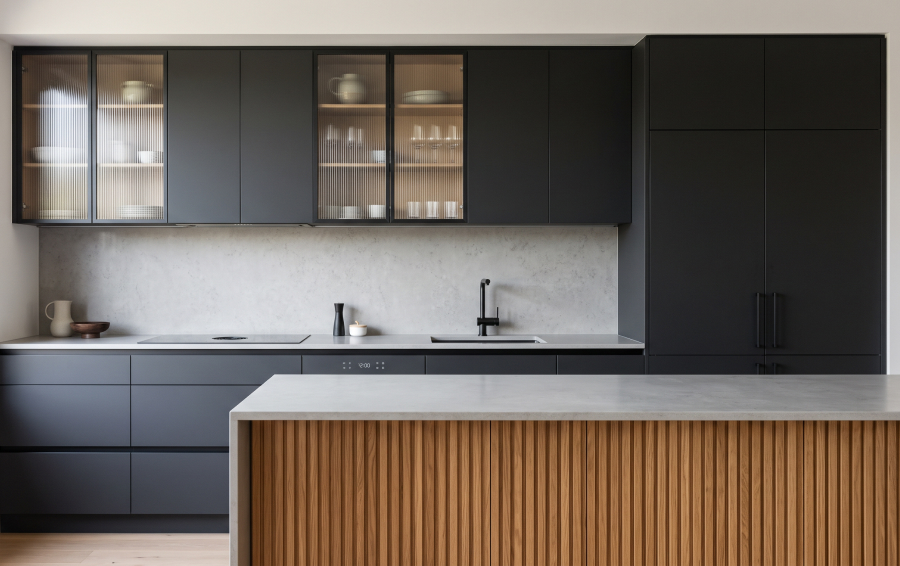
Among the defining factors of your kitchen’s overall look are its cabinets. After all, in kitchen design, the cabinetry often serves as an anchor, the thing that ties every other design elements together to create a seamless look. As such, beyond style, what’s more, important is to choose the right materials for your kitchen cabinet. As such, beyond style, what’s more important is to choose the right materials for your kitchen cabinet. The materials used in custom kitchen cabinet doors play a significant role not only in durability but also in achieving the desired finish and long-term performance of your space.

Reliable flat pack kitchen contractors can offer you a variety of kitchen cabinet material choices. Moreover, they can also recommend suitable materials and even combinations of materials to suit both style and practical function. Here’s a quick look into the most common materials used by cabinet makers.

How to Choose the Right Kitchen Cabinet Materials for Your Project:
kitchen cabinet materials

Hardwood Cabinets

You could say that hardwood kitchen cabinets are the grandfather of all kitchen cabinets. One of the main draws of using hardwood is that, because it’s a natural material that varies in grain from piece to piece, every kitchen cabinet will be equally unique. There are no two trees that are exactly alike, which means that even cabinets made from the same kind of hardwood will have subtle differences. Another benefit of hardwood is that it’s not only durable. It’s also easy to repair. Even inexperienced carpenters can DIY procedures like sanding, staining, or refinishing. Finally, there’s a wealth of options to choose from. Popular hardwood species include jarrah, marri, birch, cherry, maple, and oak.

When it comes to downsides, however, the most common disadvantage people cite is that hardwoods tend to be heavy. As such, if you want pure hardwood cabinets, you have to make sure that there’s a sturdy enough structure to support them. Another drawback of hardwood kitchen cabinets is that they’re expensive, especially if you want fully customized designs. Some Perth kitchen cabinet makers will suggest combining hardwoods with other materials to help drive down the cost.

Are hardwood cabinets right for your kitchen? If budget isn’t an issue and you want beautiful, long-lasting cabinets, hardwood is the best choice. Hardwood is also great for busy kitchens since it’s a heavy-duty material.

Medium-Density Fibreboard Cabinets

Medium-density fibreboard or MDF has gained popularity in the world of cabinetry, especially since IKEA has long been using it for their own kitchen cabinets and other furniture. The material is a composite of recycled wood fibers and wax, bound together by resin. The boards are made through high-pressure CNC milling, resulting in strong and dense material.

Indeed, MDF is a versatile substrate, able to be painted, veneered, lacquered, laminated, or treated with almost any process or substance. MDF is also proven to be resistant to cracking and is considerably smoother than plywood.

The one downside of MDF is that it needs to be properly sealed. Otherwise, it has a tendency to warp. You can use carpenter’s glue for this purpose, especially if you’re going to paint over the material. For some waterproofing, you can use the wood sealant, varnish, or a coat of moisture-resistant paint.

Are MDF cabinets right for your kitchen? Those looking for more affordable yet high-quality alternatives can turn to MDF. Contemporary kitchens and those who love to DIY and customize will also benefit from MDF cabinets.

Plywood Cabinets

Plywood is made from multiple thin layers or plies of wood that are bound together by a combination of glue, heat, and pressure. The adjacent layers are rotated so that the grains are facing alternate directions. This technique, called cross-graining, enhances the material’s strength in all directions. Moreover, it helps prevent shrinkage and expansion, minimizes splitting of the layers (when nailed at the edges), and reduces warping.

Many cabinet makers consider plywood excellent material. Apart from the benefits mentioned above, plywood is also moisture-resistant, light but sturdy, flexible, and easy to install. In case the cabinets get damaged, plywood is also quite easy to repair through DIY methods. Finally, plywood is also much less expensive compared to even the most affordable hardwood.

Do remember that making plywood cabinets is all about choosing the right thickness. You’d want to use a thicker material on drawer bottoms, for example, or you risk it cracking or splitting if you put heavier items in it. Your kitchen cabinet maker likely already knows this, of course, but just make sure that you tell them what you need so they use the correct types of material. Also, ask where they source their plywood. Note that some lower-quality products may have gaps between the individual plies.

Are our plywood cabinets right for your kitchen? Plywood is ideal if you’re working with a stricter budget but don’t want to compromise on quality. You may also want to consider plywood if you’re making your own cabinets since it’s an easy material to work with.

Particleboard Cabinets

Particleboard is often compared to plywood. Also called low-density fibreboard (LDF) or chipboard, particleboard is engineered from various recycled wood products like wood chips, sawdust, and wood shavings. These materials are glued together, then pressed and extruded to create sheets. As a final touch, particleboard is laminated or given a wood veneer for a better-looking appearance (as plain particleboard can be, well, plain-looking).

The primary advantage of using particleboard for kitchen cabinets is that because it’s made from scrap materials, it’s very cheap. It’s also very lightweight. However, particleboard also tends to be on the lower end of the durability scale, especially when subjected to tension. Moreover, the material is prone to moisture damage and is not built to withstand sagging. Nonetheless, you can still find high-quality particleboards that are quite sturdy. Ask your kitchen cabinet maker to help you find the best ones.

Are particleboard cabinets right for your kitchen? If your kitchen doesn’t see too much action and you don’t have any heavy equipment, particleboard cabinets and shelves will more than suffice.

Stainless Steel Cabinets

Finally, there’s stainless steel. Not many households opt for this material for kitchen cabinets. In fact, these are often seen only in industrial, professional-level kitchens. Nonetheless, stainless steel is an ideal material in the kitchen, both for cabinets and general usages like shelving and racks. It’s durable, doesn’t expand or contract, and resistant to most kinds of damage. Stainless steel can be difficult to clean, however, but it’s very hardy so it can withstand a lot of scrubbing and even harsh chemicals. This makes sterilizing a breeze. Nonetheless, you should also note that stainless steel cabinets tend to be expensive, sometimes costing even more than hardwood.

Are stainless cabinets right for your kitchen? Do you consider yourself a chef in your own right? Do you often cook, not just for yourself but also for your family and friends? If you do, then stainless steel kitchen cabinets are perfect for you.

Many of these materials, except perhaps for stainless steel, can be customized and combined with plenty of other materials, so the style isn’t the biggest issue. Therefore, in the end, choosing the right kitchen cabinet materials all boils down to two primary considerations: your budget and how often you’re going to use your kitchen. When you focus on these two, the decision will become simpler.

Contact kitchens now for quality flat pack kitchens

Read Also:

Content Rally wrapped around an online publication where you can publish your own intellectuals. It is a publishing platform designed to make great stories by content creators. This is your era, your place to be online. So come forward share your views, thoughts and ideas via Content Rally.

View all posts

Leave a Reply

Your email address will not be published. Required fields are marked *

Related

Drywall

Elevate Your Home With Unique Ceiling Textures

Drywalls are those construction materials that are used to create walls and ceilings in your home. Not all that, but drywalls also come in handy if you want to create design features like eaves, arches, or any mind-blowing architectural requirements!!! Do you know the best part about drywalls? These are super easy to install, highly durable, and only require simple repairs when damaged. So, drywall is a flat component composed of calcium sulfate dihydrate, typically between thick sheets of backer paper, and facer, used to construct interior ceilings. Let’s talk about the ceiling textures and the drywall options you can choose for your home!!! The Ceiling Textures And Your Drywall Options Decorating your home can be a real challenge for many !!! Therefore, choosing the right drywall finish or texture can prove to be a hard nut to crack. And it’s very natural to get in a state of indecision if you are handpicking it for your new home or renovation project. There are so many options that it feels like you are “searching for a pearl in an ocean.” Making up your mind about whether or not to go texturing your ceiling can be a tough job. And even if you choose to texture your ceilings, there are chances you’ll be confused about which one to go for!!!! And remember, getting the drywall right is the first step of tiling projects?”. But No Need to Worry!! This article will guide you in choosing the perfect texture and drywall option for your ceilings to look more elegant than ever!! 1. Sheetrock Texture: Old Is Gold Sheetrock ceiling texture is a drywall ceiling texture that has been famous since 1917. The reason this drywall texture is so awesomely renowned is because of the artistic look that it gives to your ceiling And the best part is you don’t need to use any sort of spray paint in this case. You can achieve this texture by using your artistic hand technique and without using any special brushes. This texture is perfect for any room. There are no restrictions on the use of this ceiling texture. 2. Stipple Brush Texture: A Test Of Your Skill This texture is not as easy as it seems. You need skills to create this texture. To create this texture, you need a roller and slap brush. The fascinating fact about this texture is it can cover the bumps and holes on your ceiling. And if you have the skills, then this texture can surely make your ceiling look gorgeous than ever!! 3. Swirl Texture: Creativity Taken To A New Level To achieve this texture, you need either a roller or sprayer. You can also do this by using a technique called “the basic swirl” method. But one thing that you need to keep in mind is while creating this texture, you’ll need a lot of patience to get the best result. And the difficult part is you need to create the pattern before the mud dries. So, make sure to have a helping hand by your side. Overall, the texture can really give that awesome look on your ceilings if you do it in the right way!!! 4. Orange Peel Texture: A Color Of Choice The name suggests all the colors of orange skin, but sometimes it’s also called “an eggshell” ceiling texture. If you really love this color, then this can be on the top of your favorite lists. To create this texture, you need to apply thin mud to the ceiling using a spray gun set at very high pressure. The more artistic mind you have, the more artistic look it has got!!!! 5. Smooth Textures: Choice Of Many If you are someone who wants the best at a cheap cost, then this texture is just the right choice for you. Moreover, you don’t need to have many skills to create this texture design. The look of this texture is just mind-blowing, and if you are someone who likes things to be consistently gorgeous, then this is the texture you can have for your ceiling. This texture is effortless to remove and is also perfectly suited for any room. 6. Tree Bark Texture: Beauty Of Nature If you are someone who loves nature and wants to bring the reflection of nature inside your home, then this textured style is just the option you can have. This ceiling has the look of a tree. You can create this texture just by using a heavy roller. The texture might look simply, but it’s very artistic and can surely catch the eyes of many. If you have a farmhouse, then this texture will double the beauty!!!!! 7. Slap Brush Texture: Slap The Beauty Out Artistic, gorgeous, beautiful, and elegant are the nicknames you can give to this texture. A complete package of beauty!!!! To get this texture, you’ll need a brush with very stiff bristles and thin mud. Firstly, you have to cover your ceiling with mud using a roller, then take the brush and slap the ceiling from the edge. This can be a hard nut to crack because if you don’t get it right on the first shot, the whole ceiling might end up looking messy. 8. Popcorn Texture: Cottage Cheese This texture, also known as the “cottage cheese” or “acoustic” ceiling texture, is probably one of the most famous ceiling textures ever!!! If you look closely, you’ll see it’s kind of a look-alike of “popcorn.” That’s why it’s called “popcorn texture.” To achieve the correct texture, you need to use a sprayer to apply to your ceiling. This contains Styrofoam with mud which gives that puffy effect. But it will require you to have a lot of skill to achieve this effect. That’s because the “popcorn texture” is both challenging to apply and remove. I hope this article will help you to know about the needs of ceiling textures and drywall options. And now I believe you’ll be able to get yourself the perfect texture for your ceilings. How Can I Remove Old Ceiling Textures Safely? Removing old ceiling textures can be a big job, but it doesn’t have to be intimidating! If you want to update your ceiling and get rid of that outdated texture, I’m here to help. No matter if you have popcorn, stipple, or another type of texture, this process takes a little bit of care, but don’t worry! Here’s a step-by-step guide on how to remove an old ceiling texture without breaking your back or the bank. Step 1: Test For Asbestos Before you get out any tools…safety first!  Remember, many older ceilings (especially those with popcorn texture installed prior to 1980) contain asbestos. Before doing anything else, have your ceiling tested for asbestos. You can hire a pro to test the ceiling or buy a self-test kit. If asbestos is present, halt all work and consult pros immediately. Asbestos removal is not a do-it-yourself job because it poses serious health risks if mishandled. Step 2: Clear The Room If there’s no asbestos present, it’s time to get the room ready. Cover all the furniture. You’d be amazed at how far a fine mist of water, compound, and paint can travel! Also, plastic should be removed from the floors, and tape should be around any ceiling fans or lights that are not being removed. I can personally tell you we didn’t do this. We found dried white dust on our bedspread when we were stripping the wallpaper in our bedroom, and we had to clean up all the residual dust a little too late. It was wild! Step 3: Soften The Texture For Better Finish Here’s where the fun starts! To make that texture easier to remove, you’ll need to soften it. Fill a spray bottle with warm water and mist the ceiling. You don’t want to drench it. If you put too much water on the ceiling, it could end up damaging the drywall underneath. Allow the water to sit for about 15–20 minutes or so, giving it time to penetrate and loosen up that texture material. Don’t rush this step. It’ll only cause more work for you in the long run. Step 4: Clean Your Work Grab a wide putty knife or scraper and start scraping off the texture. Do small sections at a time, and scrape at a shallow angle so that you don’t gouge the drywall underneath. If it’s not coming off well, spray some more with the water bottle and let it sit for a little longer. This step can be kind of messy and time-consuming, but have patience because, in the end, you will have a nice smooth ceiling. Step 5: Patch & Sand Once the texture is gone, you may notice a few dings or dents in the ceiling. Don’t worry! Just fill them with some joint compound, sand it smooth, wipe away any dust and you’re ready for a new ceiling. And that’s it! A fresh, smooth ceiling in no time! Read Also: Here’s How to Turn Your Garage into a Bedroom on a Budget! Turn your attic into a living space

READ MOREDetails
Oil Heater vs. Fan Heater: Which Is Better

Oil Heater vs. Fan Heater: Which Is Better

A dependable heater may make all the difference in keeping your home warm and inviting during the bitterly cold winter months when the frigid air bites your nose. However, it might not be easy to select the best heater for your needs, given the variety of products on the market. Oil heaters and fan heaters are two standard options, each having pros and cons of their own. This article will examine the differences between oil and fan heaters to see which is better. Oil Heaters: The Basics Oil heaters also referred to as oil-filled heaters, work by heating a particular kind of oil inside the metal fins of the device. Because of the effective heat retention of this oil, the heater can continue to provide warmth long after it has been switched off. Oil heaters give a steady, soft warmth that many people find comfortable, although they usually take longer to heat up than fan heaters. Fan Heaters: The Basics In contrast, fan heaters operate by drawing air over a heating element and then using a fan to distribute it around the space. Fan heaters are renowned for their ability to heat a space quickly, increasing the ambient temperature. They can, however, occasionally produce a dry heat, which some people may find less comfortable. Here are the various considerations before you buy oil heaters online: Energy Efficiency And Cost-Effectiveness The energy efficiency of oil heaters is highly praised. The heater's oil holds heat efficiently after it reaches the proper temperature, reducing the frequency of on and off cycles. As a result, there may be a decrease in energy use and, eventually, heating costs. Furthermore, oil heaters can contribute to energy conservation by maintaining a comfortable temperature without continuously using power because they generate heat even when shut off. Meanwhile, fan heaters use more energy even though they are good at warming a space rapidly because they run continuously. Using a fan to disperse heat is another way that using more electricity might increase. But thanks to developments in fan heater technology, more energy-efficient models with eco modes and thermostat controls have been created to help reduce energy use. Cost Comparison Fan heaters are typically less expensive upfront than oil heaters, which makes them the more logical option for consumers on a tight budget. The long-term operating costs, however, must be taken into account. Oil heaters are typically more energy-efficient because they use a heating element soaked in oil, which maintains heat well and permits less frequent cycling. As a result, this may lead to decreased energy use and cheaper heating costs over time. Improvements in fan heater technology have created more energy-efficient versions with features like eco modes and thermostat settings, which help partially offset their higher energy usage. Consequently, even though fan heaters could be less expensive initially, the overall cost-effectiveness of the two differ based on several variables, including usage habits, energy costs, and the particular model. Heating Performance And Comfort Known for its capacity to deliver even, delicate warmth, oil heaters are highly recommended for use in living rooms, bedrooms, and other spaces where keeping a comfortable temperature is crucial. Many people describe the warm, comforting, radiant heat that oil heaters create as ideal for resting and relaxing. Meanwhile, fan heaters are excellent at quickly heating a space, making them ideal for short bursts of heat in areas like bathrooms or home offices that need to be warmed up immediately. However, some people might feel that the dry heat of fan heaters is less comfortable, mainly if they use them for an extended period. Safety Considerations Because of how they are made, oil heaters are typically considered safer than fan heaters. The oil-filled fins encase the heating element, reducing the possibility of fire or burns from direct contact with the hot surface. Oil heaters usually have automatic shut-off systems and overheating prevention to prevent further mishaps. Unfortunately, burn risks are increased by fan heaters, mainly when they come in contact with skin or explosive objects. Fan heaters can also be dangerous due to their exposed heating element and moving parts, so they must be positioned steadily, away from potential threats. Read Also: What To Do When Your AC Unit Stops Working Impact On The Environment Due to its higher energy consumption and shorter lifespan, fan heaters typically have a more significant environmental impact. Carbon emissions are increased when electricity is used to run the fan and heating element, mainly when that electricity is produced from non-renewable resources. Nonetheless, the environmental impact of fan heaters can be reduced by selecting and operating them wisely. Oil heaters are often seen as being more environmentally friendly. They are quieter to operate and have less emissions since they use radiant heat instead of forced air. Fan Heaters vs Oil Heaters: In Summary It's critical to consider your unique heating requirements and preferences when choosing between oil and fan heaters. An oil heater can be a better option if you need constant, soft warmth in larger areas, including living rooms or bedrooms. Oil heaters are excellent at producing radiant heat that heats the surrounding space gradually, making it seem friendly and suitable for rest or sleep. However, a fan heater can be a better option if you're searching for a rapid and effective heating solution for smaller spaces or regions that need instant warmth, such as home offices or restrooms. Fan heaters are renowned for their speedy heating qualities, allowing them to relieve chilly air and raise the room's temperature instantly. Make The Right Choice There must always be a clear winner in the age-old comparison between oil and fan heaters. The ideal option ultimately relies on your preferences, budget, and particular heating demands. Each type of heater has a mix of benefits and drawbacks. Whichever kind of heater you use, you must always take safety precautions. By researching and using your heater sensibly, you may have a warm and comfortable house all winter while consuming the least energy and having the least damaging effect on the environment. Read Also: What You Should Know about Solar Energy for Schools Benefits The Benefits of Solar Lighting in a Nutshell Everything You Need to Know About Portable Solar Power

READ MOREDetails
landscape financing

Backyard Oasis: Landscape Financing for Relaxation & Entertainment

Creating an oasis for relaxation in your backyard is exciting and cool. With meticulous planning and the right landscaping idea, you can make a serene retreat that offers much-needed relief from the daily stress of life.  Besides, the space becomes aesthetically inviting for gatherings on different occasions. You may have a large or compact backyard. What you need is to invest in the right planning to explore outdoor decoration ideas. Additionally,  you can get help from landscaping financing. Yes, they are invaluable tools to make your vision a reality, besides managing the budget constraints. Define Your Space Before you explore the different landscaping ideas, you must first define how you want to use your backyard. Consider the elements that are your top priority for entertainment and relaxation.  Are you looking for a space for outdoor dining, a lush garden, or a cozy fire pit area for meditation?  Your priorities in designing your backyard oasis help you create a cohesive, concrete, and attainable plan. Comfortable Seating Areas Creating comfortable seating areas is and must be one of the core ideas or an integral part of designing a backyard oasis.  Weather-resistant furniture with high quality is definitely one of the important elements that invites you to sit and stay awhile.  Also, you can consider hammocks, cushioned lounge chairs, or a swinging daybed. These are great for providing the ultimate relaxation.  For larger spaces, built-in benches around a fire pit can help provide an adequate sitting area for your guest of honor. Incorporate Water Features Water features add a relaxing ambience that suits your outdoor space. Moreover, the sound of running water has a natural ability to cover the noise pollution and create a calm and comfortable atmosphere.  You can make the simplest of fountains to the most exquisite cascading waterfalls-  options are galore.  If you increase your budget a bit, a small pond with koi fish can be the ultimate focal point of beauty and attractions.  Lush Plantings and Greenery Lush plantings are one key element to creating an eye-soothing backyard oasis.  In addition, to add style, texture, and color to your landscape, you can incorporate a mix of shrubs, flowers, grasses, and trees into your plan. Budget! You can use landscape financing options to have control.  One great tip is to use native plants. Yes, they are an excellent choice because you don't need to spend much time on maintenance. Moreover, they are better suited to your local climate. Consider planting tall hedges or bamboo along the perimeter of your yard for safety and security. Outdoor Lighting Effective outdoor lighting completely transcends the barrier of usability of your backyard oasis, especially during the evening! You can select from lanterns and string lights to make the evening romantic.  Furthermore, you could use solar-powered garden lights to create an enchanting atmosphere.  Highlight the sitting area and key landscape features with strategically placed lighting to enhance safety and aesthetics. Create Zones for Different Activities Designating specific zones for various activities can make your backyard more functional and enjoyable. For example, you might have a dining area with a table and chairs, a lounging area with comfortable seating, and a play area for children. Clearly defined zones help organize your space and ensure it meets all your needs. Planning the layout of these zones requires a clear vision for how the yard fits together. Many people find that a professional landscape design company helps bridge the gap between hard surfaces and soft gardens. They look at the slope of the land and how water moves across the grass. This step makes sure that your new patio or pond stays in good shape for a long time. It also helps you pick the right spots for shade and sun. Fire Pit or Fireplace A fire pit or outdoor fireplace can be a central gathering point for friends and family. It provides warmth on cooler evenings and creates a cozy ambiance.  So, whether you opt for a built-in stone fireplace or a portable fire pit, ensure you build it away from flammable materials and are compliant with local regulations. Hardscaping Elements Incorporating hardscaping elements like patios, walkways, and retaining walls can add structure and functionality to your backyard.  Use natural materials such as stone or wood to seamlessly blend with your garden.  However, a well-designed patio can serve as an outdoor living room with comfortable furniture and shade options like pergolas or umbrellas. Landscaping Financing  Creating your dream backyard oasis can be a significant investment. However, the Landscaping financing options can help manage budget challenges and make your vision a reality.  Many financial institutions offer loans specifically for home improvement projects, including landscaping.  These loans typically have flexible terms and competitive interest rates, making them an attractive option for homeowners. Landscape Financing Options  Homeowners are spending a great deal on beautification, and the markets in landscaping projects reflect this particular development.  Home and commercial landscaping companies are coming up with smart solutions to deck your dream home.  According to a study, the global landscaping service market was veiled at USD 296.09 billion. Even projections say that the market will increase at (CAGR) at a rate of 6.4% by 2030. The Increasing popularity is due to the high-tech market products.  The discussion of landscape financing is pertinent. Moreover, the recommendations and guidelines supported by the American Society of Landscape Architects on landscaping your backyards offer an individual a safety shield.  Furthermore, ther are a plethora of landscaping financing options that you get that can help you save money for non-essential projects. Less discuss them in this section to have a better understanding of the subject.  Using Home Equity For Landscape Financing  When you are considering landscape financing options to deck your backyard, there are diverse options for home equity financing for landscape projects.  Home equity financing for landscaping offers benefits.  Firstly, you get the services at lower rates of interest, and secondly, you get them all with home equity loans. Hence, you can take the help of this option for your convenience and live your dream.  Zero-Equity Personal Loans For Landscape Projects  Zero-equity personal loans offer advantages when considering them as financial options for landscaping projects.  Furthermore, the options help lower the loan minimums and maximums compared to home equity loans.  Moreover, you could reap advantages like a quick application process and funding time Yes,  you do not have to consider the prepayment penalties associated with this format of loan.  So, reap the advantages of zero-equity personal loans on garden landscaping as they are safer financial options to leverage.  Credit Card financing For landscape projects Another feasible option to aid your landscaping project development is credit card financing for the landscape projects. You could use this option for the home improvement credit cards for the smaller landscaping projects.  There, you get the introductory 0% interest rates for a limited time period. In addition, you are also getting flexibility in payments with credit card financing to give wings to your imagination (an oasis in your backyard).  Conclusion Creating a backyard oasis for relaxation and entertainment is an investment in your home and well-being.  You can transform your backyard into a serene retreat by carefully planning your space and incorporating comfortable seating, water features, lush plantings, and thoughtful lighting.  Don’t let budget constraints hinder your project—explore landscaping financing options to help bring your vision to life. With a well-designed backyard oasis, you’ll have a beautiful space to enjoy for years. Finally use the landscape financing options to serve your requirements. Happy landscaping! Additional Reading: What Do Artificial Grass Recyclers Do? 3 Keys To Achieving Optimal Lawn Nourishment The Beginner’s Guide to Landscaping Design: 7 Tips for New Homeowners

READ MOREDetails