Published on: 08 March 2019
Last Updated on: 24 November 2021
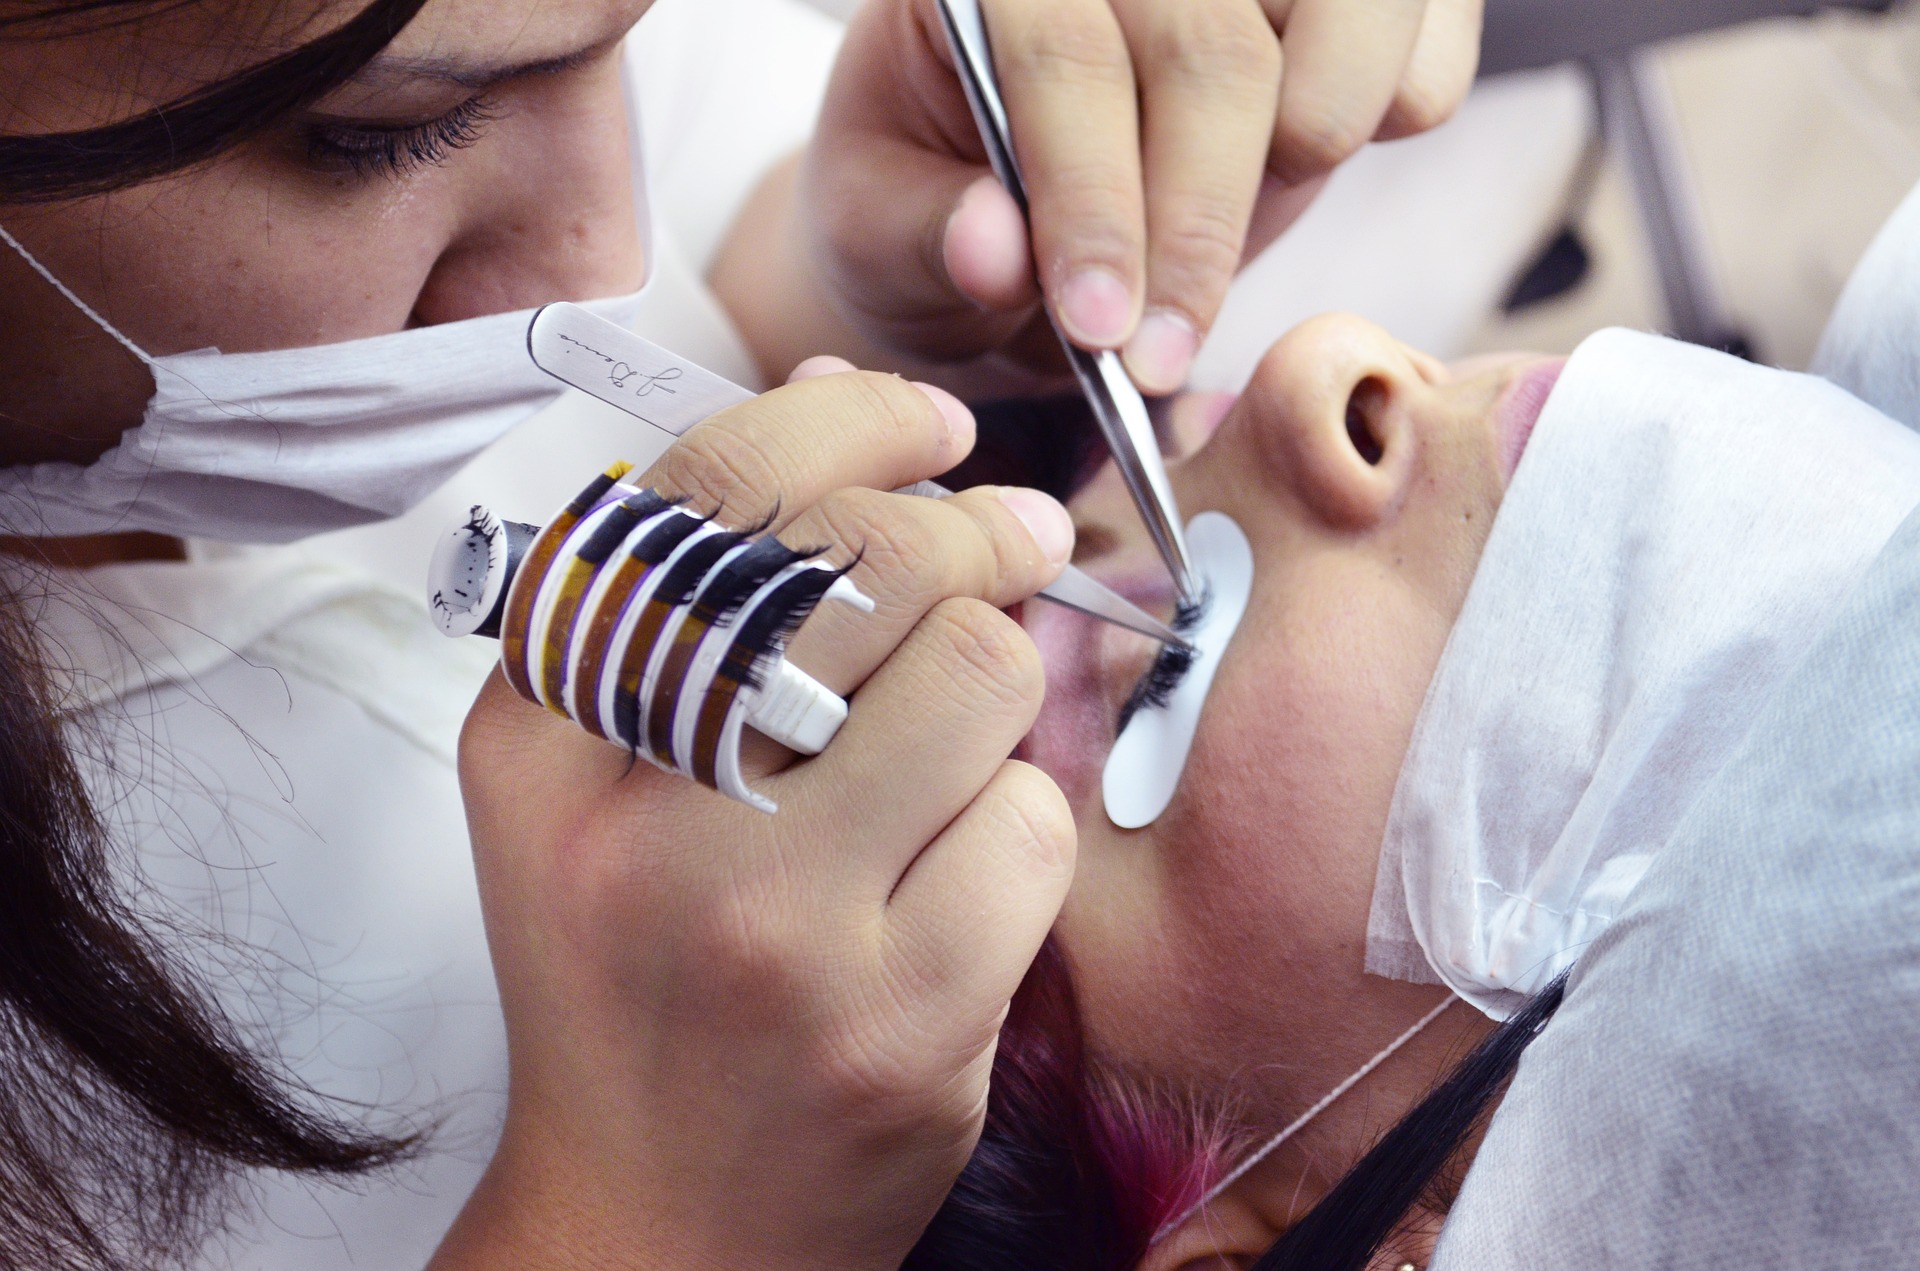
What To Know About Laser Hair Removal Utica NY
If you’re tired of managing your body hair and you’ve been thinking of ways to permanently remove them, then laser hair removal may be the best option for you. This method can get rid of the fast and thick growing hair you’ve been struggling with. Continue reading this to know all about laser hair removal.
1. How does it work?
In the cycle of hair growth, each follicle will have its own cycle, which means that each one of them will not grow at the same time and speed. Laser hair removal targets the follicles when they’re just about to start the anagen phase, which is the active growth phase where the root of the hair is rapidly growing.
Laser hair removal completely eradicates the follicle and effectively stops hair growth. The treatment can take several sessions, which are spaced out between four and six weeks to achieve the desired results. Laser hair removal treatments are considered cosmetic procedures that are strictly regulated by the state. Thus, you should make sure that you book a treatment at a licensed cosmetic facility with qualified technicians and the Food and Drug Administration (FDA) approved equipment. If you’re wondering where to find such a facility, then visit the website https://aesyracuse.com for more information.
2. What are the three main types of lasers?
Here are some of the most popular types of lasers used in hair removal treatments:
Alexandrite: One of the fastest types of lasers, which are commonly used to treat larger areas of the body and patients with light complexions.
Diode: This type of laser is effective for both light and dark complexions.
Nd: YAG (Neodymium-doped Yttrium Aluminum Garnet): This type utilizes long pulse lasers that are safe for all skin types. However, it’s less effective in patients with fine or light hair.
3. Which areas does laser hair removal work best?
Although the treatment can be done on any part of the body where you want to remove hair from, it’s particularly effective on parts such as:
Underarms
Chin
Lip
Bikini area
4. Is it safe for someone under medication?
As with most skin care treatments, the intake of certain medications should be stopped. In the case of laser hair removal, photosensitive medications must be discontinued one week before treatment. For example, if you’re under antibiotic medication for an infection, it might be best for you to reschedule your treatment as most antibiotics are photosensitive.
Additionally, you should avoid using skin care products that have strong, active ingredients such as alpha hydroxy acids and retinoids. These ingredients will increase your skin cell turnover and will make your skin vulnerable to irritation. It’s best to consult your doctor first and ask if your current medication can have adverse effects on your treatment.
5. How many treatments will you need?
The number of treatments required will vary for each individual, as factors such as skin complexion and hair color can affect the effectiveness of the treatment. Laser hair removal treatments work best when your hair is still in its anagen phase, and different parts of your body will have different hair growth rates. This means that treatment can be shorter or longer depending on which body part, and it can average from six to eight treatments.
6. Should you attend all the sessions?
It is essential that you complete all the treatment sessions as per your doctor’s advice. Don’t be under the impression that once your hair growth slows down, further treatments will not be necessary, as this can negatively impact the effectiveness of the laser hair removal.
7. Will it be painful?
Laser hair removal is practically painless, as most treatments will include numbing of the skin for added comfort. However, patients will still feel a warm and light pinching.
8. Will your monthly period affect the treatment?
Unlike waxing, your monthly period will not have any adverse effects on laser hair removal. Keep in mind that treatment schedules should be strictly followed for it to be effective. However, if you’re treating your bikini area while on your period, it’s advisable that you use a tampon.
9. Should you shave before the appointment?
Shaving the area that you want to treat before the treatment is necessary for the laser to penetrate the roots of your hair. However, you should avoid waxing, tweezing, and bleaching your hair at least a month before treatment.
Closing thoughts:
Now that you’ve read most of the things you should know about laser hair removal, you should be all set and ready for your first treatment session. Also, keep in mind that you should find a doctor that you’re comfortable working with to make your experience even better and to get the best results out of your treatment.
Content Rally wrapped around an online publication where you can publish your own intellectuals. It is a publishing platform designed to make great stories by content creators. This is your era, your place to be online. So come forward share your views, thoughts and ideas via Content Rally.
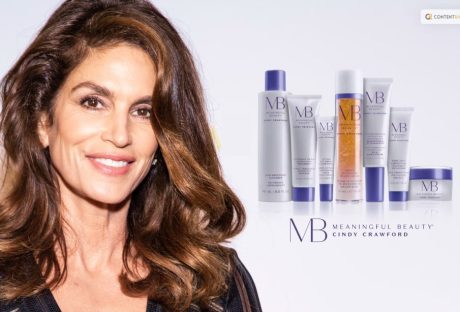
Are you searching for Meaningful Beauty reviews? If your answer to this question is a YES, then you have reached the right place!
Meaningful Beauty is a skincare brand made by Cindy Crawford as a team with French cosmetic specialist Dr. Jean-Louis Sebagh. The brand offers a scope of hostile to maturing skincare items that plan to address normal skin concerns and advance young looking skin.
Keep reading this article till the end to learn more about this brand and its product…
Meaningful Beauty Reviews: Everything You Should Know!
Image Source: meaningfulbeauty.com
Most people find it hard to believe that Cindy Crawford is in her mid-50s because she looks almost exactly the same as she did when she was a model. What is her secret after all?0
Having access to celebrity dermatologists and estheticians who have shared their best tips for maintaining Crawford's flawless skin over time certainly helps. But is that all?
Dr. Jean-Louis Sebagh, a French anti-aging specialist, is the skincare expert who has had the greatest impact on Crawford's life. Cindy and Dr. Sebagh began working together more than ten years ago to bring his anti-aging formulas to women all over the world. Meaningful Beauty was born as a result of that.
Crawford is said to know the Meaningful Beauty products that give her skin a youthful glow. But are you really going to get skin like Cindy Crawford with these products?
In this blog, these are the questions that I will be addressing and reviewing. So, if that is something that you want to know, keep reading this article till the end…
Who Is Cindy Crawford?
Image Source: images.squarespace-cdn.com
Cindy Crawford is an American supermodel and actress who gained fame during the 1980s and 1990s. She was born on February 20, 1966, in DeKalb, Illinois, United States. Crawford's career took off in the mid-1980s when she appeared on the covers of various fashion magazines, including Vogue, Elle, and Cosmopolitan. She quickly became one of the most recognizable and sought-after models of her time.
Crawford's distinctive features, including her signature mole above her lip, helped her stand out in the fashion industry. She worked with renowned photographers such as Richard Avedon, Herb Ritts, and Helmut Newton. Crawford's modeling career included numerous high-profile campaigns for major brands, such as Pepsi, Versace, Revlon, and Omega.
Beyond modeling, Cindy Crawford ventured into acting, appearing in films and television shows. Some of her notable acting credits include appearances in movies like "Fair Game" (1995) and "The Simian Line" (2001), as well as guest roles in TV shows like "3rd Rock from the Sun" and "According to Jim."
If there is one thing that makes her the talk of the town still now, it has to be her age-defying looks.
What Is Meaningful Beauty?
Image Source: meaningfulbeauty.com
Meaningful Beauty is a skincare brand created by Cindy Crawford in collaboration with French cosmetic surgeon Dr. Jean-Louis Sebagh. The brand offers a range of anti-aging skincare products that aim to address common skin concerns and promote youthful-looking skin.
Meaningful Beauty focuses on incorporating key ingredients and advanced formulations to target signs of aging, such as fine lines, wrinkles, and loss of firmness. The products are designed to hydrate, nourish, and protect the skin, with an emphasis on promoting a radiant and healthy complexion.
The brand's flagship product is the "Crème de Serum," which combines the benefits of a cream and a serum to deliver hydration, antioxidants, and other anti-aging ingredients. Other products in the Meaningful Beauty line include cleansers, toners, moisturizers, eye creams, serums, and masks.
Why Is Meaningful Beauty Popular?
Image Source: dietsinreview.com
Searching for Meaningful Beauty reviews, you might be wondering why this brand is becoming so popular. Well, I have the right answer for you!
Meaningful Beauty places importance on the use of antioxidant-rich ingredients, such as superoxide dismutase (SOD), melon extract, and coenzyme Q10, to help combat the effects of environmental stressors and promote overall skin health.
The skincare line has gained popularity not only due to Cindy Crawford's endorsement but also through its availability for purchase online and through select retail channels. The products are marketed as part of a comprehensive skincare routine aimed at providing visible improvements in the appearance of the skin.
What Are The Ingredients In Meaningful Beauty?
Image Source: dev.rodpub.com
Melon fruit extract is a key component that is utilized in the entirety of the Meaningful Beauty collection. The brand claims that this uncommon French melon extract is utilized due to its presence of superoxide dismutase (SOD). I will be discussing the advantages of this ingredient and the supporting key ingredients in these products. Here are some of the main ingredients of this product:
1. Vitamin C
Although French melon extract is a novel ingredient, we are pleased to see that several Meaningful Beauty products contain tried-and-true vitamin C. Vitamin C is not a miracle cure for aging, but it comes pretty close. It is a potent antioxidant that shields your skin from free radical damage from the environment.
Additionally, Vitamin C aids in the removal of dark spots evens out skin tone, and boosts radiance. As if that weren't enough, research shows that applying vitamin C to the skin significantly reverses structural changes caused by aging by influencing the synthesis of collagen and elastin.
It is included in the Meaningful Beauty Dark Spot Correcting Treatment, which also contains glycolic acid and hydroquinone, two skin brighteners.
2. SOD
SOD, or superoxide dismutase, is an antioxidant enzyme that is present in all living cells. Free radicals, unstable molecules that contribute to the development of premature wrinkles and fine lines on the skin, are limited in their ability to cause oxidative damage by antioxidants. In particular, the dismutation of the superoxide free radical into oxygen and hydrogen peroxide is catalyzed by superoxide dismutase.
It has been demonstrated that topical application of superoxide dismutase protects cell membranes and type I collagen from fragmentation caused by free radical damage. In the end, this aids in the prevention of age spots, wrinkles, and fine lines. Superoxide dismutase may also aid in wound healing, soften scar tissue, and shield against UV rays, according to research.
3. Retinol
SOD, or superoxide dismutase, is an antioxidant enzyme that is present in all living cells. Free radicals, unstable molecules that contribute to the development of premature wrinkles and fine lines on the skin, are limited in their ability to cause oxidative damage by antioxidants. In particular, the dismutation of the superoxide free radical into oxygen and hydrogen peroxide is catalyzed by superoxide dismutase.
It has been demonstrated that topical application of superoxide dismutase protects cell membranes and type I collagen from fragmentation caused by free radical damage. In the end, this aids in the prevention of age spots, wrinkles, and fine lines. Superoxide dismutase may also aid in wound healing, soften scar tissue, and shield against UV rays, according to research.
Best Selling Products From Meaningful Beauty
Image Source: m.media-amazon.com
One of the major things that you need to keep in mind while looking for Meaningful Beauty reviews is the list of products that you should try. Cleansers, toners, exfoliators, masks, eye creams, moisturizers, sunscreens, and serums are all included in the Meaningful Beauty product collection.
Here are some of the bestselling products from the Meaningful Beauty:
1. Meaningful Beauty Creme De Serum
The purpose of the formulation of Meaningful Beauty Creme De Serum was to combine the moisturizing properties of a cream and the potency of a serum. As you will see, the main ingredient in every Meaningful Beauty product is a French melon extract (more information about this extract can be found in the Key Ingredients section below).
2. Meaningful Beauty Dark Spot Correcting Treatment
The most widely used ingredient for treating hyperpigmentation is included in this treatment for dark spots: Hydroquinone at 2% The American Osteopathic College of Dermatology asserts that hydroquinone causes reversible skin lightening by interfering with the melanocytes' production of melanin.
3. Meaningful Beauty Skin Softening Cleanser
This gentle soap-free cleanser gently removes excess oil, impurities, makeup, and mascara while preserving the skin's natural pH balance. The primary cleanser in the formulation is sodium laureth sulfate. Despite their similar names, sodium laureth sulfate (SLES) and sodium lauryl sulfate (SLS), both of which are known to irritate the skin, are not the same thing. Instead, SLES is a gentle cleanser that cleans the skin without making it dry, tight, or irritated.
4. Meaningful Beauty Glowing Serum
The Meaningful Beauty Glowing Serum is packed with isoflavones thanks to its high concentration of hydrolyzed soy protein. Isoflavones may be able to thicken skin because they have a weak estrogenic effect. This serum also contains vitamin E, kelp extract, pumpkin fruit extract, and ascorbyl methylsilanol pectinate, a vitamin C derivative.
5. Meaningful Beauty Youth Activating Melon Serum
It is claimed that this Meaningful Beauty serum helps to shield the skin from future environmental damage while also visibly increasing firmness and elasticity. Encapsulated melon leaf extract is one of this serum's most important components.
6. Meaningful Beauty Anti-Aging Day Cream
Anyone with even a passing interest in skin care is aware of the significance of using a day cream that blocks UV rays from the sun. It is the most effective method for avoiding wrinkles, lines, and dark spots.
The Meaningful Beauty Anti-Aging Day Creme, which contains chemical sunscreen ingredients (avobenzone, homosalate, octisalate, and oxybenzone), provides broad spectrum SPF 30 protection for your skin. Despite the fact that these chemical sunscreen ingredients do not leave a white cast like mineral sunscreens do, research has demonstrated that they do absorb through the skin and into the bloodstream.
Meaningful Beauty Reviews: What About Their Ultra 5-Piece?
Image Source: instyle.com
If you are looking for a package, Crawford is ready to deliver that for you and your skincare needs as well. And that is where the Ultra 5-Piece cones in the picture!
What Is The Ultra 5-Piece?
The Meaningful Beauty Ultra 65-Piece contains five items that are intended to cooperate as a total framework that smoothens out your skincare schedule. The kit will help visibly firm, smooth, increase radiance, and improve clarity while also reducing the appearance of fine lines and wrinkles when used regularly. Overall, the system gives skin a more youthful and radiant appearance.
What Does It Contain And How To Use?
The kit has everything that you need. The products that you get in this kit are Skin Softening cleanser, Creme de Serum, Anti-Aging Day Creme with Environmental Protection SPF 30, Ultra Lifting and Filling treatment, and Lifting Eye Creme Advanced Formula.
Here is a how you can utilize the skincare kit for your daily routine:
Step 1: Cleanse dry skin directly with the cleanser. Use circular motions to massage. Use a cotton pad and warm water to rinse.
Step 2: In the morning, apply a thin layer of Ultra Lifting and Filling Treatment to a clean face and neck.
Step 3: Apply a thin layer of Environmental Protection Broad Spectrum SPF 30 to the neck and face in the morning. Apply a light amount of SPF and evenly massage it to the skin. Apply Crème de Sérum as an overnight serum and cream at night.
Step 4: Apply a small amount of Lifting Eye Crème Advanced Formula to the under-eye area with a gentle pat every morning and evening.
Frequently Asked Questions (FAQs):-
If you were searching for Meaningful Beauty reviews, I hope that this blog has answered most of them for you. However, it is never too bad to learn a bit more. Here are some of the questions that readers and users often ask about the products and the brand. So read them a little before you leave…
Q1. Does Meaningful Beauty Have A Money-Back Guarantee? Ans: Yes! Return the product containers within 60 days of receiving them for a full refund of the purchase price (less shipping and handling), even if they are empty, if you are not satisfied for any reason, and purchased from an authorized retailer. You can keep any freebies you receive! Q2. How Do I Cancel My Subscription? Ans: If you want to cancel your Meaningful Beauty, you can do so very easily. You can cancel your subscription anytime by accessing their online chat feature or contacting Customer Service. Their customer contact number is (800) 927-0047. Q3. How Does Auto-Delivery Work In Meaningful Beauty? Ans: A membership or "auto-delivery" is a basic method for guaranteeing you get the items you need, when you need them. Your favorite Meaningful Beauty products will arrive at your doorstep immediately. You can also cancel, reschedule, or modify it at any time.
Wrapping It Up!
It's worth noting that while Meaningful Beauty has garnered a dedicated following and positive reviews from some customers, individual experiences with skincare products can vary. It's always advisable to research and consider personal skin type and preferences when choosing skincare products.
In case you were searching about the Meaningful Beauty reviews, I hope that this article has been of great help to you in understanding the products and how they work. If there are any other questions that you may have related to the same, please feel free to let me know. All that you need to do is scroll down till you reach the end of this blog and leave your comments and queries in the box below. And I will be there to answer them all for you!
Learn More About:
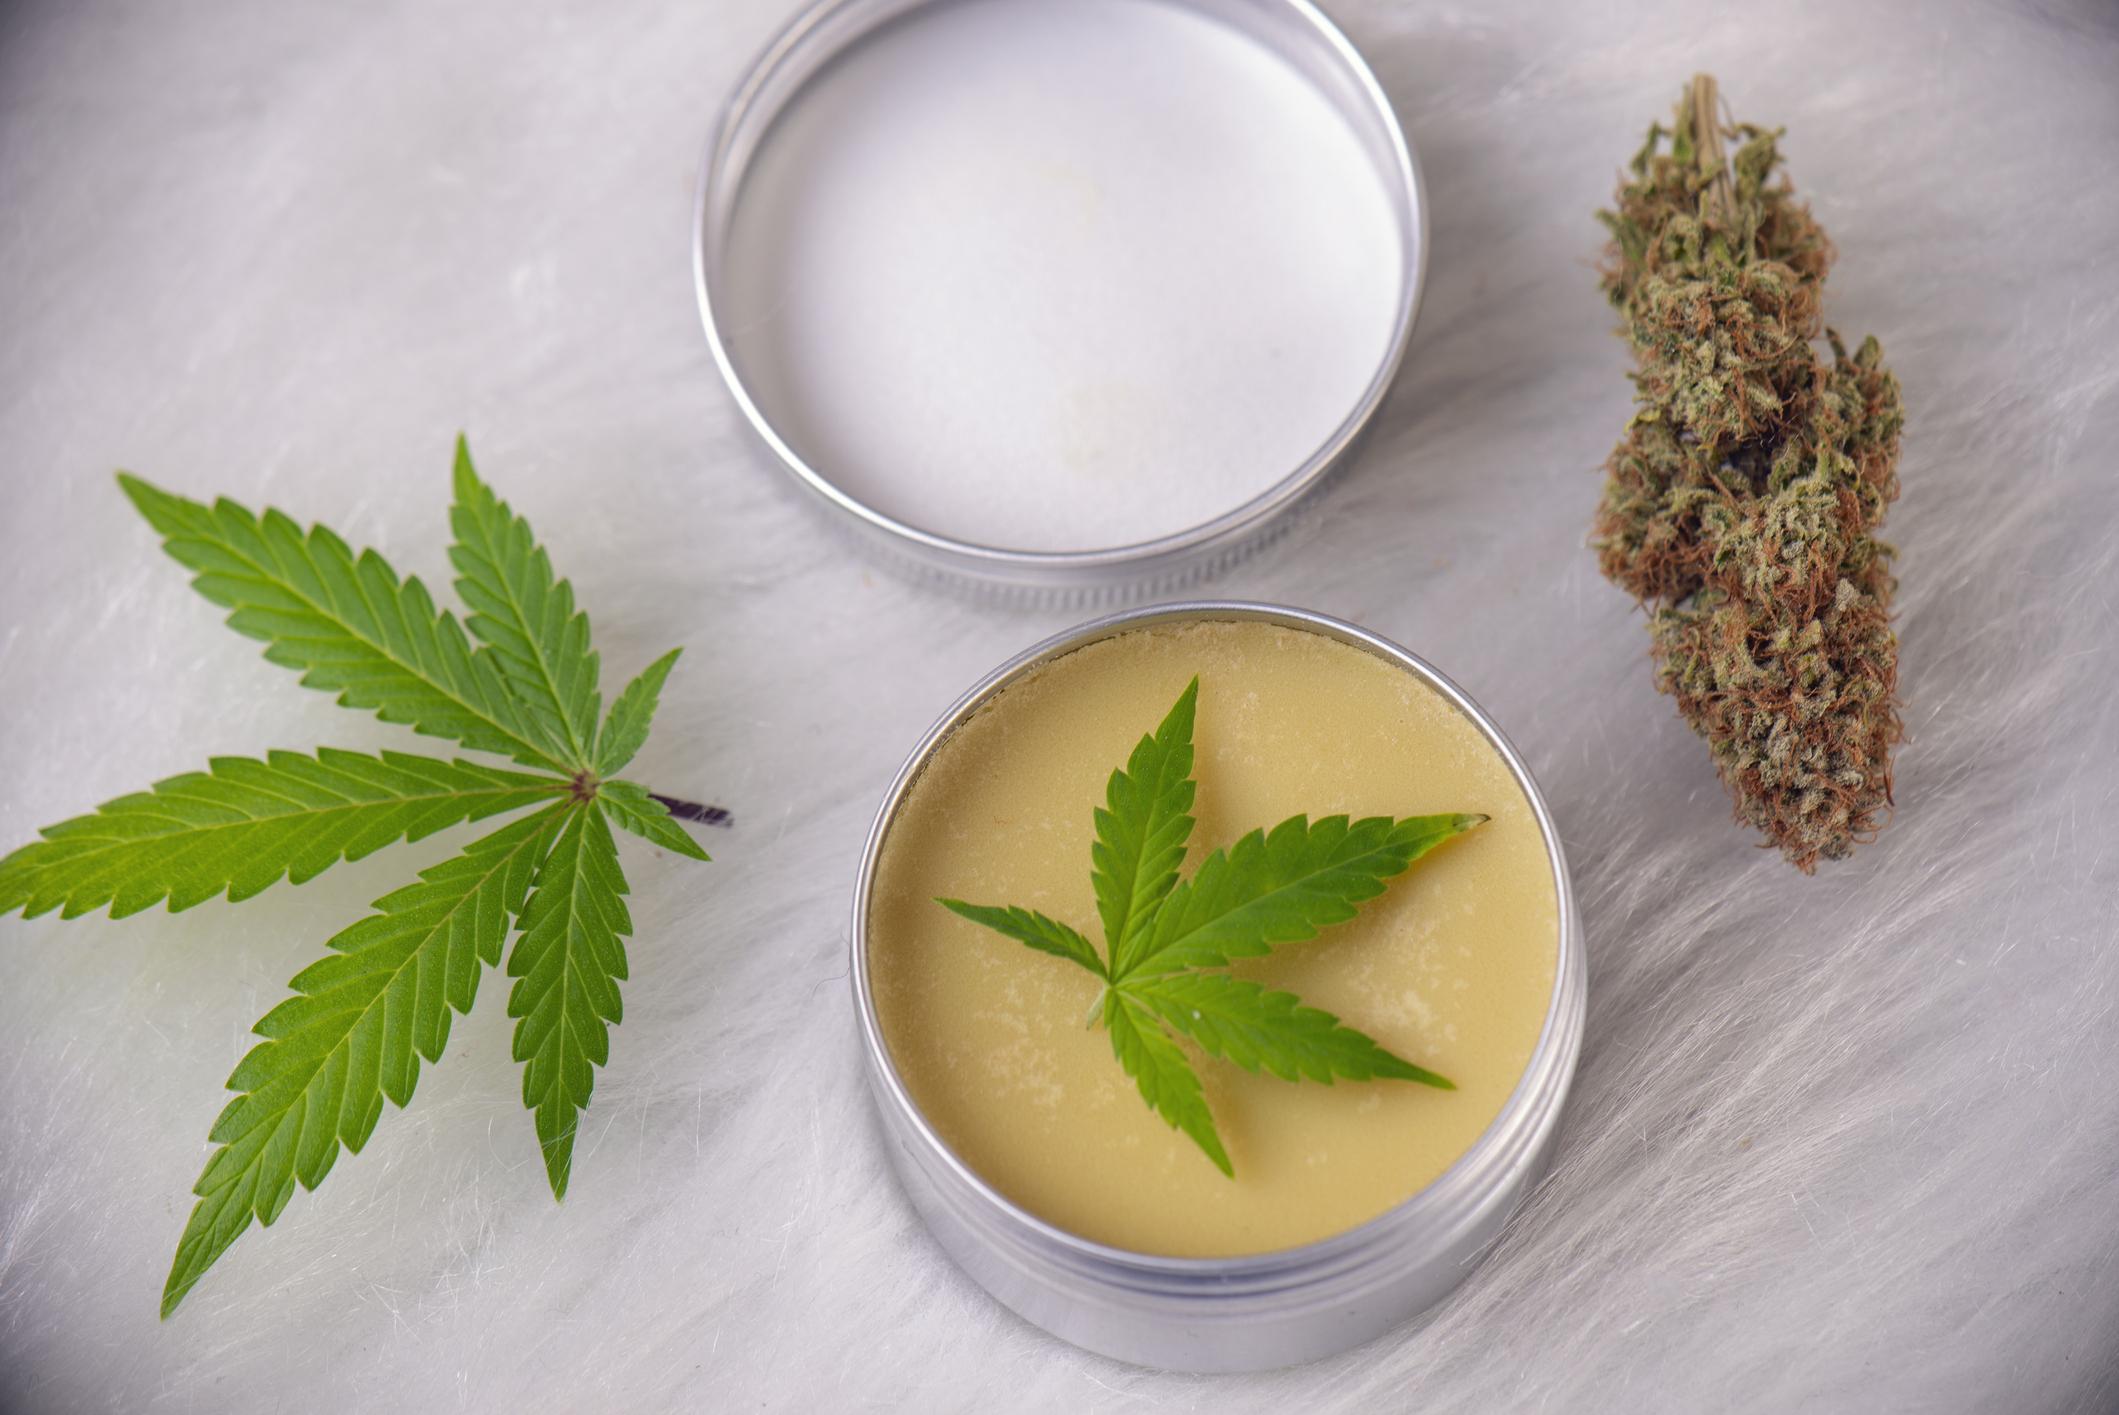
Are CBD Lotions Good For Your Skin?
What Is The Best Vitamin To Take For Dry Eyes?
Is the 10 Step Korean Skincare Routine Worth the Hype?
When it comes to beauty and skincare, Vancouver residents know the challenges of maintaining radiant skin in the city's rainy climate. With its frequent drizzles and overcast skies, Vancouver's weather affects your skin. However, thanks to the growing popularity of medi spas in Vancouver, achieving and maintaining radiant skin has become more accessible than ever. This article discusses how a Vancouver medi spa plays a crucial role in meeting the unique skin care needs of Vancouverites.
Understanding Vancouver's Unique Climate
The city of Vancouver is known for its mild, wet winters and cool, temperate summers. While this climate is comfortable for its residents, it also means dealing with higher humidity levels and increased moisture in the air. This combination can lead to a range of skincare challenges, including:
Increased Moisture Levels: Vancouver's high humidity can make your skin feel oily and prone to breakouts.
Dry Spells: Paradoxically, despite the moisture in the air, some individuals may experience dry and dehydrated skin due to temperature fluctuations.
Sun Exposure: Vancouver's overcast skies can be deceptive, leading many to underestimate the sun's harmful effects on their skin.
How Medi Spas Address Unique Skin Care Challenges
Tailored Skincare Solutions
Medi spas in Vancouver specialize in providing customized skincare solutions that take into account the city's distinct climate and the individual needs of their clients. Here's how they do it:
Personalized Assessments: When you visit a medical spa in Vancouver, skin care professionals will conduct a thorough assessment of your skin type, taking into consideration your lifestyle and the city's climate. This assessment ensures that the treatments you receive are tailored to your specific needs.
Hydration Treatments: To combat the increased moisture levels in Vancouver, medi spas offer a range of hydration treatments, including moisturizing facials and advanced skincare products. These treatments help balance your skin's moisture levels, keeping it healthy and clear.
Anti-Aging Solutions: Vancouver's overcast skies can be deceiving when it comes to sun exposure. Medi spas offer anti-aging treatments such as chemical peels and laser therapies to address sun damage and maintain youthful skin.
Acne Management: For those struggling with oily or acne-prone skin due to the humidity, medi spas provide effective acne management solutions, including facials and medical-grade skincare products.
Innovative Technologies
One of the reasons media spas are so effective is their use of cutting-edge technologies. These technologies are designed to address specific skincare concerns and adapt to Vancouver's climate conditions. Some notable treatments include:
Laser Therapies: Laser treatments are used for a variety of purposes, from skin resurfacing to hair removal. They can effectively treat sun damage, wrinkles, and other skin imperfections caused by Vancouver's unique climate.
Cryotherapy: Cryotherapy treatments can help reduce inflammation and redness, making them ideal for individuals dealing with skin sensitivities exacerbated by the weather.
Microdermabrasion: This non-invasive procedure exfoliates the skin, leaving it smoother and more radiant. It's a popular choice for those seeking to rejuvenate their skin in Vancouver.
In Conclusion
A Vancouver Medspa is a valuable resource for residents seeking to achieve and maintain radiant skin in the city's unique climate. With personalized skincare solutions and innovative technologies, these establishments play a vital role in helping individuals look and feel their best year-round.
Read Also:
What You Need to Know About Caring for Your Skin as You Get Older: Your Guide
7 Anti-Aging Tricks and Tips to Get Youthful Skin Like A Teen
11 Foods You Must Incorporate Into Your Diet for Great Skin
Seek the use of the Best epilator. Though the numbers of hair removing techniques are available only through the experience you will definitely learn and get on the right conclusion that some methods are better as compared to others.
Shaving, Tweezing, plucking and waxing, all can easily eliminate the unwanted hair but the outcomes can be less than our desires. If you are in search of something better then the epilator for the full body will be fair for hair removal that you have been long searching for. This is an electrical gadget that is designed for removing the hair from the roots directly.
The choices include dry epilator that one can use without water or also wet epilator if you want hair removal ease while in the shower and in the bath. Removing hair by the root is too much pain and it is true that people experience a measure of discomforts particularly when they undergo hair removal for the first time. Some areas of the body are too much sensitive than the others. Here using the epilator will 100% assure you that the more you epilate, lesser pain you will be experiencing.
How can you use the Best epilator?
Best Epilator for full-body working same as that of waxing and in it, the hair is removed deeply from the roots. But epilator is not using wax. It just plucks away the hair as the device is moved all over the part of the body. For the best outcome, it is better that you exfoliate the skin before using the epilator. Through exfoliation, all the dead skin cells will be removed and it can easily prevent ingrown hair.
Just start by positioning the best epilator for your body at the angle of 90 degrees to the skin. There is no need to press the device against the skin. Hold this device softly against the skin and pull skin taut and then gently move the device into the hair growth direction. If you move this device in the hair growth opposite direction, you will cut hair at the skin rather than fully removing the hair from the root.
More easy to follow tips on using the epilator:
Use the device at night time.
It is true that some people face redness as well as skin irritation after the hair is removed. Skin redness will go away after a few minutes and will result in smooth and clear skin.
Be calm and patient, for getting the expected outcome you must move the device softly all across the body so just take your time and don’t be hurry. If you move it faster, you can leave some hair behind.
Some of the best epilators are having different speed setting so begin on low setting and then you can increase the speed gradually to see what can be easily tolerable for you.
Moisturize the skin after you use this device so that the skin irritation can be reduced.
Do not forget to clean the epilator that you use for hair removal after every use do that risk of skin infection can be easily eliminated. Also, remove the lingering hair and also make use of alcohol for device cleaning.
Make use of the best epilator that can improve your skin quality.
Is there any risk to use it?
Using the best epilators is the safest way to remove all unwanted hair and it can be painful as well as uncomfortable. If in case you go too much faster or move the epilator against the hair growth direction, rather than pulling it out deeply from the root and these broken, shorten hair might become infected. Making use of this device is not at all harmful in fact if you use it carefully definitely you will get the desired outcome.
It would be safe to say that epilators are one of the safest devices to remove hair. You can rely on them if you want to experience the best hair removal in Montreal. Although there are many options, choose one that causes no harm to your skin.
Epilator for types of hair:
The best Epilator for the full body can be used on the body hair from several parts of the body that includes legs, arms, pubic area, and face too. While not all types of epilators for the facial hair is recommended, there is the one that is particularly made for the soft facial hair. In order to remove the hair from the face, you must look at devices that clearly states using those will be safer for your face.
The epilators can be also used for removing the coarser hair like heavy facial hair and pubic hair. This device is having tweezers head and strong motors that help in managing the thicker hair.
Benefits of using epilator:
Price- This device is inexpensive to buy and buying it will be a onetime expense unlike the buying of sugaring products or shaving equipment. The best epilator can make things easier for you.
Conveniences- This hair removal device for home use and doesn’t need a salon trip. These are small enough to place in the suitcase and takes when you travel. It can be used on the arms, face, legs and at bikini area. The special epilators might produce better results on the bikini or underarms areas.
Not complicated to use- Using this hair removal technique is not at all a complicated process. It can be used into the shower and it doesn’t need shaving cream and also no residue is left on skin once done with hair removal.
Long-lasting results- As epilator remove the hair deeply from the root, the result will be long-lasting than the shaving. It will take two or even more weeks for the re-growth of the hair. Moreover, this tool can easily remove shorter hair than other epilator methods. If in case you wax it might not result in you that you expect and when you undergo it, you might face lots of pains and troubles. Therefore it is better that you undergo hair removal through epilator only.
Conclusion:
Epilator for the full body can leave behind the smoother skin that lasts for up to a month. The ends results are totally impressive and this hair removal technique doesn’t give you pain. The more one uses it and improves the technique of hair removal, less uneasiness one will feel. And no doubt at the end this technique might become your favorite hair removal technique.
Read Also:
Epilators: The Best Solution To Smooth Skin
Ways To Rejuvenate Your Skin In Montrose
From Flint To Lasers – The Evolving Techniques Of Hair Removal
5 Most Exciting Facial Treatments Of 2018 – For Smooth, Gorgeous Skin