Enhancing Spaces With Greenery: The Art Of Plant Styling In Interior Design

Published on: 18 August 2023 Last Updated on: 07 February 2026
Plant Styling In Interior Design

In the dynamic realm of design, a captivating trend has taken root that resonates globally and within the context of interior design. The art of plant styling, a practice that breathes life into spaces by introducing lush greenery, has found its place within the landscape of interior design. From the serene homes of Singapore to bustling commercial establishments, the fusion of nature and interior design in Singapore has paved the way for a new aesthetic that redefines spaces. This article looks into the profound impact of this transformative approach, exploring its role in shaping ambience, fostering well-being, and enhancing visual appeal within Singapore’s interior design framework. Singapore combines innovative interior design with abundant urban greenery, creating harmonious living spaces that blend functionality and nature seamlessly. The city’s commitment to sustainable architecture and lush landscapes enhances the overall quality of life.

Integrating Nature’s Serenity:

Plant styling represents an endeavour to transcend the conventional boundaries between indoors and outdoors. The gentle sway of leaves, the soothing rustle of branches, and the play of light on foliage create a captivating tableau of serenity. These natural elements have the remarkable ability to not only enrich the visual aesthetics of a space but also to imbue it with an intangible sense of calm, offering a haven of tranquillity amid the modern whirlwind.

Foliage As Functional Art:

Beyond its artistic significance, the incorporation of greenery within interior design holds functional virtues that are equally captivating. Indoor plants act as dynamic purifiers, diligently working to improve air quality by absorbing pollutants and releasing oxygen. This symbiotic exchange is a testament to the remarkable synergy between the natural world and human habitation, resulting in spaces that are not only visually inviting but also remarkably conducive to holistic well-being.

Evolving Design Aesthetics:

The interior design canvas is ever-evolving, with aesthetics that shape-shift in response to cultural shifts and design movements. The beauty of plant styling lies in its ability to seamlessly adapt to these evolving aesthetics, transcending the boundaries of design trends. Whether it’s the sleek lines of minimalism, the free-spirited eclecticism of bohemian design, or the raw industrial appeal, greenery finds a way to weave its verdant magic, breathing life into these aesthetics and fostering a harmonious coexistence between the designed and the natural.

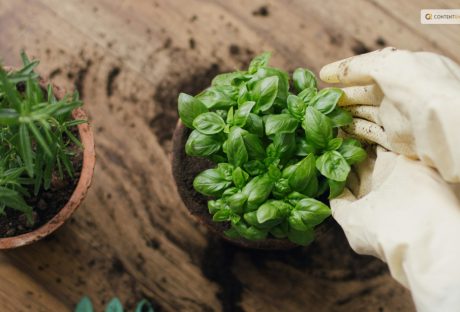
The Art Of Selection:

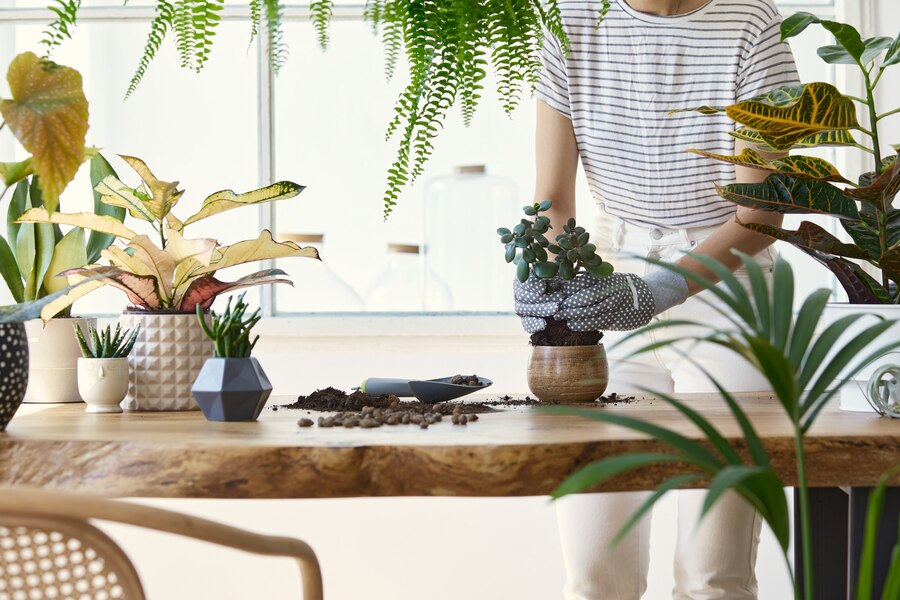
Choosing the right plants to adorn interior spaces is akin to curating a living gallery. Each plant chosen is a testament to an intricate interplay of factors – from light availability and humidity levels to aesthetic preferences and maintenance commitments. The heart of this endeavour is striking the perfect equilibrium between aesthetic allure and the practicality of plant care, resulting in a tapestry of green that enchants the senses and enhances the atmosphere.

Nurturing Connection:

Plant styling is more than an aesthetic venture; it’s an intimate connection with nature that thrives within one’s living space. Nurturing indoor plants instils a sense of responsibility and mindfulness as one tends to the growth, well-being, and seasonal changes of these living companions. This connection fosters a deeper appreciation for the resilience of nature, weaving the threads of the natural world into the fabric of daily life.

Creating Focal Points:

In the tapestry of interior design, plants serve as masterful focal points, guiding the eye and punctuating spaces with living accents. Majestic ferns, cascading ivy, or sculptural cacti effortlessly take centre stage, captivating the observer with their unique forms and textures. These focal points transform mundane corners into captivating nooks, where the play of light and shadow on foliage tells a visual story that evolves throughout the day.

The Versatility Of Planters And Containers:

The vessels that cradle these botanical wonders are as integral to the design narrative as the plants themselves. The design spectrum of planters and containers spans rustic terracotta pots to sleek, modern ceramics and even repurposed vessels that breathe new life into forgotten objects. This versatility extends the creative possibilities of plant styling as containers become an extension of the design language, introducing new textures, colours, and forms.

Integrating Plant Styling In Commercial Spaces:

The allure of plant styling isn’t confined to residential spaces alone; it has also made its indelible mark on the commercial landscape. Forward-thinking offices, elegant hotels, and dynamic retail environments have embraced the verdant touch of greenery. The infusion of plants within these spaces goes beyond aesthetics, fostering employee well-being, enhancing customer experiences, and creating an environment that promotes creativity and productivity.

Symbiosis Of Light And Greenery

The interplay between light and plants is a symphony that defines the heart of plant styling. Plants thrive in well-lit spaces, where sunlight cascades over leaves, casting intricate patterns and dynamic shadows. This symbiotic relationship between light and greenery transforms interiors into living canvases, where the ever-changing dance of illumination narrates an evolving story.

Conclusion:

As the chapters of interior design in Singapore continue to unfold, the integration of plant styling emerges as a timeless motif that marries the lush beauty of nature with the precision of design. This artistic symbiosis transcends aesthetics, creating spaces that exude tranquillity, health, and elegance. From the serene corners of private homes to the innovative interiors of commercial spaces, plant styling infuses its magic, redefining the essence of interior design in Singapore. In this ever-evolving narrative, the fusion of greenery and design remains a constant reminder that the beauty of nature is an eternal source of inspiration. As interior design in Singapore continues to shape urban environments, the allure of plant styling serves as a testament to the enduring power of nature’s splendour within the tapestry of design.

Read Also:

Content Rally wrapped around an online publication where you can publish your own intellectuals. It is a publishing platform designed to make great stories by content creators. This is your era, your place to be online. So come forward share your views, thoughts and ideas via Content Rally.

View all posts

Leave a Reply

Your email address will not be published. Required fields are marked *

Related

how to harvest dill

How to Harvest and Preserve Dill for Year-Round Use?

The tender, fern-like leaves of dill almost beg to be touched. If you want to cook them, trim the fresh dill foliage and gather the seeds for pickling. Or you can chop the feathery leaves and yellow umbels for attractive bouquets of homegrown flowers. In addition, black swallowtail caterpillars love to feed on it. Its tiny yellow blooms are great at drawing in a wide range of pollinators. Dill grows as an annual for summer harvests in USDA Hardiness Zones 2–8. In other parts, it may self-seed and is hardy in the winter in Zones 9–11. Here is everything you need to know about how to harvest dill. Keep reading for a comprehensive guide. How to Harvest Dill? Fresh dill clips easily, but it soon starts to droop. Sounds familiar to Cilantro, right? Its flower umbels may look lovely in a mixed bouquet, but after a few hours, don't be shocked if they start to wilt. When harvesting dill for recipes, use it as soon as possible because its flavor starts to fade after a few days. Cut off the flower stalks of dill after the yellow blooms have faded but before the seeds start to ripen and come away from the umbel. Cover the entire flower head with a small paper bag that has a few tiny holes for ventilation. Hang the plant upside down in a cool, dry place. Watch for the seeds to fall and collect them in the bag's bottom. The seeds should be kept in a cool, dry, and dark area in an airtight glass container. When and How to Plant Dill? Dill grows best outside and is simple to start from seed. Plant the seeds directly into the ground, 1/4 inch deep and spaced 1 to 2 inches apart, in the springtime following the last frost. If you want the dill plants to be able to self-sow, plant the seeds in tufts so the seeds can fall and sprout the following year. Or you can plant them in rows spaced about 6 inches apart. You might want to think about succession planting if you want a reliable supply of dill. During the growing season, start by planting a small number of seeds from the packet at a time and then a few more every week. Typically, seeds take 7 to 14 days to germinate. Also, dill can be grown from transplants grown in nurseries planted in the ground or in containers in spring. You can plant dill outside a few weeks before the last predicted spring frost because it can withstand light frost. To achieve lush growth and stop crowded seedlings from producing seed heads, which stops the production of foliage, thinning is essential. Every 12 to 24 inches, reduce the number of seedlings to just the strongest one once they reach 3 or 4 inches in height. As they get bigger, some start to flop. Plants can be kept upright by placing a stake or a sturdy twig in the ground close to the plant's base. To loosely secure the plant to the stake, use garden twine. You can start the dill seeds indoors four to six weeks prior to the last frost. And you can move the seedlings to the ground once the risk of frost has passed. Transplanting mature dill does not work well, so plant your seedlings where they will be able to grow and thrive. Where To Plant Dill? Dill should be planted in a spot with well-drained soil and at least 6 to 8 hours of daily full, direct sunlight. Particularly for cottage gardens, the delicate foliage gives garden beds and borders textural interest. Choose a location for your dill that will shield it from the wind if possible. Just like spinach, high winds can easily damage its stalks if you do not stake the dill. You can plant dill's fragrant foliage in perennial garden container plantings. Or you can plant them alongside other herbs or vegetables in a traditional kitchen garden. In an edible garden, cruciferous vegetables such as Brussels sprouts, collard greens, broccoli, and cabbage are good companion plants for dill. Dill draws beneficial insects like ladybugs and bees and drives away common brassica pests like loopers and cabbage worms. But avoid planting dill close to carrots. Carrots can be stunted by dill, and because they are closely related, dill can cross-pollinate with carrots to produce inferior hybrid plants. Planting dill close to tomatoes is also not recommended. Mature dill will probably stunt your tomatoes' growth, even though some studies have indicated that tomatoes and dill can be beneficial companions when they are young. How to Propagate Dill? Seed is the most effective method of dill propagation. Cuttings can also propagate Dill, though this isn't as dependable. Seed: Direct sow the dill seeds in early spring at a depth of 1/4 inch in a prepared garden bed. Dill does not tolerate transplanting well. Thin the seedlings so they are 12–24 inches apart when they are 3–4 inches tall. Cuttings: Using shears or scissors, cut off the stem with at least 3 to 4 inches of new growth to take a dill cutting. Place the cutting in a water-filled container, making sure to remove any leaves below the water's surface, and allow the roots to grow for two to three weeks. Fertilizer and rooting hormones are not required. Plant the dill in a container or on the ground once the roots are 2 to 3 inches long. Is Dill a Type of Weed? No, I am not talking about WEED weed (read: marijuana). Although dill isn't technically a weed, some individuals and spice companies call the plant dill weed, possibly due to its feathery leaves. Dill weed is a dried or fresh foliage plant. Flower umbels are yellow and used to make dill seeds. How Should Dill Be Stored for Optimal Quality? You can keep fresh dill in the fridge by wrapping its leaves in a moist paper towel. Or you can tuck its stems into a container of water. Fresh dill can be frozen by submerging it in water in ice cube trays. Place the cubes in cooked dishes that have enough moisture to withstand them. Dill seeds and leaves can also be easily dried for later use, though the flavor is a lot more muted. Water and Soil Sow dill in soil that is moist but well-drained. If there is a lot of clay in your soil, add organic matter to the top few inches to aid in drainage. If you have trouble with poor soil drainage, plant this herb in raised beds or containers. Growing dill requires proper irrigation. As the seeds germinate, keep the soil evenly moist. Dill plants require one to two inches of rain or extra water each week once they begin to grow. Humidity and Temperature Dill tolerates temperatures as low as 25ºF, but 70ºF is the ideal temperature for it. Dill often bolts, sending up flower stalks to set seeds when temperatures rise. This annual herb dies after it flowers and produces seeds. Get rid of the flowers to prolong the plant's growing season. Apply Fertilizer While most herbs, including dill, don't require extra fertilizer, you can give them once or twice during the growing season by applying a balanced 10-10-10 fertilizer. When planting, either mix a liquid fertilizer with water or etch a time-release fertilizer into the soil. Refer to the product label for instructions on how much to use. Trimming Dill should be pruned early in the growing season to prevent limb bending. Cut off the top leaves of the plant to promote more growth of the lower leaves. Food preparation and cooking can be done with anything that has been pruned. Repotting and Potting You can grow dill in pots on a sunny balcony or deck, even if you don't have an outdoor garden. Due to the deep taproot that dill plants have, choose a container that is at least 12 inches deep. Because clay and terracotta pots don't retain as much moisture as plastic or glazed ceramic pots. They are ideal for growing dill. Make sure the container you select has good drainage and is big enough to allow you to space your plants 12 to 24 inches apart. It is best to start over in a new, larger container. Especially if your dill plant outgrows its current one because it does not take well to transplant. If the temperature where you are planting is not too high, you can keep planting seeds into the summer. Types of Dill Dills can be of many types with each of their distinct looks and flavors. Here are the three different types of dill you can grow in your kitchen or backyard. Long Island Mammoth Also known as Long Island Mammoth this one is an old-time favorite. Its fern-like leaves can be dried and stored for a long time, or they can be harvested fresh. It produces big clusters of yellow flowers with flat tops. They turn into brown seed heads, and they can reach a height of five feet. Fernleaf Grown to a height of only 18 inches, Anethum graveolens, or Fernleaf, is a highly productive dwarf variety. It works well in container gardens or small in-ground beds. Its feathery, delicate foliage has a great flavor of dill. From midsummer into fall, it blossoms. Bouquet The 'Bouquet' cultivar produces plants up to thirty inches tall with fine bluish-green foliage. The enormous, six-inch-diameter yellow flower heads are ideal for drying, creating an enduring arrangement. Or you could chop them for fresh floral arrangements. How to Keep New Dill Fresh? Dill weed quickly wilts after harvesting and gradually loses its distinctive flavor and aroma. If you know how to store your freshly harvested dill, this shouldn't be a problem. Here are two straightforward techniques that you can use: Put It in the Crisper Drawer of the Refrigerator Loosely wrap the recently cut and cleaned leaves in damp kitchen towels before putting them in a container or sealed bag. Put the container in the crisper drawer of the refrigerator, which has a lower humidity than the other sections of the appliance. Utilize the herbs before they begin to wilt and dry out, which should happen in a few days. Put It in Water To make this method function, when harvesting the herb, you must cut off the entire stem. After gathering the stems, put them in a glass of water and seal the opening with a plastic bag. Every day, change the water. Unlike potatoes, dill leaves can remain fresh for up to a week when stored in this manner. How to Freeze Fresh Dill? Freezing is the best way to preserve extra dill for later use if you've harvested more than you can use at once or in a few days. Dill freezes most effectively when chopped into smaller pieces and added to ice cube trays with just enough water to cover the freshly minced dill. This allows the herbs to be kept for four months or longer. This will ensure you always have dill on hand for when a recipe calls for it. How to Dry Fresh Dill? Dried fresh dill is a popular method if you're searching for another way to store dill for a long time. The herb has many uses, even though it won't have as much flavor as when it's fresh or frozen. All year long, you can use it as a herb in cooked dishes or to make tea. Stick to hang-drying if you don't want much of the flavor to be lost. This is a very easy method to use. All you must do is gather a few dill leaves and then bind them with a string. Later, place them in an area with adequate ventilation upside down.  Place them in an airtight container once they're crumbling and dry. Even though fresh dill is always preferable, make sure to save some for later use. Particularly if you don't have a year-round indoor herb and spice garden. Wrapping Up Growing dill is a great way to add flavor to fish and seafood dishes. A little goes a long way because fresh dill leaves have a strong licorice flavor. It is best that you add dill toward the end of cooking, in salads, or as a garnish for soups. Because once cooked, it tends to lose its flavor. If you have thoughts to share or questions to ask about how to harvest dill, please leave a comment below. We would love to hear from you! Read Also: Asparagus 101: When, How, And How Often To Harvest? How To Harvest Sunflower Seeds: A Fun And Easy Activity For The Whole Family How TO Harvest Lemongrass: Tips AND Tricks FOR Growing AND Using This Versatile Herb

READ MOREDetails
Pests Control

How Pests Control Maintains The Aesthetic Appeal Of Your Home

Ensuring the visual allure of your residence is vital in crafting an inviting and cozy atmosphere. From immaculate landscaping to elegant interior design, each element shapes the overall atmosphere. However, one often overlooked aspect of preserving your home's beauty is hiring pest control services from sources like Forterra Pest Control. This article delves into how pests control measures help protect your home's aesthetic charm. Preventing Structural Damage Termites, carpenter ants, and rodents present substantial risks to the structural stability of your residence. These invaders can cause extensive damage to wooden structures, including support beams, door frames, and furniture. Left unchecked, this damage not only compromises the safety of your home but also detracts from its aesthetic appeal. Implementing regular pests control measures helps prevent infestations and minimize the risk of structural damage. By addressing potential entry points and eliminating nesting sites, pests control professionals safeguard your home against the destructive effects of pests, preserving its architectural beauty for years to come. Maintaining Cleanliness Pests are not only a nuisance but also carriers of disease and filth. Cockroaches, rodents, and flies can contaminate food, surfaces, and air quality, posing health risks to you and your family. The presence of pests not only compromises the cleanliness of your home but also detracts from its visual appeal. Effective pest control practices focus on eliminating existing infestations and implementing preventive measures to maintain cleanliness. By targeting pest breeding grounds, sealing entry points, and employing safe eradication methods, pests control professionals help keep your home free from unwanted visitors, ensuring a clean and aesthetically pleasing environment. Preserving Outdoor Spaces Your residence's exterior plays an integral part in shaping its overall visual allure. Beautifully landscaped gardens, well-maintained lawns, and inviting outdoor living areas enhance the curb appeal of your property. However, pests such as mosquitoes, ants, and spiders can disrupt outdoor activities and mar the beauty of your outdoor spaces. Integrated pest management techniques help protect your outdoor areas from pest infestations while minimizing environmental impact. By utilizing targeted treatments and natural deterrents, pests control specialists create a pest-free environment, allowing you to enjoy outdoor spaces without compromising their beauty. Safeguarding Decor And Furnishings Interior decor and furnishings are essential elements that contribute to your home's aesthetic charm. However, these items are susceptible to damage from pests such as moths, beetles, and rodents. If not adequately protected, fabric upholstery, wooden furniture, and delicate decor items are particularly vulnerable to infestation and deterioration. Regular pests control inspections and treatments help safeguard your decor and furnishings against potential damage. Pest control professionals ensure that your home's interior remains pristine and visually appealing by implementing preventive measures such as barrier treatments, fumigation, and targeted eradication. Promoting Peace of Mind Beyond the tangible benefits, pest control provides homeowners with peace of mind. Knowing that your home is protected against pest infestations allows you to relax and enjoy its beauty and comfort. Whether hosting gatherings with friends or simply spending quiet moments with family, a pest-free environment enhances your overall quality of life. Tips For Selecting The Right Pests Control Services Pest control is one of the most important things about maintaining a certain aesthetic of your home. However, this would only happen if you get a hold of the right control company. Hence, this section will help you do just that. We have curated a small bonus section discussing the important factors that you need to know in order to select the right Pest Control Services.  Quality Pests come in varied shapes and sizes. As a result, you need to deal with them with specific care. Therefore, quality assistance should be your first priority. Go for companies that offer 24*7 support crews for your every query.  Make sure the professionals you hire have enough experience and training to handle your pest problems. Finally, only go for a firm that has a 24*7 customer support team and warranty for their services. All of these metrics ensure that you get quality assistance from the firm.  License Licensing is an important thing to consider while selecting the right pests control services. Make sure that you are partnering up with the right firm that is qualified and authorized in order to deal with the kind of pests control services that you want to avail. Use Google to do your research. Make sure you know all the angles before you make any sort of decision. Narrow down your search according to your requirements and look for the licensing you might need in order to deal with the problem. Then, use this information to approach the right firms.  Chemicals If you are already on the internet, you should also start inquiring about the required chemicals. Chemicals are an integral part of a pests control operation. Therefore, you need to understand these chemicals very closely. Google whatever you can about these chemicals. See how these chemicals morph your instant atmosphere. Understand the repercussions of these chemicals and how they affect your family’s health. If you have a pet, you need to google if these chemicals are pet-friendly or not. Otherwise, you might end up with a disaster on your hands.  User Review Taking recommendations is a very important thing. We suggest that you start inquiring about the local pests control firm that usually works in your neighborhood. Start by asking the neighbors. Ask about their personal experience and assess it. If the reviews are mostly okay, then start looking up the firm on the internet. Yelp could be a good place to start your research. Never go for unverified firms that have less than 4 stars. Otherwise, you might end up doing more damage than fixing.  Cost The final aspect of this whole journey is the cost. Cost is a very important thing to keep in mind. However, lower costs are not always good. Always compare the cost with the aforementioned parameters. A firm that offers several levels of quality and assurance at $20 is definitely doing something fishy compared to a firm that is offering the same thing at $1000. Cost needs to be looked at from a logical perspective.  Conclusion Effective pests control measures are crucial for preserving your home's aesthetic appeal. By hiring services from a reputable source like Forterra Pest Control to prevent structural damage, maintain cleanliness, safeguard outdoor spaces, protect decor and furnishings, and promote peace of mind, pests control measures ensure that your home remains a beautiful and welcoming sanctuary for years to come. Prioritizing pests control is not just about protecting your property; it's about preserving its inherent beauty and creating a harmonious living environment for you and your loved ones. ADDITIONAL READING: 10 Hidden Dangers Of DIY Pest Control The ROI Of Proactive Pest Control For Property Management 9 Signs You Have a Pest Infestation in Your House (And What to Do About It)

READ MOREDetails
Artificial Grass

How To Install Artificial Grass In Your Garden – Installation Guide Step By Step

Artificial grass or fake grass is more popular than ever. The best part is you don’t have to hire a professional to install artificial grass in your garden. With the help of this article, you can do it by yourself with the help of your friends or family members.   With proper installation, you don’t have to maintain your artificial grass in the long run. You just have to keep it neat and clean with a spray. On the other hand, maintaining real grass seeds is very difficult and may not be possible for busy individuals who don’t get enough time to maintain the same. If you still love natural grasses and want to play games on grass, you can consider growing them that may give you a real feeling of natural grasses.  What Is Artificial Grass? Artificial grass is basically a material made up of artificial, human-made fibers that seem like real grass, but in reality, it is not! This saves you both money and time in the long run.  This fake grass was first installed in the multipurpose sports stadium. This grass has made leaps and looks real. On the other hand, this type of grass is designed for those individuals who don’t have enough time to plant grass seeds. Why Should You Consider Artificial Grass? Artificial grass may have various benefits for consumers. It saves you both time and money and is regarded as an excellent landscaping option.  The best part about artificial grass is that it does not require any water and includes less maintenance. You can also consider centipede grass seed for this because it also requires low maintenance and can grow in any condition.  Real grass can die, but artificial turf can last for more years. Moreover, you don’t have to buy any fertilizers or pesticides to maintain your fake grass. However, there are various pros and cons of artificial grass that you need to consider before buying. You can buy good quality artificial turf with the help of turf near me feature on EasyTurf to make it last for a longer time. How To Install Artificial Grass In Your Garden – Step By Step Guide Installing artificial turf is not as easy as it seems. To do this work, you need a good amount of time and hard work. Also, be prepared to get your hands dirty to install the fake grass on your lawn. Now, there are four elements to almost every installation that can reduce the cost of installing fake grass are: Tools used Seaming system Material waste Subbase material Here are the major steps to follow in order to install artificial grass in your garden in 2021. 1. Measure Your Area It is obvious that the area of the garden will differ for everyone. First, you need to measure the length and width of the area that you want to install with the artificial grass. Thus, measuring the area is an important factor that you need to consider at the earliest. 2. Gather Tools And Equipment The second step to install artificial grass in your garden is to gather vital tools and equipment for the same. You cannot complete the task without the use of a Stanley knife, geotextile weed killer, a turf cutter, and accessories such as tape and glue.   3. Remove The Existing Surface Now, it’s time to remove the existing surface with your hand if the area is small. However, you need to use a turf cutter if the lawn is very big. You can also plan this before removing the existing surface. 4. Compact The Ground Another step to install artificial turf in your garden is to compact the ground. You can take the help of a roller or a vibrating plate to meet your objectives. You need to follow this step again later.  5. Place Grass Edging Down Placing this is not mandatory but optional. If you have a desire to use timber or other edgings, you can follow this step. However, you need to ensure that your final grass line should not be smaller than edging. This is generally done to enable water to run off the turf.  6. Lay Your Sand Or Stone Base Another step to install fake grass in your backyard is to lay your sand or stone base, and this is one of the most vital factors that you need to consider. Place at least 40mm of compact sand and add more wet sand if the sand is dry. Then, you need to compact the ground again.  7. Roll Out Your Underlay And Grass Now, roll out your underlay grass first. By keeping in mind not to disturb the weed-killing underlay, roll out the artificial grass on top of that. In this step, you need to do it very carefully.  8. Let The Grass Settle One of the most vital things to do while installing your artificial turf is to let your grass settle after you have completed the above steps. This is generally done to stop the grass from creasing or wrinkling. 9. Trim The Edges After completing the above steps, you have successfully installed artificial grass. Trimming is the only thing left now. Trim and cut the artificial grass from the edges neatly. You can use a sharp Stanley knife for trimming. 10. Brush The Grass Up And Relax! Before brushing up the artificial grass, you need to pin it down using landscape pins. You need to brush up again to bring the fibers of the artificial turf upright. Now, it’s time to sit back and relax and enjoy the artificial grass in the garden.  The Final Thoughts The best part about artificial grass is that it saves you lots of time and effort that you can spend on other important projects. Once you lay your artificial grass in your garden, it will always be green without any maintenance. Isn’t this amazing? Let me know your views about this in the comment section below. Reference: https://www.buzzgrass.com/how-to-install-artificial-grass/ More Resources: 5 Best Vegetables You Should Try Growing In Your Garden 7 Secrets to keeping your Lawn Tidy and Green All You Need To Know About Resurrection Plant and its Facts

READ MOREDetails