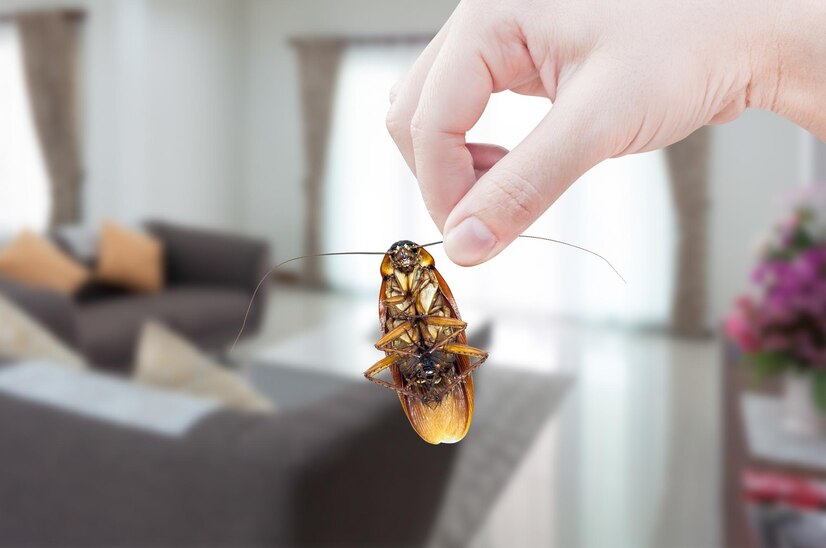
Simple Ways To Prevent Insects From Taking Over Your Kitchen

Published on: 23 March 2023 Last Updated on: 05 November 2024
Prevent Insects

No one wants to come home to a kitchen crawling with critters.

Imagine coming home and seeing ants, weevils, cockroaches, and other insects moving amongst your foodstuff and utensils. If that doesn’t make the hairs on your neck stand, we don’t know what will. Not only do these insects carry germs and other harmful substances, but they also have a distinctive odor that lingers even after they leave.

Pests can chew through boxes and plastic containers; some can even chew through metal. They can also contaminate food and surfaces, and they leave droppings on drawers and pantries. These pests are a nuisance that most homemakers don't want to encounter because they know how wasteful and problematic they can become.

You don’t want to throw away (but you have to) cereals, pasta, and other foodstuffs that have been crawled and nibbled upon by rodents, cockroaches, and other pests, don't you? In this case, you need to look for a reputable pest control company like Top Line Pest Control to ensure there won’t be any pests in your home fast.

Here Are Four Prime Steps To Prevent Insects From Taking Over Your Kitchen

Prevent Insects From Taking Over Your Kitchen

If you want to keep your home pest-free, here are some things you need to consider.

1. Immediate clean-up

Crumbs, leftovers, and spills always attract pests inside the house. It would be best to conduct an immediate clean-up after every meal. Remove leftovers and place them in your recycling bin or trash compactor, place your dishes and utensils in the dishwasher, and wipe down eating surfaces immediately after eating. Doing this will prevent pests from making their way to your kitchen.

You can also prevent pests by wiping surfaces and problematic areas with 50% vinegar, dish soap, and water. You can also use a salt and water solution to directly wipe the surface and spray on bugs. 

2. Buy and stock food in cans and glass jars

When you shop for your groceries, select products that come in cans. Most pests can chew through paper, cardboard boxes, and even thin plastic containers. If you stock the pantry, it will be better to stock cans or glass jars of food because pests rarely chew through these materials. 

3. Check on the kitchen pipes 

Another way to prevent insects from coming into your home is to check the kitchen pipes. If the holes are bigger than the pipes, you have to cover them properly with sealant to prevent mice and other pests from using them as the entryway to your home. You can do it yourself by using caulking agents, glue, or expanding foam to cover such spaces, however, you can ask a pest control company to eliminate insects and pests professionally and safely in the long term.

4. Take out the trash

If you don’t have waste disposal in your sink, you must take out the trash regularly. You also have to use top-grade trash bags to keep pests away. 

Endnotes

Keeping pests away from your kitchen can be challenging. However, with a few simple methods, you can ensure your kitchen is as clean as possible.

Read Also:
Arnab is a professional blogger, having an enormous interest in writing blogs and other jones of calligraphies. In terms of his professional commitments, He carries out sharing sentient blogs.

View all posts

Leave a Reply

Your email address will not be published. Required fields are marked *

Related

Easy Home Decors? Try These Wall Painting Designs

The interior of the home reflects the aura of our personality of the person living within. A well-proclaimed quote states that a pleasant mind lies in a neat and clean home.   Any guest who walks into our home notices the interior look, the furniture, the walls, and the space we live in.  The choice of interiors showcases our thinking and taste. Paintings, ultimately, enhance the decor and interiors.   As the culture of artistically designed walls evolves, design options have also expanded in recent times. Interior Wall Painting Designs offer more than just a painting option—they're a delight for the artistic-minded.  Beginning - Interior Painting Varieties Interior painting Each room is unique and depends on the desired requirements. Some prefer a plain, subtle look, some flamboyant, and others fashionable and vibrant.   The painting world gladly offers multiple options for these varied choices. Smooth and matte finish emulsions, as well as Enamel, provide versatile options.   Emulsions and Enamel work well for wall painting designs in the living room, while matte and textured are ideal for wall painting designs in bedrooms.   Expert paint professionals carefully blend the textures of wall paints, brainstorming the outcome desired for each room.   Some areas of the home demand wellness, relaxation, calmness, and smoothness for a healthy mood, while others invite pleasure, and kids' rooms need a look that cheers up, motivates, and appeases them.   So, colors in a kid’s room are often fun and playful, featuring more of the cartoon characters they love.   Therefore, the paint textures and the painters' work are carefully tailored to each space.  Different Types of Wall Paintings Ideas (Trends of 2024) As 2024 rolls in, wall painting ideas are making a major turnaround, presenting innovative ways to revamp our homes.   Whether you plan on renovating one room or your entire house, there are plenty of new and upcoming fashions to keep you busy this year.   Here’s a closer look at some of the interior wall designs that will be on everyone's lips this year.  Textured Walls: Adding Some Personality Textured walls will be huge in 2024!  They add character and warmth to a room. In fact, instead of just having smooth walls, we now have walls you can touch and feel.   It is not just about the tactile experience, but the look!  Rough stone or soft, velvety texture are the top two textured wall ideas.   If you are too basic, you can also go for the exposed brick wall design.  These walls look amazing but also give a room more life. If you’re someone who likes adding personality to your home, textured walls might be for you.   2. Asymmetric Geometric Patterns: Fun and Modern I’ve always loved the clean lines and sharp edges of geometric patterns, and this year, they’re more popular than ever. But instead of the usual straight lines and perfect shapes, 2024 is all about bold colors and playful, uneven designs.   Think of big hexagons, triangles that don’t quite match up, and shapes that seem to dance across your walls.   These patterns aren’t just about filling space—they bring energy into a room and can totally change the vibe.   If you want to inject a bit of fun into your home, this trend might be perfect for you.  Nature-Inspired Murals: Bringing the Outside In Nature is always in style, but this year, it’s about more than just a few houseplants.   2024’s nature-inspired murals are big, bold, and beautiful. People are literally turning a wall into a window overlooking a lush forest or a calm beach.   Plus, it is great to calm down anxiety & bring a sense of serenity. These murals are perfect if you love the idea of bringing the peace and beauty of the outdoors into your living room or bedroom.   If you’ve ever dreamed of escaping to a quiet, natural place, why not paint one on your wall?  Color Blocking: Simple Yet Striking Color blocking is an easy trend to love. Basically, you just use big blocks of color to create a simple (and somewhat striking) look.   You don’t have to be an artist to do it either.   Just paint one of your walls a bold bright and leave the other ones neutral! It’s perfect for people who want their home to make an impression – without being overwhelmed.  Custom Design Your Walls When it comes to designing, the magnificence of natural depictions now replaces boring colors and plain looks on interior walls.   From oceanic waves to green forests, the world of crafts, or official décor, all these extraordinary themes now enhance our atmosphere.   The Royale play satin finish, and the highlights of a well-drawn wall give a completely new feel.   Geometrical curves, painted stripes, and lines also contribute to stunning wall painting designs.   The myriad shades and combinations forming a holistic art have now become a new professional career path. Consider random rectangles—cool, modern, and eye-catching.   Nordic blues, with their blue-grey shades, create typically cool, modern, and minimalist interiors.   Creative painting  techniques and wall patterns instantly add life and movement to room designs. The sheer variety of designs available can be mind-boggling.  Professional Painting Service Trained professionals in this trade are well-placed in renowned Paint Production and Service companies.   Consumers now prefer pioneered home painting services for an all-around service experience that includes:  Consultancy at-home  Site estimation & testing  Usage of automatic tools  Site supervision  Dust-free, and better painting job.   Wall Painting designs have now sparked a new evolution in painting.  Stylish, contemporary, subtle, and elegant—the look of your home depends on the wall painting designs and ideas you choose. Wall designing, therefore, offers the right opportunity to add an explosion of color to your home and life. Read Also: How to Make Your Home Look Like You Hired An Interior Designer Find the Right Painters for Your Ann Arbor Home This Painting Season Interiors to Reduce the Heat Build-up in Your Homes Top Expert Tips for a Stunning Condo Interior!

READ MOREDetails
Match Sofas With Accent Chairs

How Do You Match Sofas With Accent Chairs?

It is unarguable that decorating our own home will surely excite us. The thoughts of what color palette to use or what furniture to put or how to arrange them will get us a bit carried away for sure. The entire decoration plays a key role as it sets up the mood for the house. Whether you want a refresh or moving into a new space, it is vital to purchase durable furniture to incorporate your home. Choosing your furniture can take you a lot of time to consider its design and quality. In Chesterfield furniture, they offer a wide range of designs that will not compromise your comfort as they only intend to use the finest materials for their sofas and chairs. The most crucial spot of the house to decorate is the living room. Being the center of the house, a heart is considered a symbol for the living room. The living room is the primary room you will see upon entering a home, and it is where guests are entertained. The living room should be an area to indulge and lie on the couch as you enjoy a bowl of popcorn watching your favorite movie. Most importantly, the living room is where families should spend time together to relax and share stories. There is a long list of furniture to consider putting in the living room. The essentials are the sofa, coffee table, accent chairs, media stand, and side table. Putting together all these are overwhelming; thus, one should consider hiring an interior decorator to do the job, or if not, dig deep on Pinterest for design inspiration. One of the common mistakes in arranging your furniture is the improper incorporation of your sofa with your accent chair. If you want to create a pleasing space to the eye and a solid setup, you should consider a few tips and tricks to have a successful mix and match. What Do I Have To Put In Mind: In pairing your sofa with your accent chair, contrasting them is most crucial. You will have to make these pieces complement each other and, at the same time, can stand on their own. You shall also consider the style, color, and form of your selections. 1. Style Style is an essential element to consider. If you opt for minimal decoration, both your sofa and accent chair should embody that style. 2. Color Carefully decide on the color palette you will use for your sofa and your accent chair. Your choice can either be a monochromatic or complementary color scheme; always make sure they don’t crash with each other. 3. Form Always be mindful of the form. A skirted sofa would go along well with an accent chair that has an intricate or evident leg style. How Do I Arrange These Pieces? There are various ways to arrange your sofa and your accent chair: front and center, and section-off space. When you follow the front and center arrangement, you must consider where you will be facing as you sit down. The section-off space arrangement considers arranging the furniture in ways that can accommodate visitors and guests. There are no rules on how you should decorate your place; as being said, it is your home and your own space. However, it would help if you always put in mind that the design must go together harmoniously. Read Also:  Some Common Reason why we Use Futon Mattress Modern Home design ideas for crowded families Top 5 Trending Home Renovation Ideas For Australian Families

READ MOREDetails
Drywall

Elevate Your Home With Unique Ceiling Textures

Drywalls are those construction materials that are used to create walls and ceilings in your home. Not all that, but drywalls also come in handy if you want to create design features like eaves, arches, or any mind-blowing architectural requirements!!! Do you know the best part about drywalls? These are super easy to install, highly durable, and only require simple repairs when damaged. So, drywall is a flat component composed of calcium sulfate dihydrate, typically between thick sheets of backer paper, and facer, used to construct interior ceilings. Let’s talk about the ceiling textures and the drywall options you can choose for your home!!! The Ceiling Textures And Your Drywall Options Decorating your home can be a real challenge for many !!! Therefore, choosing the right drywall finish or texture can prove to be a hard nut to crack. And it’s very natural to get in a state of indecision if you are handpicking it for your new home or renovation project. There are so many options that it feels like you are “searching for a pearl in an ocean.” Making up your mind about whether or not to go texturing your ceiling can be a tough job. And even if you choose to texture your ceilings, there are chances you’ll be confused about which one to go for!!!! And remember, getting the drywall right is the first step of tiling projects?”. But No Need to Worry!! This article will guide you in choosing the perfect texture and drywall option for your ceilings to look more elegant than ever!! 1. Sheetrock Texture: Old Is Gold Sheetrock ceiling texture is a drywall ceiling texture that has been famous since 1917. The reason this drywall texture is so awesomely renowned is because of the artistic look that it gives to your ceiling And the best part is you don’t need to use any sort of spray paint in this case. You can achieve this texture by using your artistic hand technique and without using any special brushes. This texture is perfect for any room. There are no restrictions on the use of this ceiling texture. 2. Stipple Brush Texture: A Test Of Your Skill This texture is not as easy as it seems. You need skills to create this texture. To create this texture, you need a roller and slap brush. The fascinating fact about this texture is it can cover the bumps and holes on your ceiling. And if you have the skills, then this texture can surely make your ceiling look gorgeous than ever!! 3. Swirl Texture: Creativity Taken To A New Level To achieve this texture, you need either a roller or sprayer. You can also do this by using a technique called “the basic swirl” method. But one thing that you need to keep in mind is while creating this texture, you’ll need a lot of patience to get the best result. And the difficult part is you need to create the pattern before the mud dries. So, make sure to have a helping hand by your side. Overall, the texture can really give that awesome look on your ceilings if you do it in the right way!!! 4. Orange Peel Texture: A Color Of Choice The name suggests all the colors of orange skin, but sometimes it’s also called “an eggshell” ceiling texture. If you really love this color, then this can be on the top of your favorite lists. To create this texture, you need to apply thin mud to the ceiling using a spray gun set at very high pressure. The more artistic mind you have, the more artistic look it has got!!!! 5. Smooth Textures: Choice Of Many If you are someone who wants the best at a cheap cost, then this texture is just the right choice for you. Moreover, you don’t need to have many skills to create this texture design. The look of this texture is just mind-blowing, and if you are someone who likes things to be consistently gorgeous, then this is the texture you can have for your ceiling. This texture is effortless to remove and is also perfectly suited for any room. 6. Tree Bark Texture: Beauty Of Nature If you are someone who loves nature and wants to bring the reflection of nature inside your home, then this textured style is just the option you can have. This ceiling has the look of a tree. You can create this texture just by using a heavy roller. The texture might look simply, but it’s very artistic and can surely catch the eyes of many. If you have a farmhouse, then this texture will double the beauty!!!!! 7. Slap Brush Texture: Slap The Beauty Out Artistic, gorgeous, beautiful, and elegant are the nicknames you can give to this texture. A complete package of beauty!!!! To get this texture, you’ll need a brush with very stiff bristles and thin mud. Firstly, you have to cover your ceiling with mud using a roller, then take the brush and slap the ceiling from the edge. This can be a hard nut to crack because if you don’t get it right on the first shot, the whole ceiling might end up looking messy. 8. Popcorn Texture: Cottage Cheese This texture, also known as the “cottage cheese” or “acoustic” ceiling texture, is probably one of the most famous ceiling textures ever!!! If you look closely, you’ll see it’s kind of a look-alike of “popcorn.” That’s why it’s called “popcorn texture.” To achieve the correct texture, you need to use a sprayer to apply to your ceiling. This contains Styrofoam with mud which gives that puffy effect. But it will require you to have a lot of skill to achieve this effect. That’s because the “popcorn texture” is both challenging to apply and remove. I hope this article will help you to know about the needs of ceiling textures and drywall options. And now I believe you’ll be able to get yourself the perfect texture for your ceilings. How Can I Remove Old Ceiling Textures Safely? Removing old ceiling textures can be a big job, but it doesn’t have to be intimidating! If you want to update your ceiling and get rid of that outdated texture, I’m here to help. No matter if you have popcorn, stipple, or another type of texture, this process takes a little bit of care, but don’t worry! Here’s a step-by-step guide on how to remove an old ceiling texture without breaking your back or the bank. Step 1: Test For Asbestos Before you get out any tools…safety first!  Remember, many older ceilings (especially those with popcorn texture installed prior to 1980) contain asbestos. Before doing anything else, have your ceiling tested for asbestos. You can hire a pro to test the ceiling or buy a self-test kit. If asbestos is present, halt all work and consult pros immediately. Asbestos removal is not a do-it-yourself job because it poses serious health risks if mishandled. Step 2: Clear The Room If there’s no asbestos present, it’s time to get the room ready. Cover all the furniture. You’d be amazed at how far a fine mist of water, compound, and paint can travel! Also, plastic should be removed from the floors, and tape should be around any ceiling fans or lights that are not being removed. I can personally tell you we didn’t do this. We found dried white dust on our bedspread when we were stripping the wallpaper in our bedroom, and we had to clean up all the residual dust a little too late. It was wild! Step 3: Soften The Texture For Better Finish Here’s where the fun starts! To make that texture easier to remove, you’ll need to soften it. Fill a spray bottle with warm water and mist the ceiling. You don’t want to drench it. If you put too much water on the ceiling, it could end up damaging the drywall underneath. Allow the water to sit for about 15–20 minutes or so, giving it time to penetrate and loosen up that texture material. Don’t rush this step. It’ll only cause more work for you in the long run. Step 4: Clean Your Work Grab a wide putty knife or scraper and start scraping off the texture. Do small sections at a time, and scrape at a shallow angle so that you don’t gouge the drywall underneath. If it’s not coming off well, spray some more with the water bottle and let it sit for a little longer. This step can be kind of messy and time-consuming, but have patience because, in the end, you will have a nice smooth ceiling. Step 5: Patch & Sand Once the texture is gone, you may notice a few dings or dents in the ceiling. Don’t worry! Just fill them with some joint compound, sand it smooth, wipe away any dust and you’re ready for a new ceiling. And that’s it! A fresh, smooth ceiling in no time! Read Also: Here’s How to Turn Your Garage into a Bedroom on a Budget! Turn your attic into a living space

READ MOREDetails