Published on: 06 September 2019
Last Updated on: 20 July 2024
Most people probably believe that parties would never be complete without music. They have a point. Music helps create the right atmosphere for people to let loose.
Creating a fun party atmosphere can be challenging at times. This is the reason why DJs are hired since they are experts in creating a more vibrant environment during parties. In doing so, they have been getting help from synthesizers, such as the Serum synth plug-ins.
As a Serum user, have you already maximized your unit? Do you know that there are several ways to optimize your synth?
Here is a rundown of some of the most important shortcut keys that may excite you, and it does not matter whether you are a professional DJ or not:
Modulation Depth. If you want to change the depth of your Serum’s modulation, you can hold the “Alt” button then click-and-drag the knob. This will help you in improving the modulation depth easier and faster.
Parameter Assignment. Assigning an LFO or envelope to a parameter can be done more quickly by dragging the modulation source button then dropping it into a specific parameter.
Getting Help. If you have some difficulties setting up your Serum, you can quickly get help by hovering your mouse over a parameter. Doing so will give you a dialogue box that describes how it works.
Oscillator Replication. Copying an oscillator from one point to another manually can be tiring. To avoid this, you may copy A to B and vice versa through the Menu button. This can be found on your selected preset, particularly on the right portion.
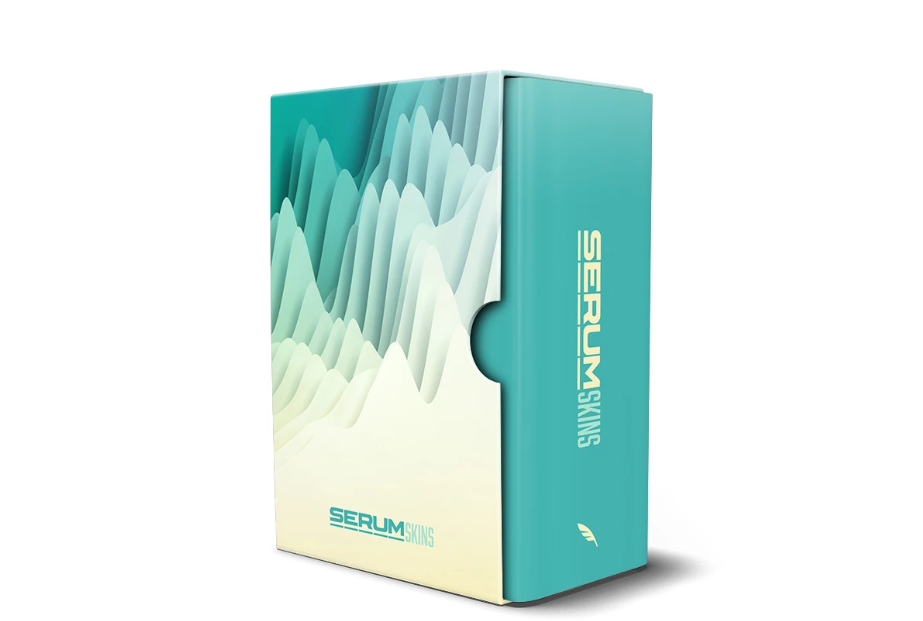
In the meantime, you can put more oomph to your Serum synth’s appearance by incorporating skins. These serum skins are available in different designs that you can choose according to your preference. Here is how you can install it:
Download your selected serum skins in.ZIP folder then extract it.
Open Serum’s latest version in the DAW.
Choose the “Show Serum Presets Folder” in the dropdown menu then look for the “Skins” folder.
Locate the unzipped folder of the downloaded serum skins. Transfer it to the “Skins” folder by dragging.
Go back to Serum and click on the “Rescan folders on disk” in the dropdown menu.
On the top left portion of your Serum, locate the Serum logo, click on it.
Click “Skins” then choose the skin you want to use.
This is how easy it is to install the serum skins.
To know more about this product, you can look for a reliable provider near your area.
According to IBIS World, the musical instrument industry has been steadily growing at 1.2 percent from 2014 until 2018. The report further revealed that the sale of musical instruments recorded total revenue of $6 billion in 2018.
The business research group noted that amid the projected continuous increase, the industry might need to contend with the stiff import competition.
I enjoy writing and I write quality guest posts on topics of my interest and passion. I have been doing this since my college days. My special interests are in health, fitness, food and following the latest trends in these areas. I am an editor at Content Rally.
Hey there, beautiful! Are you tired of the never-ending battle with razors, painful plucking, and those annoying ingrown hairs? Well, it's time to remove those old-school hair removal methods and jump on the laser hair removal bandwagon. Trust me, it's a game-changer.
Today, we will spill the beans on why you should ditch the shave-and-pluck routine and embrace the beauty of a laser hair removal service.
The Never-ending Struggle
Let's face it: shaving and plucking can be a real pain in the, well, you know where. Not only is it time-consuming, but it's also a temporary solution to a problem that never seems to go away. One day, you're smooth as a baby's bottom, and the next, it feels like you've got a five o'clock shadow. Talk about frustrating!
But fear not, my friend, because laser hair removal is here to save the day. Imagine saying goodbye to the constant battle with razors and tweezers and hello to smooth, hair-free skin that lasts longer than your latest Netflix binge.
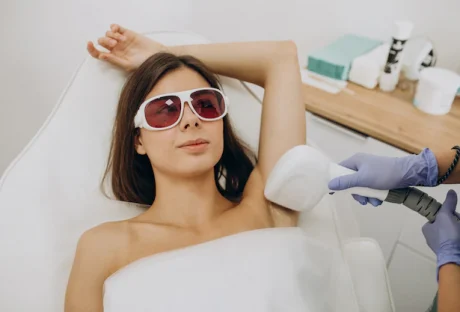
The Lowdown on Laser Hair Removal
So, what's the buzz about laser hair removal? It's a revolutionary method that uses laser beams to zap those pesky hair follicles, preventing them from growing back. It sounds like something out of a sci-fi movie. But trust me, it's real, and it's fantastic.
Here's how it works: the laser targets the pigment in your hair follicles, heating them and destroying the root. No root, no hair. It's like magic, but better. And the best part? It's not just for one specific area; laser hair removal can be done anywhere you have unwanted hair – legs, underarms, bikini line, you name it!
The Beauty of Time-Saving
Let's talk about time, honey. We all know how precious it is, and who wants to spend it constantly shaving or plucking? You can say goodbye to those daily or weekly rituals with laser hair removal. It's a more permanent solution that frees up your schedule for brunch dates, Netflix marathons, or perfecting your TikTok dance routine.
Sure, the initial laser sessions might take some time, but think of it as an investment in your future self. Once those sessions are done, you'll be strutting your stuff with smooth, hair-free confidence, and you won't have to worry about scheduling shaving sessions ever again. Now, that's what I call a win-win.
Adios, Ingrown Hairs
Let's talk about the bane of many beauty routines – ingrown hairs. Those pesky little bumps seem to pop up at the worst times, creating a visual eyesore and an uncomfortable, itchy situation. If you're tired of dealing with the aftermath of shaving and plucking, laser hair removal might just be the solution you've been searching for.
When you opt for laser hair removal, you're bidding farewell to visible hair and taking a stand against the potential for ingrown hairs. Here's the deal: the laser targets the hair follicles at the root, preventing them from growing back and, in turn, minimizing the likelihood of those irritating ingrown hairs. It's like a double whammy of smoothness and comfort, and who wouldn't want that?
Imagine a life where you no longer have to endure the discomfort of ingrown hairs or spend extra time and money on products claiming to soothe these skin nuisances. With laser hair removal, you're not just saying goodbye to unwanted hair; you're also saying goodbye to the itchy, bumpy blues often accompanying traditional hair removal methods.
Related: How To Spot Hair Loss Early
Cost-Effective in the Long Run
I can almost hear your thoughts: "But isn't laser hair removal expensive?" Well, my friend, let's break it down. The upfront cost may seem steep compared to a pack of disposable razors but consider the long-term savings.
Consider all the money you spend on razors, shaving cream, waxing appointments, and whatever else you use to keep those hairs at bay. Now, imagine ending those expenses and investing in a more permanent solution. In the grand scheme, laser hair removal is a cost-effective choice that saves you money from the hassle of constant upkeep.
Safety First
I can't stress this enough – safety should always be a top priority. The beauty of laser hair removal is that it's a safe and FDA-approved procedure when done by a certified professional. No more nicks, cuts, or accidental razor slips that leave you resembling a plucked chicken.
Sure, there might be a slight sensation during the laser sessions – some describe it as a gentle snapping of a rubber band against the skin – but paying for the long-lasting results is a small price. Plus, the pros know how to tailor the treatment to your skin type and hair color, ensuring a safe and effective experience.
The Confidence Boost
Let's talk about confidence, shall we? There's something undeniably empowering about not worrying about stubble, stray hairs, or the constant need for touch-ups. Laser hair removal allows you to feel confident in your skin, no matter the occasion. Whether you're hitting the beach, attending a special event, or just going about your daily routine, the confidence that comes with silky-smooth skin is a game-changer.
Say goodbye to the stress of last-minute shaving emergencies and hello to spontaneity. No more canceling plans because you forgot to shave or to feel self-conscious about visible hair. Laser hair removal allows you to embrace natural beauty, boosting your self-esteem and letting your inner confidence shine.
And let's remember the joy of waking up daily with effortlessly smooth skin. It's a confidence boost beyond the surface – about feeling comfortable and content in your body. Laser hair removal isn't just a beauty treatment; it's a confidence investment that pays off every time you step out into the world with the assurance that you look and feel your best.
Conclusion
So there you have it, beautiful – the lowdown on why you should kick those razors and tweezers to the curb and embrace the wonders of laser hair removal. It's time to say goodbye to the never-ending struggle, the time-consuming rituals, and the constant battle with ingrown hairs. Say hello to smooth, long-lasting results, and reclaim your time and confidence.
Read Also:
The Ultimate Guide To Choosing A Professional Laser Hair Removal Machine
From Flint to Lasers – The Evolving Techniques of Hair Removal
What To Know About Laser Hair Removal Utica NY
Dore Aesthetics is a one-stop solution for men and women who are struggling to restore the lost beauty of their face and body. Utilizing the best technology and industry treatment procedure, Dore Aesthetics has to offer a wide range of services with proven results.--Since in the end, we want to have something that's reliable, and that works. Domains such as clearawayacne.com provide you with answers that will aid both you and your skin, helping you regain your self-esteem back. It's important to see yourself as a person beneath the acne, as you regularly engage in treating it. Acne has now become a major problem which needs to be cured with safe and proven techniques. As there are trained professionals to cure all of your skin related problems, each of the treatment process is according to the best medical standards. So, if you are tired of using cosmetics and supplements to cure your unwanted face acne, Dore Aesthetics surely has to offer result-oriented treatment packages.
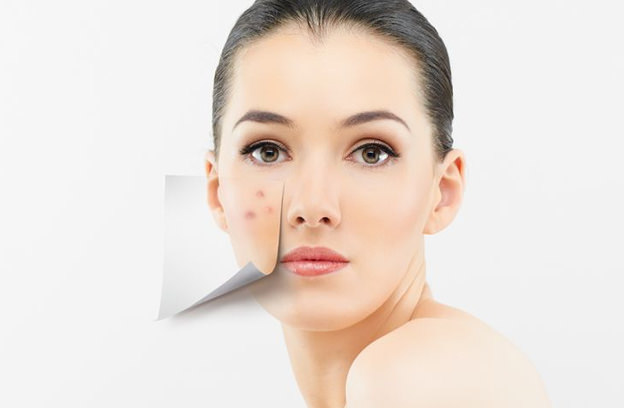
How does Acne destroy your face skin?
Acne is a result of deployed hair follicles which are surrounded by oil, dead skin cells and dirt. As they combine to clog the pores and create pimples over the skin surface, you might also notice redness and dark spots on your face. There are multiple treatment procedures available to cure acne for which you need to get a detailed analysis of your skin surface. Moderate acne such as blackheads can be treated by using simple cosmetics and medications whereas complex types such as cystic need more attention. If you wish to minimize acne blemishes as a sign of aging, how about trying a non-invasive procedure like cryo t-shock facelift in Dubai first?
Treatment procedure at Dore Aesthetics
By properly searching and implementing the most useful approaches in order to permanently cure acne, Dore Aesthetics offers state of the art services for its customers which deliver proven results. As each procedure is safe and long-lasting, customers do not have to follow any extensive medications or treatments to finish skin acne. Starting with the first step, the revolutionary acne treatment technology introduced by Dore Aesthetics begins with shrinking your oil glands. This can unclog your pores and finish acne bacteria to reach deeper areas of the damaged skin surface.
When the bacteria are killed properly, the dead skin cells are removed which cause the inflamed pimples to dry up rapidly. Moreover, it will also permanently eliminate redness and swelling which is caused due to prolonged acne. After all of the pimples are permanently healed, your skin surface will start to gain freshness and smoothness resulting in fewer whiteheads, blackheads and clogged pores. As the whole procedure is medically safe and secure, you surely do not have to worry about any side effects.
Quick Results
As a whole of the treatment, the procedure is planned at first, each step is supposed to kill acne and restore the sensitivity of your skin. Usually, customers start to notice visible results within the early 3 weeks from the start of the treatment. Moreover, further improvements continue for each session if you properly follow the methods as advised by our experts. Unlike conventional acne treatment methods, our approaches are absolutely painless and cause no scarring or itching in the future. Once the whole of the procedure is complete, you can carry on with your routine activities without any hassle.
Summary
Dore Aesthetics has to offer proven acne treatment procedures which are by far the best you can have in Singapore. With the support of professional and trained workers, men and women of different skin types can avail amazing treatments without the risk of any side effects. As all of our approaches are result-oriented, you can start to notice visible results within the first 3 weeks of your treatment. So, if you are determined to cure skin acne and restore the lost beauty of your skin, Dore Aesthetics is absolutely the best option to be considered.
Read More:
Top 4 Natural Combination For You To Eliminate Blackheads (Infographics)
The Selfie Culture: Should We Be Worried?
9 Magical Benefits Of A Vegetarian Diet
6 Imbalances In Body Hampering Weight Loss Efforts
Anti Aging Creams – What To Consider Before You Purchase?
What To Know About Laser Hair Removal Utica NY
If you’re tired of managing your body hair and you’ve been thinking of ways to permanently remove them, then laser hair removal may be the best option for you. This method can get rid of the fast and thick growing hair you’ve been struggling with. Continue reading this to know all about laser hair removal.
1. How does it work?
In the cycle of hair growth, each follicle will have its own cycle, which means that each one of them will not grow at the same time and speed. Laser hair removal targets the follicles when they’re just about to start the anagen phase, which is the active growth phase where the root of the hair is rapidly growing.
Laser hair removal completely eradicates the follicle and effectively stops hair growth. The treatment can take several sessions, which are spaced out between four and six weeks to achieve the desired results. Laser hair removal treatments are considered cosmetic procedures that are strictly regulated by the state. Thus, you should make sure that you book a treatment at a licensed cosmetic facility with qualified technicians and the Food and Drug Administration (FDA) approved equipment. If you’re wondering where to find such a facility, then visit the website https://aesyracuse.com for more information.
2. What are the three main types of lasers?
Here are some of the most popular types of lasers used in hair removal treatments:
Alexandrite: One of the fastest types of lasers, which are commonly used to treat larger areas of the body and patients with light complexions.
Diode: This type of laser is effective for both light and dark complexions.
Nd: YAG (Neodymium-doped Yttrium Aluminum Garnet): This type utilizes long pulse lasers that are safe for all skin types. However, it’s less effective in patients with fine or light hair.
3. Which areas does laser hair removal work best?
Although the treatment can be done on any part of the body where you want to remove hair from, it’s particularly effective on parts such as:
Underarms
Chin
Lip
Bikini area
4. Is it safe for someone under medication?
As with most skin care treatments, the intake of certain medications should be stopped. In the case of laser hair removal, photosensitive medications must be discontinued one week before treatment. For example, if you’re under antibiotic medication for an infection, it might be best for you to reschedule your treatment as most antibiotics are photosensitive.
Additionally, you should avoid using skin care products that have strong, active ingredients such as alpha hydroxy acids and retinoids. These ingredients will increase your skin cell turnover and will make your skin vulnerable to irritation. It’s best to consult your doctor first and ask if your current medication can have adverse effects on your treatment.
5. How many treatments will you need?
The number of treatments required will vary for each individual, as factors such as skin complexion and hair color can affect the effectiveness of the treatment. Laser hair removal treatments work best when your hair is still in its anagen phase, and different parts of your body will have different hair growth rates. This means that treatment can be shorter or longer depending on which body part, and it can average from six to eight treatments.
6. Should you attend all the sessions?
It is essential that you complete all the treatment sessions as per your doctor’s advice. Don’t be under the impression that once your hair growth slows down, further treatments will not be necessary, as this can negatively impact the effectiveness of the laser hair removal.
7. Will it be painful?
Laser hair removal is practically painless, as most treatments will include numbing of the skin for added comfort. However, patients will still feel a warm and light pinching.
8. Will your monthly period affect the treatment?
Unlike waxing, your monthly period will not have any adverse effects on laser hair removal. Keep in mind that treatment schedules should be strictly followed for it to be effective. However, if you’re treating your bikini area while on your period, it’s advisable that you use a tampon.
9. Should you shave before the appointment?
Shaving the area that you want to treat before the treatment is necessary for the laser to penetrate the roots of your hair. However, you should avoid waxing, tweezing, and bleaching your hair at least a month before treatment.
Closing thoughts:
Now that you’ve read most of the things you should know about laser hair removal, you should be all set and ready for your first treatment session. Also, keep in mind that you should find a doctor that you’re comfortable working with to make your experience even better and to get the best results out of your treatment.
Read Also:
Top 7 Superfoods For Healthy Skin And Hair
Dore Aesthetics: Proven And Safe Acne Treatment