Published on: 25 August 2017
Last Updated on: 16 August 2019
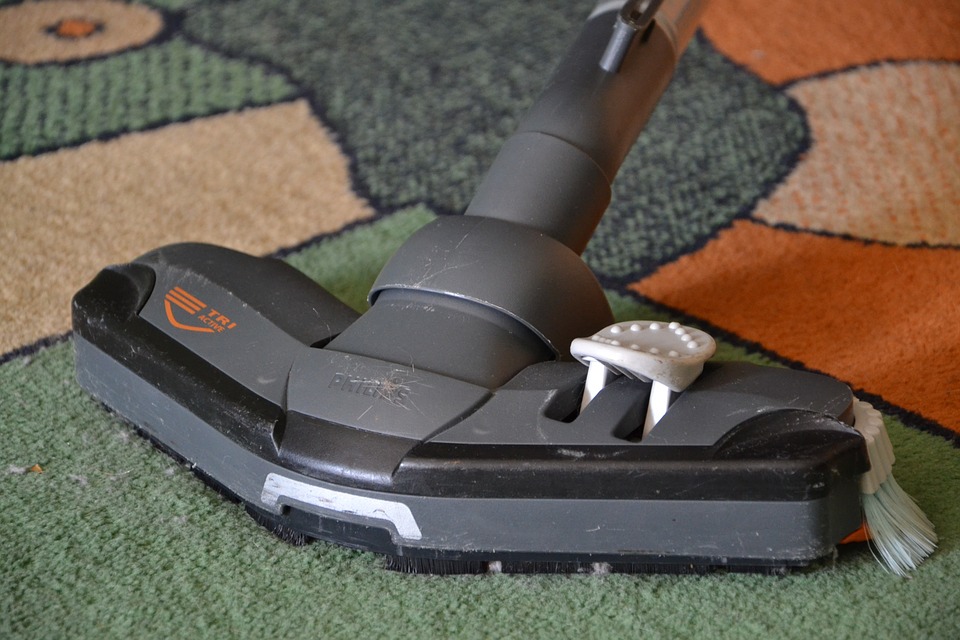
Have you tried deep cleaning your carpets such as using solutions in order to remove stains? Vacuuming is fairly easy and anybody can do it. But with the complexity of cleaning your rugs, the dirt, stains, and all that, leaving it to a professional is better. You do not know what lurks under those rugs.
Why do you need to hire a professional cleaner?
The who are specialists in many types of fibers. They know the type of cleaning material to use for any type of fiber. Their technician will simply have to inspect the rug to be treated and teach you ways to prolong the life of your rug.
Cleaning your carpet and rugs by yourself is time-consuming. It might even result in a disaster if you do not know what you are doing. By hiring a professional to do the work, you can save a lot of time.
Whenever you hire professionals, they will also be the ones to move the furniture and put them back. This is also another convenience because you do not have to do the moving. It can be quite exhausting.
Extend Your Rug’s Life
A rug cleaning in Dallas, when done by professionals, can extend the life of your carpets and rugs. With regular cleaning, your rugs will look as good as new.
A professional cleaner will always perform a better job than hiring an amateur without so much experience. You can expect that every inch and fiber of your rug will be cleaned without damaging them.
Preserve Indoor Air
Rugs and carpets trap a lot of bacteria that you are not aware of. These can pollute your house and might cause allergies. Regular cleaning will prevent the growth of bacteria and allergens that can make you sick. By maintaining clean rugs, you will also preserve a dirt-free surrounding.
Feeling Clean and Comfy
Have you ever felt good walking into a house that is clean? Chances are, you know the feeling of a newly cleaned house. This is pretty much the same when you have a newly cleaned rug. There is that smell of freshness and your rug feels good on your bare feet.
Certification
Professionally trained cleaners are certified in all types of fibers. They know how to clean your rugs and spot any other necessary treatments to prolong the life of the rugs.
While it is true that professional rug cleaners cost more than an amateur, DIY or rentals, in the long run, you are still able to save more. A professional cleaner knows what to do with dirty and stained rugs. They know the chemicals to use without damaging the rug. They are also equipped with the necessary tools and cleaning solutions that are effective than those found in stores.
You can be sure that with professionals, your rugs will not get destroyed as opposed to doing everything yourself and not knowing the precautions on the use of chemicals.
Content Rally wrapped around an online publication where you can publish your own intellectuals. It is a publishing platform designed to make great stories by content creators. This is your era, your place to be online. So come forward share your views, thoughts and ideas via Content Rally.
In the realm of property ownership, maintaining the health of your roof is paramount. Aerial roof inspections emerge as a game-changer, providing a unique perspective that goes beyond traditional methods.
In this comprehensive guide, we will be discussing what aerial roof inspection is all about and how it benefits. So, what are we waiting for?
Let's delve into the world of aerial inspections and discover how they can revolutionize your roof maintenance routine.
What Is Aerial Roof Inspection?
Automated aerial systems or vehicles that work remotely generally do not need human intervention. But, most often, the inspector has to take control of his devices to ensure safety. With the advancement of technology, aerial roof inspection came into being.
The drone is helpful in reducing risks because it provides a 360-degree view of the roofs. Moreover, it can trace even the smallest faults at the earliest. In the next section of the article, we will be discovering the advantages of inspecting roofs aerially.
How Does A Typical Aerial Roof Inspection Process Look Like?
A general roof inspection is a bit different. Here, the contractors and building professionals make use of off-the-shelf drones accompanied by software applications. Other steps included in the roof inspection procedure are as follows:
The pilot, operator, or estimator uses the application to make a flight plan. It is possible to do this either on-site or within the workplace. Furthermore, it includes building address specifications and defining the roof’s perimeter.
After the plan is ready, the pilot confirms the proper order of everything. They make use of the mobile app or controller to control and launch the drone.
Next, the drone follows the path automatically along with collecting images and other relevant information. This basically depends on the inspection’s cause and the sensors.
After 10 minutes, the drone automatically lands as per the program and transfers the data to other devices.
What Are The Benefits Of Aerial Roof Inspection?
Roof inspection plays a critical role in ensuring the longevity and durability of your house. Conventionally, these inspections are a bit expensive. But even after the price factor, there are some advantages of aerial roof inspection. Check them out here:
Unlocking Precision with Aerial Insights
Aerial roof inspections leverage cutting-edge technology to scrutinize every inch of yourroof with unmatched precision. Drones equipped with high-resolution cameras soarabove, capturing detailed imagery that might be easily missed during groundinspections. This method ensures a thorough examination, leaving no room foroversight.
Bolstering Structural Integrity
One of the key advantages of aerial roof inspections is their ability to detect structural vulnerabilities early on. By identifying potential issues such as cracks, leaks, or weakened areas, proactive measures can be taken to address these concerns promptly. This not only safeguards your property but also prevents costly repairs down the line.
Time and Cost-Efficiency at Its Finest
Traditional roof inspections often involve time-consuming processes and extensivemanpower. Aerial inspections, on the other hand, streamline this operation. The swift deployment of drones reduces the time required for a comprehensive assessment, translating to cost savings for property owners.
Embracing Sustainability in Maintenance Practices
In an era where sustainability is paramount, aerial roof inspections align seamlesslywith eco-friendly practices. The minimized need for physical access to the roof reducesthe carbon footprint associated with maintenance activities. Property owners cancontribute to environmental conservation while ensuring the longevity of their roofs.
Supporting Innovation and Progress
As we navigate the realms of modern technology, embracing innovative solutionsbecomes imperative. Aerial roof inspections showcase a commitment to progress andefficiency in property maintenance. Property owners adopting this method not onlyenhance their roof health but also position themselves at the forefront oftechnological advancements in the real estate landscape.
Transitioning to Aerial Excellence
In conclusion, aerial roof inspections stand as a beacon of progress in the realm ofproperty maintenance. From precision to efficiency and sustainability, this method ticksall the boxes for an optimal roof care strategy.
Elevate your roof asset management by embracing the power of aerial insights – your roof deserves nothing less. Remember, a well-maintained roof is not just an investment in your property; it's aninvestment in peace of mind.
Read Also:
How Often Do You Need A Roof Inspection?
Choosing A Siding And Roofing Companies In Delaware
Why You Must Use A Residential Roofing Company For Your Home
The global housing market is reportedly shifting. Now, some of the most luxurious homes around the world are being sold at a fraction of what they cost a few years ago.
While it may be the dawning of a worldwide seller's market, there are plenty of expensive homes exceeding the average buyer's price range.
Even if you can't fork over mega-millions for a mansion of your own, it's fun to imagine what it might be like to live in the world's most luxurious residences.
Amazing Abodes: 10 Stunning Homes Around the World
Read on for an inside peek at ten of the world's most stunning abodes!
1. Beverly House, Beverly Hills, California:
The Beverly House is within walking distance of the iconic Sunset Boulevard and has been in many major motion pictures. It appeared on-screen in major box-office hits, such as "The Godfather" and "The Bodyguard".
Designed by the famous architect, Gordon Kaufman, the Beverly House is on the market for a cool $135 million dollars. But, if you don't want to commit to a mortgage, you can rent the star-studded digs for a mere $600,000 dollars a month.
If you're looking to move out west, you could always sell your home to Otranto Real Estate. It won't get you $135 million, but it's a start, right?
2. Luxury Italian Villa, Otranto, Italy:
This luxury Italian villa has stood the test of time since its construction, which dates back to 1840. Perched on the coast, overlooking the sandy shores, and full of charming courtyards and gardens, this one-of-a-kind 16-room property is breathtaking, even in pictures.
It's currently for sale, but the price isn't open to the public. The price tag on this stunning display of Italian architecture is available by application only.
3. Buckingham Palace, London - One Of The Most Famous Homes Around The World:
It's easy to see why this royal beauty is fit for a queen.
As the home of Queen Elizabeth, there's no chance of buying this castle for yourself. But, you can visit and tour the castle's grounds. Buckingham Palace is open to the public during specific times throughout the year.
It's unlikely that you will get around to viewing all 775 rooms. But, many of the staterooms are available for viewing and they are every bit as glorious as you might imagine. In fact, every inch of Her Majesty's royal homestead is worth the price you will pay for admission to the royal grounds.
While you're there, make sure that you swing by Windsor Castle, which marks 900 years of royal architecture. If you want to see the actual home of the Queen, you will want to head to Edinburgh where you can visit the Palace of Holyroodhouse. Both are open to visitors all year.
4. Antilla, Mumbai, India:
The Antilla is a 27-story skyscraper that's owned by the fifth richest man in the world.
Mukesh Ambani, the world-famous billionaire, had the luxurious tower built for his own private use. His wife visited New York and fell in love with Asian interior design, causing him to design the tower for her.
Antilla is the world's largest and most extravagant residential property. The home cost the businessman around $2 billion dollars.
5. The Playboy Mansion, Beverly Hills, California:
It's not the original Playboy Mansion, which was in Chicago, but Hugh Hefner's final party house is bigger and better than the first.
Hefner, known for his partying lifestyle and hosting exclusive soirees, placed his mansion on the market for $200 million. However, the deal included a caveat that he would be able to use the address to party until he passed.
Eventually, the Playboy Mansion sold for half of the original asking price. The Greek millionaire who owns Hostess, the brand that makes Twinkies dessert cakes, bought the home.
6. Fleur de Lys Mansion, Los Angeles, California:
The former home of Mariah Carey recently sold for $102 million dollars, paid in cash by an anonymous buyer. Its spread includes 12 bedrooms and 15 bathrooms. There's also a 3,000 square foot wine cellar, tasting room, two-story library, expansive ballroom, swimming pool, tennis courts, and a spa.
The Fleur de Lys Mansion, built in 2002, modeled the French castle known as the Palace of Versaille, which had been the most decadent home of its time. The Palace of Versaille was the home of Marie Antoinette, who became famous for her narrow-minded extravagance.
Supposedly, a crowd of peasants once stood in arms outside of her palace complaining that they hadn't even a crumb of bread to eat. The wealthy Mademoiselle supposedly responded "Let them eat cake", even though we now know that isn't accurate.
The socialite's supposed response, absurd to those hearing it, has defined Antoinette as one of the most out of touch characters to ever grace the pages of history books.
The quote is still cited when referring to the overwhelming differences in thought between social classes.
7. Xanadu 2.0, Medina, Washington:
Owners Bill and Melinda Gates built their sprawling Washington home with many cutting-edge features. As the mastermind behind one of the century's most notable companies, Gates created the tucked away abode to match his tech-savvy image.
A few of the unique amenities of Xanadu 2.0 include an underwater music system, a separately-housed swimming pool, and a trampoline park with 20-foot ceilings.
The 66,000 square foot home has 24 bathrooms in all, 10 of which are full baths.
In addition, it also has 6 kitchens, male and female locker rooms, a sauna, and a 2,300 square foot reception hall. The reception hall has a wall-to-wall limestone fireplace and a massive video screen for entertaining. It can seat up to 150 people or accommodate up to 200 guests if standing.
Also interesting is the home's heating and light system. They are controllable using a pin-passcode that guests can set according to their personal preferences. The house's sheltered design aids in reducing energy usage and regulating temperatures.
Gates also houses his ancient Da Vinci manuscripts here, which he acquired in 1994 for over $30 million dollars at an auction. He can display additional artwork, stored on $150,000 worth of storage devices, via the $80,000 computer screens adorning the walls.
8. Acqua Liana, Florida:
This property's claim to fame is that it holds the title for the world's most luxurious eco-mansion.
The 15,000 square foot home boasts 7 bedrooms, 11 bathrooms, a waterfall spa that's lit with fire, floating sun terraces, and an arched aquarium wet bar. It's almost hard to believe that such extravagant details could also be eco-friendly.
Still, for any doubters, there are plenty of "green" qualities throughout the luxurious homestead. Acqua Linea has superior air quality, $120,000 worth of solar panels, ultra-efficient appliances, and extra LEED features. This helps the eco-mansion to maintain an energy-neutral setting most days.
Its' designer created the home, not only to be sustainable living quarters but also as a work of art. His visits to exotic tropical locations such as Bali and the South American rainforests inspired him.
9. Palazzo Di Amore, Beverly Hills, California:
Jeff Greene, an LA real-estate mogul, owns the Palazzo Di Amore, which is Italian for "Castle of Love". He listed the home for $195 million dollars but has since lowered the asking price by at least $66 million.
The sprawling compound is an entertainment mecca. It features a rotating dance floor, laser light system, and a high-tech DJ booth. There's also a bowling alley, game room, theater, and parking space that can accommodate up to 150 cars at a time. The hard part is getting your friends to come over, it's getting them to leave!
10. Kensington Palace, London:
Valued at $222 million dollars, Kensington Palace sits on one of Britain's most exclusive streets, which also known as London's "Billionaire Row".
When the homeowner, Laski Mittal of India, purchased the 55,000 square foot palace for $128 million dollars, it was the most expensive address on the market. In addition to owning the famous mansion, Mittal also owns the world's largest steel manufacturing company.
Kensington Palace was once home to the de Rothschild family. It's located near the current home of Prince William and Duchess Kate Middleton.
Looking Into Buying a Mansion of Your Own?
If you're interested in purchasing one of the mansions above, you'll be happy to know that several of these properties are currently up for sale. But, there are also plenty of other homes around the world priced for much less in the event you aren't prepared to spend millions (or billions) of dollars.
But, before you invest in any type of real estate, there is some crucial information that you need to know.
Ready to start searching for your own dream home?
Check out this post for a list of essential things to know before buying a new house!
Read Also:
Top 5 Most Expensive Beachfront Homes
Different Types Of Conversions To Make The Most Of Spare Space In Your Homes
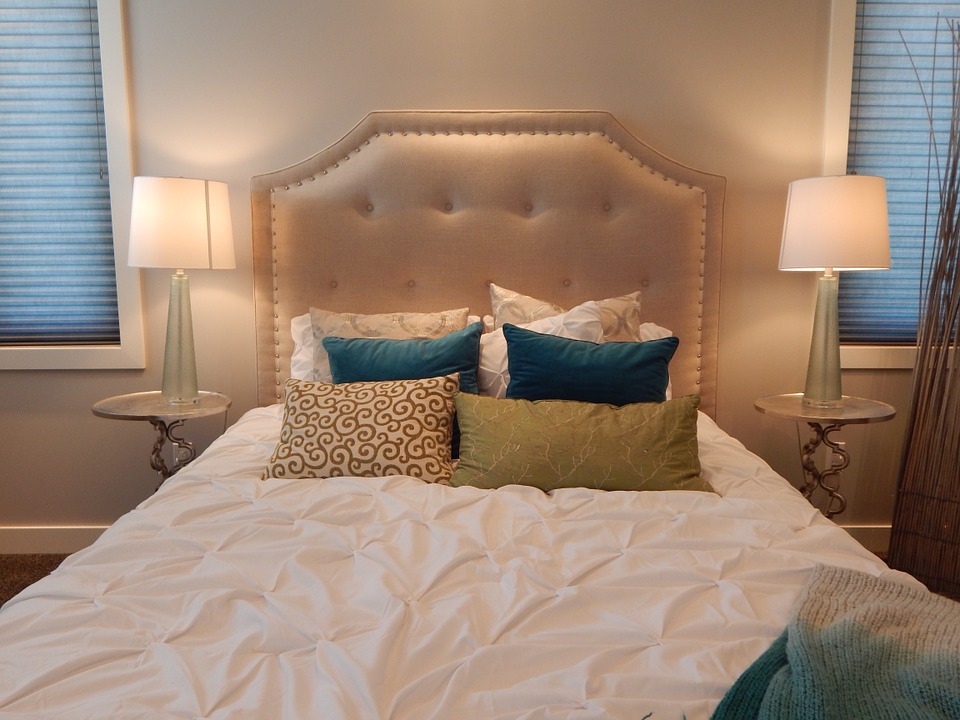
It is highly important to clean your mattress on a regular basis. This is because mattresses could become a breeding ground for dust mites, stains, and bad odor. None of which we would want in our homes. Since we spend about a third of our lives sleeping, it’s only proper that the mattress we’re sleeping on is clean.
But mattress cleaning may prove to be an intimidating task, especially if you do not know what to do. Do you wash it or dry it out? What cleaning agents will you use? Are you using the right cleaning techniques? The questions are endless – and overwhelming, too. After all, no one would want to damage an expensive mattress.
To help you out, we have compiled a few tips to make the mattress cleaning experience a lot less daunting. Read on and find out.
Suck Up the Dirt :
Vacuuming your mattress is perhaps one of the easiest ways available to clean it. It may also be one of the most convenient ways. First remove your pillow top, sheets, pillows, and blankets. After doing so, you may then proceed to vacuum your mattress. This will:
Remove any crumbs that may have accumulated from late-night snacking sessions or from movie marathons.
Take off any pet hair that may have stuck to the mattress after letting your pet sleep in the same bed as you.
Remove any dust that has formed since the last time you took the time to clean your mattress.
Nearly every house would have a vacuum cleaner for general cleaning purposes. If yours does not, then consider getting one, as it is quite a good investment. It makes cleaning not only the rooms of your house a breeze, but it is a big help in cleaning your mattress as well, keeping it as comfortable as possible.
Easy Spot Cleaning :
The next thing you can do to clean your mattress is to spot clean it. The type of stains present on a mattress will vary from person to person. Likewise, the best ways to clean these stains vary as well. Here is a quick list of what you should use when you get an unsightly stain on your mattress:
Water: Water is a safe bet. It is cheap and safe to use on absolutely everything. It is good as an immediate treatment to prevent stains from setting. It also lessens the effect of dyes but is not 100% effective.
Detergents: These can be used for most situations, especially for grease stains. Commonly, people have detergents for laundry and dishwashing at their disposal. You must be careful with the latter, as it could damage the fabric on the mattress.
Salt: This one can be found in almost every household. It is effective in removing sweat or deodorant stains. It is also good in lessening red wine and bloodstains.
Vinegar or Lemon Juice: These two are amazing tools for removing coffee and tea stains. People have also found them effective against grass stains as well as tape and glue residue.
Bleach: Bleach is effective in removing dyes. This means that it is a good bet for make-up and grass stains. This should be used in moderation, as it can damage more delicate mattresses.
People also rely on a combination of hydrogen peroxide, liquid detergent, and baking soda. Simply spray the mixture on a stain and spot clean away. Another easy combination is that of lemon juice and salt. Spread this on a stain and leave it on for at least half an hour. Afterward, just wipe it off.
Remove Foul Odors :
The third step we suggest for the mattress-cleaning process is deodorizing. There are multiple, easy ways for you to do this.
Air Dry: Perhaps the easiest and most convenient way to do when you want to deodorize. Simply leave it in the heat of the sun for a couple of hours. This will remove any foul odors and naturally kill bacteria as well.
Baking Soda: Simply sprinkle this stuff on your mattress and leave it be for a couple of hours. It is a natural deodorizer that also kills germs. After it has done its job, just vacuum off the excess on the mattress.
Lavender: A bit of an extra step, but has proven to be worth it. It does not only remove unwanted odors from your mattress, it also adds a relaxing scent that will help you get a better night’s sleep every night.
While each one of these suggestions is effective in their own right, doing all three would help you achieve better sleep. It may take some more effort on your part, but it will all be worth it.
Clean Your Sheets :
Washing your sheets is another important step in this process. It’s not enough that your mattress is clean; your sheets should be, too. It is always a good idea to clean your sheets regularly as this would prevent stains from seeping through to the mattress. This will also remove unsightly stains and foul odors. Together with a clean mattress, this will help you wake up more relaxed and energized.
When doing this, it is important to remember the following :
The washing machine is your best friend when it comes to washing bulky sheets. A dryer would also help deodorize and kill bacteria with its heat.
Read care labels so that you do not cause damage to your sheets especially on sensitive fabrics. Some detergents are very strong and may actually do more harm than good. Some may even make the stain spread instead of removing it.
It would not hurt to use a scented detergent to wash sheets. Just know how much and which brand to use. As mentioned before, lavender is a good scent for some more peaceful sleep.
It is recommended that sheets be washed at least once a week. If this is not possible, then at least make sure to change them.
Protect Your Mattress :
Lastly, we would recommend you to protect your mattress. A lot of manufacturers offer mattress covers nowadays. They help prevent future stains from getting on the mattress itself. Not only that, some of them even make the bed more comfortable. As an added bonus, they can easily be thrown in the washing machine with the sheets.
And On That Note…
While this task may seem like it is too much, it really is not. This also has a lot more benefits than just removing stains. If you haven’t tried doing it and you’re scared of trying, ask someone who can help you out. Additionally, a wealth of information is available on the internet. Sometimes, the answers to your questions are a mere mouse click away.
Cleaning your mattress on a regular basis is important. This would help keep germs at bay and remove foul odors. This will also increase your mattress’s longevity. Your mattress will keep you comfortable for as long as possible. All of this would lead to you getting a better night’s sleep in the long run.
Take the first step today and you will thank yourself later. You invested quite well on that mattress; make that investment well worth it. Take good care of your mattress and it will take good care of you.
Read More :
Natural ways to get rid of flea in your lawn.
Home Hacks: Stuff You Can Clean in One Hour or Less.