The Top 5 Scuba Diving Locations in Hawaii

Published on: 13 October 2018 Last Updated on: 27 November 2021
Diving

Diving originated as a food collection method for the sea. Divers would practice free diving breathing techniques that allowed them to remain underwater for longer periods. Today, diving has become much more defined because of Hawaii’s diversified sea life, environmental components like volcanic lava-tubes and manmade wrecks that were made for discovery. If you want to experience all that Hawaii offers, you will want to travel between the islands as each offers divers unique experiences with sea creatures, reefs, and corals that continue to captivate.

Best Scuba Diving Locations In Hawaii In 2022  

In this article you w

1. Kauai:

Kauai

Otherwise known as the Garden Island, Kauai is the fourth biggest island in Hawaii. With lots of greenery and towering mountains, the landscapes give way to tropical rainforests and traversing waterways that visitors crave for an authentic Hawaiian vacation getaway. Wondering about Scuba Diving Kauai? Take a trip to the south shore and visit the golden sands of Poipu Beach, Polihale State Park or Tunnels Beach where diving temperatures are between 74 and 80 degrees Fahrenheit year-round. Underwater visibility is around 3,100 feet. As there are strong currents, it is advisable to dive in groups or with a knowledgeable dive guide who knows the area well.

2. Maui:

Maui

Maui is a hot spot for divers who want to enjoy South Maui’s crescent-shaped Molokini Crater which has visibility of 150 feet. If your diving goals include marine life, you will also want to check out Honolua Bay. Some of the top-rated beaches in Maui include Kaanapali Beach, Maluaka Beach, and Kapalua Bay.

3. Kailua Kona:

Kailua Kona

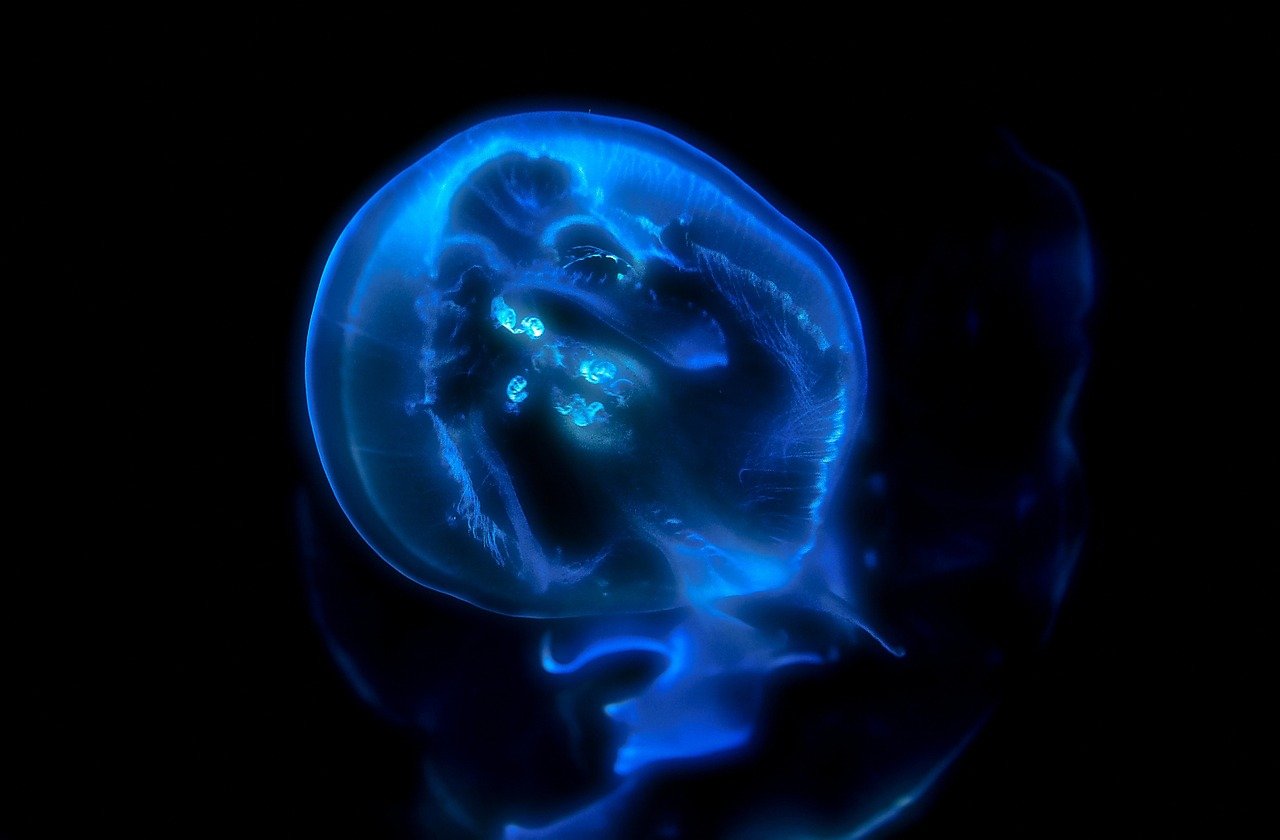
Kailua Kona is located just west of the Big Island and has dozens of dive sites that are ripe for adventure. Most notable is a 400-foot dive site called Blackwater, which lights up at night with a vast number of bioluminescent marine life that makes this dive site a once-in-a-lifetime opportunity. As your safety line is tethered to the dive boat, you can dive easily to 60 feet to avoid many of the dangers of nighttime offshore ocean diving.

4. Lanai:

Lanai

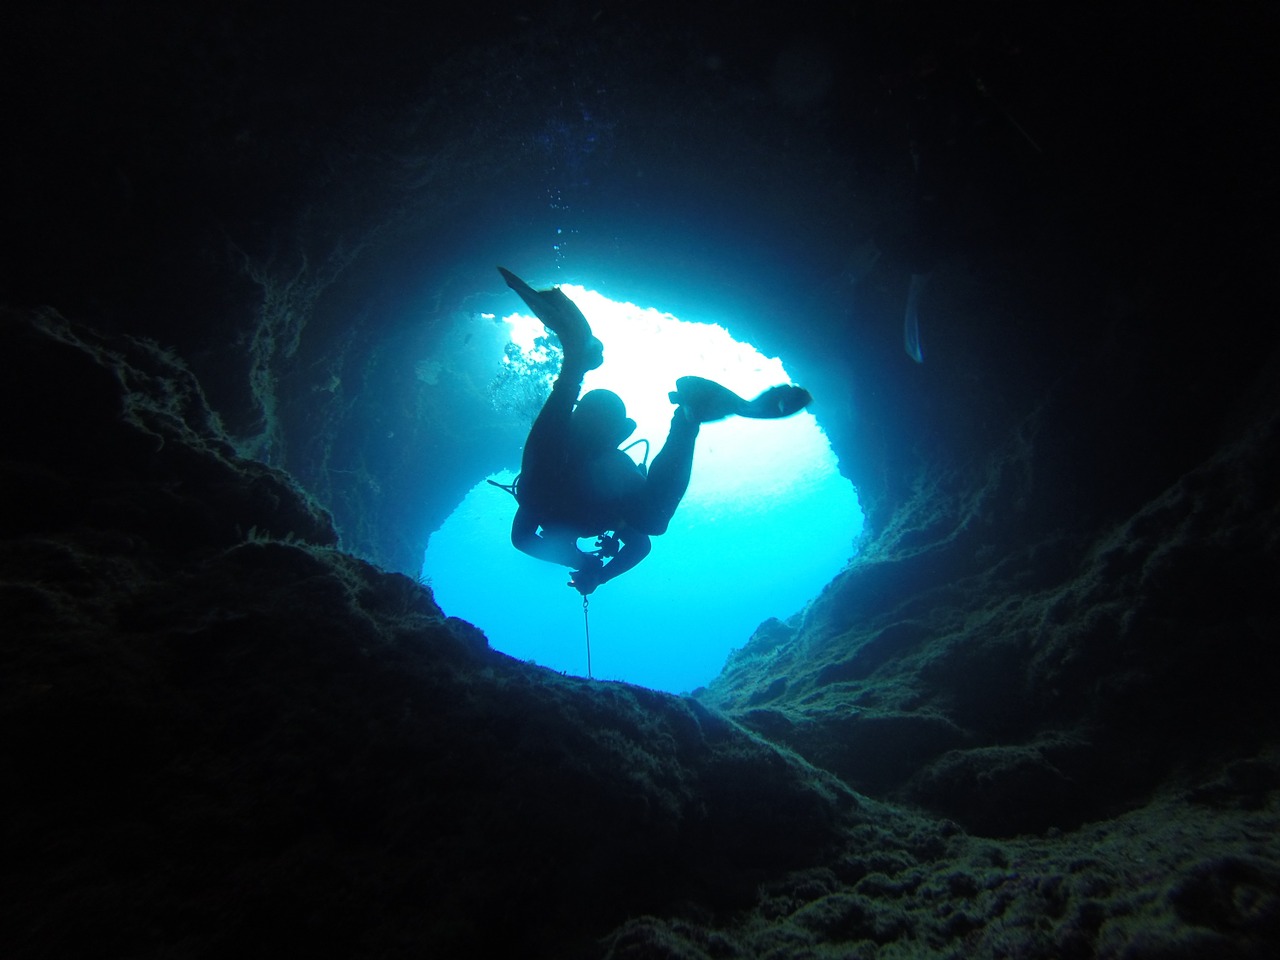
The Hawaiian Island of Lanai is yet another diver’s paradise filled with lava tubes and sea creatures that help to create a truly magnificent underwater experience. Southeast of Hulopoe Bay is one of the most popular local dive spots called First and Second Cathedral. With visibility of 80 to 100 feet, the underwater caverns filled with tunnels make for incredible exploration for both beginner and intermediate divers.

5. Niihau:

Niihau

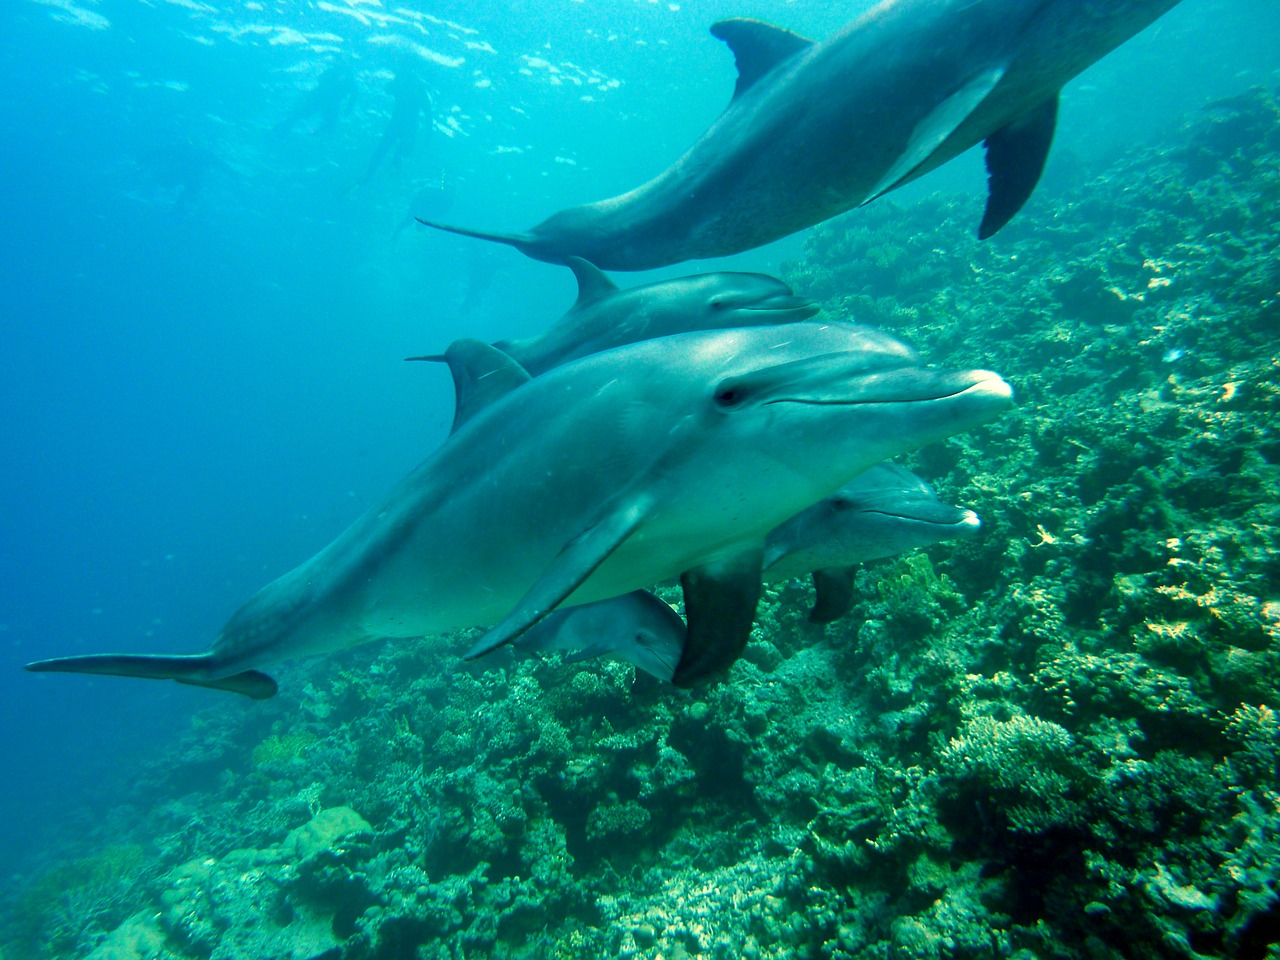
The Forbidden Island is among one of the most beautiful dive spots in Niihau. With mountainous lava formations, underwater caves, and an unbelievable amount of sea life, clear visibility provides you with access to dolphins, manta rays, monk seals, octopus, and reef sharks. With dive sites between 40 and 100 feet, it is an ideal dive site.

The Hawaiian Islands offer year-round diving. It has an abundance of reefs and endless coastline, making it is an ideal environment to hop from one island to the next experiencing designated dive spots. With shallow waters and clear visibility, you have access to the most beautiful underwater landscapes that are found anywhere in the world.

Read Also:

Content Rally wrapped around an online publication where you can publish your own intellectuals. It is a publishing platform designed to make great stories by content creators. This is your era, your place to be online. So come forward share your views, thoughts and ideas via Content Rally.

View all posts

Leave a Reply

Your email address will not be published. Required fields are marked *

Related

how to make cannabis gummies

From Bud To Bite: Crafting Your Own Cannabis Gummy Edibles  

Hello there, fellow cannabis enthusiasts! Today, I'm excited to take you on a flavorful journey into the world of homemade cannabis gummies. If you've ever wanted to try your hand at crafting these delectable treats, you're in the right place. Want to know how to make cannabis gummies? I have you covered! In this blog, I will walk you through the process step by step, from selecting the right strain to infusing your gummies with the perfect dose of cannabis goodness. So, roll up your sleeves (pun intended), and let's get cooking! Before We Dive In: A Word On Cannabis Strains   Choosing the right cannabis strain for your gummies is crucial. Each strain offers a unique flavor profile and effect, so consider what kind of experience you're aiming for. Personally, I like to use a hybrid strain for a balanced blend of relaxation and creativity. Indica strains can be too sedating for some, while sativa strains might make you a bit too chatty. A hybrid is often the sweet spot. How To Make Cannabis Gummies: A Step-By-Step Guide That You Need!   Before we start with the steps, there is one thing I would like to make clear. While making cannabis gummies at home offers numerous benefits, it's essential to approach the process responsibly, especially if you are new to cannabis edibles. Start with lower doses, be patient, and remember to comply with local laws and regulations regarding the preparation and consumption of cannabis-infused products. Now that it is done, let’s get started! Step 1: Gather Your Ingredients And Tools   Before you start whipping up your cannabis-infused gummies, make sure you have everything you need. Here's a list of what you'll require: Cannabis tincture or cannabis-infused oil: This is the star of the show, providing THC or CBD goodness. Flavored gelatin packets: Choose your favorite flavors for a delightful twist. Unflavored gelatin: This will give your gummies the right texture. Sugar: For sweetness, of course! Water: To mix everything together. Silicone molds: These will help shape your gummies. A saucepan and a whisk: To heat and mix your ingredients. A dropper or syringe: For precise dosing. Step 2: Calculate Your Dosage   Getting the dosage right is crucial. We want those gummies to provide a blissful experience, not send us to the moon! Start by determining how much THC or CBD is in your tincture or oil and calculate the dosage per gummy. For beginners, I recommend starting with a lower dose (around 5-10mg) and gradually increasing it as needed. Step 3: Prepare Your Molds   Before you dive into the cooking process, prepare your silicone molds. Lightly coat them with cooking spray to prevent sticking later on. This step will ensure your gummies pop out effortlessly once they're set. Step 4: Mix Your Ingredients   Now, let's get cooking! In your saucepan, combine the flavored gelatin packets, unflavored gelatin, sugar, and water. Stir everything together until it forms a smooth mixture. It should be free of lumps and evenly blended. Step 5: Infuse With Cannabis   This is where the magic happens! Add your cannabis tincture or infused oil to the mixture. The dosage you calculated earlier will guide you here. Use a whisk to ensure the cannabis is evenly distributed throughout the mixture. Keep the heat low to avoid overheating the cannabis, which could affect its potency. Step 6: Heat And Stir   Place your saucepan over low heat and continue to stir. You want to gently heat the mixture without boiling it. Keep stirring until all the ingredients are fully combined, and the mixture becomes smooth and shiny. This should take about 7-10 minutes. Step 7: Fill Your Molds   Once your mixture is ready, use your dropper or syringe to fill the silicone molds. Take your time and be as precise as possible. This will ensure that each gummy has the correct dosage, and they'll all look fantastic! Step 8: Let Them Set   Patience is key at this stage. Allow your cannabis gummies to set at room temperature for at least 30 minutes. You can speed up the process by placing them in the refrigerator, but be careful not to freeze them. Step 9: Pop And Enjoy!   The moment you've been waiting for has arrived! Carefully pop your gummies out of the molds and behold your homemade cannabis-infused creations. Store them in an airtight container in a cool, dark place to maintain their freshness. The Beauty Of Homemade Cannabis Gummies   There's something truly special about crafting your own cannabis gummies. You have full control over the ingredients, flavors, and dosages, ensuring a personalized experience every time. Plus, it's a fun and rewarding process that allows you to experiment with different strains and flavors until you find your perfect match. Now that you've learned the art of making cannabis gummies, the possibilities are endless. Whether you're treating yourself or sharing with friends, these homemade delights are a delightful way to enjoy the benefits of cannabis in a delicious and discreet form. So, go ahead, put on your apron, and let your culinary creativity shine in the world of cannabis-infused treats! Benefits Of Making Cannabis Gummies At Home!   Making cannabis gummies at home offers several benefits, which contribute to their popularity among cannabis enthusiasts. Here are some key advantages: 1. Control Over Ingredients:    When you make cannabis gummies at home, you have full control over the quality of ingredients. You can choose organic, non-GMO, and natural products, ensuring that your gummies are free from undesirable additives or artificial flavors. 2. Customizable Dosage:    One of the most significant advantages is the ability to customize the dosage. You can precisely measure the amount of cannabis you want in each gummy, allowing for consistent and accurate dosing. This is particularly important for medical cannabis users who require specific doses for their conditions. 3. Choice Of Strain:    Homemade gummies let you select the cannabis strain that suits your preferences and desired effects. Whether you want a relaxing Indica or an energizing sativa, you can tailor your gummies to your specific needs. 4. Variety Of Flavors:    You can experiment with an array of flavors, creating gummies that cater to your taste preferences. Whether you prefer fruity, sour, or herbal flavors, you have the freedom to get creative and craft gummies that delight your palate. 5. Cost-Effective:    Making your own cannabis gummies can be more cost-effective than purchasing pre-made edibles. You can buy cannabis flowers or extracts in bulk, which often offers better value for money, and create a substantial quantity of gummies. 6. Quality Control:    Home preparation allows for better quality control. You can ensure the cleanliness of your equipment and environment, reducing the risk of contamination. This is particularly crucial for individuals with allergies or dietary restrictions. 7. Privacy And Discretion:    Crafting your cannabis gummies at home offers privacy and discretion. You can enjoy the therapeutic benefits of cannabis without drawing attention to yourself or your cannabis consumption. 8. Fun And Educational:    The process of making cannabis gummies can be enjoyable and educational. It provides an opportunity to learn about the science of cannabis infusion and cooking techniques. It can be a fun activity to share with friends or loved ones. 9. Experimentation:    Homemade gummies encourage experimentation. You can try different recipes, ratios, and infusion methods until you find the perfect formula that suits your preferences and needs. 10. Longer Shelf Life:    Keep With proper storage, homemade cannabis gummies can have a longer shelf life compared to store-bought edibles. You can keep them fresh for an extended period, allowing you to enjoy them at your own pace. Wrapping It Up!   In case you were searching about how to make cannabis gummies at home, I hope that this blog has been of help to you. If there are any other queries related to the same, feel free to let me know. All that you need to do is scroll down till you reach the bottom of the page, Then leave your comments and queries in the box below. And I will be there to answer them all for you! Learn More About: Why Cannabis Is Good For Health? How To Make Your Own Cannabis Topicals? Things To Consider While Buying CBD Gummies Online Cannabis Can Help In The Fight Against Drug Addiction

READ MOREDetails
Wedding Aisle

A Walk To Remember: Wedding Aisles You Won’t Forget

Considered as one of the highlights of any wedding, the bride’s walk in the aisle is a cherished moment that everybody is looking forward to. It is the part of the ceremony where all eyes will be on you to adore your dress, your makeup, your hair, and even your bouquet. To make the moment even more enchanting, the aisle will serve as your frame and backdrop for the magical scene that is unfolding in front of their eyes. Walking in the aisle only happens once that’s why to Make Happy Memories, a wedding planner in Athens, encourage couples to be specific with the visuals and the vibe of their walkway. With that being said, decorating your aisle according to your objectives is certainly one of the wedding planning components that you shouldn’t take for granted. When it comes to aisle design, it is significant to ensure that the details and elements are aligned to your event’s theme. If you’re planning your destination wedding in Greece, you should clearly and precisely coordinate your ideas to your wedding planner to make your visions even more achievable. Make Happy Memories, a great wedding planner in Athens, offering wedding packages in Greece, suggests that couples should look for ideas on the web and utilize some visual documents (like images) of what they want. This is especially important if you’re planning a destination elopement and all your transactions are online. Achieving your dream wedding is possible as long as you’re specific with every detail such as those that are related to your wedding aisle. To make it easier for you, we have gathered some wedding aisle decoration ideas for a walk that you’ll remember forever. Show these to your planner, okay? 1. Outdoor Rustic: Perfect for countryside-style weddings, this aisle is undoubtedly a sight to behold. The trunks and foliage that are enlacing the aisle highlighted the greeneries that are surrounding this outdoor ceremony. Your guests and your loved ones will surely be in awe when you walk through this captivating pathway. 2. Glowing and Magical: Having an evening or midnight ceremony? Use it as a perfect excuse to splurge on string lights and adorable candle sets! These hanging cierges and caged bougies leave a fairytale atmosphere that is totally Instagram-worthy. Walk down the aisle feeling like you’re surrounded by will o’ wisps by incorporating this candle-lit walkway in your wedding day. 3. Chic and minimalist: Blending well with the neutral tones of this indoor setting, the white and pink bouquet of roses added a pop of colors and a gorgeous touch to this wonderful aisle. Finishing the look, the carpet of petals set a romantic mood to the whole pathway setup. 4. Fresh Textiles: Who says that you can’t hang huge textiles in your ceremony’s main corridor? These soft-looking white chiffons provide a dreamy setup which also acts as a quixotic backdrop for your images. Moreover, the yellow and purple bouquets of flowers add some right amount of colors that bring life to the whole arrangement. And oh, let’s not forget those chandeliers that bring an extra oomph of elegance. 5. Ocean Vibe: If you decided to tie the knot on a beach, you might want to consider incorporating the colors of the sea in your wedding ceremony. Adding a nautical touch to this neutral walkway, the plain tulle and white blue bouquets highlighted the colors of the ocean backdrop that surrounds the area. 6. Flower Cages: This is yet another aisle inspiration that you can incorporate for your beach wedding. Mainly composed of whites, this romantic walkway is a great idea that minimalist couples will like. With the hanging caged flowers and the cream sand as your natural carpet, what more could you ask for? Read Also: Ethnic Wedding Attire: 3 Tips to Wear The Traditional Dhoti-Style Maharashtrian Saree Wedding Photo Album: How To Calculate The Cost? Popular Styles For Punjabi Salwar Suits At Weddings

READ MOREDetails
sympathy flowers etiquette

Sympathy Flowers Etiquette: Everything You Need To Know

While many of us give flowers to celebrate things like birthdays, graduations, and other happy times, flowers can also be given in times of mourning where sympathy is required. This sympathy flower etiquette can be a great way to show you care about someone and are there for them. In the past, sympathy flowers etiquette was the symbol of care and protection. However, you also need to tread lightly; when it comes to delivering sympathy flowers. There are certainly some etiquette-related rules to keep in mind. If you don’t think of these, you could end up offending someone or making the situation worse. To help you with that, this blog post is going to go over everything you need to know about sympathy flowers etiquette. Send The Right Symbolic Flowers As you probably know, there are many different types of flowers out there. They can vary a ton in terms of color, size, and even their scents. However, not all are appropriate for every event and greet with sympathy flowers etiquette.  You need to be sure to choose the right ones. In general, you want to hold off from giving flowers that are too bright and “happy,” like bright red roses or tulips. Bright pinks, purples, and other vibrant choices are often not a good idea, either. Instead, opt for flowers that are a little more muted and pale. They can still be colorful, just not as bright and intense as flowers given during happier occasions, and white is used for sympathy flowers etiquette. Of course, sometimes these rules can be broken, but a pale white or other soft tone is often a safe bet. Also, familiarize yourself with the different meanings behind flowers, as that can help you decide which to give. Some can symbolize hope, sorrow, gratitude, and a variety of other emotions. Oftentimes, the right flower can show off what you are trying to say without you even having to say a word. You may go through Love in the Air with the Beautiful Flowers Include A Hand-Written Note Flowers themselves are nice to give but aren’t all that personal in nature. They can look pretty, but without something a little extra, people may forget who they are from in a matter of hours. Being sympathetic is all about showing your support and being there for someone else. Take the time to write a little message or note on a card and deliver it along with the flowers and for the sympathy flowers etiquette. Leaving this blank is not a good look and can show you didn’t put the time or effort into the gift. As for what you should write on the cards, that is up to you. It should be something that is heartfelt and respectful and should show how much you care. Keep it short, simple and make sure it is sincere and empathetic. Always begin with a few words of condolence and then a little personal anecdote or story relating to the situation or individual. Then, end the letter with some support and encouragement to show you will always be there for them with proper sympathy and etiquette. You may go through Send Flowers to Congratulate your Dear Ones on Their Achievements Faith Can Impact The Role And Importance Of Flowers Another part of sympathy flowers etiquette to keep in mind comes down to the faith or religion of the recipient. Different faiths may have different rules about flowers. Some faiths may see certain flowers in different ways than others, while others may not even see flowers as a sympathetic gift at all. So always be sure to do a bit of research to ensure you are not offensive to their culture or religion. For example, funeral flower etiquette can vary significantly from one faith to another. While they are acceptable in the Roman Catholic faith and can be sent to the wake, the funeral home, or even a house, for a Jewish funeral - flowers are not acceptable. If the recipient and their family are not faithful people, this may not be as important, but it is always a good idea to consider what is appropriate. Also, just because a particular individual isn’t faithful, don’t assume that their family isn’t. Conclusion: Sympathy flowers and the sympathy flowers etiquette can be a kind way to show your support and sympathy to a friend, family member, or co-worker. By keeping this etiquette-related information in mind, you will be able to ensure you can be as respectful and understanding as possible. Read Also: Best 5 Valentine Flowers for Your Special Someone Tips to make a flower bouquet for every occasion

READ MOREDetails