9 Clothes Dryer Maintenance Tips

by

27 December 2019

Home Improvement

Clothes Dryer Maintenance

Taking care of your appliances is the key to saving money, time, and effort. The clothes dryer maintenance is among essential major assistants in your household. While it works, you don’t notice it. When it breaks down, you face a disaster.

The life expectancy of an average dryer is about 13 years. However, the majority of these appliances last much less. The reason is the lack of proper operation and maintenance. It’s not enough to plug the unit in and forget about it. If the only thing you do for your dryer is clean the lint filter, your appliance is likely to demand repair in just a few years.

In this article, we’ll share top clothes dryer maintenance tips to keep your dryer working for as long as possible.

Here are the 9 Clothes Dryer Maintenance Tips:

1. Run Full Loads Only

The more you run your dryer the faster it will give out. It’s as easy as that. Since you are unlikely to limit the number of times you do laundry, you can at least add some efficiency to the process.

By ensuring you only run full loads, you don’t just extend the lifespan of your clothes dryer, you save energy as well. Don’t rush to do laundry when you have free time. Wait until a full load is available.

On the other hand, don’t overload the dryer. In the rush to finish laundry quicker, many homeowners overload washers and dryers. As a result, the motor strains, dryer becomes misbalanced and eventually stops functioning.

2. Opt for Professional Installation

With numerous DIY videos overwhelming the Internet, homeowners often opt for DIY appliance installation to save money. Even though installing a dryer may appear straightforward, it’s not as easy as it sounds.

You may not notice the mistakes you make during the process. They’ll become obvious after several uses. By that time, your dryer could already be damaged.

Proper venting is highly important for a clothes dryer. You would need to select the right material and size for the venting tube and install it properly. Meanwhile, you should make sure the appliance is perfectly balanced. It’s especially important if you are placing it on top of the washer.

3. Clean the Dryer Vent

The dryer vent is the most important part of your appliance. It needs regular maintenance. Ideally, you should hire professional technicians to check and clean the vent at least once a year. However, some owners do it on their own.

Cleaning the vent involves disconnecting it from the dryer. After that, you would need to use a long-handled attachment to ensure penetrability. Special dryer vent cleaning brushes exist to remove clogs.

Be careful about reinstalling the duct properly after the cleaning is done. If you fail to do it, the dryer won’t function. Consider hiring professional dryer vent cleaners to avoid mistakes. According to experts from Jacksonville appliance repair services, if ducts aren’t cleaned regularly, the dryer’s motor can burn out leading to costly repairs.

4. Limit the Number of Dryer Sheets

While dryer sheets are an excellent way to keep your clothes static-free and soft, they aren’t harmless. These products have a wax layer that melts when the dryer heats up. If you use too many of them, the wax settles on the appliance’s interior walls and clogs the venting system and the lint trap.

Removing this layer may be tough. No matter how many dryer sheets you use, it’s important to clean your dryer once a week even if you don’t see any dirt inside. Failure to clean the dryer regularly is the top cause of dryer-related fires in households.

5. Clear the Lint Trap

Lint trap is one of the most important parts of your clothes dryer maintenance tips. Cleaning it regularly is the key to the appliance’s longevity. Wipe the lint filter clean after EACH load. Even if you are planning to do two loads in a row, clean the trap between them.

At least once a week, remove the lint screen and vacuum the trap. You can use a brush to loosen the residue.

Every one or two months, remove the lint filter and soak it in warm soapy water for about an hour or so. This can help remove wax, which appears after using dryer sheets and residue that settles after using a fabric softener.

6. Inspect the Appliance Weekly

A visual inspection of the dryer can help prevent damages. Make sure no moisture is trapped around the door seal. If there is any, wipe it off gently. In fact, you can wipe the door after each load is done to prevent mold formation and bacteria growth.

When checking the appliance, pay special attention to the doors seals. If they are cracked, ripped or damaged, the dryer is struggling to maintain the right temperatures. It may be straining the motor and overusing electricity. Replacing door seals is much easier and cheaper than repairing the motor.

7. Listen to it Work
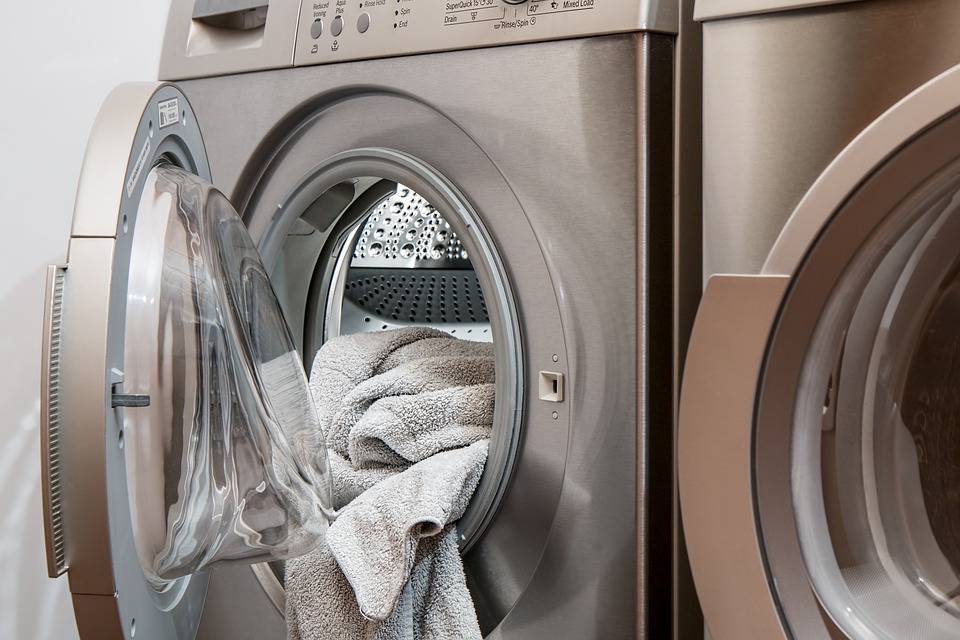
Dryer

One of the first signs of dryer problems is the change in its operating noise. If you hear that something seems off, turn the appliance off immediately and check what’s happening inside. The reason for the change of sound could be overstuffing dryer with clothing or a sleeve caught up in an improperly installed lint trap.

If everything seems to be in order, but the dryer continues to make strange noises, call professional technicians.

8. Check Exterior Vents

Every month or so inspect the exterior vent of your dryer. While the appliance is working, go outside and check if the air is flowing freely through the vent. If something seems wrong, the pipe may be clogged.

If you have a plastic vent, consider replacing it with a metal one. A plastic vent is a fire hazard.

9. Find a Professional Repair Service

Some clothes dryer maintenance tasks require an expert’s assistance. Spend some time looking for a reliable repair service before anything breaks down. Knowing whom to call in case of an emergency could prevent further damage to your dryer.

Start following the above clothes dryer maintenance tips today, and your dryer will serve you for at least a decade.

Read Also:

Content Rally wrapped around an online publication where you can publish your own intellectuals. It is a publishing platform designed to make great stories by content creators. This is your era, your place to be online. So come forward share your views, thoughts and ideas via Content Rally.

View all posts

Leave a Reply

Your email address will not be published. Required fields are marked *

Related

Your Home

Top Useful Tips On How To Make Your Home Allergy-Free

Many people suffer from dust, pet dander, pollen, mold, and other allergy-causing substances. These allergens can be found throughout your entire home, including the air you breathe, the floors you walk on, and the drapes you open. Sadly, allergy-causing substances are unavoidable, but you can do something about the severity of your allergies. We’re here to help you find the top tips that will make your home more allergy-free. Hide-and-seek: hidden allergens in your home Allergens are everywhere! They live in our bed, clothes, carpet, and walls. The air we breathe can contain allergens, and staying indoors can make the problem worse. Even if you avoid allergens, you may be exposed to them in other people's homes or places you visit. It's true that the highest concentrations of allergens are in your home, but they can also be found in restaurants, grocery stores, and many other places you visit. Now that you know where allergens are hiding, it's time to figure out how to get rid of them. While getting rid of all allergens in your life can be next to impossible, there are some things you can do to keep your home clean, reduce allergens in your life, and keep yourself healthy. Why are allergens dangerous? Allergens are small particles in the air that cause people to produce an immune system response. People with allergies will react to these particles and release histamines, which cause the body to work harder and release more of the allergy molecules. This can cause asthma attacks and other autoimmune problems. On top of that, they can cause rashes and just be difficult to live with. Allergens are especially bad for people with asthma, and other respiratory problems, but they can also trigger sneezing, coughing, or itchy eyes. The best way to rid your home of allergens is to remove them, by regular home cleaning and using allergy-friendly products. How to reduce allergens in your home? Did you know that keeping your home clean can help eliminate allergens? There are plenty of easy ways to keep everything clean without any hassles or extra work! If you're looking for ways to reduce allergens from your home, check out the following tips. Wash your bedding, curtains, and comforters frequently in hot water. Limit the number of carpets, rugs, and other floor coverings. If you can’t remove them, wash them often. Vacuum often. Wash your floors with a mop and hot water. Leave your shoes at the door. Dust frequently. Remove clutter. Use a HEPA air cleaner. Choose allergy-friendly houseplants. Use safe cleaning products, especially hypoallergenic laundry detergents. As you see, there are many steps you can take to reduce allergens in your home. By implementing a few of these tips, your home will be a safe, healthy environment for you and your family. Read Also: Vancouver House Cleaning Services with Local Home Cleaners Near You Cleaning Your Home with Pets – The Most Common Problems  

READ MOREDetails
Sound Dampening

What Does Sound Dampening Mean?

Noise traveling to and from rooms can be distracting when trying to work, read, or enjoy some peace and quiet. It can be hard to focus on what you are trying to do when you can hear music blaring, a loud television, or children screaming through the walls, not to mention a million other potential distractions. Fortunately, there are ways to reduce sound transmitted through the walls, which can be invaluable when preventing sound transfer inside or outside a room. Felt Right has a unique way to achieve this. Depending on the materials you use for this procedure, you can obstruct more or less sound, even blocking the transmission of sound waves entirely, if you choose. What is Sound Dampening? Sound dampening is installing materials within a home, vehicle, or other location to absorb, reflect, or diffuse sound. This reduces the amount of noise that passes through and can also improve a room’s acoustics, which is why sound dampening is also known as “acoustic treatment.” It is a significant reason that recording studios make use of this technique. Sound dampening can eliminate approximately 80% of the sound transfer, meaning that you can prepare a room for studying, work, hobbies, or mental health. However, there is just enough sound to hear if there is an emergency in another room or someone yells for you. This is especially ideal if you have children in the house or others who may need your attention so that you can focus on what you are doing while still being accessible to others if required. If you need even greater solitude, one option is to soundproof a room similar to sound dampening but endeavors to block any sound infiltration whatsoever completely. However, this process is far more intensive and to prove entirely successful generally requires planning in architectural design before room construction to ensure complete soundproofing. What Materials Work Best for Sound Dampening? When you sound dampen locations, you must decide which materials you wish to use. Different materials can prove effective to different degrees; some are external solutions, while others require installation within the walls or other surfaces. Keep in mind if air can pass into an area, so can sound. For best results, address windows, spaces between and under doors, and other airflow conduits. No matter how effective your sound-dampening materials are, if air passes freely through such openings, you will have more noise. Felt Tiles One of the easiest methods for sound dampening is through the use of felt tiles. These panels have an adhesive back designed not to damage walls or paint, creating a plug-and-play solution. Felt tiles are versatile, coming in various shapes, sizes, and colors, so they are excellent choices if you wish to snazzy up the interior design of your room and enjoy the benefits of the felt’s sound-dampening qualities. Choosing felt tile designs to match your taste or set a professional tone can be invaluable when creating a relaxing atmosphere or environment conducive to work. A soothing, welcome decor has proven effective in improving mental health by reducing stress and anxiety. Having an attractive backdrop during work video calls provides an air of credibility to a home office space. In either situation, the reduced noise permeation is invaluable. Polyurethane Foams These polymer foams come in rolls or sheets and can serve as a suitable sound-dampening barrier, particularly when reducing high-frequency noises. However, low-frequency sounds are more likely to penetrate if the foam is not sufficiently thick, so keep this in mind if you want more effective noise reduction. Also, be aware that polyurethane foams are flammable, so only place them in areas where they will not be susceptible to open flames or other fire risks. As a result of this quality, this type of sound dampening should be for home use in fire-safe locations rather than used in an industry setting, where there is a greater risk of inflammation. Polyester Fibers These dense materials are excellent for sound dampening in industrial settings or other noisy areas. They work best on high-frequency sounds and are often lauded for their strength and durability, making them incredibly resistant to general wear and tear and fire. Plus, it is a lightweight material, which makes it easier to transport and install. Cork This porous material is surprisingly effective as it can trap a significant quantity of air, which means it can catch sounds and convert them to vibrations, effectively deadening noise. Cork is effective even in thin sheets, and the material is incredibly lightweight. Furthermore, it is an accessible material to install and can be purchased in tile forms for easy customization. Mass-loaded Vinyl A popular choice because it is one of the least expensive sound-dampening options, mass-loaded vinyl is explicitly intended for sound dampening. It is easy to find and acquire this material, but remember that the denser the material, the more effective it will be. Mass-loaded vinyl does not have much elasticity, so it forms a solid barrier that sounds waves have trouble passing through. Green Glue, Gaps, and Spaces Remember that sound can pass through any space air can, so for better sound dampening, you need to find spaces where air can pass through, such as cracks or gaps within the walls. Green glue is an excellent choice for filling holes, blocking airflow, and reducing the noise that can enter (or exit) the room. For areas you will not want to seal, such as windows, you can find sound-reducing curtains that can serve as sound dampening, combatting unwanted outdoor sounds such as those from traffic, industries, and neighbors. For doors, sound dampening can be as simple as placing a blanket against the gap beneath. Alternatively, you can install a door stop, soundproofing rubber, or acoustic panels to block sound from entering. The Bottom Line When you want to keep from traveling in or out of a room, one of the most effective ways to reduce sound is to find appropriate materials that function as sound-dampening agents, placed along walls and wherever there are gaps or cracks in which sound can pass. Proper sound dampening can create an atmosphere conducive to work or relaxation or prevent televisions, music, musical instruments, and other loud forms of recreation from disturbing others. Read Also: How To Get 60 Day Trial For Luxury Beddings Five Bedroom Rug Ideas – Area Rugs and Decorating Ideas Living Ideas In Small Bedroom House Plans With Efficient House Designs

READ MOREDetails
Iron Clothes

How to Use Iron Clothes With Steam

Believe it or not, the amount of people that don’t know how to iron clothes is amazing. There’s no shame on it since most of us were thrown into society without really practicing skills that would definitely help us fight back as we become independent. These skills include things like cooking a proper meal before going to work, knowing what groceries to buy without spending all our money on unnecessary things, being able to pay bills accordingly without becoming a mess, cleaning the house every now and then, and of course, knowing how to use steam irons and what to do to properly iron our clothes to not look like folded toilet paper. Don’t worry though! In this guide, I’m going to teach you the essentials of how to iron, and how to deal with different types of fabric. To be honest, ironing is not something as complicated as many think. It’s all about knowing what to do, which is what most people lack. The process may require a little preparation and patience, though, so be prepared to practice with different pieces of clothing to get the main idea. One thing is sure, though. You have to be careful when using an iron because they can be harmful if dealt with without precautions! How to Prepare for It The first thing you’ll need is a flat surface where you can prepare your clothes to be ironed. Try to have everything neatly organized to avoid possible accidents, and if you can, try to do it on an ironing board. Some clothing is too delicate for the heat produced by the heated metal of the device, so have a piece of fabric to protect these. Read more: A Complete Guide on Using IRON on Transfer Paper Connect the Iron Irons can take some time before they are ready to be used. They usually show a sign that they are ready, so be sure to be attentive about them while you take care of the next step. Never try to do it before its ready, since it’ll lead to a slower and far less efficient process. Know the Differences Between Materials, and Sort Them Beforehand Depending on the type of fabric you are dealing with, you might want to change your approach while ironing. You can’t deal with a silk piece the same way you would deal with a cotton one, for example. Some pieces of clothing will require you to use the lowest setting of heat possible, while others may require even more heat. Separate silk, wool, rayon, and acetate to be dealt with the lowest settings. Wool clothes may require the protection of another piece of fabric that was previously dampened, so take that in mind! For polyester, go with the medium heat setting, and for cotton, you can go either medium and high heat setting. Both of them should be dampened to be protected from the heat. Before the iron is ready to go, you should have them sorted out. How to Iron Clothes When you deal with shirts with a collar, you should start with it. You can start with a pattern that follows the inside part of the collar, starting from the center of it, until you reach the edges. Then, fall back to the center, and keep moving between both sides. Once you’ve finished with it, you can work the outside. Lay down the shirt in a way that you can flatten it with the iron with simple movements. After that, you have to work your way down, slowly moving the shirt. Then, work the sleeves then the cuffs. Pants are much easier than shirts with a collar. You just have yo lay them down in a way that you can work both legs at the same time. Start with the waist, gently work with the pockets, and go your way down. Repeat the process until you are satisfied with the results, but make sure to be gentle and careful with the heat and the ironing. Considering that there are way too many types of clothing to teach all of the proper methods and techniques to iron them accordingly, you should check this guide on how to do it without fail. Safety Recommendations Ironing can be a pretty dangerous process if you are not attentive while you do it. If you don’t take safety measures, you might harm yourself or others, so make sure to pay attention to this part of the guide. The very first thing you should always make sure is that the iron is unreachable for children. Children can be curious and do things without knowing, so you will be the one to blame if you allow them to get closer while they are heated up. This is important even after you’ve finished ironing. These devices tend to remain heated up even after disconnecting them, so you should still be attentive to any possible situation. I recommend you to wait at least 10 minutes before taking your guard off. Remember to check just in case. While it rests, don’t leave it face down. You might burn something or damage the iron if you do. If an accident happens and you burn yourself or someone else gets burned, treat the burn with cool water for as much time as you can. 20 minutes should be more than enough. Don’t use things like butter or oil, since it might infect the injury. if the burn is too big, you should check yourself with a doctor. Read Also: How To Choose A Washing Machine? How to Pack Clothing Properly for Shipping Choose The Latest Collection Of Women Clothing For a Stylish Look 6 Benefits Of Buying Clothes Online – Why People trust online shopping

READ MOREDetails