Timber! 8 Facts About Log Cabin Construction You Should Know

Published on: 27 February 2019 Last Updated on: 09 August 2019
log cabin construction

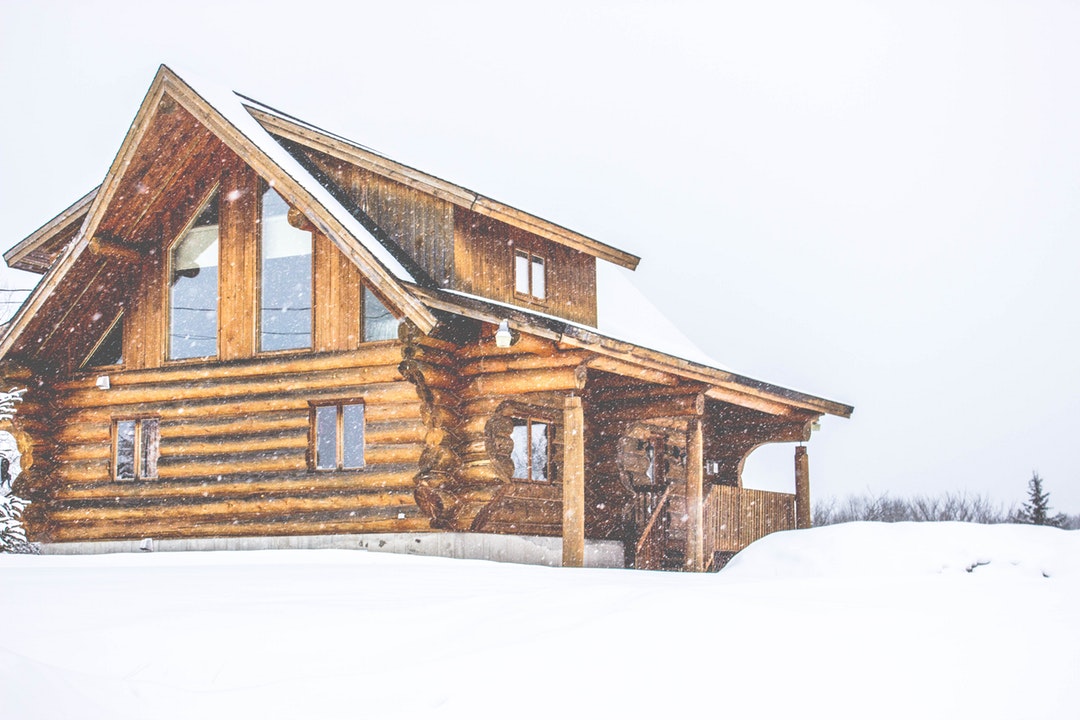
Thought log cabins were a thing of the past? Think again.

Today, log cabin construction has become a chic, upscale way to build a modern home with a unique look. In fact, some people have even built high-rise buildings that pull design elements from cabin construction.

Log cabins have a solid place in modern architecture. They meld old-fashioned traditions that endure for a reason with popular modern elements like environmentally-friendly designs. Wondering what else you don’t know about log cabins? Keep reading to learn more fascinating cabin facts!

1. You Can Calculate Exactly How Many Logs You’ll Need

How many logs does it take to build a log cabin? Turns out it’s all a matter of simple math.

For example, by determining the height of each wall, then the height of each individual log, you can calculate how many logs you’ll use per wall. From there, it’s simple to add up the number of walls in a room to get the total.

Of course, other design aspects like the addition of doors or window can make things more complicated. When there’s an opening in the wall, it will get flanked by shorter logs, which can increase the total number of logs used. If the roof is built of logs, that will also change the numbers.

While you’ll want to leave it to the professionals when it comes to deciding how many logs to order, it can still be fun to try your hand at calculating the number of logs in a cabin.

2. You Can Build from a Kit:

Did you know that you can order a log cabin kit for a major DIY moment?

With a log cabin kit, you don’t have to be a pro to have a rustic cabin of your own. Most companies also offer plenty of customer service support, so you’ll know where to turn if you run into problems along the way.

It also doesn’t take a lot of extra tools to work from a kit. Most people can get the job done with just a few basics (think drills and hammers).

Since this is a more rustic form of the building, it appeals to many environmentally-savvy consumers. You’re not bringing in heavy machinery to pollute the area and disrupt local wildlife.

3. Log Homes Stay Warm:

Having trouble keeping warm in the winter? A log cabin just might hold the answer.

Wood naturally keeps heat in — that’s why wood furniture tends to feel relatively warm, even if the rest of the room is cold. Many modern building materials, from concrete to sheetrock, get cold fast. This lowers the overall temperature of your home fast.

With walls made of solid wood, your home actually soaks up and stores heat, dispersing it into the home over time. This helps your home stay warmer, while you save on heating costs.

4. Moisture Matters:

When you’re building a log home, one of the keys to success is keeping your logs completely dry.

You can actually choose to buy logs with different levels of moisture content. The lower the moisture, the better, because you won’t have to worry about what happens when the logs shrink and settle over time.

You’ll also need to take care to keep your home as dry as possible after it’s complete. This can mean installing different design elements (read more here) to keep water away from the walls.

Sturdy log cabins often include an overhanging roof or protective landscaping elements. You’ll also need to take care to keep other sources of water, like an automated sprinkler, away from the log walls.

5. Log Homes Last a Long Time:

There’s a reason many historic log cabins from 100 or more years ago remain to this day. This is one of the most durable ways to build a home that will remain sturdy for years to come.

Although American architecture doesn’t date back so far, you can find homes and churches made of logs in Europe that have stood strong for many hundreds of years. This natural building material offers the perfect balance of strength and flexibility to withstand all kinds of threats.

6. Log Cabins Work Best in Shade:

In addition to keeping your cabin away from moisture, you’ll want to build it so it’s shaded from the sun as much as possible.

Sun won’t destroy a log home, but it will mean you’ll need to re-finish the logs more often to make them last. If you can build in a shady area that’s guarded against moisture, your log cabin will require virtually no maintenance at all.

7. Log Homes Save Energy:

In log cabin construction, it’s super-important that you seal up the spaces between the logs carefully. But as long as that’s done properly, you’ll have an incredibly energy-efficient home to enjoy.

Spaces, where energy can escape, include the connection between individual logs, the space between the foundation and the lower logs, and space between the walls and roof. But when those spaces get sealed, your home will be significantly more energy-efficient than most.

The solid wood walls offer great insulation, so keeping your home warm or cool becomes far easier than with other materials.

8. Air-Dried Logs Work Best:

Drier is generally better no matter what, but if you have a choice between air-dried and kiln-dried, opt for the first choice.

Logs that get air-dried for the proper amount of time have already adjusted to the outdoor environment where they’ll be placed. This reduces settling even more because the moisture content of an air-dried log isn’t likely to change much further.

Kiln-dried logs tend to absorb more moisture when they first get placed outside. Then, as they lose that moisture over time, they’ll settle, creating a need for more home maintenance.

Will You Try Log Cabin Construction at Home?

Whether you build it yourself or hire the professionals, log cabin construction can give you a durable, unique, cozy home that you’ll love. These tips will help you plan ahead for the best possible cabin construction.

Once you build a log cabin, it’s time to decorate the inside! For a rustic look that matches perfectly, try these cork board ideas.

Read Also:

Content Rally wrapped around an online publication where you can publish your own intellectuals. It is a publishing platform designed to make great stories by content creators. This is your era, your place to be online. So come forward share your views, thoughts and ideas via Content Rally.

View all posts

Leave a Reply

Your email address will not be published. Required fields are marked *

Related

8 Plumbing Myths Busted

8 Plumbing Myths Busted

Plumbing is an essential part of any home although it is something that most would pay attention to if something goes wrong. Ranging from leaks to busted garbage disposals, folks turn to temporary measures to address the problem and only call the professional plumbers once all else fails. Aware of the multiple problems plumbing fixtures can cause, some household employ maintenance beliefs that have proven not to be entirely effective. Folks have been left under the impression that several of them actually improve their piping and fixtures but conversely cause more harm than good. That said, below are some of the mythical stuff tied up to plumbing. Some may make sense although they do carry consequences that can be good or bad. 1. Placing bricks in the toilet to conserve water : Making sure that the toilet properly functions is a must to ensure that water is not wasted. This includes making sure that the stopper closes properly to avoid water from continuously flowing. The amount of water that goes through it is key. So would having less stored water be equivalent to savings? Using logic, it does make a bit of sense although it alters the proper water stored in the tank. Also, a brick dilapidates over time. At some point, it could affect parts of a toilet and end up wasting more water and money. 2. Limiting a dripping faucet prevents water bill from escalating : A drip may not matter much but it does translate to unwanted expenses. Some have toyed with the notion that wrapping a piece of cloth or sticking a small piece of wood to somehow clog and lessen water that goes down could save some cents. Small or not, such does not address the problem. The fact here is that unless a plumber actually stops the drip or leak, money is wasted. 3. Plumbing can be a simple DIY job : Again, this belief is a temporary solution. Some could change faucets or pipes although some of the little things are overlooked. One example is the placement of Teflon to make sure that water does not seep through. Leaks may not show at first but eventually will due to continuous usage and fixture depreciation. 4. Flushable Wipes pose no threat : There are some who claim that wipes are flushable. But the fact here is that they are still solid. Some assume that being branded as septic-safe translates to them being biodegradable. The truth is that despite those claims, they cause clogging just the same. Hence, the best way is to dispose of them the traditional way – that is through the waste can and not down the drain. 5. Flushing dead goldfish is safe : Folks who take care of pet fish often find themselves wondering how to dispose of them. The common way for most is to flush them down the toilet. However, this is provided that they are really dead. Flushing living fish down while they are alive could lead to dire consequences such as affecting the eco-system which could end up being contaminated by them. 6. Plungers may not always save the day : When clogs occur, the simple recourse is to use a plunger to free up the drain. It does resolve the problem at first but there is that chance that the blockage may get worse. Should recurring clogging happen, it would be best to seek the help of a professional plumber? Besides, it takes the stress and worries away once the actual reason for the clog is addressed right? 7. Egg shells or Ice cubes can sharpen garbage disposal blades : Most believe that throwing down ice cubes or eggshells can benefit from a garbage disposal. However, this does not include sharpening them. Rather, ice cubes and/or eggshells can help resolve the bad odor garbage disposal may give out. But as far as sharpening the blades, this does not follow. 8. Pouring grease down the drain is helpful with boiling water : There are certain forms of liquids that can be poured down the drain and some that should not. Grease or fats are one of the most common ones that are discouraged since they would end up clogging the pipes. Although most are aware, adding some boiling water has led most to believe that clogged drains would be avoided. But the truth is that grease or any fat-containing liquid will compromise any sink. Boiling water does not really help meaning grease and other fatty substances should be disposed of using the trash bin and not through sinks. There are plenty other plumbing myths going around such as a rumbling heater that could end up exploding or using lemon peels to freshen up stinky disposals. Like most of the enumerated ones above, they are either temporary measures or things that could lead to disaster, leaving most to possibly face higher repair costs than average. When any plumbing related problem occurs, it would be best to call the pros for best (and reasonable) results. Some claim that they are never around when you need them, probably a reason why most should have their plumbing checked regularly – regardless if there are signs of issues or not. Read Also : Mirror Decorating Ideas To Style Your Bathroom Best Ways To Maintain A Shower Cabin 5 Easy Ways To Detect A Water Leak In Your Home

READ MOREDetails
Best Heat Pump

How to Choose the Best Heat Pump for Your Home?

Heat pumps serve dual purposes. They heat the home when it is cold outside and cool it when the temperature rises. These units are energy efficient and good for the environment because they don't burn fuel. However, the homeowner needs to ensure they get the correct unit for the home.  The Concept Of A Heat Pump  The heat pumps are becoming more and more popular these days. If you still don’t know about them and are trying to look for more information before buying a heat pump for your house, then you have landed yourself on the right page.  An electric air source heat pump is an outdoor unit. You can use this unit to keep your home both heat as well as cool your home. This totally depends on the weather.  The heat pumps are a great alternative to your central air conditioner or your furnace systems. This technology is specifically used in a refrigerator or an air conditioner. The unit extracts heat from a specific source.  It can be from the surrounding air, nearby sources of water, or eleven geothermal energy. Once it is done collecting the heat, it further amplifies it and then transfers it to the space where it is necessary.     How Do Heat Pumps Work?  Most heat pumps pull heat from the air and move it to the desired location. When heating the home, the unit takes the hot air from outside and brings it indoors. When cooling the house, the unit removes hot air from the home and transfers it outside.  They use less carbon than other heating options and work best when set at a consistent temperature. To see the optimal results, homeowners must ensure their houses are properly insulated and sealed. What else should they know before requesting a heat pump installation?  Heat Pump Options Air-to-air heat pumps are the most common air-source heat pumps used in America today. They come in two forms.  Ducted air-source heat pumps function like central AC units. Treated air is distributed throughout the home with the help of ductwork.  Ductless or mini-split air-source heat pumps are the second option, increasing in popularity. No ductwork is needed when a homeowner selects this option. However, other options exist.  Geothermal heat pumps pull heat from the ground to warm a home and release heat into the ground to cool the house.  These systems are highly efficient, but they often cost more to install. Water-source heat pumps are similar to ground-source units but are installed at the bottom of a pond. Air-to-water heat pumps use a hot-water radiator system to distribute heat throughout the home.  The Benefits of Heat Pumps Heat pumps are easy to install and work in most homes. The mini-split system is ideal for those without ductwork because the house won't have to be modified during installation.  Moving to a heat pump will significantly reduce the owner's carbon footprint, and many areas offer subsidies for those who choose to upgrade to this type of unit.  Let’s learn about the benefits of the best heat pump:  Energy Efficiency  Many users have agreed that heat pumps show more efficiency than all traditional furnaces. These heat pumps help to move the heat from the outside air or ground into your home.  As a result, you can easily save a lot of money on the overall energy bills.  Improved Air Quality  The heat pumps can both filter and then deodorize the air. This helps you to reduce allergies as well as asthma.  Quiet Operation  The heat pumps are an excellent choice for your home and businesses as they generate less noise and are typically quieter than the other systems.   Easy Maintenance Process   The heat pumps do not require much attention and are very simple to manage. It does not need regular servicing.  P.S. Heat pumps can be expensive, and you may face difficulties installing the system. Otherwise, the system and its benefits make it a perfect long-term investment.  When Not to Install Heat Pump? A poorly insulated home or a leaky one will not benefit from a heat pump because drafts and cold spots are often an issue.  Homeowners must research their electrical service to ensure it can handle the heat pump load, as upgrading the electrical system to install this unit will add to the cost.  Finally, individuals in cold climates may find their heat pumps cannot keep up. The Department of Energy has established eight climate zones for the United States. In zones 7 and 8, homeowners need to consider other options.  Choosing a Heat Pump Homeowners must consider several factors when choosing a heat pump. You must consider the size and capacity of your space. If you fail to choose the best heat pump of the proper size, it will cost more to run. Moreover, it won't keep the home at the desired temperature.  The determination of the right size heat pump involves two kinds of measurements:  1. Manual J Load calculation  HVAC technicians widely use this specific kind of calculation. They consider certain factors that help them to understand how much heating and cooling your home needs before choosing the best heat pump. These factors are as follows:  The square footage measurement of your home Ceiling height  Insulation of your house  The climate type and the number of days you might need the heating or cooling  How often the space is being used?  The number of people who use the space The total number of heat-producing appliances that you have in your room  Number of windows and doors.  The technicians consider these values and further enter them into a formula to get the precise result.  2. Square Footage Calculation The calculator might seem a bit simpler, but it is not precise enough to calculate the required heat pump capacity.  For instance, if your total house space is around 1500 square feet, then you would need a 3-ton unit. BTUs, or British Thermal units further measure these ton units.  An experienced technician can help the homeowner determine the BTUs needed for the house.   Home size (sq. ft.)Size of the heat pump (in tons)Size of the heat pump (in BTUs)500 sq. ft.1-ton 12000 BTUs. 1500 sq. ft.3-ton36,000 BTUs2500 sq. ft.5-ton 60,000 BTUs Apart from these calculations, compressor type is important when choosing the best heat pump. Most homeowners choose a variable-speed compressor, which automatically adjusts to maintain the selected temperature.  Efficiency is also a consideration when choosing the best heat pump. Look for a high SEER rating to save on energy bills.  Learn about each unit's climate performance and research the noise level. Finally, the reliability of each unit must be considered to ensure the heat pump will work when needed.  Once a heat pump has been selected, choose a contractor. Ensure they are trained to handle this task and have been in business for a while.  Doing so ensures best heat pump will be installed correctly, and help will be available if problems arise. When homeowners take these steps, they will have peace of mind knowing their unit will work when needed. Additional Reading: Removing Air Conditioner Filters: A Guide Advantages Of Using A Water Heater At Home What Can An Air Conditioning Installation Expert Assist You With?

READ MOREDetails
TV Stand

The Top Five Ways To Decorate A TV Stand

Decorating a TV stand should actually be a fairly easy thing for you to do, but you need to make sure that you have done so in a way that will make sense for the room and your home.  All stands are different, and they can take on many different decorations that you might not have thought of.  It all depends on what you think your best options is when you are trying to find a way to make the house look better while working around the TV. The Top Five Ways To Decorate A TV Stand: 1. Staining: Staining a TV stand is a very simple thing to do, and you can match up colors to the house like the ones that you see at https://www.moderndigsfurniture.com/modernfurnitureblog.html?article=Modern-TV-Stand-Guide.  You need to make sure that you have found a simple way for you to get the stain on the stand, how to make it the right color, and how to do this across the whole piece of furniture. 2. Painting: You can paint the TV stand in a way that will be best for you, and you will be much happier when you have chosen something that you think fits the house.  You could paint the whole stand, and you could put the stand in a place where different colors all play off one another.  You have to be sure that you have chosen the proper paint style, sanded the stand, and even used a primer if needed. 3. Stencils: You can use stencils to be sure that you have found a pattern that will look nice on the TV stand.  You want the stand to look great, and you want it to have a way to show off your personal style even in something as simple as a TV stand.  If you have a choice of how to make the stencils look, you could layer their designs and use a spray can get the paint on the surface. 4. Fabric: You could actually put the fabric with the TV stand so that it has something soft to play off the wood of the stand.  You might actually put a skirt around the bottom as if it were a Christmas tree, or you could choose a fabric that will actually drape off the TV stand. 5. Glass: You could put glass doors on the TV stand, and you might even use glass to build the TV stand.  There are some lovely glass styles that you might like, and they look really modern because they have been made from the heaviest of all the glass that you could find.  This is a fun thing to use when you want the stand to look perfect. You have to be sure that you have found a very simple way to decorate your TV stand so that it will look its best.  You can use all these tips to make the house look great while showing off the style of the TV stand when you have it adorned in the right way. Read Also: Why ‘Breaking Bad’ Is The Best Ever TV Shows 5 Ways That Ensure That Your Home Is Safe For Living

READ MOREDetails