7 Tips to Increase The Value of Your Home

Published on: 04 March 2019 Last Updated on: 31 July 2024
Value of Your Home

Increasing the value of your home is not as difficult as one might initially think. Increasing your home’s value is a smart plan, especially if you plan to sell your home over the short term. In fact, according to real estate experts across the industry, you are two to three times more likely to sell your home if it possesses fresh renovations or improvements.

7 Tips to Increase The Value of Your Home:

1. Remodel Your Kitchen:

Remodel Your Kitchen

Remodeling your kitchen is one of the more expensive home renovation tasks that you can do to substantially increase the value of your home. This renovation will likely include replacing or refinishing your kitchen cabinetry. You will also need to replace your kitchen countertops, as they are likely to be old and outdated. The flooring is likely going to need to be torn up and replaced as well, especially if even the slightest amount of water damage has occurred. Lastly, you will likely need to replace your appliances such as your stove, microwave, and refrigerator, especially if these items will be included in the sale of your home. A company like Gold Coast Veraniece Construction Corp can do this kitchen renovation job for you very quickly and affordable if you aren’t into a DIY gig.

2. Get Your Attic Cleaned:

Some people don’t even look into their attic for decades. If you plan to increase the value of your home or sell it quickly, then you should get into the attic and thoroughly clean it. Replace any broken floorboards, completely clean out the dust and debris, throw away or sell stored away items that you are not using anymore, and just generally get the attic into a much more presentable state. You would be shocked at just how cluttered some people’s attics can become after decades of letting space fall into neglect.

3. Get Rid of That Popcorn Ceiling Texture:

If you haven’t already heard, the popcorn ceiling texture is officially out of style. Thankfully, this is a job that is not particularly difficult to undertake yourself, however, it could take a bit of time and elbow grease to complete it. If you do the job yourself completely then you could end up saving yourself a fairly large amount of money ranging into the thousands of dollars. Another way to go about getting rid of the textured ceiling is to do a partial DIY renovation. In this case, you would remove the ceiling texture and then let a professional come in and refinish the ceiling. Lastly, you could also just opt to have a contracting company come in and do the entire job for you, however, this option will obviously cost you the most money.

With regard to what you can do to replace a textured ceiling, there are really just two options that are currently in style at the moment. You could go the easiest route and paint over the texture free surface with a color that matches the walls, or possibly even using a color slightly offset from the wall color. The second option is that you can add panels to the ceiling, however, you should be aware that this is the more expensive of the two options. Regardless of what you choose in the end, getting rid of that textured popcorn ceiling is guaranteed to improve the value of your home.

4. Remodel Your Bathrooms:

Bathrooms

Outside of a full kitchen remodel, remodeling your bathrooms is one of the more expensive home renovation tasks. Thankfully, however, money and effort spent on doing this can substantially increase the value of your home. Bathroom renovation tasks will likely include replacing old toilets, professionally cleaning or replacing shower cabins or bathtubs, refinishing or replacing bathroom cabinetry, and putting a fresh coat of paint on the walls and ceiling.

5. Brighten up Your Interior:

Studies have shown that brighter interior living space is much healthier and far better perceived than a dim or dark interior. A great way to increase your home’s value is to replace old light fixtures, add in more energy-efficient bulbs, lighten up your curtains, and possibly even do some repainting that lightens up your living space. All of this is especially important if you are seeking to make your home more attractive to a prospective buyer.

6. Freshen up Your Landscaping:

It doesn’t take much of a break from yard work to cause your landscaping to fall a bit behind the curve. If you plan to sell your house, however, freshening up the landscaping is a great way to not only increase the value of your home but doing this will also more than likely help you sell your home more quickly. Let’s face it, your front and back yards are the first thing a prospective home buyer will see when they enter the property, so it is definitely a first impression builder. You can quickly and affordably freshen up your landscaping by getting rid of the junk or needless yard debris, raking up leaves or trash, and trimming your shrubs, hedges, and trees. It is also a great idea to plant fresh shrubs or flowers, add bark dust or garden pebbles to plain dirt covered areas, and edge your grass line. All of these tasks can be done yourself and will definitely add more equity to your home’s overall value.

7. Fix Any Plumbing Issues:

Plumbing

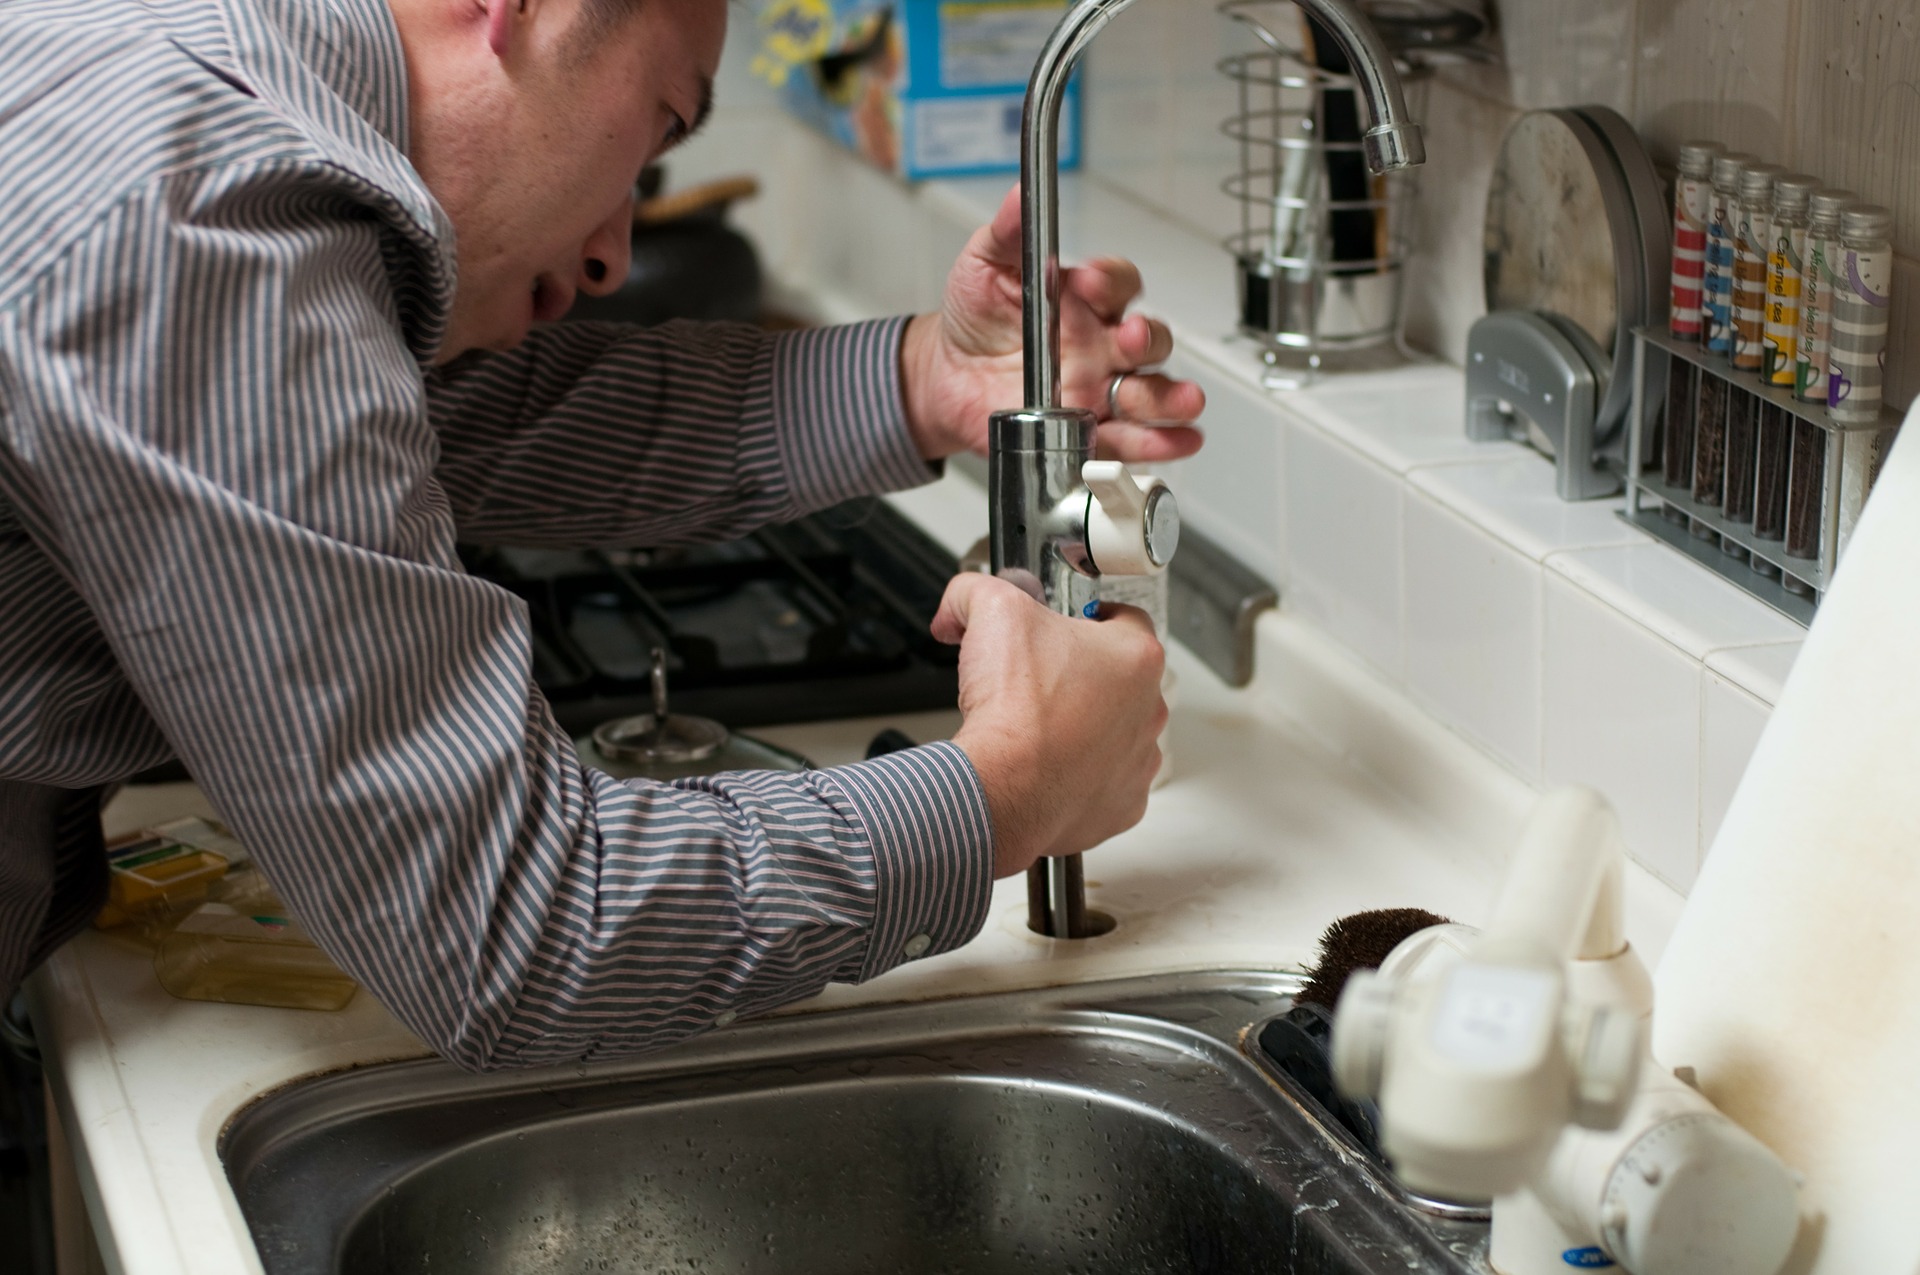
Nearly every home out there is going to accumulate plumbing problems over time. These problems could be a leaking faucet, clogged drain, leaking sink pipe, malfunctioning toilet flush, or even a basement pipe leak. Whatever the problem is, you will need to fix it if you plan to sell your home. A house with perfectly functioning plumbing and zero problems is going to be extremely attractive to any prospective home buyer. Making these repairs will also dramatically increase the value of your home, whereas numerous plumbing problems could do the opposite and sink your home’s value.

Read Also:

Content Rally wrapped around an online publication where you can publish your own intellectuals. It is a publishing platform designed to make great stories by content creators. This is your era, your place to be online. So come forward share your views, thoughts and ideas via Content Rally.

View all posts

Leave a Reply

Your email address will not be published. Required fields are marked *

Related

Toilet Flush Button

Toilet Flush Button: Understanding The Nuts And Bolts

Though our bathrooms play a critical role in daily life, they're often forgotten until a problem arises. Of all its components, one that stands out is the toilet flush button's use - and understanding. This article looks closely at its workings, maintenance needs and replacement considerations. The Fundamentals Of The Toilet Flush Button What Exactly Is A Toilet Flush Button? A toilet flush button is the mechanism responsible for initiating the flushing process in your toilet system. Situated on the tank's exterior, we press or push this component when using our toilet to flush out its contents into the sewage system. By activating this flush button, we begin an action chain within our bathroom that sends water from its tank into our bowl to flush away its contents into sewer lines. How Does The Flush Button Work? The magic of the toilet flush button lies in its ability to control a more complicated mechanism. Pressing it lifts a lever connected to a chain inside the tank; that chain connects to a flapper (or flush valve seal), covering up drain holes at the bottom. When the flapper is raised, water stored in the tank begins rushing from its source into the bowl through its drain hole and siphon tube into the sewage system. As soon as this process completes, however, the flapper falls back down, sealing off its drain hole once more - and replenishing its supply in readiness for another flush cycle. Maintenance Of The Toilet Flush Button Regular Cleaning Regular cleaning of your toilet flush button is vital to its optimal operation, as dirt can clog the switch and make it less responsive, leading to inconvenient situations for users. A non-abrasive cleaner and soft cloth should be used for exterior cleaning; internal components should be checked regularly to avoid build-up and potential mechanical problems. Checking For Wear And Tear Given how often flush buttons are used, wear and tear are inevitable. Look for signs of damage, such as cracks or looseness. If the control becomes less responsive when pressed or sticks down without returning up when released, this may indicate internal components need to be reviewed for potential problems. Troubleshooting Common Problems Is The Button Hard To Press, Or Is It Sticking A toilet flush button that is difficult to press or sticks down often points to a problem with the connected lever or chain inside the tank. It could be that the chain is too tight or too slack, or the lever needs to be aligned or fixed. A careful inspection and adjustment of these components usually solve the issue. The Button Doesn't Activate The Flush If the button doesn't activate the flush, the issue could be that the switch is no longer effectively connected to the lever, or the flapper isn't lifting. A look inside the tank should reveal the issue. The button, lever, or flapper may need to be replaced. Replacing The Toilet Flush Button When Should You Replace The Button? As with any mechanical component, toilet flush buttons have a finite lifespan. Over time and through regular use, their controller may wear out or become damaged, requiring replacement. Signs to replace it include physical damage to its housing and sticky buttons or ones that no longer activate flushing actions. Looking for a portable toilet rental might also be necessary if you need to fix your toilet for a couple of days. Toilet Flush Buttons: More Than Meets The Eye Though seemingly simple, toilet flush buttons are critical in maintaining sanitation in homes and public spaces. Understanding their inner workings helps us better appreciate their importance, maintain them properly, and effectively troubleshoot any potential issues with them. So next time you press one, remember its critical function while giving it some love and consideration. Conclusion: Understanding how a toilet flush button works may initially seem complicated, but understanding its mechanics is crucial to efficient bathroom operations and sanitation practices. Knowing their inner workings could save us from future inconvenience or repair costs. Maintaining the toilet flush button regularly is vital to prolonging its lifespan and guaranteeing reliable performance within a plumbing system, thus streamlining home maintenance. By periodically inspecting it for signs of wear and tear, individuals can identify and address potential issues early on and prevent more significant ones from developing into larger problems later. By taking proactive measures like this one, individuals save both time and money on costly repairs and ensure an effortless toilet operation experience. Maintaining a flush button is an accessible DIY project for anyone, provided they possess basic knowledge and the appropriate tools. Even if it eventually succumbs to wear or damage despite regular maintenance efforts, replacing the button remains straightforward, making this an achievable DIY project for homeowners. Read Also : Mirror Decorating Ideas To Style Your Bathroom Using Feng Shui In Your Bathroom Design The Different Kinds Of Toilets

READ MOREDetails
Roof Inspection

How Often Do You Need A Roof Inspection?

For home maintenance, it's important to know the roof's age to maintain the house in good condition. The roof is an essential part of the house. It holds the overall structure of the house together, and it is essential to maintain your roof and keep it safe from roof damage. So how often should you inspect your roof in Crestview, Niceville, Milton, Pensacola, Pace, Florida?  If you inspect your roof regularly, you can save money that will cost you later when the house is rebuilt. It can lead to extending the roof's life if taken good care of. Issues should be identified at an early stage to avoid the extra cost of major repair.  Regular maintenance & inspection of the condition of your roof can help inspect a roof for wind damage, and inspect a roof for hail damage and structural damage. Keep reading to learn how often to inspect the roof of your house.  Frequency of Roof Inspections Do you ask yourself this question ‘How often to inspect the condition of your roof?’ or ‘How often are roof inspections needed?’ During damp seasons of the year, it’s important to regularly inspect a roof for leaks. It can detect any algae growth or water leaks. This should be done at least twice a year. These inspections can be of advantage in saving cost and also saving the structure of the house. A weakened or damaged roof might endanger the safety of homeowners and their loved ones.  Frequent inspections can assist in locating possible safety risks, such as loose or damaged shingles, and guarantee that they are quickly fixed. It should be done for the increased safety of the people. A yearly inspection helps homeowners remain on top of any existing issues while getting wiser to larger risks coming in the way.  You need to inspect your roof at least once a year, ideally in the spring or autumn. This way, you'll be able to determine whether your roof is prepared for the seasons that bring more severe weather. Signs That Indicate the Need for a Roof Inspection Several signs indicate that your roof needs inspection. For house owners, waking up to a leaking roof is no less than a nightmare. To avoid such circumstances, it is crucial to pay attention to the roof, and ask for a repair or inspection. Gutter Issues Damaged Shingles Discoloration of walls Stained Ceilings Wind damages visibly curling of shingles Dark streaks or other leaks in the attic Professional vs. DIY Inspections DIY projects might help you save money. But before you start a DIY roofing job, you might want to consider it seriously. You probably lack the tools and expertise required for the task unless you're a licensed roofing contractor in Destin, FL.  You may make a costly or hazardous error on your roof. Rolled roofing is one of the cheapest roofing materials that can be purchased. Additionally, it is one of the few types of roofs that most homeowners can install themselves, although in a limited fashion. There are certain things that a roof inspector will look for when doing an inspection professionally. Surface Materials.  Decking and Frame. Roof Penetrations. Fascia and Soffits. Attic. Ventilation System. Gutter System. Age of Roof. Regular roof inspections are an essential part of home maintenance, it helps you ensure that the roof is in good condition. DIY inspections can assist you in staying vigilant. But that’s certainly not all! It also ensures to catch smaller issues early, although they must not replace proficient inspections. Professional roofing contractors bring expertise, experience, safety, and documentation to the table. What to Expect During a Roof Inspection? The purpose of roof inspections is to find any problems as well as gauge the remaining life of the roof. A professional roof inspection should look at every part of your roof, inspect the walls and ceiling for damage, analyze the structural integrity of the roof, and analyze the roofing material.  A structural inspection, an interior inspection, a material inspection, and a workmanship inspection should all be part of it. Conclusion The age of the roof, the local climate, and the kind of roofing material used are some of the variables that affect how frequently a roof is inspected. Generally, having a roof inspection at least once a year is generally advised.  Frequent inspections can aid in the early detection and resolution of possible problems, averting eventual more serious and expensive damage. Additionally, it's a good idea to arrange for a quick inspection to determine any potential damage following severe weather events like storms or a lot of snowfall. To sum up, regular roof inspections are an essential part of house upkeep since they encourage early detection and prompt repairs. In order to evaluate their particular needs and create an appropriate inspection schedule that takes into account the particulars of their roofing system and the local climate, homeowners should collaborate with certified professionals.  In the long run, regular inspections and maintenance can save homeowners money by extending the roof's lifespan and improving overall condition. FAQ block  Some of the most common questions we get about roof inspections are: How long does an inspection take? It usually takes 45 minutes to inspect a roof properly, but depending on other factors, such as roof size and age, it may take a few hours. You should meet with the inspector to know the estimated time according to your house. Is roof inspection expensive? The average cost of a roof inspection ranges from $100 to $400, depending on the size, complexity, and type of inspection—physical, infrared, or drone. A roof certification extends the roof's lifespan and can be added for $75 to $200. Is professional inspection necessary? Roofs are prone to damage from storms, aging, and other problems that can erode their structural integrity over time. Ensure your roof is safe and long-lasting by scheduling routine inspections by the licensed roofing company. Do I need frequent inspections? How often should you inspect your shingle roof? It is essential to schedule an annual roof inspection to ensure your roof is in good condition. A professional inspection is recommended once a year and may be more frequently conducted based on the age of your roof, any damage you find, or any significant storms. Do it immediately if you need help remembering when you last had a roof inspection. What will the roof inspector do? To ensure your roofing material is still functioning as intended, a roof inspector will examine its state. For instance, if your roof is made of asphalt shingles, they will search for moss, stains, or rust in addition to curling, loose, or missing shingles. Read Also: Choosing A Siding And Roofing Companies In Delaware Why You Must Use A Residential Roofing Company For Your Home Everything You Need To Know About Metal Roofing: Pros, Cons, And Costs

READ MOREDetails
Homemade Mosquito Trap

How to Make a Homemade Mosquito Trap

Though mosquitoes are little creatures on earth, they disturb not only human beings, but others are also biting. A homemade Mosquito Trap can reduce the problem of your health disorder due to mosquito bites. They can inject a few viruses which can cause great damage to us. Some diseases may result in you lying on the bed for days whereas others may have an untold health impact on your overall health. But you can get rid of these annoying creatures by adapting some steps. There are various ways to drive these little vampires away. They may be hazardous for your health as they emit harmful chemicals. There are environment-friendly ways too to drive them away. According to my, homemade mosquito trap is the best mosquito trap among them. And, in this article, I am going to assist you on how to make a homemade mosquito trap at home easily. Homeowners, as well as commercial establishments, should realize the dangers of mosquitoes. There are many serious dangers and diseases that you can end up contracting. From malaria, and dengue to encephalitis, not only can it ensure that you stay bedridden for weeks, but in extreme cases, it can prove to be life-threatening. This is why you need to look at the best mosquito trap to help you keep these dangerous insects away from yourself and your family at all costs. Dump and wetlands are the main sources of mosquitoes' breeding place. So, make sure there are no spaces inside or outside your house where water is logged or dump areas. If you find any, try to clean them fast before they increase their number immensely. Carbon dioxide is a gas that attracts mosquitoes and following carbon dioxide traces; they find their victims out to bite us. We leave carbon dioxide at the time of our inhaling. How does a homemade mosquito trap work? Cool! The concept is very simple, and anyone can do it without any hassle. In this trap, a plastic water bottle is needed to make it. In it, there is a mixture of yeast and sugar. When the yeast consumes the sugar, it started to produce carbon dioxide continuously. As the little bugs attract carbon dioxide, they fly in the water bottle and get stuck. After a few times, they die inside. This is the basic concept of making and executing a trap that can attract mosquitoes. After clearing the main concept of the trap, I would like to describe to you the ways of making the mosquito trap. To do the entire process, all you need are a few materials along with a water bottle (a maximum of 2 liters can do the job perfectly). So, let’s get started…. Materials you need: An empty 2 liters plastic water bottle Scissors or box cutter or razor knife Duct tape A marker (red or black will do) ¼ cup brown sugar 1 cup of hot water (need to make it cool later) 10-gram brewer yeast As you have arranged all the materials mentioned above, it is time to start the next steps. Cutting the water bottle to make a funnel: With the help of scissors or a box cutter, you can cut the bottle at the desired point. To make it easier, you can use a marker to make a circle on the bottle where it needs to be cut. You should cut the bottle 4 inches from the lid of the bottle. Do it carefully as there are no unfinished zigzag edges that may cause harm to your hands. Now, if you put the top part of the bottle facing down, it should look like a funnel through which mosquitoes will enter. Water, brown sugar, and brewer yeast: With the measuring cup, take 1 cup of water into a pot and boil. Allow it a few moments to be cool and then pour brown sugar with the water to make a mixture. You should wait a few moments to dissolve the sugar. When it dissolved, add yeast to the mixture and let it be cool again. Make sure you have put the mixture into the lower part of the bottle (bigger part). Now place the top lid onto the bottle facing down so that it can make a funnel. Use duct tape to wrap the uneven edges as they can harm your hands while moving. The trap is ready for the action: As the funnel to trap mosquitoes is almost ready to use, and the yeast is ready to consume sugar to produce carbon dioxide, the play begins. Keep one thing in mind that carbon dioxide will produce as long as the yeast eats all the sugar up. After that, it will not work as a trap. In this case, you can reuse the trap again and again. The yeast may take only two weeks to eat up all the brown sugar and end producing carbon dioxide. But you should not worry about it as you can replace all the materials, again and again, to rejuvenate the trap for attracting the little vampires. In this way, drive the annoying mosquitoes away and keep your surroundings these little bugs-free to lead a healthier and happier life. Now, you can enjoy the summer vacation sitting on your armchair at the time of sunsetting. A homemade mosquito trap can ease the chances of your disease rate. If you do not want to get your hands dirty or do not have time to invest in the creation of such tools, there is an easy way out. You can always look at some cost-efficient and affordable residential mosquito removal services that guarantee peace of mind and great hygiene for your home. Read Also: 10 Pest Control Tips To Keep Pests Away This Summer What You Should Expect From A Pest Control Visit

READ MOREDetails