7 Secrets to keeping your Lawn Tidy and Green

Published on: 04 March 2019 Last Updated on: 04 November 2024
Tidy and Green

Your yard is an extension of your home. Just like your home, you want to keep your yard in great shape. Like your home’s interior, you also want to make sure the yard is an entirely inviting place. You also want your lawn to stay tidy and green. There are lots of steps you can take to accomplish this task. A beautiful yard is not only a place to admire. It’s also a credit to the neighborhood for your neighbors to adore as much as you do. If you’re going to put that house on the market, you’ll want to make sure it has instant curb appeal. Homeowners planning on staying put can also benefit from a lush yard full of pleasing features any day of the year.

Here are 7 secrets to keeping your Lawn Tidy and Green:

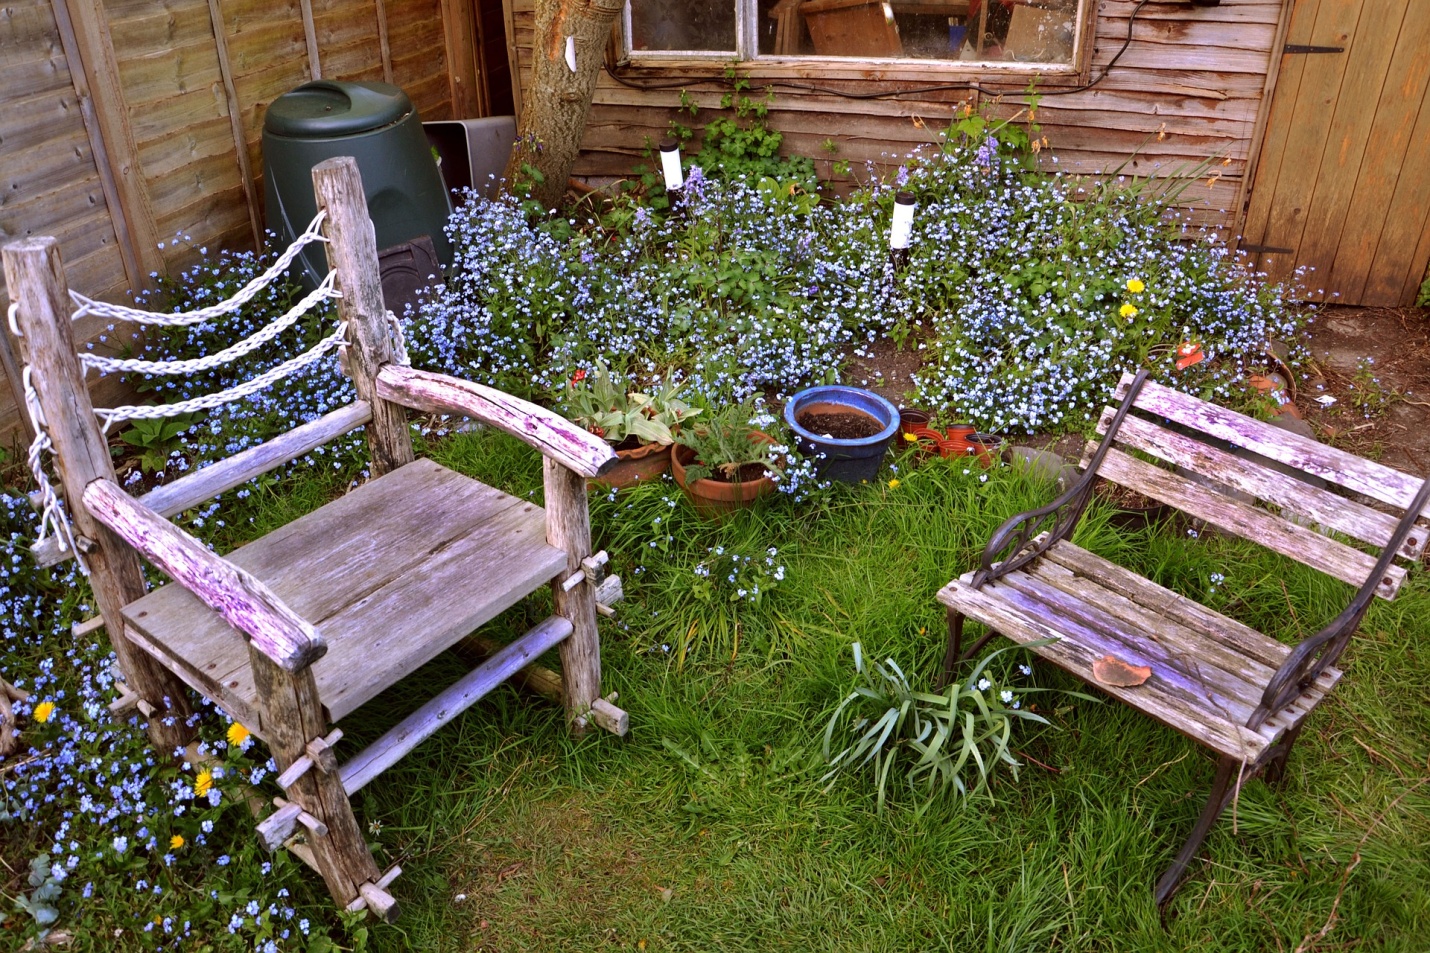
1. Creating Outdoor Rooms:

It’s best to think about the entire yard as a series of open rooms. Each room can be dedicated to a separate purpose. One area might be where you grow your beautiful roses. The next might be an area dedicated to growing lots of fruit and vegetables or a grove of trees that you can retreat to on a hot day. Each area can serve different purposes and yet still be part of an organic whole at the same time. Each area can also provide you with hours of enjoyment. Keeping each area in the best shape possible makes it possible for you to use that part as intended.

2. Other Features:

A yard typically has lots of other features besides the grass. You might have a birdbath or a pool. One area might have a large deck and a patio where you take your morning coffee before heading off to work. When making sure that your own lawn is in ideal shape, you’ll want every single feature to work effectively. Allow enough space to make sure that any chlorinated water in your pool is firmly away from your more delicate flowers and growing vegetables. Keep a close eye on your deck and the patio area. These need to carefully examined as the season’s pass. Look for any cracks in the pavers and other parts of the patio. Apply a coat of stain to the entire deck with waterproof features to keep it looking good and avoid problems with wood rot.

3. New Forms of Grass:

Different kinds of grasses can also be used in your yard. Synthetic turf from SurfaceIT Sydney can provide you with a useful alternative to your standard yard materials. This new form of grass is easier to maintain than many other types of grasses. There’s no need to use lots of messy chemicals like fertilizers to keep in looking good. This form of grass also needs a lot less help to make it look good. You don’t have to spend hours mowing it each year. It will also last longer than a handful of grass seeds and won’t get full of dirt in the middle and muddy patches in the middle of a storm. This is a good choice that can work well with other types of lawn material for a coherent and elegant look.

4. Proper Fencing:

Fencing is another way to keep your yard looking fabulous. If you have a large dog, the fence will make sure they’re not wandering the neighborhood. Fencing also provides a safe space for kids to enjoy as parents watch them have fun. Think about the kind of fencing you want to use. There are many choices ranging from standard wood to aluminum siding. Fencing can be easily integrated with the rest of the home’s look and materials by using the same material as the rest of the house in this design. Add additional privacy by training a series of vines to climb over varied areas of the property. They’ll add lots of colors and provide a lot of interest to the entire yard.

5. Long Term Plans:

Any plan for your yard should have both short term and longer-term ides in place. In the short term, you might want to begin by removing any existing features that you don’t like. For example, you might have bushy areas with lots of growth that have grown over time and even uprooted areas in your yard.

Investing in the right tools to help you clean your yard effectively and swiftly is essential. One must-have tool is the Milwaukee M18 electric string trimmer which is a flexible, multi-use tool that is durable and long-lasting.

Your longer-term plans for the yard might include other aspects of it such as putting down a brand play space for the kids and installing new railings. Consider how you reach each area in the yard. Keeping it in good shape also means removing any obstacles in the path to the yard such as redoing the paths that lead to it.

6. Feeding the Yard:

All cards need to be fed to look good. You’ll want to think about how to feed your yard and when to feed it. Now is the time to bring in the tools you need and store them in an easy and convenient place such as your garage. The yard needs to have food typically several times a year. You’ll want to take the time to make sure the yard is fed on schedule. Adding additional items such as mulch can help by adding even more interest and protecting areas of the yard that might otherwise get too much sun all day long.

7. Watering It Right:

A yard also needs water. Water makes sure are all areas of the yard look nice. Nature typically waters the yard as needed. However, sometimes nature needs a little help now and then with the watering process. If you see areas that look as if they are getting a little bit brown, you’ll want to make sure they are fully watered. A few minutes of watering once a week can keep your yard in great shape even in the middle of long, hot days. Consider grasses and other plants that need less water but will still look great. You’ll conserve water and have a stunning yard at the same time.

Read Also:

Content Rally wrapped around an online publication where you can publish your own intellectuals. It is a publishing platform designed to make great stories by content creators. This is your era, your place to be online. So come forward share your views, thoughts and ideas via Content Rally.

View all posts

Leave a Reply

Your email address will not be published. Required fields are marked *

Related

Shower Pods

How to Properly Maintain Your Shower Pods

Shower pods are the best thing that has entered the London market in recent years. They're perfect for achieving that modern and sleek vibe, making your home look minimalist. Additionally, the pods make sure that your bathrooms stay clean, free from water spills and splashes from your energetic little ones. So, shower pods are very functional and quite handy to have around especially if you are starting a family. They allow you to have more time to spend for yourself since you won't need to clean up water puddles every few seconds. Proper maintenance is key to keeping your shower pods in tip-top shape. Here are two crucial things you should remember to make sure that your shower pods will still be in good condition even after a few years. Different Ways To Maintain The Shower Pods  There are several factors that you have to consider while you want to maintain your shower pods in all possible manners. Work out the plans that can help you to achieve your goals in the best possible ways.  1. Mould prevention  Any shower will eventually grow mould if not cleaned regularly. You should immediately remove mould to avoid health complications. In a mouldy environment, you may be more prone to coughing, sneezing, nasal stuffiness, throat irritation, wheezing, eye irritation, and skin irritation. It would also pose a serious risk to those who have mould allergies or lung illnesses. Mould loves to grow in moist environments, and that’s why even shower pods are vulnerable to it. To effectively clean mould, use a damp cloth to wipe every available surface you see in your shower pod. For stubborn ones, you need to make a DIY solution by mixing 1-part bleach and 1-part water. Spray the DIY solution onto the affected area and wait for at least 15-20 minutes. You can rinse the surface afterward. Repeat the process as necessary. To avoid mould from growing in the future, you should open at least one window in your bathroom. It will ensure that there will be proper ventilation and airflow to prevent humidity inside. 2. Glass cleaning  All pods have shower glass which is what makes them famous in the home fixture market. The shower glass needs to be cleaned at least once a week to maintain its sheen and beautiful finish. The cause of this is the shampoo and soap deposits that stick to the shower door glass while you’re bathing. You need to clean your shower pod often. If you do it regularly, all deposits will be easily removed, and it won’t require too much of your time to clean it. Additionally, you need to drain all the water and dry the shower after use. It will significantly benefit you because there will be no accumulation of soap scum sticking to your glass. Sometimes, stubborn deposits won’t be easily removed. Apply a glass cleaner to ensure that the glass door is sparkly clean. Use a clean paper towel to apply the glass cleaner and spread the solution in a circular motion. Leave it to do its magic for a few minutes. You’ll see the beautiful result after rinsing it off. When you do these things, you can guarantee that your shower pod will last you a lifetime. Not to mention you can better protect your family from unwanted diseases and other health problems. Final Words  Hence, these are some of the factors that you have to take care of while you want to maintain your shower pods in all the possible manners. Do not make your choices in grey while you want to improve the arrangements of the shower pods. Shower pods can make things work in your favor if you select the best one for yourself. Do not make your choices in the wrong direction in all possible manners.   Read Also : Bathroom Remodeling Tips And Ideas Bathroom Upgrades You Should Consider Mirror Decorating Ideas To Style Your Bathroom

READ MOREDetails
Make Most Out Of Your Outdoor Space

Ten Tips to Make Most Out Of Your Outdoor Space

Bored of seeing the old patio and cringe every time your friends come home for a barbecue backyard? Not anymore! Give your boring living space a beautiful makeover. Whether you have small outdoor or a big yard, you don’t need to juggle a lot to make a big statement to your outdoors. Just some tips and bang on! From the most beautiful designs to the personalized touch, get the most out of your outdoors with these ten practical tips: Seating: A perfect seating as per the ambiance is the one everybody wants to relax on. While the right seating can enhance the look, inappropriate arrangements can ruin the whole look. For big spaces, add farmhouse table or a custom-built bench, or perhaps an artistic sofa. However, for small spaces, try bold colors or make use of wicker chairs. Lighting: One of the essential elements in outdoors is the lighting. Perfect lighting can uplift the mood as well as can change the ambiance of the place to dress up your place, use chandeliers or small lamps. String lights can also work for small patios to make a significant impact. Read More: Create A Stunning Outdoor Space With These Residential Landscape Lighting Tips Bar/ Kitchen: A bar at the outdoors is a must! Turn your patio into an outdoor kitchen space or a customized bar with all the liquor to make your weekend party a bang! Rug area: Dress-up your outdoors with the beautiful rugs of different patterns and shapes. Try primary colors, or a plane stencil pattern would work in that green lushes. Storage seats: Storage is another essential thing for outdoors. Use a multifunctional box or perhaps a functional couch to place drinks, cushions or eatables in it. Adorn the storage box by painting on it or make them look like extra seating for your guest or friends. DIY planters: Plants at outdoor are no exception, but plants in quirky things can be. Don’t settle for pots or hanging pots, instead make use of every other waste thing lying around to bring greenery to your outdoors. Grab a tin or maybe an old bottle or perhaps tire, spray paint on it and done! Flower boxes: Flower boxes are also a beautiful way to enhance the look of outdoors. Use shutters or wall hangings of a different color to get the most out of your living space. Give it a curb appeal by planting colorful flowers in it. Fire Pits: If your outdoors has a fireplace, you know it’s the place to cuddle on beautiful nights. The source of fire at outdoor draw people, so if you have one makes the seating around it and get set party! But if you don’t have any fireplace, DIY one by making small pits. Fire pit cover: Put your fire pit to double duty by popping a lid on it making it a unique tabletop. For daylight gathering or day parties, coving a fire pit will add more space to the outdoor to place things. Add a sporty look: Fashion and sport can go hand-in-hand. And with greenery, it looks the best. Use some of your favorite outdoor games to decorate the space. Make use of walls, install shelves on the railings or look for the places where you can hang on things. So those were some of the most favorite home builder tips that you can use to remodel your outdoors.  Want to go a step ahead? Build a swimming pool in the space and enjoy outdoor bathing or how about a pool party! Insert these ideas and make outdoor living beautiful. Read More: 3 Amazing Flower Street Garden – How To Design Does Organic Gardening Improve Soil Quality? How To Choose The Right Containers For Your Container Garden Grow These Flowering Plants In Your Home Garden To Remove Vastu Related Problems

READ MOREDetails
Mattress

Five Easy Steps When Cleaning Your Mattress

It is highly important to clean your mattress on a regular basis. This is because mattresses could become a breeding ground for dust mites, stains, and bad odor. None of which we would want in our homes. Since we spend about a third of our lives sleeping, it’s only proper that the mattress we’re sleeping on is clean. But mattress cleaning may prove to be an intimidating task, especially if you do not know what to do. Do you wash it or dry it out? What cleaning agents will you use? Are you using the right cleaning techniques? The questions are endless – and overwhelming, too. After all, no one would want to damage an expensive mattress. To help you out, we have compiled a few tips to make the mattress cleaning experience a lot less daunting. Read on and find out. Suck Up the Dirt : Vacuuming your mattress is perhaps one of the easiest ways available to clean it. It may also be one of the most convenient ways. First remove your pillow top, sheets, pillows, and blankets. After doing so, you may then proceed to vacuum your mattress. This will: Remove any crumbs that may have accumulated from late-night snacking sessions or from movie marathons. Take off any pet hair that may have stuck to the mattress after letting your pet sleep in the same bed as you. Remove any dust that has formed since the last time you took the time to clean your mattress. Nearly every house would have a vacuum cleaner for general cleaning purposes. If yours does not, then consider getting one, as it is quite a good investment. It makes cleaning not only the rooms of your house a breeze, but it is a big help in cleaning your mattress as well, keeping it as comfortable as possible. Easy Spot Cleaning : The next thing you can do to clean your mattress is to spot clean it. The type of stains present on a mattress will vary from person to person. Likewise, the best ways to clean these stains vary as well. Here is a quick list of what you should use when you get an unsightly stain on your mattress: Water: Water is a safe bet. It is cheap and safe to use on absolutely everything. It is good as an immediate treatment to prevent stains from setting. It also lessens the effect of dyes but is not 100% effective. Detergents: These can be used for most situations, especially for grease stains. Commonly, people have detergents for laundry and dishwashing at their disposal. You must be careful with the latter, as it could damage the fabric on the mattress. Salt: This one can be found in almost every household. It is effective in removing sweat or deodorant stains. It is also good in lessening red wine and bloodstains. Vinegar or Lemon Juice: These two are amazing tools for removing coffee and tea stains. People have also found them effective against grass stains as well as tape and glue residue. Bleach: Bleach is effective in removing dyes. This means that it is a good bet for make-up and grass stains. This should be used in moderation, as it can damage more delicate mattresses. People also rely on a combination of hydrogen peroxide, liquid detergent, and baking soda. Simply spray the mixture on a stain and spot clean away. Another easy combination is that of lemon juice and salt. Spread this on a stain and leave it on for at least half an hour. Afterward, just wipe it off. Remove Foul Odors : The third step we suggest for the mattress-cleaning process is deodorizing. There are multiple, easy ways for you to do this. Air Dry: Perhaps the easiest and most convenient way to do when you want to deodorize. Simply leave it in the heat of the sun for a couple of hours. This will remove any foul odors and naturally kill bacteria as well. Baking Soda: Simply sprinkle this stuff on your mattress and leave it be for a couple of hours. It is a natural deodorizer that also kills germs. After it has done its job, just vacuum off the excess on the mattress. Lavender: A bit of an extra step, but has proven to be worth it. It does not only remove unwanted odors from your mattress, it also adds a relaxing scent that will help you get a better night’s sleep every night. While each one of these suggestions is effective in their own right, doing all three would help you achieve better sleep. It may take some more effort on your part, but it will all be worth it. Clean Your Sheets :  Washing your sheets is another important step in this process. It’s not enough that your mattress is clean; your sheets should be, too. It is always a good idea to clean your sheets regularly as this would prevent stains from seeping through to the mattress. This will also remove unsightly stains and foul odors. Together with a clean mattress, this will help you wake up more relaxed and energized. When doing this, it is important to remember the following : The washing machine is your best friend when it comes to washing bulky sheets. A dryer would also help deodorize and kill bacteria with its heat. Read care labels so that you do not cause damage to your sheets especially on sensitive fabrics. Some detergents are very strong and may actually do more harm than good. Some may even make the stain spread instead of removing it. It would not hurt to use a scented detergent to wash sheets. Just know how much and which brand to use. As mentioned before, lavender is a good scent for some more peaceful sleep. It is recommended that sheets be washed at least once a week. If this is not possible, then at least make sure to change them. Protect Your Mattress : Lastly, we would recommend you to protect your mattress. A lot of manufacturers offer mattress covers nowadays. They help prevent future stains from getting on the mattress itself. Not only that, some of them even make the bed more comfortable. As an added bonus, they can easily be thrown in the washing machine with the sheets. And On That Note… While this task may seem like it is too much, it really is not. This also has a lot more benefits than just removing stains. If you haven’t tried doing it and you’re scared of trying, ask someone who can help you out. Additionally, a wealth of information is available on the internet. Sometimes, the answers to your questions are a mere mouse click away. Cleaning your mattress on a regular basis is important. This would help keep germs at bay and remove foul odors. This will also increase your mattress’s longevity. Your mattress will keep you comfortable for as long as possible. All of this would lead to you getting a better night’s sleep in the long run. Take the first step today and you will thank yourself later. You invested quite well on that mattress; make that investment well worth it. Take good care of your mattress and it will take good care of you. Read More : Natural ways to get rid of flea in your lawn. Home Hacks: Stuff You Can Clean in One Hour or Less.

READ MOREDetails