How to Prevent Mold Damage In a Building

Published on: 13 February 2022 Last Updated on: 04 February 2026
Mold Damage

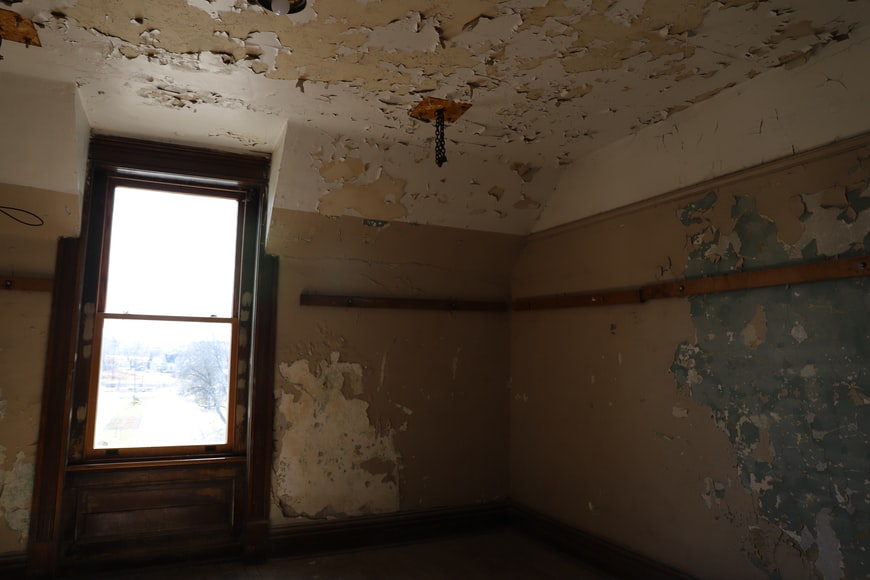
Healthy living requires a clean and safe environment, but with the prevalence of many microorganisms such as mold damage, this can be challenging. This is because they are invisible to the naked eye and release spores into the air, which cause major health problems when inhaled.

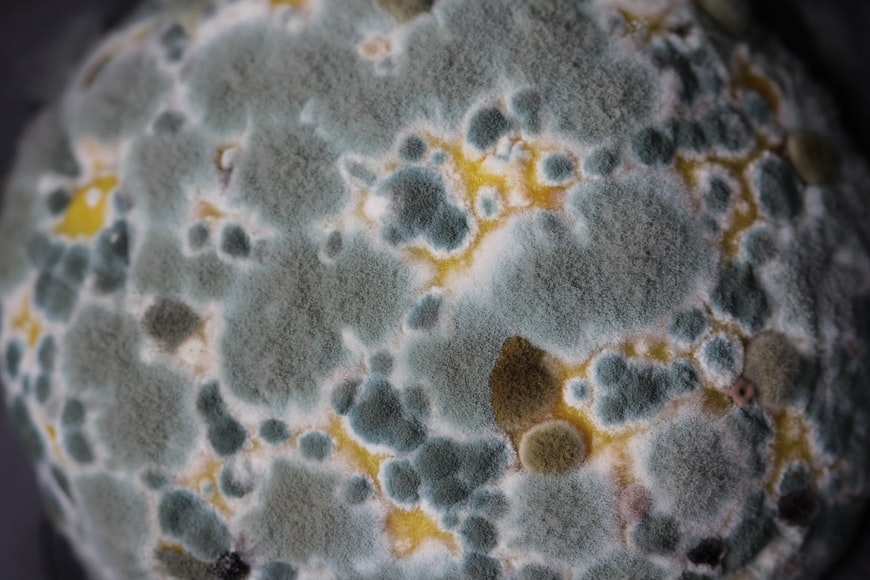
Mold is a fungus that grows in the form of hyphae, which are multicellular threads. It is composed of microorganisms that can be found almost anywhere. They are useful outside for breaking down garbage and composite materials, but when found indoors, they are extremely detrimental to human health.

Mold damage produces allergic reactions or irritation and must be removed as soon as possible. To stop it from spreading, early detection and removal are essential. Mold remediation or removal is not something just anyone can do. To achieve a proper sanitization of the entire building to avoid the existence of mold, you will need to contact professionals or follow the complete guide about damp wall treatment procedures. This way, you will be sure that your home or office will be properly treated.

Finding a good remediation service is not always a stroll in the park, especially if you have not worked with one before. However, with the right guide handy, you can easily find a professional company that will properly clean and sanitize your building. If you do not know how to find a good company, and you need recommendations on reputable companies to work with, you can visit the Long Beach mold removal company for help.

Types of Molds Damage:

Types of Molds Damage:

Here are some common types:

Aspergillus

This type does not need much ventilation and can be found in attics, textiles, walls, dry food, and basements. It has a powdery appearance and may be white, green, or gray in color, with dark dots. It has several carcinogenic forms, but when detected within the home, it causes serious respiratory problems.

Cladosporium

This can be found in both warm and cold places. It can also be found on carpets, clothes, wood, and heating and cooling ducts, among other things. The color is usually black, or green.

Alternaria

This fungus has a white background with black dots and can be found near windows, in fabrics, bathrooms, kitchens, air conditioning units, and wallpapers. However, it is commonly found outdoors.

Trichoderma

This fungus is commonly creamy-white in appearance, but as it releases spores, it becomes green. Windows, baths, kitchens, and wood are among its favorite areas.

Penicillium

This type is fuzzy and comes in a variety of colors, including blue, green, and yellow. Basements, insulation, and carpets are all common places to find them. It is usually present anywhere a water-damaged structure is found. Penicillin, an antibiotic, is derived from it. You can learn more about penicillin by reading this article.

Key Materials for Mold Removal

Key Materials for Mold Removal

Mold damage removal requires a variety of tools, depending on the size of the fungus and the type of surface to be cleaned. There are natural cleaning methods that may be utilized to get rid of it as well.

Plastic Sheet

A plastic sheet is used to separate the infected region from the rest of the room, preventing spores from spreading. It is used to block openings to air vents, doorways, and the rest of the building.

Biocide

It is critical to use a high-quality cleaning product for removing mold damage. The fungus will only be hidden if you use poor or regular household bleach or cleaning agent. Biocide is particularly effective at killing and inhibiting this bacterium’s growth.

Vinegar 

Despite its strength, it is quite effective against fungus. Baking soda, hydrogen peroxide, and lemon juice can all be added to it. Wear safety clothing such as goggles, gloves, and a breathing mask when using it. To remove the mixture, wipe the area with a clean moist cloth.

Sodium Bicarbonate 

Baking soda, or sodium bicarbonate, has a wide range of applications, including the removal of fungus. It should be sprayed on the damaged surface after being combined with vinegar or water. After spraying, scrub the area with a brush, rinse, and then spray again.

Dehumidifier

This gets rid of the moisture and prevents future growth. It is best used after the cleaning procedure to air the place and remove any remaining moisture, but it can also be used as a preventative strategy. As a solution, a portable one can be stored in a room with an infestation.

If you need tips on how to use a dehumidifier, you can check here.

Lemon Juice

This natural cleanser is efficient, non-toxic, and has a pleasant scent. Before spraying it, clean the surface with soap and water. It can also be applied daily to keep fungus at bay. It is an excellent choice because it is both environmentally and pet-friendly.

How to Keep Mold Damage at Bay

How to Keep Mold Damage at Bay

Here are some methods to guide you:

Regular Checks

They can be found in open regions, but they can also grow in secret spots. This means that regular inspections of damp, dark areas like basements should be carried out to detect the infestation early before it worsens.

Repair any Leaks

If there is a leak from pipes or faucets, fix it immediately and dry the area. Also, inspect drains and pipelines on a regular basis. Liquid storage areas should also be checked because they can leak from their bottles.

Make Use of Cleaners

While it is necessary to deep clean your home on a regular basis, you should do so with a mold-prevention agent. Natural cleaners such as natural lemon, white vinegar, baking soda, as well as other citrus-based treatments are recommended. In addition to keeping fungi at bay, these solutions leave a fresh smell around the building.

Allow Sunshine In

Mold does not thrive in natural light and fresh air. This means that you have to open the windows and curtains to allow sunshine in. You can also turn on your ceiling fan to prevent the survival of mildew. Keep in mind that mold damage is detrimental to human health and this should guide you in taking the right steps to prevent its growth and survival. You can read articles explaining how mold affects human health for more information.

Wrap Up

Mold growth can pose a danger to human health; therefore, it should be nipped in the bud. Always inspect the bathroom, roof, pipes, and foundation for cracks, leaks, or damages. Delaying treatment as soon as the condition is discovered can worsen the condition and increase the cost of treatment, especially if toxic or black mold is present. This article outlined tips to help you prevent mold damage in a building. Feel free to check them out.

Read Also:

  • We Buy Houses Companies Saving Homeowners From Foreclosure
  • Cleaning Your Home with Pets – The Most Common Problems
  • Hosted Mail Service That Runs on the Cloud

Content Rally wrapped around an online publication where you can publish your own intellectuals. It is a publishing platform designed to make great stories by content creators. This is your era, your place to be online. So come forward share your views, thoughts and ideas via Content Rally.

View all posts

Leave a Reply

Your email address will not be published. Required fields are marked *

Related

Rug Layering

Tasteful Or Messy? How To Nail The Rug Layering Trend In Your Home

Rug layering, a trend that has gained popularity in interior design, can be perceived as both artsy and deliberate or, alternatively, as a bit sloppy, depending on the execution and context. When done with care and a discerning eye, rug layering can add depth, texture, and visual interest to a space, elevating it to a more eclectic and personalized level.  The key to artful layers Artful layering involves combining rugs of varying patterns, textures, or sizes in a way that complements the overall design scheme, creating a harmonious and intentional aesthetic. Starting with a Large selection of stylish rugs is the best way to move forward in a stylish and purposeful way by allowing for a dynamic interplay of colors and materials, contributing to a space that feels curated and thoughtfully designed. While a good rug collection is the best way to nail this trend, some thought and artistic design is still required in the process. If not executed thoughtfully, rug layering runs the risk of appearing haphazard or messy. The key to avoiding a sloppy look lies in keeping a sense of cohesion and balance. It's essential to consider the color palette, scale, and patterns of the layered rugs, making sure they work together rather than clash.  Proper placement is also crucial; overlapping rugs in a purposeful manner can create zones within a room, defining different functional areas and enhancing the overall design. Without this intentional approach, however, rug layering may come across as disorganized and lacking in visual harmony.  If you would like to add additional warmth to your home, and perhaps find a way to tie your rooms and decor together, then blankets are a great way to do that. They blend in easily and provide both aesthetic and practical value. Why add warmth with rugs and blankets?  Rugs and blankets play crucial roles in enhancing the comfort, aesthetics, and functionality of a home. Rugs, with their diverse textures and patterns, serve as versatile decor elements that can tie together various design elements within a room. They not only add warmth to hard flooring surfaces but also define and delineate living spaces. Whether it's a luxurious Persian rug in the living room or a cozy sheepskin rug in the bedroom, these floor coverings contribute to the overall ambiance of a home. Similarly, blankets are multifunctional essentials that go beyond providing warmth. They introduce layers to interior design, allowing homeowners to infuse colors and textures that complement their style. Blankets draped over sofas or neatly folded beds serve as both decorative and functional accessories. In addition to their aesthetic value, blankets offer a sense of coziness, inviting individuals to snuggle up during chilly evenings. Together, rugs and blankets contribute to a home's atmosphere, creating a welcoming and personalized space where style meets comfort. Ultimately, the method of rug layering chosen is really dependent on individual taste. For those who appreciate a more eclectic and bohemian look, carefully layered rugs may be considered artsy and avant-garde. The key here is to strike a balance that aligns with the overall design vision and the desired atmosphere of the space. Read Also: Home Decoration At Its Best: 7 Key Ideas To Recreate Your Home Top Home Remedies To Make A Floor Non-Slip Ideas for Modern Flooring Designs for Home Improvement Plans

READ MOREDetails
Apartment

6 Types Of Signs Every Apartment Resident Should Know About

Signage plays a crucial role in communicating important information and guiding residents and visitors at apartment complexes. From practical wayfinding signs to eye-catching banners advertising available units, the right signs can make all the difference.  This blog explores the array of sign options that apartment managers have at their disposal to effectively convey messages, improve accessibility, and enhance curb appeal. We’ll look at everything from illuminated “Vacancy” signs to inform potential renters of availability to parking designation signs that help maintain order in lots. Metal laser cut signage like building and unit number markers also make it easier for emergency responders, delivery drivers, and visitors to navigate complexes. Plus, promotional banners can attract interest from passersby. With a thoughtful signage strategy, managers can ensure their apartment community puts its best face forward while helping residents and guests seamlessly get where they need to go. Effective Safety Signage for Apartment Complexes Strategic safety signs are a must for any apartment community, helping to mitigate risk and give residents peace of mind. Required by law in many cases, these symbols and warnings serve an important function by alerting residents and visitors to potential hazards, emergency resources, and proper protocols.  Exit signs with directional arrows provide critical guidance in the event of a fire or other emergency evacuation. Highly visible hazard signs denoting slippery floors or wet paint caution people to avoid dangerous conditions. Signs indicating the locations of safety equipment like fire extinguishers and defibrillators can save critical seconds in an emergency. Parking and traffic signs help maintain order in complex lots and garages. Warning symbols for loud noises, falling objects, or other construction hazards around work zones keep passersby safe. When properly placed around an apartment community, these simple but essential signs convey a message of preparedness and attention to safety that gives residents confidence in their building management. Contemporary Signage for an Inviting Apartment Atmosphere An apartment community's signage makes a strong first impression on prospective residents. To keep pace in a competitive market, modern, stylish signs are a must in showcasing an up-to-date, inviting atmosphere.  Sleek, backlit LED signs at a complex's entrance identify the property while seamlessly blending contemporary aesthetics. Likewise, stylish building IDs with minimalist lettering and colors that pop evoke modern tastes. Parking signs with clean lines and high-visibility reflective vinyl or thermoplastic lettering also exude a contemporary vibe.  Inside leasing offices, wayfinding signage with intuitive pictograms, sans-serif fonts, and bright accent colors speaks to today's sensibilities. Outdoor banners sporting vibrant images, short impactful phrases, and a distinctive modern style attract the gaze of passersby. Signs with polished, contemporary finishes appeal aesthetically and communicate professionalism and quality. By partnering with an innovative sign company, apartments can keep their image fresh, memorable, and inviting for new generations of renters. Promotional Signage for Apartment Events Special events help apartment communities build a sense of togetherness and camaraderie among residents. To generate buzz and boost participation, targeted signage is an invaluable promotional tool. Eye-catching vinyl banners prominently displayed at a complex's entrance build anticipation and awareness of upcoming holiday parties, poolside barbecues, and other resident events. Sandwich boards stationed in high-traffic common areas like mailrooms spread the word on everything from movie nights to fitness classes. For events like trick-or-treating or a pet parade that will draw outside visitors, roadside signs posted nearby grab attention from passersby.  Temporary signage like corrugated yard signs, A-frame sidewalk signs, and posters hung in common spaces ensure residents receive frequent reminders leading up to each event. The vibrant, festive designs set a fun tone. After an event concludes, a thoughtful "Thank You" sign shows appreciation for those who participated. With the right signage strategy, apartment managers can generate buzz and bring their community together around special activities and gatherings year-round. Clear Identification Signs for Apartment Buildings A clear signage strategy is essential in any apartment community to help residents and guests easily identify buildings, units, and common spaces. Proper identification guides traffic, minimizes confusion, and improves the overall living experience.   Illuminated building numbers and address signs ensure emergency responders can quickly locate the correct structures. Unit number signs on floors and doors give each residence a sense of identity. Room ID signs labeled with easy-to-read text and icons help differentiate laundries, fitness centers, lobbies, and other shared amenities. Custom room name signs add personality to spaces like game rooms or theaters.  Well-designed identification signage also reinforces security. Authorized access signs for private lobbies or gated garages deter unwanted visitors. And placards labeling restricted areas like electrical rooms or roof access help keep people safe.  Finally, a clear wayfinding signage strategy with directionals pointing to different building exits or parking areas simplifies navigation. With thoughtful placement and durable materials, identification signage provides clarity, security, and convenience for years of daily use. Accessible Signage for ADA Apartment Compliance In apartment complexes, proper ADA-compliant signage is a legal requirement to accommodate residents and guests with disabilities. Following ADA guidelines help ensure equal access and inclusion for all. Signs must have high visual contrast between lettering and background without glare or shadows. Grade 2 braille placed below the text provides accessibility for the blind and visually impaired. Raised characters and pictograms allow signs to be interpreted non-visually by touch.  Accessible signs use simple, intuitive icons that transcend language barriers. Directional signs assist with wayfinding. Room signs identify amenities. Informational signs indicate accessible routes, entrances, exits, and areas of rescue assistance. Stairway signs guide users towards ramps.  By law, permanent spaces like unit entrances and common rooms require ADA signs. Temporary signs like parking warnings should also follow recommendations. With a thoughtful sign plan incorporating contrast, braille-raised characters, and icons, apartment complexes demonstrate their commitment to creating a welcoming, navigable environment for all residents and visitors. Intuitive Wayfinding Signage for Apartment Complexes A clear wayfinding signage strategy is essential for any apartment community, allowing residents and guests to seamlessly navigate between buildings, amenities, and parking areas. Intuitive signs reduce frustration and reflect thoughtful management. Directional signs posted at complex entrances and key intersections point visitors toward leasing offices, guest parking, and specific buildings. Trailblazer signs on main walkways provide ongoing orientation. Arrows, international symbols, and maps further aid navigation at junctions.  Building directories found in main lobbies centralize location information for amenities like fitness centers, pools, and business centers. Illuminated unit number signs outside stairwells and elevators confirm users are on the correct floor. Parking signs with color coding and space numbers help distinguish lots and spaces.  With thoughtful placement and highly visible reflective materials, wayfinding signage ensures visitors quickly find their destination. This cuts down on circling, enhances first impressions, and communicates a resident-focused environment. Simply put, good wayfinding equals good management. Conclusion An effective signage plan is invaluable for any apartment community, serving practical and aesthetic purposes. From illuminating building numbers that assist emergency response to wayfinding signage guiding foot traffic, signage provides orientation, security, accessibility, and visual appeal. Managers must consider permanent signage needs like room IDs and ADA compliance and options for changeable messaging to promote leasing availability or resident events. The finishes and design details of all signs should align with the complex's contemporary style and branding. Utilizing sign types from digital displays to sidewalk A-frames provides flexibility. With the help of an experienced sign company, managers can develop a comprehensive signage strategy tailored to their complex's specific spaces, needs, and aspirations. From influencing first impressions to sustaining long-term functionality, signage positively impacts apartments in countless ways. When thoughtfully designed, fabricated, and placed, signage cements an apartment community's identity as an inviting, navigable place residents are proud to call home. Read Also: How to Make Your Student Apartment Feel Like Your Own House? Things You Can Do to Your Apartment to Raise Its Value 5 Interior House Painting Tips

READ MOREDetails
how to harvest lettuce

How to Harvest Lettuce: A Step-by-Step Guide for Fresh and Crispy Salads

Since lettuce plants grow best in cool growing seasons, most lettuce varieties are classified as spring or fall greens. However, if the longer days are keeping your lettuce plant producing leaves well into the summer and it hasn't bolted yet, here are some excellent tips to follow to maximize your harvest. Taking individual leaves off the plant is one way to increase its yield. Alternatively, you could sow in succession every two weeks in the early spring or fall to continue the harvest. To offer lettuces shade and protection from the hot summer sun and high temperatures, a third method is to interplant with a taller crop. Lastly, cultivators should seek out cultivars known for their slow bolting, like the looseleaf varieties "Slobolt" and "Sierra." Here is how to harvest lettuce so you can eat some leaves right away and encourage the plant to continue growing more. How To Harvest Lettuce? If you want to harvest lettuce and do not know how to go about it, here are all the details. Follow the steps closely to get the healthiest and crispiest lettuce for your salads and sandwiches. Plant Looseleaf Varieties Your lettuce variety should be ready to harvest in 35 days, according to the seed packet, which means you should have large enough leaves to pick a little more than a month after planting. By regularly picking the outer leaves, you may be able to extend the harvest until late June if you sow seeds in March or April. Begin Harvesting Early in The Season Young lettuce plants will be harmed by light frost, but mature plants can withstand it. If you live in an area where there is no winter frost, you can plant early and begin harvesting the outer leaves when they get to be 4 or 6 inches long. Your harvest can last up to 30 days longer if you plant and harvest early. Pick Lettuce in The Morning It is ideal to harvest lettuce early in the day to avoid the leaves wilting due to the intense heat. The leaves are crispest and flavorful in the morning because they contain the most water. Look For Plants with Large Outer Leaves The center of the crown is where the new growth starts on the lettuce. You must remove the largest, oldest leaves that are about 4-6 inches long. You will find these leaves on the outside of the plant. Cut or Pinch The Outer Leaves At 1/4 to 1/2 inch from the base, pinch off each outer leaf. To break the leaf off the crown, apply just enough pressure with your thumb and forefinger. Another option is to use a sterile, sharp scissor or snipping tool, though there is disagreement about whether doing so accelerates the browning of cut edges. Harvest Until it Flowers When older, mature leaves are consistently removed, the lettuce plant is encouraged to grow new leaves in their place. Harvesting individual leaves is possible until the plant produces a flower stalk, which indicates that it is ready to bolt and set seed. Lettuce turns bitter once it bolts. When to Harvest Lettuce? As soon as the lettuce is large enough to pick, it can be harvested. A seed packet will typically tell you how many days it will take to harvest. For the "cut and come again" method of harvesting loose leaves, standard-size varieties are the most effective. When outer leaves are 4 to 6 inches tall, that's the best time to begin harvesting. There are many varieties of lettuce seeds available, including blends and mesclun mixes. The best varieties to plant for a continuous harvest are called bi-colored, spotted, or loose-leaf lettuces in green and red or burgundy tones. The following are some varieties you might want to try: Black Seeded Simpson Green Salad Bowl Freckles Lolla Rossa Gourmet Mesclun Blend Deer Tongue Garden Leaf Blend Loose leaf lettuce varieties yield the best results from the cut-and-come-again method. Red, green, and oak leaf lettuce are a few examples. Additionally, you can wait to pick until a full head has matured or harvest early leaves from loose-heading varieties like butterhead and romaine. When and How to Gather Lettuce Heads The growth habit of head lettuce is akin to that of cabbage. In order to form a dense, rounded, or clumped shape, younger leaves emerge from the center, and older leaves form layers. There are two types of head lettuce: loosehead (similar to romaine) and crisphead (like iceberg). Let the crisphead varieties mature for a single harvest and keep an eye on them in accordance with the days to harvest specified on the seed packet. When the heads are dense and the appropriate size, they are ready to be picked. If you remove the outer leaves once or twice, loosehead lettuces will still head. However, the size of the fully mature head may decrease as a result. These lettuces can produce a head of looser layering or wrapping leaves (butterhead) or a clump of tall, straight leaves (romaine). Remove crispheads by chopping off the stem just below the center. Loose heads can be trimmed similarly or removed, with roots and subterranean stems cut back to the leaf base, depending on size. What Happens If a Flower Stalk Bolts A lettuce plant will eventually shoot up a flower stalk in the center, a sign that it has reached the end of its life and is ready to bolt, or bloom, and set seed. Though they might still be edible, the lettuce leaves are starting to get tough and bitter. There is no stopping flowering once this process has begun. Throw away the plant and plant again if the weather permits. Types of Lettuce There are four types of lettuce you can choose from when choosing which to grow: leaf, butterhead (loosehead), romaine, and head lettuce. When it comes to cultivation and harvesting, the main distinction is that leaf lettuce crops yield several harvests, whereas head lettuce varieties, such as iceberg, romaine, and butterhead, only yield one harvest. Leaf lettuces are, therefore, a favorite among home gardeners since you can grow them in raised beds, on the ground, or in patio containers. Keep in mind that lettuce is a cool-season crop, so you should schedule your harvest for the spring when the temperature is still cool. Such temperatures are usually around 70 degrees. Find out when the first frost occurs in your area each fall and plant appropriately. Starting fall crops from seed indoors and moving them outside as the weather cools down may be the best option. Seek out head lettuce cultivars such as Crisphead and Iceberg that you can grow from seed. In roughly six weeks, the lettuce will reach maturity and be ready for harvest after the seeds have germinated in 10 to 21 days. One loose butterhead variety that you can grow from seed or seed tape is called Buttercrunch. It takes 65 days to be ready for harvest. Vivian is one of the romaine varieties that yields soft, flavorful leaves. Directly sow seeds in the garden in the spring. Start seeds indoors in the fall and transplant them to your garden. Varieties of loose-leaf lettuce grow quickly and are enjoyable to experiment with in salads, sandwiches, and other culinary creations. Look for mesclun mixes and heirloom cultivars such as "Black Seeded Simpson." Many come in simple-to-grow seed tapes that can be harvested in roughly seven weeks. How to Harvest Leaf Lettuce? When the weather gets chilly, you can harvest salad from a leaf lettuce crop in your home garden whenever you're ready to eat. You can harvest an entire crop of lettuce at once by waiting for it to mature. However, cutting fresh lettuce leaves off as they grow is the easiest way to prepare them for consumption at any time. Depending on the variety, lettuce leaves should be harvested when they reach a length of 3 to 6 inches. Gather leaves continuously until the lettuce plant "bolts." This indicates that the plant has focused its energy on developing seeds and flowers, and as a result, the leaves typically develop tough stems and a bitter taste. How to Harvest a Full Head of Lettuce? A lettuce plant can continue to grow until it produces a full head of leaves. Use the "one and done" approach when harvesting head lettuce. Just make a clean, above-soil knife cut across the entire head of lettuce at the base of the plant. For this, a harvest knife comes in handy. Remember the seed packet and note the maturity or harvesting days. As your plants get bigger, keep an eye out for indicators of maturity, which are typically firm, full heads. Harvest in the spring before it gets too hot, usually when the daytime highs hit 70 degrees Fahrenheit. The bitter taste of the leaves and the mushy head of lettuce can result from warm weather. How to Store Lettuce? When the lettuce is inside, you can use a colander to wash the leaves and thick cotton towels to dry them so you can use them in salads and sandwiches. In case you cultivate a lot of lettuce, investing in a salad spinner would be wise. It helps dry and wash Lettuce quickly. Lettuce leaves without water should be refrigerated. For most greens, store the leaves in a loose plastic bag for approximately a week. When the salad greens are ready to be eaten, give them a good rinse in several runs of cold water and then pat dry. How to Harvest Lettuce Microgreens? Microgreens are incredibly simple to harvest! When the first true leaves appear, after ten to fifteen days of planting the seeds, they will be ready. When the microgreens are two to three inches long, harvest them if you are measuring them by height. Investigating the flavor profiles of the microgreens at various heights is enjoyable. Cut the entire plant ½ inch above the soil line with a pair of scissors or grass shears. If you need more inspiration, check out our many other interesting gardening tips for growing microgreens, like growing lettuce microgreens! How to Harvest Romaine Lettuce? The leaves of romaine lettuce (also known as cos) have the perfect amount of crunch or crispness. The lettuce plant's outer leaves can be harvested as it grows. The leaves can be chopped off one to two inches above the ground. Gathering these tender green leaves now will give the lettuce more time to ripen before full plants can be harvested. Before Romaine lettuce reaches maturity, it can take 55–70 days to grow from seed. To determine when the lettuce is ripe, examine it directly. When the romaine lettuce leaves are 6 to 8 inches tall, the ribs are firm and juicy, and the leaves have formed a tightly compacted head, the lettuce is ready for harvesting. To test if the lettuce head is firm, squeeze it. Overripe head lettuce will be tough, while young head lettuce will be soft. Harvest by making a cut an inch above the ground, saving the crown for a subsequent harvest. You can harvest the lettuce head by digging up the entire plant if it is nearing the end of its garden lifespan. Read More: Everything You Need To Know About Harvesting Basil! Loose Leaf lettuce The harvest window for leaf lettuce varieties is quite broad. After planting, the young, baby lettuce leaves can be harvested 25 days later, and the plant will mature fully in 50–60 days. Make sure your crop is harvested prior to it bolting. Since you can harvest loose-leaf lettuce more than once during the growing season, it's ideal for repeated harvesting. You can chop the entire lettuce plant 1-2" above the soil line once the leaves reach 4".  In 10 to 15 days, fresh leaves that have sprouted from the base will be ready for harvesting again if the crown is left intact.  Try spreading out your seed sowings and doing multiple sowings to ensure a consistent harvest all season long. If you want to preserve the crisp flavor of the young baby greens, you should sow them again. Another method of harvesting involves leaving the inner leaves to grow while pruning the young leaves on the outside of the head for greens. When the plants are 4 inches tall, you can begin harvesting lettuce by cutting them just above the soil line. Crisphead Lettuce When grown locally, crisphead or iceberg lettuce makes for incredibly tasty salad greens.  You might not get a whole head of lettuce, but this can be a cut-and-come-again harvest.  A single harvest is more appropriate for this green lettuce. After planting, there is a 50 to 75-day window for harvest. Iceberg lettuce can be harvested as soon as the head appears before the outer leaves turn brown and as soon as the center feels firm, and the leaves are compacted tightly. Before the crisp lettuce starts to open and the seed stalk starts to form, harvest it. More importantly, if you see the lettuce beginning to bolt—a common issue in hot weather—or the seed stalk, harvest it right away. Harvesting iceberg lettuce is best done by digging up the entire plant and then cutting off the stalk. Because of its thick stem, this lettuce plant can be challenging to harvest while it is still in the ground.  If you decide to harvest the lettuce while it's still in the ground, please take care not to harm it.  You can cut the stem just below the leaves by lifting the lettuce upwards. Wrapping Up Nothing compares to the sheer satisfaction of harvesting and regrowing fresh, new lettuce from the same plant. You are far superior to other lettuce owners if you can figure out how to harvest lettuce correctly so that it keeps growing. Thus, if you want to become a rich lettuce farmer, make sure you constantly and meticulously follow all the above steps! If you have thoughts to share or questions to ask about how to harvest lettuce, then please leave a comment below. We would love to hear from you. Read Also: Some Facts You Need to Know About Rainwater Harvesting Asparagus 101: When, How, And How Often To Harvest? Exploring Ideas For A Biophilic Home Design

READ MOREDetails