Taking a tour through what Sober Living Entails

Sober Living

More people today are resorting to sober living in their journey back from addiction. Sober living here facilitates your reintegration into society and healthy living typically after drug rehabilitation.

This is a kind of therapeutic community where patients in the post-rehabilitation stage heal themselves by living with themselves, sharing their recovery process.

Here residents of that specific sober living facility bond, grow and mutually build accountability. This way, one is a watchdog unto the other the same as the other is a watchdog unto him.

Sober living involves being domiciled in a reserved community of patients (in similar recovery stages). These people can go to the same work, partake in the same social activities and even go to school together. The sense of communal healing is well emphasized here.

More sober living homes are sprouting up today in Dallas, Texas, as our societies struggle with a modern leap in substance abuse. Charity organizations or private institutions operate a number of these sober living homes.

In most instances, these homes are well insulated from the buzzing bustle and fast life of the outside world. This healthy segregation gives the patients the required calm, setting, and peace to recover better and more sustainably.

Sober living homes are freer:

Sober living homes are not typically the same thing as conventional rehab centers. For the latter, there is a lesser volume of autonomy or freedom. Rehab centers operate more intensive cares than sober living homes. In contrast, sober living houses tend to cut the patient lose a bit to recuperate independently.

This doesn’t mean Sober Living Dallas TX is free for all party where anything goes. Most of these sober living house institute specific guidelines for which adherence is mandatory for residence in such homes.

Staying conditions apply:

Many sober living homes require that the patients staying there periodically undergo drug tests to affirm how sober they have been. Others would institute curfew systems that require patients to be home at specific intervals of the day.

Violation of these rules comes with varying levels of consequences. This ranges from “community service” within the facility, fines, and even expulsion from the facility.

The constitutions of much sober living home differ. Yet, the prevailing emphasis is on abstinence and sobriety. Fundamentally, drugs, and sometimes alcohol is strictly prohibited.

There are cases of sober living Dallas TX, where the facility goes as far restricting the type of mouthwash and cooking ingredients residents use. The idea is to reduce the possibility of relapse or unconscious misuse.

Nonetheless, sober living homes are far more repressive and are willing to delegate a level of responsibility to the individual. Thus we see that the resident in the facility buy their food, go to work, and even pay their rent. This level of accountability or “maturity” would acceleration their reintegration into responsible living when they finally get back to the bigger society.

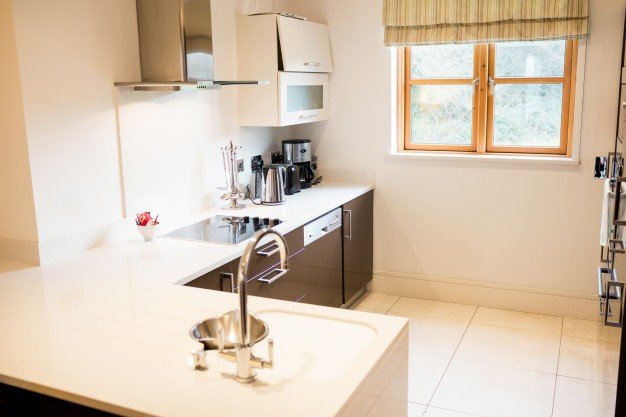
Real Deal presents one of the best sober living facilities in Dallas. This facility is abundantly stocked with some of the best resources you need to accelerate your recovery process. Well-furnished and boasting workout supplements, personal TVs, and UA/Breathalyzer Testing, Real Deal brings that real“ cool” element to getting healthy again.

Read Also:

I enjoy writing and I write quality guest posts on topics of my interest and passion. I have been doing this since my college days. My special interests are in health, fitness, food and following the latest trends in these areas. I am an editor at Content Rally.

View all posts

Leave a Reply

Your email address will not be published. Required fields are marked *

Related

Cooking

6 Tips To Improve Your Cooking Overnight

Cooking is a form of art and like any other art, it needs your devotion. While many love the idea of cooking and spending hours in the kitchen, to some it is an excruciatingly scary idea as they just cannot find that confidence to cook something. But worry no more as we have come up with some spectacular tips and tricks that will help you improve your cooking hand and make you an expert at it. The best part about cooking is that you don’t have to be an absolute professional at it. There are several ways in which you can practice and enhance your cooking techniques for attaining better results. Therefore we have designed 10 unique tips to help you become better at cooking and you can definitely see the change overnight. 1. Invest In a Quality Knife This is the most important part of the cooking process. Handling a knife properly is significant when it comes to cooking and for that, it is ideal to invest in a good quality knife. Not only will it improve your ability to handle the knife but will improve the quality of the cuts in your food as well. 2. Always Choose Fresh Ingredients Ingredients make a huge impact in your dish. It is the core of the dish that makes or breaks it and whenever you are attempting to cook something always make sure that you have picked out the freshest ingredient possible. This will escalate and improve the quality and taste of your food. 3. Learn to Use Hands For Better Estimation Your hands are the ideal tool to use in the kitchen when it comes to cooking. Using your hands and fingers to check whether the meat is properly cooked is traditional and best techniques as your hands are the most sophisticated and very sensitive tools and hence can make the ideal estimations. 4. Learn to Saute professionally Often we do the mistake of overcrowding the pan with ingredients while sauteing which is absolutely wrong can make the food soggy and ruin the taste.  It is crucial that the bottom of the pan is still visible while you are frying or sauteing your ingredients. And always remember to put in the ingredient when the pan is heated. This will enhance the quality of your cooking to a whole new level and make a huge difference in the food quality as well. 5. Reduce The Gravy To Get a Richer Flavour Did you know that the flavors in your gravy or any liquid item enhance when you reduce the liquid to a more thicker consistency? This is a great tip to brighten the flavors in your food and gravy items. People often tend to struggle to bring out the flavors in the gravies and soups. To avoid that, make sure to simmer the liquid for some time and you can observe a huge difference in the meal you cook. 6. Rest Your Roasted Meats This is a mistake that many make that they forget to allow the roasted meat to rest before carving them. When you immediately carve meat before it gets time to rest, the meat will release all the juices out and dry out faster. To avoid that, make sure you let the meat rest which will help it soak in all the flavors and keep them intact within. Conclusion Cooking is easy and not as challenging as you might think it to be. Only with a few tricks and by avoiding some silly mistakes while doing so you can improve your cooking overnight and that is guaranteed. Hence go ahead and make your meal by applying these few basic tips and you will surely see a change in the quality of the food you serve. Read also: 10 Unique Kitchen Hacks To Save Your Time In Kitchen And Cooking

READ MOREDetails
Tree Grates

How to Expand Tree Grates

Trees are an essential component of any great urban landscape. They not only add a touch of beauty to a property but also help urban dwellers by providing cleaner air, cool down buildings and their surroundings, and providing a natural carbon sink. Trees can affect both the micro and the microclimates of an urban area, making them an integral part of any city’s transformational plan. If you want to transform your urban property into an enduring beauty, it’s time to start planting the best trees. However, while trees will work great for your landscape, they have to endure a harsh environment that can cause lasting damage. Trees have to withstand car accidents and vandalism, increasing microclimate temperatures, paved surroundings, exposure to de-icing salt, wind, and the reflecting glare from buildings. This is where tree grates come in handy. If you have an urban area or property you would like to landscape, this article explores the role of tree grating, types of grates, and how to expand these installations. Introducing Tree Grating in Urban Landscaping A tree grate is a ubiquitous feature in most cities but most people don’t give these landscaping features a lot of thought. This is despite the fact these installations play a critical role in protecting trees from abrasion caused by bustling urban life. The landscaping installation protects roots that would otherwise become exposed and vulnerable to damage. The grating provides an ideal pit where roots can thrive without any dangers from pedestrians, exposure to glare, de-icing salt, and other harmful materials. Tree grilles create a greater surface area for natural or supplemental irrigation. These root coverings also facilitate better air circulation within the covered space. Tree grating protects the soil, the rooting system, and sometimes the trunk. If trees are left to grow without this physical protection, they might not withstand the harsh urban environment. While most people enjoy the beautiful landscaping, they don’t make any efforts to protect these trees. Other reasons to install tree gratings include: Enhanced aesthetics: You can choose a tree grate that increases the visual appeal of your landscape. Most of the products on the market are visually appealing and are designed to improve curb appeal. These installations are easy to customize to suit your landscaping needs. Improving safety: Grates also protect pedestrians against injuries that would be caused by exposed roots. Landscaping maintenance: Maintaining a green landscape is not easy due to litter build-up from trees. However, grates help by preventing weed build-up around the tree and also make it easier to maintain the area around the trees. Diverse styling options: You can choose grates in multiple sizes, shapes, materials, and designs. This makes it easier to find that perfect grating system that suits your landscape. Flexibility: The best grates for your trees should accommodate the tree’s growth. Expanding the tree grates is an important step in maintaining your green landscape. This gives room to your trees to thrive at their different stages of growth. You can choose grates for your trees from different materials including cast iron tree grates, natural stone, steel, recycled plastic, concrete tree grates, and other materials. When choosing any tree grilles, consider: The durability of the material Theft and vandal-resistance ADA (Americans with disabilities act) compliance Ease of customization Eco-friendly materials Ease of installation and expansion The versatility of the tree grills for different tree species. Steps to Expand a Tree Grate When designing and installing a tree grate, it’s important to appreciate that the tree will continue growing. This necessitates changes to the tree grille to accommodate such growth. If a tree grate is not expandable, it might cause more harm than good to the tree. For this reason, always assess how expandable any tree grille is before you buy it. The best tree grills are easy to expand by removing the inner center rings. This means you can continue expanding the grates as the tree continues to grow. When shopping for a grate, look for one designed for expansion. Here are the steps for expanding a tree grate: Check the rate of the tree’s growth and identify the grate rings you should cut.  Depending on the material, use a portable hard wheel grinder with an abrasive wheel (aluminum oxide) to cut off the marked rings.  Cut through with the wheel on thin areas of the grate casting For thicker areas of the grating, (including casting edges or areas with heavy support ribs) cut halfway through the casting with the grinder. Use a heavy hammer to remove the marked areas and they should break at the core line. Before applying the sharp blow, ensure there’s sufficient support behind the casting.  Continue the process for all the grates and leave enough room for the tree trunk to grow. Final Thoughts Using trees for landscaping has both functional and aesthetical purposes. Tree grates are crucial for green landscaping as they protect your trees against physical damage. These installations fuse aesthetics with function to add visual appeal to an area while also protecting tree roots, managing floodwater and maintaining beautiful, neat and safe sidewalks. With time, you should expand these grates to allow more room for tree trunks’ growth. Read Also: How to Safely Prune Your Trees Create A Stunning Outdoor Space With These Residential Landscape Lighting Tips 5 Essential Tips to Designing a Beautiful Front Yard Garden

READ MOREDetails
Blocked Drains

How to Solve the Biggest Problems in Blocked Drains

Many things can clog a drain in a tub or sink by blocking nooks and crannies in its plumbing system. The big benefit is that there are easy ways to eliminate different clogs, and you can achieve practical results by using the solutions in this guide. Bent Hanger A hanger can extract hair and goo that blocks a drain in a tub or sink. To use a hanger, you'll need to take it apart so that its hook can travel down the drain. When wiggling the hook around, ensure that it doesn't push the debris down the pipe. You can avoid this problem by maneuvering the hook around in a circle before pulling it up. The rotation will help you grab debris that's lodged against the walls in the drain. Once you've removed most of the debris, eliminate the lingering particles by running the hot water. Baking Soda and Vinegar A baking soda and vinegar solution can get rid of a general clog. To make the solution, mix 1/3 cup of vinegar with 1/3 cup of baking soda. When the mixture fizzes, pour it down the drain so that the bubbles can dissolve sticky grime that's causing the clog. If possible, let the solution set in the drain for 24 hours. Then, flush the drain thoroughly with hot tap water. When a drain has a heavy clog, pour the baking soda down the drain first. Then, gradually pour the vinegar into the drain. This strategy will give the solution an opportunity to activate the source of the clog. Vacuum A wet and dry vacuum can pull up the is that's stuck in the upper portion of a drain. The suction power is very important as it can impact how effectively a vac extracts debris, to ensure that your vacuum has an efficient motor. To use a vacuum, adjust it to the highest setting. Then, place the hose over the drain. If the debris isn't too dry or stiff, the vacuum will remove it. Tumbling Water When your plumbing system has a clog that's tough to access, you can remove it by pouring boiling water down a drain. If you have a kettle, you can use it to bring the water to a boil, or you can boil water in the microwave. While the water is boiling, pour it slowly down the drain in stages, and wait a few seconds between each pour. To avoid burn injuries, hover the kettle or pot close to the drain so that the water doesn't splash. Caustic Soda Caustic soda contains sodium hydroxide, which is a risky substance that can produce chemical burns. As a result, you must wear dense rubber gloves and protective goggles when using caustic soda. Because caustic soda is strong, you'll need to combine it with ¾ gallons of cold tap water. For a general clog, you'll only need three cups of soda. To mix the soda, stir it around in the water with a wooden spoon. The mixture will begin to fizz as it heats up during this process. At this point, pour the solution down the drain, and let it sit there for about half an hour. Then, use boiling water to flush the drain. Pipe Maintenance General maintenance is an easy way to unclog a drain underneath a sink. Begin by placing a bucket below the trap. The bucket will capture water that spills after the trap is removed. To remove the trap pipe, gradually loosen it with a plumber's wrench. While the trap is detached, lift the housing, and rotate it until the trap is upside down. The source of the clog should drop on the ground. If nothing drops, use a tool to fish out the debris. Salt and Baking Soda Thick blockages will break down when they're treated with strong chemicals. The easiest way to create a chemical reaction that's powerful enough to destroy heavy grime is by mixing ½ cup of baking soda with ½ cup of salt in a drain. After the solution sets for about 20 minutes, rinse it down the drain with boiling water. Dish Detergent Dish detergent can eliminate clogs in a toilet bowl if it's mixed with hot water. The soapy suds are effective because they strategically break down dry debris. For an average clog, you'll only need to mix ½ cup of dish soap and a cup of hot water in the bowl. Vinegar and Baking Soda Tubs have the toughest clogs since a lot of dirt and grime travels through the drains each day. To get rid of thick debris, you'll need to loosen the goo, and the best solution for this task is made with a combination of baking soda and vinegar. To treat a clog, pour the solution down the drain. Then, cover the drain with a stopper. At this point, let the solution set for about 45 minutes, and pull the stopper off the drain. As the water exits the tub, the pressure will get rid of the blockage that was weakened by the vinegar and baking soda. Plunger Plungers can get rid of a clog in the toilet bowl. When using a plunger, totally submerge it underwater. The rubber portion of the bell should touch the housing in a sink or toilet. Once you have a good grip, push and pull the handle rapidly for about 20 seconds. Then, lift the plunger, and let the water escape out of the drain. Whenever the process of unclogging a fixture is too complicated, seek help from a professional plumber. If you want great service options, considering working with Canberra Blocked Drains Definitive Plumbing. Read Also: The 7 Most Common Types Of Plumbing Problems 8 Plumbing Myths Busted 4 Tips For Finishing A Basement

READ MOREDetails