Published on: 30 May 2021
Last Updated on: 09 February 2026
A cold winter night with a delicious dish of chili is all you need to enjoy your moment. But wait, Are you left with too much liquid in your chili? Ah! No need to worry at all. There are numerous ways on "how to thicken chili".Honestly, you don’t want a thin chili because there is nothing better than a cheerful bowl of thick chili as your winter dish. Many times, just to thicken the chili, people cook it more than it is necessary. Later, other ingredients in it fall apart and turn to mush. Don’t panic. There are effective and easy ways to thicken chili at your home, and all of these methods are tried and tested. Just be sure to use at least some of these methods to thicken chili before your precious moment turns into sour.
How To Thicken Chili - Tried and Tested
You may be wondering that cooking your dish for a little longer will make your chili thick. But do you know that you are mushing other ingredients in it? So, you must know other effective ways about how to thicken chili. Below listed are the perfect ways to thicken chili for the perfect night.
1. Flour - Standard Thickening Method:
Wheat flour is composed of proteins, sugars, lipids, starch, and enzymes. It is used for making different types of foods. Flour is widely used for thickening chili in most of the kitchens. It really works great. Now its time to try for yourself as well.
Ingredients:
30ml or two tablespoons of flour and 60ml or ¼ cup of cold water.
How to Use?
Take a separate bowl. Mix flour and water thoroughly in it.
Make sure that the resulting mixture has no lumps and is smooth.
Then add the flour mixture in your thin chili while cooking it in medium-high heat.
Stir constantly. Let the mixture boil and thicken well. It will hardly take few minutes.
Make sure to continue stirring an additional few seconds to see if you are able to detect flour in your chili flavor.
So, here is your hearty chili dish! Now, it is much thicker and tastier than before. You can even serve this to your guests.
2. Arrowroot- Best Thickening Agent:
Arrowroot contains Vitamin B, Iron, Potassium, low-protein, starch, etc. It is widely used as a thickening agent in all household kitchens. It is a starch that is extracted from the arrowroot plant. When you will use arrowroot in your dish, then it will give an amazing surface gloss to your liquid chili.
Ingredients:
5ml or 1 tablespoon of Arrowroot and 5ml or 1 tablespoon of cold water.
How to Use?
Take a separate bowl. Mix thoroughly water and arrowroot to turn it into a smooth paste.
Make sure that you add only a small amount of arrowroot as it is potent and flavorless.
Then add slurry into your thin chili cooking it in medium heat.
Stir constantly below the boiling point.
Then after 1 to 2 minutes, your thin chili will thicken instantly.
Arrowroot adds gloss like appearance to your chili dish making your dish thicker and delicious. I have used this method and got the result, so now it’s your time!
3. Cornstarch- Anti-sticking Agent:
Cornstarch is also known as Maize starch which is extracted from the maize grain. It is a food ingredient that is used in thickening soups and sauces. Cornstarch gives a moderate glossy appearance and when mixed with liquid, it rearranges itself.
Ingredients:
15ml or 1 tablespoon of cornstarch and 15ml or 1 tablespoon of cold water.
How to Use?
Take a separate bowl. Mix thoroughly cornstarch and water before mixing it to chili.
After adding cornstarch paste to chili, heat it in a medium to high flame.
Stir it well until the bubbles start appearing.
Wait for few minutes to see the results.
If you still feel that your chili should be thicker then you can add more cornstarch and water on it.
Then let it cook for an additional few minutes.
You can use cornstarch to thicken your chili because it will not alter the taste of your dish of chili as cornstarch is flavorless.
Other Simple Ways to Thicken Your Thin Chili:
4. Mix it in Tomato Paste
Now, no need to worry about how to thicken chili. If you want your chili only a little thick then you can use this method. Tomato is one of the main elements in chili. So adding it to your mixture won’t alter its taste and makes your chili thicker.
Ingredients:
170 grams of tomato paste.
How to Use?
I am suggesting that you should use fresh handmade tomato paste.
Since tomato paste is recognized as bitter in taste, so you can add a pinch of sugar in it.
Sugar will add a mild sweetness to your dish by removing tomato’s bitterness.
During the final thirty minutes of cooking add 170 grams of tomato paste into your thin chili.
Slowly add tomato paste to your thin chili. You can also add it after every ten minutes if you wish (⅓ of the tomato paste).
Stir constantly to combine it well.
You can use tomato paste to thicken your thin chili dish. But keep all the instructions in mind so as not to make any mistakes while preparing it.
5. Use More Beans to Thicken Your Thin Chili:
A bean is a seed of numerous genera of the flowering plant. They have the ability to curl up on any medium. Beans can be use to thicken your thin chili. Do you know that India is the largest producer of dry beans in the world? Yes, it is.
Ingredients:
125ml or a half-cup beans.
How to Use?
If your chili contains beans then strain half cup of beans. Then refry and blend it.
Then again mix this mixture to your chili and cook for a few minutes.
Stir occasionally to warm it well.
You can use canned or home-cooked beans as per your wish.
If you still feel that your chili is thin, you can add extra beans in it but make sure you blend it well.
Here you go! Your thick chili dish is ready now to serve your family. If you don’t like beans then no need to worry. You can add meats to make your chili thicker.
Wrapping it Up
"How to thicken chili" is one of the major problems for all the cook masters. Even I have used many methods to thicken my thin chili but all went in vain!Therefore, all the above methods are tried and tested about how to thicken chili. So, you can use it to thicken your thin chili. I know nobody likes to serve thin chili to their family or guests. Even I don’t like it. Do you?
Image source: wikihowRead Also:
Content Rally wrapped around an online publication where you can publish your own intellectuals. It is a publishing platform designed to make great stories by content creators. This is your era, your place to be online. So come forward share your views, thoughts and ideas via Content Rally.
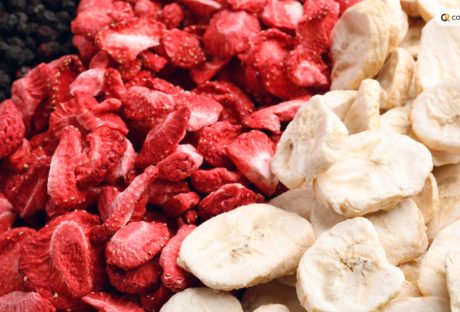
How to freeze dry food? - To freeze-dry your food, you need first to freeze your food and then dry it under pressure to remove water content. This process is called lyophilization.
In fact, it is one of the best methods to use if you want to dry your food. Actually, it is a common practice in both the pharmaceutical and food industries.
In this article, you will learn how to freeze dry food at home with simple methods. However, before that, you will also understand the freeze-drying process and the types of food you can freeze-dry.
Moreover, you will also learn the benefits of freeze-drying and essential tips to freeze-dry your food successfully.
Hence, to learn more, read on to the end of the article.
Understanding Freeze Drying
Freeze drying is a process where you remove water from a food material by freezing it. Then, you turn the ice into vapor by putting the item under pressure. Hence, you can see that this process is a dehydration technique where you sublimate the water in a product.
It means that the water content in your product changes from a solid state to a gaseous state (sublimation). Here, the water does not turn into liquid.
Generally, this method is helpful when you want to preserve any perishable materials. Here, the goal is to extend the shelf life of the material. In this case, you freeze the material and reduce the pressure. Then, you add heat to allow the frozen water in the food (material) to change directly to vapor.
How Does Freeze Drying Work?
Freeze drying consists of three stages: freezing, sublimation, and desorption.
Here is an explanation of the three stages:
1. Freezing
This process involves freezing the food at a very low temperature. Generally, you have to freeze to -30 to -50°F.
2. Sublimation (Primary Drying)
In this stage, you have to pass mild heat over the frozen material while the material is under vacuum. Hence, the ice crystals vaporize into water vapor. After that, you remove the water vapor with the help of a vacuum pump.
3. Desorption
This is the second stage of drying. Here, you have to remove all the remaining moisture from the surface of the food.
Benefits Of Freeze Drying Food
The following are the major advantages of freeze-drying that will benefit you a lot:
Generally, the foods that you freeze-dry retain up to 97% of their nutritional value. For instance, the food retains vitamins, minerals, and antioxidants.
Those foods have a long shelf life. Moreover, you do not need to store it in cold chains.
Once you freeze-dry your food, you will end up removing 98% of its water content. Hence, you will reduce its weight by 90%. Thereby, it will be easy for you to carry that food on camping and backpacking trips.
Freeze-dried food is easy to prepare. This is because you just have to add water to rehydrate them. Moreover, the shape and size of the food remains intact. Also, freeze-drying helps in preventing the growth of pathogenic organisms.
You can preserve a wide range of foods with freeze-drying. This includes meat, fish, fruits, vegetables, eggs, ice cream, and more.
When you freeze-dry food, it does not get brown or caramelize. However, this is quite common when you dry food traditionally.
How To Freeze Dry Food At Home?
Here are the steps you must follow to freeze dry food at home:
Wash your food items that you want to freeze-dry. Also, remove dirt and residues from the food. This way, you can ensure food safety.
Cut your food into small pieces. This way, you can make the freeze-drying process faster.
Place your food on a flat tray. Moreover, make sure to spread the food evenly. Basically, if you spread your food properly, you can freeze the food evenly.
Place your food in your freezer, and set the temperature correctly. Then, place the food in your freezer for two weeks. Actually, you need this time to remove the moisture in the food.
After the completion of two weeks, remove the trays from the freezer. After that, quickly place the food items in airtight bags. Make sure to take out one tray at a time to ensure that the food does not rehydrate.
Make sure to place the food bags in the freezer, and also in a cool, dark spot.
Check the food after a couple of days. This way, you ensure whether all the food is dried-up or not.
Tips For Successful Freeze Drying
The following are some essential tips by following which you can successfully freeze dry your food:
1. Preparing the Food
Harvest the food produced when it is ripe. Then, wash the food, remove the damaged parts, and prepare it as desired. This is because if you cut your food into small pieces, it will dry faster.
2. Arrange the Food
Place your food on a tray and arrange it into pieces. Also, make sure to place those pieces in such a way that they do not touch each other.
3. Use A Freeze Dryer
With the help of a freeze dryer, you can automatically lower the temperature. Moreover, a freeze dryer also helps you to create a vacuum.
4. Store The Food
Once you freeze-dry your food, store it in an airtight container. Also, you can store it in a bag which you can vacuum-seal it.
5. Cook Raw Foods:
One of the drawbacks of freeze-drying is that it does not kill harmful bacteria. Hence, you must cook freeze-dried foods thoroughly before consumption.
Related: The Importance Of Proper Cutting When Preparing Meals
Common Uses For Freeze-Dried Ingredients
The following are some of the common uses of freeze-dried foods:
Works as essential food supplies at times of emergencies.
They have a long shelf-life and you can use it to maintain food quality.
You can use freeze-dried food in stews, soups, baked goods, etc.
You can eat freeze-dried food as a healthy snack any time.
If you freeze-dry your seasonings, you can retain the flavor and freshness for years.
Wrapping Up
You now know how to freeze dry food. Generally, in manufacturing, food companies and manufacturers prefer freeze-dried food over regular food.
This is because they are easy to prepare and are portable and lightweight. Also, such food removes the moisture from the food to make it compact.
Do you have more suggestions for freeze-drying to offer? Please share your ideas and opinions in the comments section below.
When you're preparing meals, there's a lot to get done. You might not think too much about how you're cutting up the foods that you use, but it can make a difference in how your dinner looks and tastes. Some of the reasons why it's important to make sure you're using proper cutting techniques when you're prepping foods include the following.
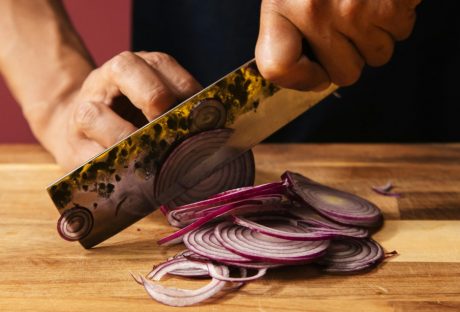
If you are planning to cook something, you probably will need to chop onions! onions play an important role with regards to bringing flavor and crunch to the dish. You can cut the vegetables into nice little cubes along with vertically chopping the food.
Read about the different ways in which you will learn to cut the onions along with keeping yourself safe! See that you don’t cut yourself.
Keep Yourself Safe When Cutting
Of course, safety should be a top priority when you're preparing meals. Knowing how you should cut an onion can help keep you safe. When you are cutting any vegetables, using the right techniques keeps your fingers out of the way, so you can cut every piece of the vegetable without getting your fingers. This could save you from a trip to the hospital or being out of commission for a while as you let your hand heal.
Make Sure Pieces Are Uniform In Size
It is important to make sure the pieces you cut are uniform in size, as this can help make sure the food all cooks evenly. There are many different methods for cutting carrots, but with any of them, if you cut some pieces large and some small, the small ones will be done cooking long before the large ones are finished. This can lead to the food not tasting as good as well as to the meal being served with some pieces that are overdone and some that might not be cooked all the way through.
Food Cut Properly Looks More Attractive
Cutting the food properly and making sure they're the right size can make the food more attractive. When you use safe cutting methods, you can do unique shapes or cut them in ways that are a little more fun or add to the presentation. Since food that looks better tends to taste better, making sure you're cutting the foods properly can mean everyone enjoys your meals more.
Make Sure Portions Are Precise
When the cut foods are plated, if there are some that are much bigger than others, it can mean that it's more difficult to get the proportions right. The plate might look more full with bigger pieces on there, but you might not be getting as much because you're only having a few of the big pieces instead of lots of the small ones. If you're portioning your plate for weight loss, this can be even more important, as you'll want to make sure you are eating enough healthy foods.
Ensure The Meal Tastes Right
Along with being more attractive and tasting better, if the pieces aren't cut properly, it can impact the overall taste of your meal. When you cut pieces that are too large for the recipe or too small, they will cook differently, even if they're all the same size. Smaller pieces when cooked may impart more flavor to the meal, so your soup could end up tasting a little too much like onions and you won't be able to taste the other flavors as much.
What Are The Types Of Cutting Techniques That Every Chef Must Know?
In the previous sections, we have discussed the important aspects to consider with the proper cutting technique. If you are a chef taking intensive training, you have to consider some of the most important aspects linked with proper technique techniques.
Therefore, you have to consider some of the important aspects linked with cutting techniques. However, here are some of the top cutting techniques that you need to master as an evolving chef So let discuss them here in this very section to get a better understanding of the entire subject.
Dice Cut
Are you looking for a proper way to cut an onion? Then you may master this very technique effective;y to get it done. This is a classic cutting technique. It involves making the fruit or vegetable small squares. In this process, you need to integrate the onion by slicing it horizontally along with keeping the roots intact!
Significance Of Cutting Onions In Different Ways!
One of the most important vegetables, onions is used in about every dish for breakfast, lunch and dinner! We also use onions in a lot of snacks, hence, you should learn how to chop onions. The flavour of onions plays an important role in chopping the pieces along with cutting them into strips.
Mincing is the first way of chopping which you can use to cook soups, raita, Manchurian balls and marinades. If you do not want to learn how to mince onions, you can use a food processor to finely mince the onions.
Chopping is another process where the size of the onions is medium. This is mostly used in dal, stir-fried veggies as it gives a delicious and nice flavour to the overall food intake. Dicing is another process where the onions are used in cutlets, dosa stuffings, paratha stuffings and omelettes.
When onions are diced, there is prominence in the dish along with the flavorful deliciousness of food. we often use half-moon cutting which is of the layer from thin or thick based on your requirements. This is mostly used in sandwiches, burgers and salads. Furthermore, the onions can be used to add a crunchiness to the food item!
Onion rings are one of the most popular food items as a lot of people eat it as a snack! You can peel the onion trim the edges and then cover it in a flour batter with salt, spices and pepper, thus creating rings of onions. When it is fried, the deliciousness is great because it can go with any sauce.
Conclusion
To sum it up, it is an important part of cooking especially when knowing the right way of chopping vegetables. If you are a cook, you will know the significance of chopping vegetables along with adding them in the form of strips. Onions are an important part of most food items, be it a sandwich, be it any protein, starting from chicken to meat, to dressing of other food items, onions are a must!
After you read the article, there are six ways to know the proper way to cut an onion and accordingly, they will help you cook different recipes. You can cook soups with onion chopping hence, after reading the article, get to learn about these different ways.
If you'd like to improve your meal prep, start by learning how to cut vegetables and other foods properly. Knowing how to cut them and the different methods you can use can help keep you safe, help ensure the food is uniform in size, and help ensure your meals always taste amazing.
Additional Reading:
8 Campfire Cooking Essentials For a Camp Kitchen That Crackles
10 Unique Kitchen Hacks to Save your Time in Kitchen and Cooking
Lift Your Home Cooking: Mysteries From HMD Bar And Grill’s Kitchen
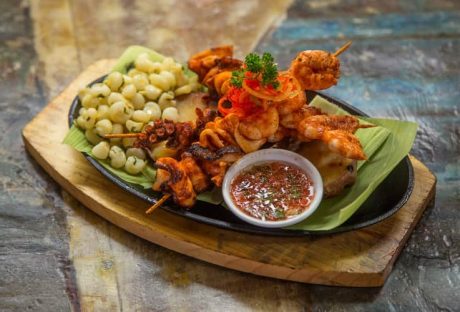
When it comes to buying some tasty seafood raw ingredients, freshness comes first. But every time it is not possible you are visiting the nearest fish market to buy the fresh fish. It is full of obstacles when it comes to finding high-quality, most delicate, and freshest seafood online. If you have been experiencing the same trouble, then read this piece of blog. It is dedicated to seafood lovers. Here I’ve listed a few best recommendations to find seafood online.
7 Best Tasting Fresh Seafood Online Services:
Seafood ingredient’s freshness is the main key factor to cook a perfect delicious seafood dish. This is the reason most customers prefer shop buying. But it is 2021.
Here is the list of the seven best seafood online services, which will supply fresh ingredients on your doorstep.
1.Fish Me:
Fish Me was introduced during COVID lockdowns when die-hard seafood lovers couldn’t have their favorite seafood dinners at fancy restaurants. They were like “where to buy fresh fish” and “how to prepare the best seafood at home.” Fish Me! It was launched in Australia in 2020, and in 2021, it is officially launching to deliver the freshest seafood.
For Australian seafood lovers, FishMe is the ultimate destination for the finest seafood online. The brand specializes in prawns, whole fish, fillets, octopus, lobsters, crabs, oysters, mussels, and squid.
2.Wulf's Fish:
Up next, I’ve got Wulf’s Fish on my list. The seller is primarily based in Boston, Massachusetts. This online site is one of the best when it comes to getting quality seafood for specialized dishes. You can expect to shop for various fishes like tuna, whole fish, fillets, shellfish, etc.
You can also get your hands on a variety of farmed fishes and roses. Recently, this brand has been widely recognized owing to plucking tilefish, Acadian redfish, scallops, and cod from the Atlantic coast. Further, this brand also supplies seafood to a long list of high-profile chefs, including those at Per Se and Nobu.
3.Ōra King:
If you are someone like me who is more into the freshest farmed salmon, then this website is best to spend your money on. Ora King’s New Zealand salmon fish is a unique breed that has to offer culinary experience.
It is fatty and rich in taste. And is always delivered fresh, not frozen. You can expect a great fish fillet at a reasonable price. Nobu Matsuhisa, Daniel Boulud, and Thomas Keller have always been fans of Ora King’s salmon.
4.Sizzlefish:
Up next, I’ve Sizzlefish on my list, which is actually a subscription-based service. But, it is quite affordable. Sizzlefish specializes in delivering clean fish, cut, and fillet for the sizzler. Among the seafood online, this is the best place to order the fillet for making sizzlers.
This brand specializes in North Atlantic Seafood like black cod and true cod. And being a seafood lover, you may agree that it is not easy to find the best cod. The brand also has to offer other species like halibut, blue mussels, sea scallops, diver, soft shell crabs, calamari, Chesapeake, and Alaska-caught salmon.
5. Wild Alaskan Company:
The wild Alaskan company is top-rated among the seafood online supplies for their excellent collections, especially Alaskan fish. They offer monthly subscriptions to their customers. The online buying facility is also here. Wild Alaskan company miny have a wild fish stock like Halibut, Cod, Salmon, and white-fleshed fish.
Every pack is carefully packed. You only have to give the order. And fresh, clean fish is going to be supplied in your house in a vacuum package. Every package is filled with perfectly boneless and skinless fillet.
6.PureFish:
In the online seafood suppliers, Purefish is well-recognized for its high-quality packaging. The brand uses a soft aluminum tray to deliver fish pieces. The tray comes with portions of two. You just need to unwrap your fish, put seasoning, and put it right in the oven. If you have always been a fan of well-trimmed, incredibly processed, and conveniently packaged food, then you must try buying fish online from PureFish.
Everything at PureFish is clean, farm-raised, and high-quality. And you can expect great nutritional value. PureFish is a growing brand and currently establishing its inventory, so you may find limited fish species like cobia, yellowfin tuna, Pacific black cod, and wild-caught striped bass.
7.Crab Place:
You are a lover of exotic seafood like crab, oysters, or shrimps? For seafood online, your best destination is the crab place. Sometimes the fishes are becoming monotonous. And Crab place is providing you the opportunity to taste something different.
The Maryland blue crab is the customer favorite. And the crab place is famous for supplying fresh ingredients. After placing the order within a few hours, you will get your order at your doorstep. From the crab, oyster, and shrimps, every type of seafood is available here.
Conclusion:
These all seven are the best suitable choice for ordering online seafood. We agree that online seafood purchasing is a little bit tricky. But if you know your right destination, your work is going to be easier. Order from these and enjoy the taste of fresh seafood.
Read Also:
How To Cook Sausage That Tastes Like Heaven
Best Summer Lunch Options
How to Choose the Right Wine: Sommelier Tips














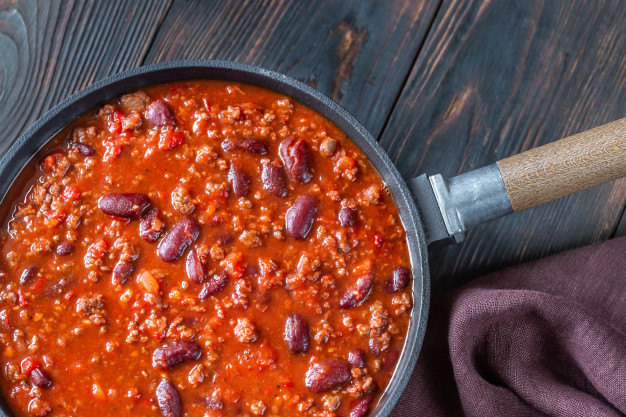 You may be wondering that cooking your dish for a little longer will make your chili thick. But do you know that you are mushing other ingredients in it? So, you must know other effective ways about how to thicken chili. Below listed are the perfect ways to thicken chili for the perfect night.
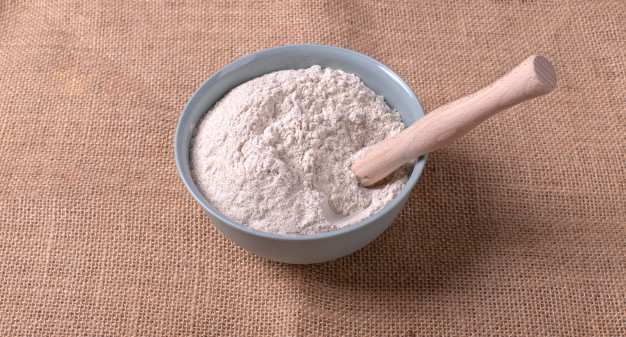 Wheat flour is composed of proteins, sugars, lipids, starch, and enzymes. It is used for making different types of foods. Flour is widely used for thickening chili in most of the kitchens. It really works great. Now its time to try for yourself as well.
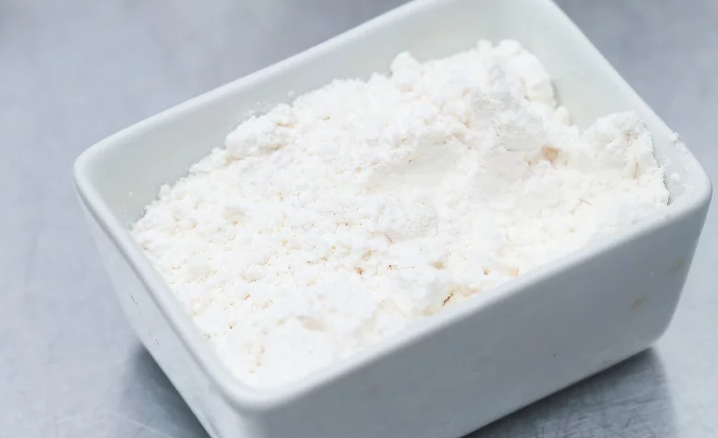 Arrowroot contains Vitamin B, Iron, Potassium, low-protein, starch, etc. It is widely used as a thickening agent in all household kitchens. It is a starch that is extracted from the arrowroot plant. When you will use arrowroot in your dish, then it will give an amazing surface gloss to your liquid chili.
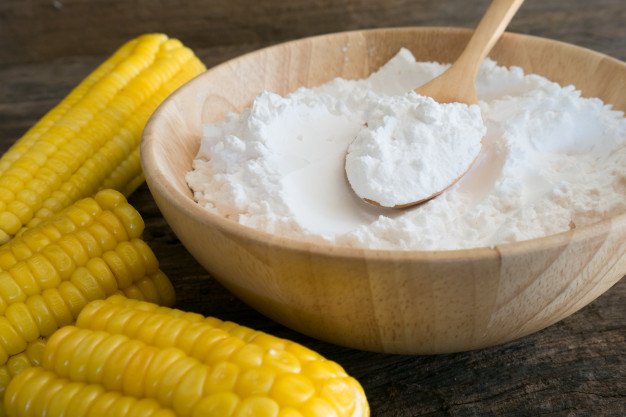 Cornstarch is also known as Maize starch which is extracted from the maize grain. It is a food ingredient that is used in thickening soups and sauces. Cornstarch gives a moderate glossy appearance and when mixed with liquid, it rearranges itself.
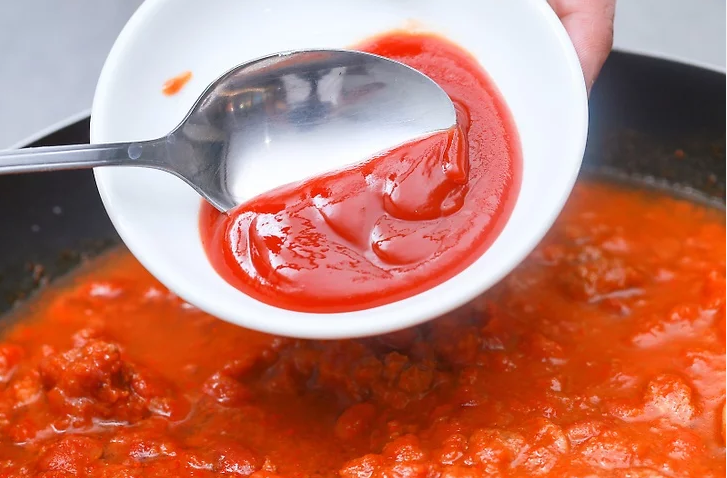 Now, no need to worry about how to thicken chili. If you want your chili only a little thick then you can use this method. Tomato is one of the main elements in chili. So adding it to your mixture won’t alter its taste and makes your chili thicker.
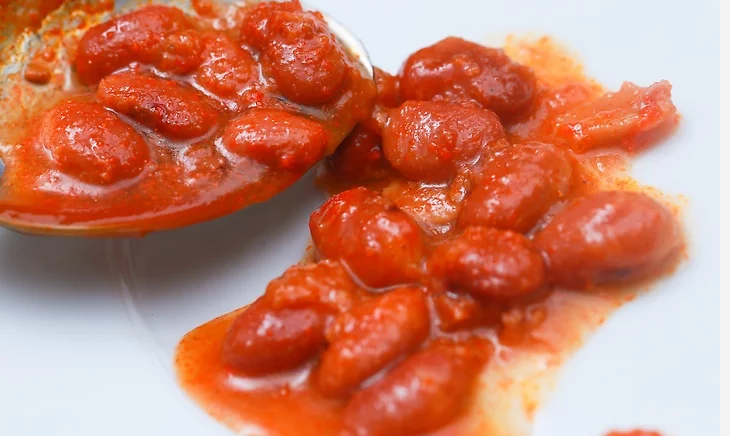 A bean is a seed of numerous genera of the flowering plant. They have the ability to curl up on any medium. Beans can be use to thicken your thin chili. Do you know that India is the largest producer of dry beans in the world? Yes, it is.