How To Choose Best Landline Phones In 2020

by

07 August 2020

Gadgets

Best Landline Phones

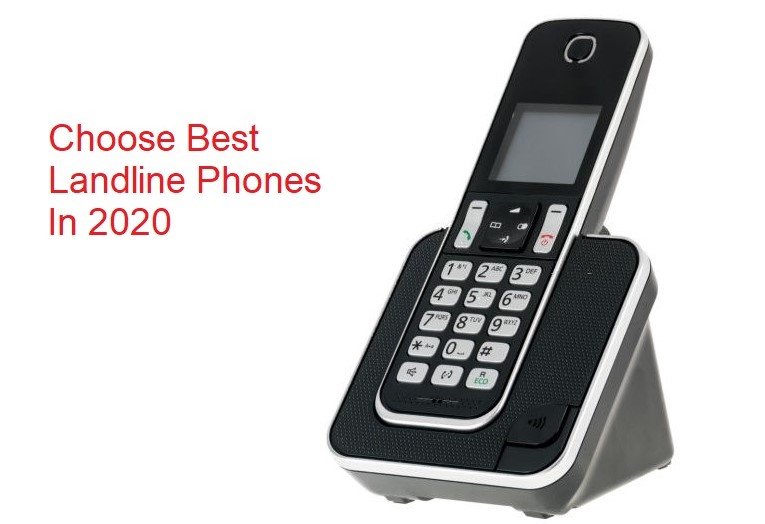
Having the best landline phones means crystal clear sound output and generous cordless range. Buy the wrong one and you might travel your whole house just to have clear communication with your friend and relatives.

Cordless phones are evolving with the technology and have maintained their uniqueness amid the smartphone era. Cordless phones come in handy when you are living in an area where the network fluctuates. 

In this article, we will discuss how best landline phones work and what are the methods that you can choose to get your hands on some of the best landline phones in India.

Buying Guide of Best Landline Phones

It is very important to go through all the features before buying a landline phone. Having an ample amount of knowledge about landline phones will certainly help you to find the best landline phones in India.

Here are the things that you must consider before buying landline phones.

1. Range

The range is the most important factor that you must consider before buying a landline phone. Here the range we are talking about the landline phones is the range in which you can comfortably call and receive calls.

Cordless phones or landline phones are mostly used for offices or at home. So, you would like them to be in such a manner that they didn’t lose connection in the between important talk.  Most of the landline line forms have good long-distance communication, while others have less.

However, you must consider all the other factors as well that might cause problems with landline communications.

Read Also: Best Laptops In India

2. Structure

Here structure means the physical body and appearance of the landline phones. Several brands offer different types of landline phones. And each model comes with its custom design. This design mostly helps users with comfortable handling of landline phones while communications.

In this matter, your choice will greatly affect the kind of landline phones you want to buy. Whether you are buying for the official use or for home purposes, your decision to choose one will be decided by their use.

3. Types of handsets

There are different types of handsets. In the market, you will find a single set handset, double set handset, and multiple set handset. The number of handsets you will buy depends on the uses. Also, you will get a discount with multiple handsets.

Earlier, to use the multiple set of handsets, you needed to have the same manufacturer. But with the new technologies, this boundary has been breached. Today, if your handset is integrated with the new technology, then there are chances that different manufactured handsets can be easily connected.

4. Caller Id features

Caller ID features are essential for any landline phone. With this feature, you will not only be able to view the number, but you will also be able to see the name of the caller and the country code. This way you will easily be bale deduced from where the call is coming.

Today, the caller ID features have now become part of the service providers. So to avail of the services, you have to make sure that your landline phone is supported by the DECT (Digital enhanced cordless technology) technology.

5. Battery

The best part of the landline phones is that they are directly powered by electricity. Hence, you don’t have to charge them. You can just plug them to the power currency and you will be all set to use them. However, there are new models of landline phones that do come with the rechargeable system.  That means, you can recharge them and use them and once the power is below the red line you can simply put them on charge again. This feature was recently added to the landline p[hiones to make office work efficient.

6. Brand

As a customer, we certainly look at the brands of landline phones.  The brands are the entities that provide a source of trustee on the product. without a reliable brand, customers might not show their faith in the product. Hence, the brand becomes very important while choosing the best landline phones in India.

There are several errands in the market that boast of selling some of the best landline phones in India. Panasonic, Philips, Motorola Beetel are some of the top brands that are considered among the best brands for landline phones. These brands have a large customer base and provide high-quality products to their customers.

7. Price

India has a price-sensitive market. Here people see the price of the product before looking at the quality of the product. And this is the reason you will find different types of products in the market. Starting from the cheap and low-quality product to the high premium quality product. No matter what your budget is, you can easily afford a landline phone.

However, you will find the differences in their performance quality with the price ranges. With the low price of landline phones, you might not find the quality.  But with high budget landline phones, it is guaranteed to get good quality products.

Read Also:

Lucia Patterson is the woman behind TheLegalGuides, a blog solely focused on legal guides, tips, and advice. Lucia loves essay writing and blogs at EssayWritingGuides from her college days.

View all posts

Leave a Reply

Your email address will not be published. Required fields are marked *

Related

Old PC

Do You Have an Old PC? Here’s What You Could Do With It

Do you have an old PC that you replaced with a newer model? Whether you’re an individual or a business or an organization, what you do with that old PC is a question that is worth thinking about. Many people simply decide to throw their old hardware in the trash – but not only is this highly wasteful, but it could also be a wasted opportunity or even a potential security breach. Any IT support professional will tell you how easy it is to retrieve data from an old PC – even a 20-year-old PC found in a landfill would have data on it that you could recover and read. For more info on what to do with an old PC, whether as an individual or as a business, we spoke to TechQuarters, an IT support provider that operates in North London. As they have been providing IT Support North London businesses have been relying on for years, they have a lot of experience managing their customer's PC and hardware. From that experience, they have suggested a number of different things you can do with an old computer, the least of which is to throw it out. Cleansing an Old PC No matter what you decide to do with a disused PC, the first step should always be to cleanse it of your data. As we mentioned earlier, anyone can restore the data on a hard drive just by using commercial software known as Data. Forensics software – so if you have anything on your hard drive you wouldn’t want other people to be able to access, such as bank details, passport info, etc. then you should make the effort to wipe the device. Before you start, you should backup your personal data, by copying it to another storage device – this might be your new computer, or it could be an external hard drive. Additionally, you should also locate any registration keys and serial numbers for software you have purchased, so that you can transfer it over to your new device – if you don’t do this, you might lose access to the software you have paid money for. Once you have backed up everything you want to keep, you should wipe the hard drive of your old PC. To begin with, restore the PC to its factory settings. This will superficially hide your data on the PC’s hard drive, but will not remove it – to do this, you will need to use a Disk-Wiping tool; this software will permanently overwrite your data with random information so that even if someone used Data Forensics, they would only find random data. What to do with an Old PC? So, once you have backed up all of your data and cleansed the old device of any personal data, what should you do with it? If your first instinct is to throw it away, think again. There are a number of things you can do to get a final return on your investment. 1. Sell for parts – depending on the condition of the PC, you can sell it for the hardware components. This is one way to get some money back from a PC that is too old for anyone to want to use it. The hard drive, CPU, RAM, Graphics Card, and even the Power Supply Unit is potentially valuable parts that others might find useful. 2. Sell as is – If your PC isn’t so old that nobody would want to use it, you could definitely sell it as a second-hand device. Just be sure to wipe your data completely, as someone else will be using it after you. 3. Recycle – If you’re not bothered about making any money back from your old device, and just want to be rid of it, feel free to dispose of it – but try and avoid letting it end up in a landfill. Instead, look for a service that can take the PC from you and recycle the materials correctly. Some computer hardware chains can do this for you. 4. Donate – Perhaps your PC is not that old, and you simply replaced it with a more powerful model. This means your old PC is still completely usable; in which case, you could donate it to an organization. For instance, schools, hospitals, and charitable organizations will all be likely to accept a second-hand PC as a donation. 5. Convert to a Server – Seeing as servers are essentially just PCs that have been optimized for a specific purpose, you could certainly consider turning your old PC into a server. Of course, this won’t be the easiest process in the world but is doable with the right guidance (which you can find online). To start with, a server needs to be running 24/7, so you will need to configure the device to run in a low-power state, make sure it doesn’t shut down at any inconvenient moments, and that it will run properly without any input – because you likely won’t want to have a monitor, keyboard, and mouse connected to it at all times. Read Also: Top 10 Computer Security Mistakes Is Computer Software Prepackaged Software A Good Career Path? How To Scan From Printer To Computer? 8 Ways For Computer Games to be Educational Techniques

READ MOREDetails
Gun Bluing

Does Vinegar Harm Gun Bluing?

Gun safety and maintenance are at the forefront of most gun owners’ minds.  We want to be able to clean our firearms without worrying about damaging them.  If you’ve looked at online forums at any point, you may have seen some people recommending using vinegar in cleaning. Is this safe, though?  Well, I’ll explain to you why it’s probably not the best thing to use in this article.  There are better alternatives that can clean it without any risk of corroding the metal – especially something like aluminum. Cleaning our Weapons As I mentioned above, if you look at any forums like this one, https://thefiringline.com/forums/showthread.php?t=524197, there is a hot debate on how to properly clean our weapons.  A variety of methods are suggested.  It’s important to remember that bluing on our guns is a vital part of it. You see, it protects the metal beneath from oxidation, usually known as rust.  Besides being ugly, it can negatively impact its integrity of it.  If there is already rust, though, you might need to scrape it away.  This can remove some of the bluings. How can you clean them, then?  Some recommend vinegar or a combination of that and other materials such as peroxide.  Unfortunately, this can damage it.  Acids and other corrosives probably are not a good idea. What Should We Use Instead? There are a few ways that we can go about this.  You are probably wondering what the best rust remover for guns is, so I’ll discuss a few options here.  The first thing I will cover is prevention. If you store your firearm in a cool and dry place, it will most likely not oxidize at all.  This is a good way to keep this problem from happening in the first place.  However, if rust does occur, you can go on to the next methods. You could try a battery charger.  For this, though, you will need a few other things.  This will probably only work for one made of something like aluminum or copper, as well.   Locate some baking soda, a battery charger, a steel rod, and a plastic container. No matter which way you are cleaning, make sure the gun is not loaded.  This is for your own safety as well as everyone else around you.  You should look in the barrel and double-check, maybe even triple-check, that there is no ammunition within. Next, you might try a traditional cleaning kit.  You can get them at most retailers that sell weapons like this.  This might be a slightly pricey option, but because the products are designed for this purpose, they are safe.  There is a low chance of damaging the bluing. Of course, you could also use steel wool and some oil.  If you use a form of lubricating oil before going in with the abrasive surface of the steel wool, you will most likely be able to remove the rust without causing any damage.  You need to have a careful and methodical process. As you go about the process of your choice, you will want to keep in mind some essential parts of cleaning your gun.  As you disassemble it, you should only do it in the way that the creator of it tells you to.  Otherwise, you may be risking your own safety. Wherever you decide to do it, it should not be a closed space.  Having proper ventilation is critical so that you do not inhale anything toxic.  Some firearms use lead in them or ammunition.  Breathing this in is not something you will want to do. If you didn’t know, it is recommended to care for your weapon after each time you use it.  Whether you go hunting or to the shooting range, getting rid of the residue is a part of being a responsible owner.  What you use for this might vary depending on the type you own. For example, rifle users may want to get a barrel snake.  This probably is not necessary for pistols or other smaller barreled guns, though.  My recommendation is to do your research on what to use for your specific weapon, and you probably should not use vinegar. Additionals: What is an Airsoft Gun?How Gun and Security Gear Advanced through the YearsParts of a Gun: All You Need to Know About the Components of Your Firearm

READ MOREDetails
Soldering Iron

How to Use a Soldering Iron

Of all techniques and methods used to join surfaces, metal sheets, Iron, and other objects together, soldering is highly preferred because it does not cause any type of damage to the items being joined together. This is because the solder used to stick them together has a lower melting point than most metals and it offers durable yet reversible bonds between the items. In addition to that, although there are a few key differences between the two types of soldering gear used, they share a similar trait and they’re both easily operable, which we will discover more in this article What Is Soldering? There are several types of soldering using different filler metals called solder, but, they all use the same concept which is heating a filler metal between two items so that it melts and fills the seam between the two items. Soldering is done using either individually bought soldering gear, which allows you to choose the type of tool that is most suitable for the project you are planning to work on, or a soldering station which usually is a standard combination of a soldering iron and a power supply. Soldering Iron  In order to learn how to use a soldering iron, one must first know its basic parts and the science behind its mode of operation. It is simply a tool that connects to a power supply, it consists of a handle that doesn’t conduct heat and a tip that heats up very quickly to high temperatures so it can melt the solder, it also cools down fast. To Be More Specific, The Main Parts Of Soldering Iron Are: Soldering tip: All soldering irons contain iron tips which are the only part that heats up; it doesn’t ooze out the solder as most people think, it simply heats the metals being joined so that when the solder is applied, it melts, but more often than not, the solder would stick on the tip. Luckily, most tips are interchangeable so, you can replace your tip in case of damage or in case you need a specialized tip to suit your uses; bear in mind that tips vary in size and shape, thus, they vary in their uses as well. Wand: The wand is the handheld part of the iron that the tip is attached to. It can be made from a large number of materials that poorly conduct heat or isolate it completely so as to prevent heat from the tip from transferring to the part where the wand makes contact with the skin. Inside the wand, there are wires and metal contacts that conduct and convert the electricity from the power outlet to heat. The contradicting functions of a wand are the reason why most people prefer to buy high-quality wands from renowned brands. Of course, there are other extras and accessories like brass sponges, cradles, and tip tinner which can be purchased individually or found in soldering stations which is actually one of the advantages of soldering stations; but, the two main parts will always remain the tip and the wand. Step 1: Safety First of all, before using a soldering iron, you must be familiar with standard safety precautions since the iron tends to get really hot; not to mention the fact that solder is literally molten metal. So, it would be smart of you to wear protective gear such as; safety goggles and protective gloves, because your fingers are most likely to come into contact with the tip during the first few times. You also should keep in mind to tie your hair and avoid wearing loose-fitting clothes. Moreover, it is preferable to work in a well-ventilated area since some types of solder contain lead which produces toxic fumes, it is also important to thoroughly clean your hands after handling lead-based material. Step 2: Preparing The Tip The tip should be regularly cleaned of any old solder because when old solder solidifies, it turns into a heat isolator due to oxidization resulting in a totally inefficient and highly wasteful soldering process. Not only that but also, slow heating means that you will have to hold the iron to the items being joined for a longer time; it would be highly inconvenient for you and very damaging for sensitive objects like PCBs. So, when the iron is fully heated, softly drag the tip against a sponge to remove old solder. You want to aim for a shiny tip. After cleaning the tip, you should “tin” the tip; to make it last longer and conduct heat better through newfound layers of solder. Same as above, on a fully heated iron, apply a little piece of solder and lightly coat the tip with tinner; then, immediately start soldering while cleaning and tinning the tip between every couple of joints for maximum conductivity and efficiency. Step 3: Actual soldering With your dominant hand holding the iron and the other holding a piece of solder, touch the area where the object comes into contact with the solder and hold it there for about a second then slide the solder underneath the tip while pushing the solder rod further according to how much solder you need. Then, make sure to pull back the solder first while holding the tip in position until all the solder melts; it usually takes about five seconds or less. Solder cools down fast so, you will not need to blow on the joint since it will only lead to a weak joint which can be identified by its oxidized, unclear, and grainy appearance. What you want to get is a smooth connection, not a lump. Finishing touches : After you’ve had enough soldering for the day, clean and in the tip again before you put it into storage, it helps increase its lifespan. As you may have noticed, soldering is not that hard of a task, it only requires soldering gear, steady hands, and concentration. So, go ahead, start soldering, and don’t be afraid to get creative. Read Also: Is Polyester Stretchy? – Its Materials & Properties [Detailed Explanation] Top 6 Different Types Of Scarves Names And Its Benefits How to Thicken Chili – Tried and Tested

READ MOREDetails