How to Choose the Right Containers for Your Container Garden

Published on: 02 April 2017 Last Updated on: 11 September 2024
Garden

imageContainer garden is a great idea for those who don’t have too much space in their house. Besides that, with a container garden, you will not have to spend too much time and effort to take care of it, such as mowing regularly with a lawn mower. So, in this article, I would like to introduce you to some ideas about choosing the right containers for your garden. I may be useful if you are intending to build one.

There are two essential things to successfully choose a container for use in a container garden: size and material. The size of the content relates to the optimal growth of the plant. Choose one that’s too small, and your plant might not reach its full potential. The material, of which the container is made, is of almost equal importance. Which material works best depends on the situation.

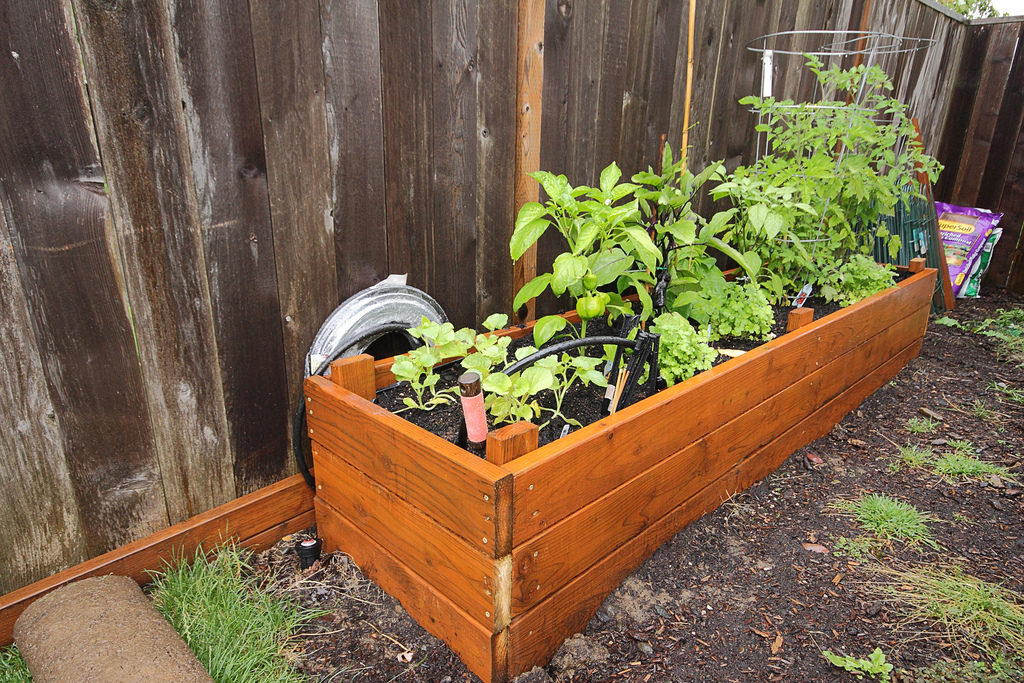
Larger perennial plants (those that grow for more than one season) do quite well in a large wooden container. Most container gardeners prefer wood for use with perennials. It’s also a good choice for plants that will be grown outside in a visible location.

Garden Container

Read also: 3 Amazing Flower Street Garden – How To Design

Although wooden containers tend to be more expensive than other materials, the cost is balanced by their extreme durability.

Should the wood be treated? Yes and no. Yes for the outside, no for the inside of the container. If the inside is treated, the chemicals could leach into the soil. Remember, whatever is in the soil ends up in the plant. At best, your plant will be damaged. At worst, if it’s an edible plant, it could actually make you ill.

Plastic pots are widely used in container gardens. The main reason for this is cost. Plastic pots are the cheapest option in most cases. There’s nothing wrong with saving money, but plastic may not always be your best choice.

Plastic pots are fine to use if you don’t intend to keep it up. Maybe you don’t even know if you’ll enjoy it or if it will work for you. But if there’s any chance you will continue to garden in the future, you should realize that plastic pots are not very durable.

Plastic pot

Read also: 5 Essential Tips To Designing A Beautiful Front Yard Garden

They look durable, but looks can be misleading. Regardless of how thick or hard the plastic seems to be, outdoor elements can quickly crack and warp this type of container. Once the pots are damaged, they’re essentially useless. Not much future in cracked pot gardening.

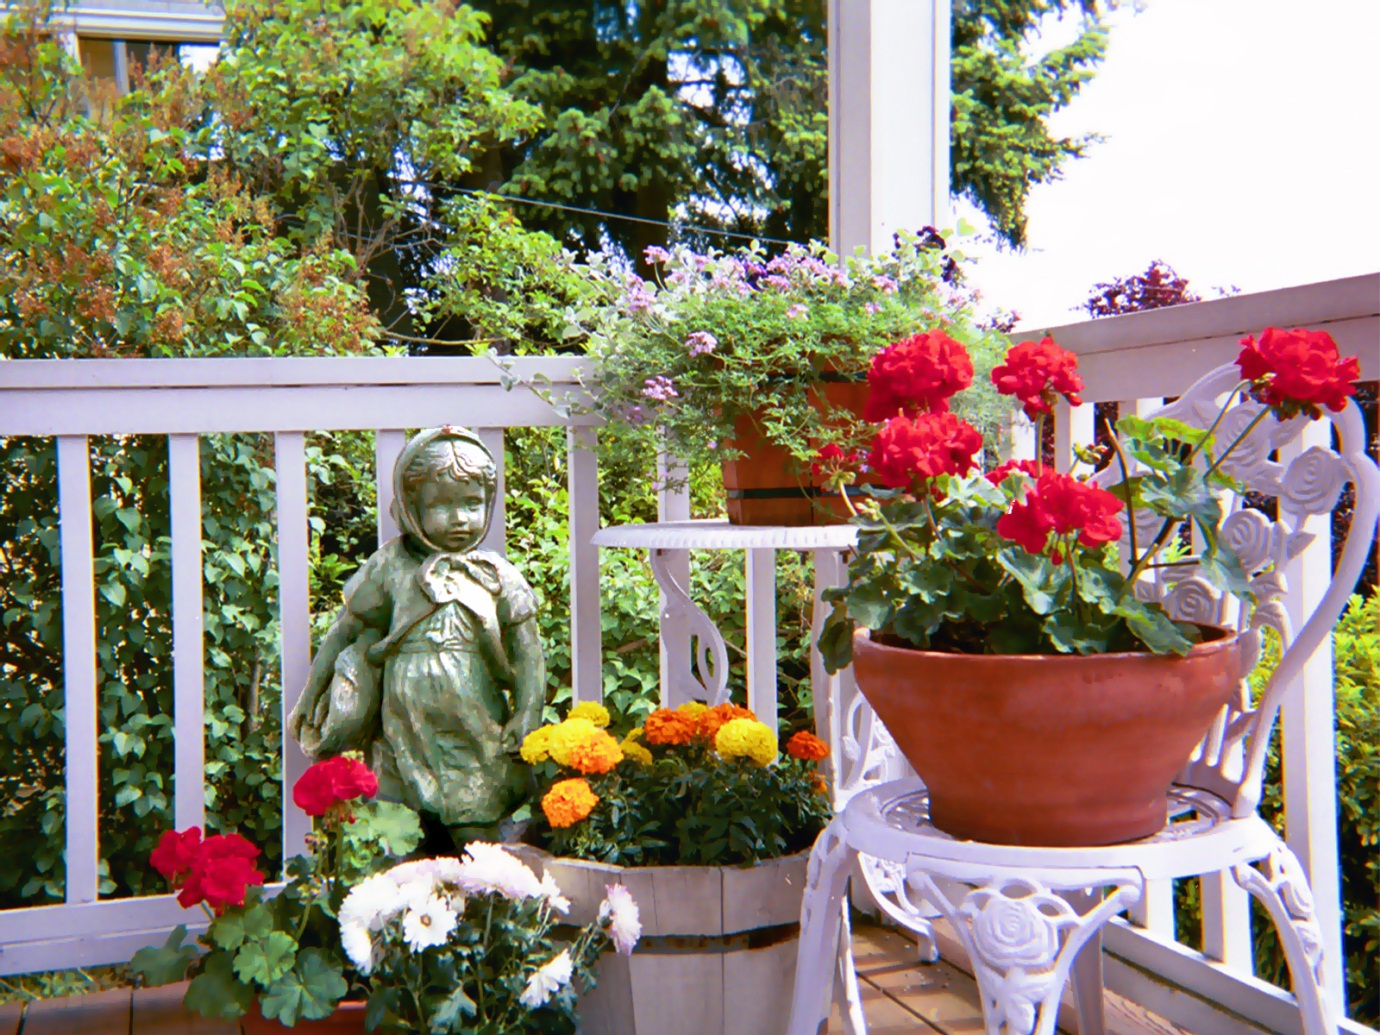
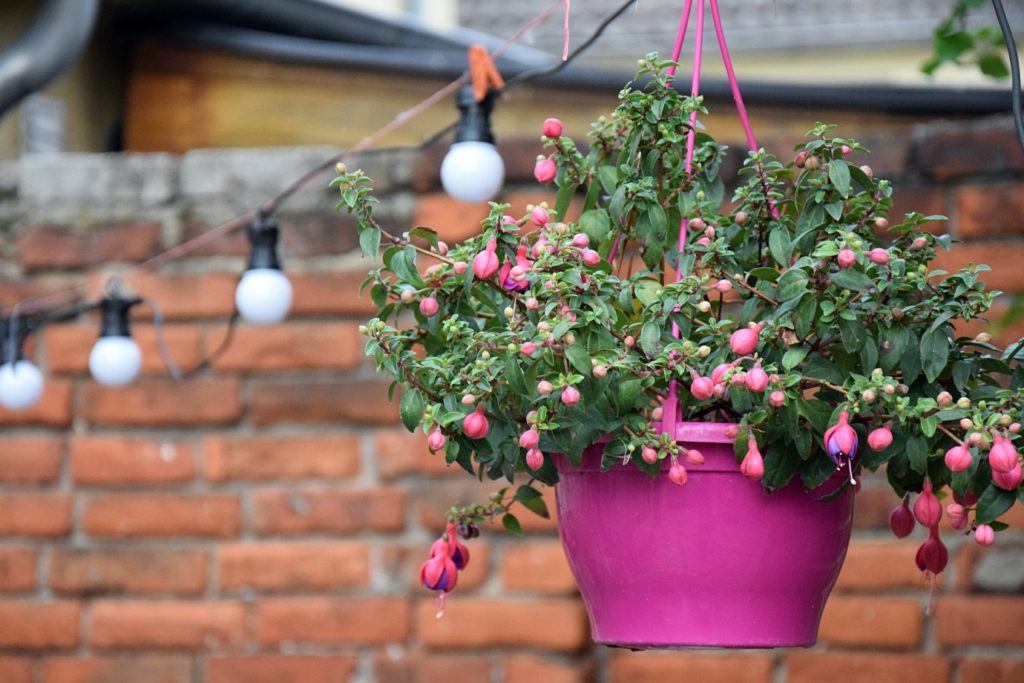
Pots made from terra cotta clay are also quite inexpensive. The only plastic is cheaper. Unfortunately, clay can be delicately made and easily broken. This material doesn’t handle freezing temperatures very well either. If your area experiences below-freezing weather, plants in terra cotta containers should be brought indoors during the winter.


Okay, so far wood is expensive, plastic is cheap and clay can break. What’s next? You can often do well with fired ceramic pots. Sometimes they are somewhat delicate but relatively durable. Look for the glaze on the outside with unglazed insides. The outside glaze enhances appearance, but inside glaze could leach into the soil.

Read also: Does Organic Gardening Improve Soil Quality?

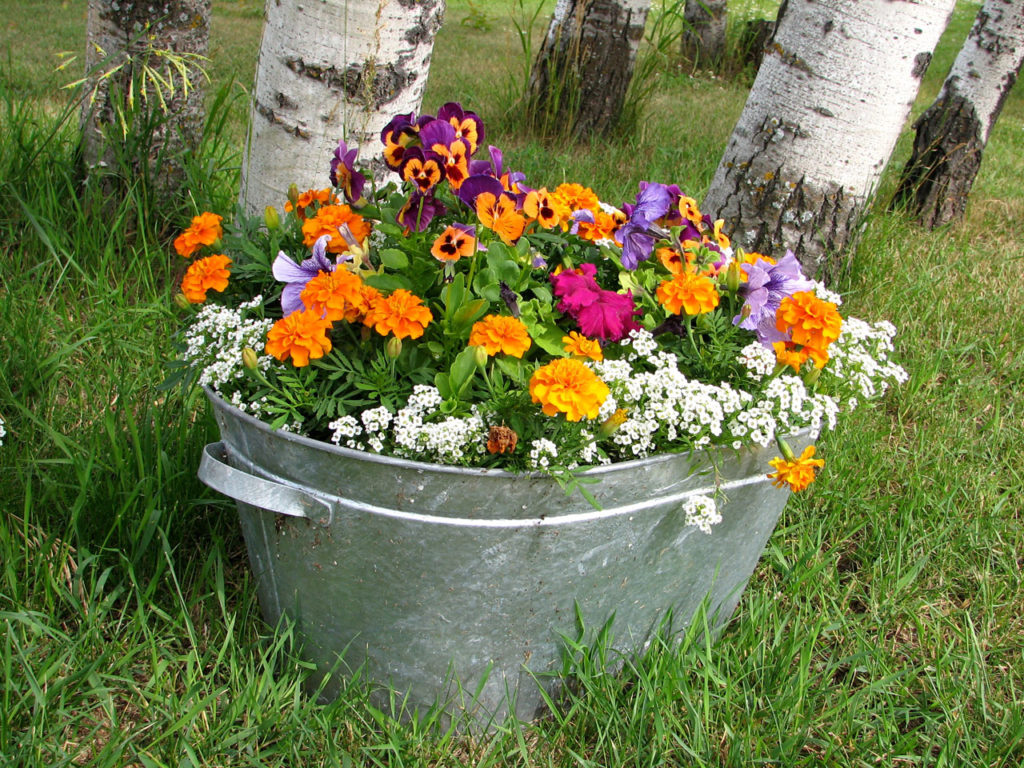
Another option is to construct containers from things around your home. If you find something large enough for the plant, cut some drainage holes in the bottom and you’re good to go. The possibilities are wide open. Milk jugs, soda bottles, and even margarine tubs have all been used. For larger plants, trash cans and plastic tubs could work.Image


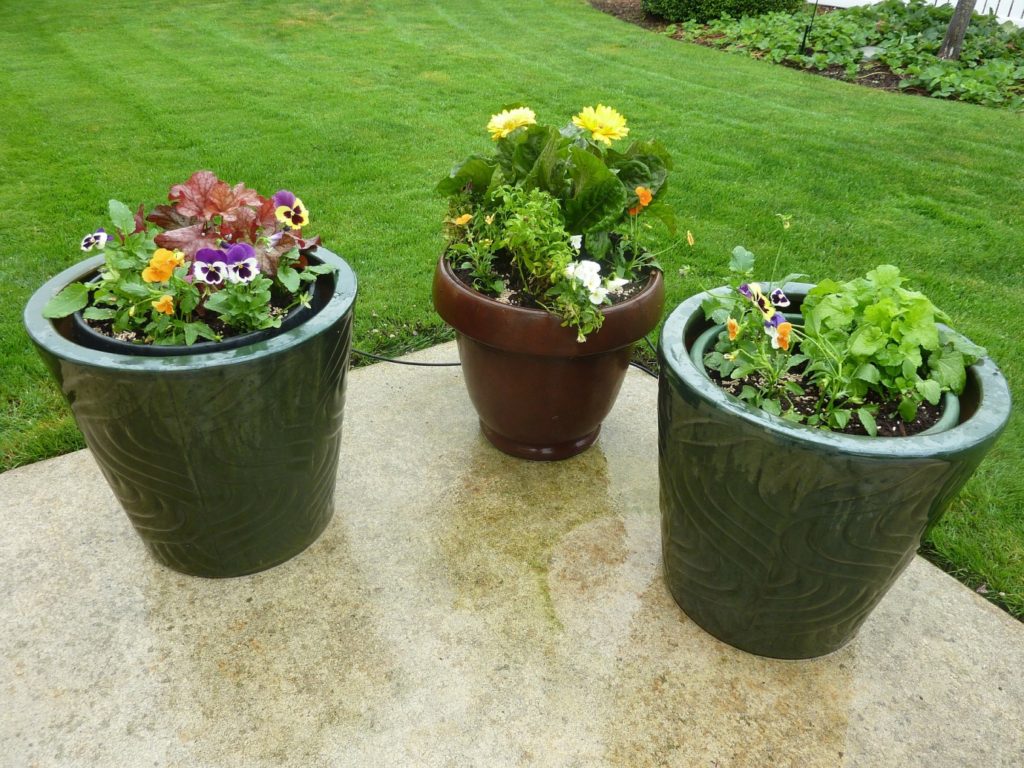
If you really want to go minimalist, then use a bag of soil. Cut a hole in the bag and plant something in the exposed soil. This simply proves that almost anything can be used. Just make sure it’s big enough for the plant, will last as long as you want it to, and allows for proper drainage.

Read also: Lawn Care Maintenance Services And Tips

Abdul Aziz Mondol is a professional blogger who is having a colossal interest in writing blogs and other jones of calligraphies. In terms of his professional commitments, he loves to share content related to business, finance, technology, and the gaming niche.

View all posts

Leave a Reply

Your email address will not be published. Required fields are marked *

Related

Zapping Light Bulbs

How Effective are Bug Zapping Light Bulbs

When the summer approaches, we can enjoy the summer’s sunsetting sitting on our armchair. This is a really enjoyable and exciting experience of our life. But what if there are full of insects both harmful and harmless that can cause great harm to your health. The Zapping Light Bulbs can help you to get the maximum light in a short span of time.  In this case, you may adopt some ways to repel and sometimes kill them. In this article, I will discuss some ways to get rid of irritating insects. There are a lot of ways to keep harmful insects including bugs, mosquitoes and many other things away from you. Some of them are fast and at the same time pollutes our environment as well while others may be environment-friendly ways too. The main concept of removing bugs by bug zapper light bulb is not so difficult. As they emit ultraviolet and infra rays, insects get attracted by the ultraviolet rays and enter into the trap and at last, they are being caught in the trap. This is as simple as water. Types of zapping light bulb But there are of two types of zapping light bulbs out there. One of them entices insects inside the zapper to kill them. On the other hand, yellow zapper light does not kill them but repel them. So, if you are searching for a solution to repel bugs from your living area, you can select the second one which does not kill them. As a result, useful insects for your environment go away from your area without killing. And the first one works not only as a device to repel them but kill them and at the same time pollutes our environment as well. Nowadays, there are other types of bug zappers which produce carbon dioxide as well to attract mosquitoes as well. Bug zapper lights that can emit only ultraviolet and infra rays to lure insects except for mosquitoes. That’s why new devices have been invented that produce both ultraviolet rays and carbon dioxide too. Now it is easier to repel and kill any insect into the zapper. Which zapping light bulb should be good for? According to me, a bug zapper light bulb is more effective and environmentally friendly than a bug zapper. A zapper can kill a larger number of harmless and useful insects entirely. Besides, if you do not keep it away from your living or dining space, it will pollute the area and as a result, your health may fall in danger. While killing the insects inside a zapper attracting by the ultraviolet rays, there produces a ‘mist’ which may pollute your living as well as your dining space. But if you can replace your thought of removing bugs from your living place and do not want to kill them, only the bug zapper light should be your best choice. It does not pollute your environment. Let’s talk about the effectiveness of the device: Are the bug zapping light bulbs are effective anyway? Well. Yes, they are more effective to repel annoying bugs from your surroundings. The main concept of repelling bugs using yellow lights are not new at all. Yellow lights attract bugs form a long distance and they come forward and cannot see further. As a result, they stuck there without being killed which is very effective not only for the environment but also for the useful insects as well. The intensity of the lights may be lower or higher. And they can attract bugs from a long distance depending on the intensity of the lights. Also, they can cover a larger part of your area. It may not repel mosquitoes: Carbon dioxide attracts mosquitoes and they find us following the carbon dioxide trails. When we breathe, we leave carbon dioxide. Besides, they also find us when we sweat. Anyways, zapper does not attract mosquitoes most. If you place a zapper near you and you sit beside the zapper, you will see that mosquitoes are not going towards the zapper leaving you. But there are zappers now in the market available that can produce both carbon dioxide and ultraviolet rays at the same time to kill the harmful and annoying mosquitoes too. The zapping light bulbs can make things happen in your favor. Conclusion: We use a lot of devices in our daily life to make our ways of living comfortable and enjoyable. But at the same time, we have also to think about our planet. We should always go for the green that will make our planet-friendlier. So, before using any device, think at least one time whether we should go for it or not. Zapper light bulb is without any doubt effective and as they do not kill the helpful and useful insects that can make our environment more efficient for us. Otherwise, we should think about our future of the present world to make it greener making any harm to the lovely planet. Read Also: A Rundown Of The Basic Led Lighting The Right Light Set-Up For Your Band Las Vegas Electricians Share Fun Lighting Ideas For Your Home

READ MOREDetails
How to Choose LED Lights

How to Choose LED Lights for Every Room in Your Home?

The lighting you choose for every room in your home impacts the overall mood and appearance of the space. In the same way that light from the sun energizes your body, the light coming from bulbs inside your house will also affect your focus and energy. Therefore, in choosing lighting fixtures for your home, you need to consider the purpose of each room and the most suitable lighting to install. How to Choose LED Lights for Every Room in Your Home: 1. Brightness and color of LED lights: There are LED bulbs that emit blue light which helps increase focus and alertness. Those that emit yellow light, on the other hand, induces a feeling of relaxation and calmness. LED bulbs with lower temperatures typically produce a warmer, yellow light and in contrast, lamps with higher temperatures have a cool white glow similar to the appearance of daylight. 2. LED lights for bedrooms: Bedrooms are supposed to be more relaxed and peaceful. In choosing an LED bulb to retrofit a bedroom, look for bulbs with a color temperature from 2,700 to 3,000 K. These tend to be warmer and produce a calming atmosphere. If you are unable to fit an entire room with new LED bulbs, you can retrofit an old lighting fixture using an LED bulb that is compatible with the existing installation such as an E27 LED bulb. 3. LED lights for a home office: In a home office, you will want lighting that helps in maximizing productivity. As mentioned earlier, LED lights with a touch of blue help you feel more alert and awake. That is why in most office and commercial spaces, bright white LED lights mimicking daylight are often used. In selecting a place for installing LED bulbs, make sure that these are not directly above computer screens to avoid unwanted shadows or glare. 4. LED lights for living rooms: The living room is typically a multi-purpose space used in entertaining and relaxing. As such, there needs to be a mixture of light sources to create the proper atmosphere and ambiance depending on the occasion. As much as possible, avoid bright LED lights for living rooms and try to incorporate features such as dimmer switches and spotlights. If you will be adding adjustable spotlights or recessed downlights, install them near walls and corners to avoid shadows. 5. LED lights for dining rooms and kitchens: Dining room lighting should not be too bright as it can be too distracting to the diners. Install LED lights with warmer temperature and dimmable features to adjust the ambiance of the room according to the time of day. On the other hand, kitchen lighting needs to be functional; thus, blue-light LED bulbs are perfect for kitchens. Adjustable spotlights are also perfect if you want them over specific work areas so that you can concentrate bright light only when needed. If you have a breakfast bar or a small dining area in the kitchen, make sure that there is separate lighting overhead to have a layered lighting scheme that complements the purpose of each area. Read Also: A Rundown Of The Basic Led Lighting Las Vegas Electricians Share Fun Lighting Ideas For Your Home Unique Military Hardware Concept Integrated Into Lumitact Flashlights Create A Stunning Outdoor Space With These Residential Landscape Lighting Tips

READ MOREDetails
Landscape Edging

Landscape Edging in Sandy/Beach Areas

Landscape edging can further add to the beauty and utility of your beach home. You might think that with a yard made of sand instead of grass you're stuck with no options. Forget that train of thought because you had a multitude of possibilities with your sandy landscape and plenty of reasons to edge your yard. Benefits of Landscape Edging : Regardless of the soil or grasses composition of your yard, landscape edging provides many benefits, including: a crisp, manicured appearance to your yard and home increases curb appeal adds value to your yard and home economically creates a root barrier to stop the spread of invasive grasses and reeds helps prevent erosion provides a contrast to the yard and your home Edging can help create paths, direct traffic flow in the yard, and set aside yard areas for special uses. You can create planting areas or a patio area with a combination of small hard materials for the main area and larger materials for the edging. Design Materials : The main advantage of sand is its neutral color goes with everything. Whether black, cream, or white sand, it works with any color contrast you choose. That leaves you open to a number of design materials including brick, fencing, glass, pavers, plastic, potted plants, stone, tile, wattle, or wood. Your choice depends on the look you want to achieve. Separating the yard from beach sand dunes with slat wood fencing provides a traditional look. Most wood edging lasts about ten years before needing touch-ups or replacement. Concrete comes performed or you can create a custom form and pour your own design. This lets you create a look no other yard has. Creating your own forms lets you add materials to dress up the concrete pavers. Add small river stones, seashells, sand dollars, beads, or small tiles. You can lay or stack large stone or brick. This forms either a low curb edge or a low wall. Plastic or resin dividers come in many designs from faux stones to fencing. Choose wisely and in-person to check the plastic's quality. The cheaper plastic edging looks just that. To achieve an organic look with sturdy materials, create a wattle fence. Wattle consists of weaving the saplings of pliable trees together. Dogwood and willow make popular choices. Another choice that mixes organic and inorganic materials, potted plants, delineate lawn areas while adding life to a sand-covered lawn. Try potted seagrasses, potted palms, or potted palmetto trees. Both the pots and plants add color. You can get numerous other ideas on websites like Pinterest. You'll also find installation ideas. Installation Tips : Set the edging in place firmly. You may need to dig a shallow space for each. Fit it inside the shallow, then re-pack the dirt around it. Installation varies based on use. Use the following a depth/height guide: lawn or garden divider - use a trenched edge or ditch with a V-shape; mowing strip - use flat, wide materials level with the ground so lawn mower wheels can easily skim over them capture mulch - keep mulch in place using a solid material that extends four inches below ground and two inches above beautification - use any height that provides the desired aesthetic. You can create an attractive lawn with sandy soil as the base. Create interest and divide space using landscape edging. Read Also : Natural Ways To Get Rid Of Flea In Your Lawn Ten Tips To Make Most Out Of Your Outdoor Space Grow These Flowering Plants In Your Home Garden To Remove Vastu Related Problems Kylie : Outside of writing for EverythingBackyard, I love to spend all the time I can outdoors and find every excuse to leave my house. I write about everything from backyard DIY projects to gardening. If you can't get a hold of me I am probably on a trail or a boat.

READ MOREDetails