Your Complete Guide To Google Play Balance Transfer: How To Manage Your Digital Wallet

Published on: 18 October 2023 Last Updated on: 04 September 2024
google play balance transfer

Let’s just say you have money saved in your Google Play balance and you are thinking of transferring it.  Your thoughts could be going in the direction of your bank account or transferring it to your Google Pay account.

We will try to help you with this. In this article, we will explain how Google Play works, what the dos and don’ts are, and how you can transfer it to other devices or accounts.

 What Is Google Play Balance? 

What is Google Play Balance

Suppose you want to buy a digital book, a movie, games, subscriptions, apps, and other digital content. Google Play balance will help you pay for all of these services with the amount attached to your Google account. This can be done in the Google Play Store.

You can also use it to make in-app purchases while using certain apps and games. Keep in mind that google play balance cannot be used to buy goods or services physically from a store.

More amount can be added to the google play balance if you redeem the gift cards and codes. Or you could use a debit or credit card, Paypal, and other different payment methods.

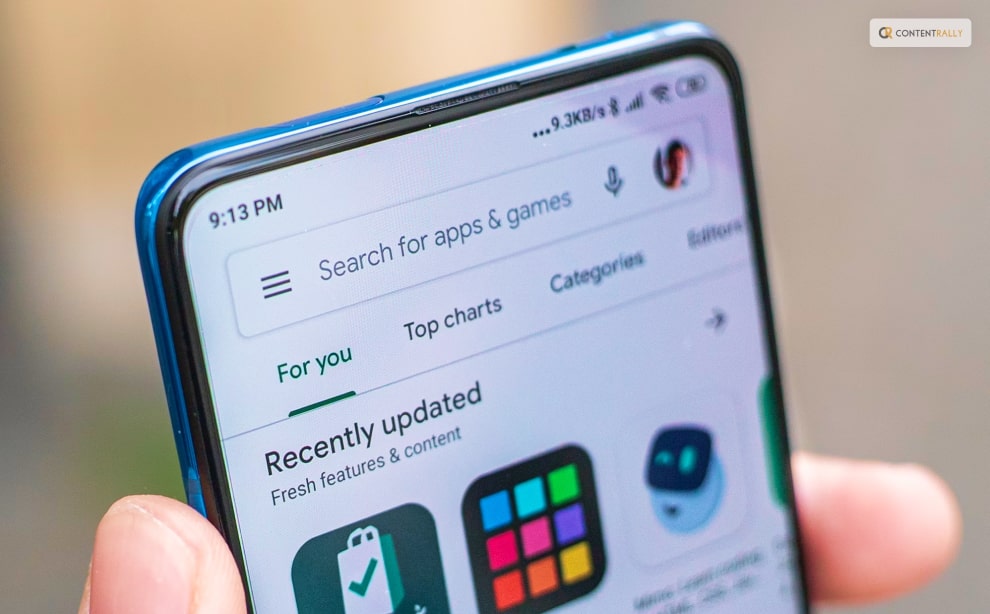
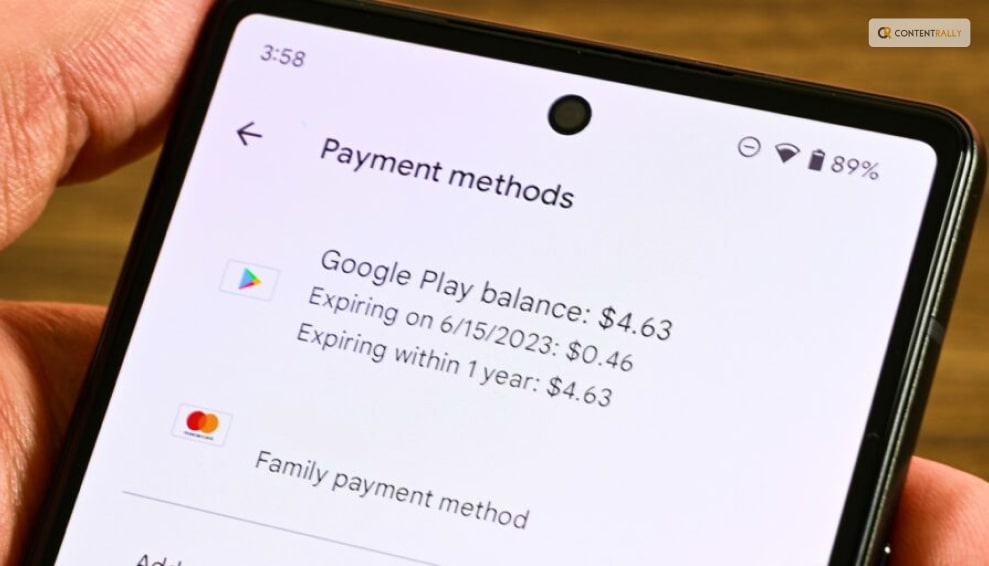
If you want to check your balance on google play, open the google play store app on an Android device. It will also show you the transaction history while helping you manage the payment methods on the same page.

If you create a Google Play Family Library, you may also share the Google Play balance with others. By doing this, you can purchase content once and distribute it to up to five family members who also have Google accounts. You may also limit the amount of money your family can spend from the shared balance. The material can also be accessed.

Restrictions With Google Play Balance 

Restrictions With Google Play Balance
Image Source: techbanta.com

You are however subject to some restrictions when using your Google Play balance.

You cannot, for instance:

Transferring the amount to other Google accounts is not possible. Your Google Play balance is tied to your Google account.

No official method exists for you to transfer the Google Play balance towards bank accounts and other forms of payment.

Transferring the amount onto a Google Pay account will enable you to use your phone to pay for items both online and in physical stores. Google Pay is a different service. Your Google Pay account cannot be funded or used to make payments using your Google Play balance.

Transfer the balance to different devices: All of the devices that are logged into the same Google account have access to your Google Play balance. It cannot be moved to a separate device that is signed in with a separate Google account.

You cannot request a refund after adding an amount to the Google Play balance unless a legal requirement exists. Only digital items from the Google Play Store may be purchased with it.

How To Transfer Balance From Google Play To Bank Account? 

How To Transfer Balance From Google Play To Bank Account? 

The ability to transfer your Google Play balance to other accounts and other payment methods is not officially supported.

But there are some underhand techniques that some individuals claim to use. They are not advised because they might be against Google Play’s terms of service or entail fraud or frauds.

Some of these techniques consist of:

Online exchange of Google Play gift cards and vouchers for cash- If you still have unused gift cards or redemption codes, this might work. This could be dangerous, though, since you might run into dishonest buyers who don’t pay or deal cards or codes that have been compromised.

Purchasing digital products from the Google Play Store to resell them for money online- If you purchase in-demand software, games, movies, books, or subscriptions then resell them on eBay or Amazon. This might work. However, you run the risk of breaking the terms of service of the platforms of the content providers.

Using apps or websites from third parties that promise to exchange your Google Play balance for cash. If you can locate a reliable app or website that provides this service and costs a fair price, this might work. But that could of give hackers or con artists access to your personal information and payment information.

As a result, we do not advise utilizing any of these techniques to transfer your Google Play balance to a bank account. It could make you lose money, get you banned from Google Play, or put you in trouble with the law.

How To Transfer Balance From Google Play To Google Pay? 

How To Transfer Balance From Google Play To Google Pay? 
Image Source: candid.technology

There are no Google-supported methods to use your Google Play balance to make payments or transfer it to a Google Pay account.

The balances in Google Play and Google Pay are two distinct objects that cannot be combined or transferred. Only subscriptions, applications, games, books, movies, and music can be purchased from the Google Play Store using Google Play balance. Only Google Pay transactions or bank account withdrawals are permitted with Google Pay balance.

Why then are you unable to transfer Google Play credit to Google Pay? The primary explanation is that the terms and conditions for Google Play balance are different from those for Google Pay balance.

For instance, unlike Google Pay balance, Google Play balance can have expiration dates or have different refund policies. Additionally, not all payment options or supported currencies for Google Pay are compatible with Google Play balance.

You will need to find other options if you wish to use the Google Play balance toward anything. For example, you could purchase digital products from the Google Play Store.

In other words, you cannot directly transfer Google Play credit to Google Pay. You must use your Google Play balance for its intended purpose or find alternative means of conversion.

 Wrapping Up:

These are the options for desktop and Android devices to quickly transfer your Google Play balance to a bank account. You can utilize other third-party apps to transfer your balance if you have trouble using the aforementioned methods to transfer the money. The charges involved are usually the biggest disadvantage of using third-party apps to make transfers.

More Resources:

Content Rally wrapped around an online publication where you can publish your own intellectuals. It is a publishing platform designed to make great stories by content creators. This is your era, your place to be online. So come forward share your views, thoughts and ideas via Content Rally.

View all posts

Leave a Reply

Your email address will not be published. Required fields are marked *

Related

Google Adsense Login

Google Adsense Login: How To Login To Google AdSense Efficiently?  

If you want to learn about the best way of monetizing your website traffic then AdSense is the way to go. Every year, Google is known to pay over ten billion dollars for its content publishers. Without any contracts and with a quick AdSense setup, site owners can now earn high revenues from their released web content. This platform is also free to access for all and the site owners get paid for impressions or clicks on the displayed Google Ads on the website. Pre-Requisites   Before creating an Adsense account, one must go through the following requirements: One must have an active Gmail account. Probably one that is not linked to an AdSense account. A person must also be over eighteen years old. This is a minimum age criterion that needs to be met.   The website must meet the terms of service of Google. Steps To Creating An AdSense Account   If you want to create an AdSense account then you need to follow the steps that I am going to discuss below: Step 1:   First, one would need to visit the official AdSense website and click the "Get Started" button. Step 2:  Next, one would need to sign in to the Google account. If someone does not have a Google account then one more would need to be created. Step 3:   Next, the user would be directed to a page with a Google AdSense sign-up button. A user would need to click on it for signing up for the AdSense account. Step 4:  Then enter the URL of the site that you would want the ads to appear on, in the given field. If you do not have any site yet then you can leave the field blank and click on the option stated as "I don't have a site yet". Step 5:   Next, a user would have to follow the instructions for connecting the website to AdSense. They are then going to provide the user with a snippet of the code that one must add to the website. Step 6:   Adsense actually allows a person to choose whether they would like to send performance suggestions and aid. It would be for the better if you opt for this facility. A user can also choose not to select that option. This option can be changed later as well. Step 7:   Then, a person would need to select their country for payment, where they will be sent a PIN through the mail. You must remember to choose the option carefully as the field once entered cannot be modified later on. Step 8:  Lastly, you would need to go through the terms and conditions and then click on accept. You would then be signed in to your Google AdSense account. Then a user can access the platform by clicking on the "Start using AdSense" option. Login To AdSense Effectively   After you are done creating an AdSense account, you can adsense sign in/log in to it whenever you want. Frequently, the users struggle a lot to find the AdSense account's login or google adsense login page. A user simply has to visit the same page they visited in order to create an AdSense account. This time they would need to click on the Sign-In button instead of getting started. Then just sign in to the Google account by entering both the email and password. Tips: If someone faces any problem they can contact Google Adsense support, to get any kind of help they need regarding the workings of the Google AdSense platform. Frequently Ask Questions (FAQs):-   Here are a few frequently asked questions regarding Google AdSense: Q1. Does Google AdSense Pay Monthly? Ans: The AdSense payment cycle actually gets circulated monthly. One gets their estimated earnings over the span of a month, and then at the beginning of the following month the earnings are finalized and posted to the balance on the Payments page. Q2. What Is The Minimum Earning For AdSense? Ans: At least for the United States region, one needs to get $100 in AdSense earnings for meeting the threshold and getting paid. Q3. Does AdSense Money Expire? Ans: In case the cash does not reach the payment threshold, the money is going to remain in the AdSense account until the next payment cycle gets completed. The build-up amount then gets transferred to the person at the end of their next payment cycle. Q4. Can AdSense Account Be Sold? Ans: A site can be sold, but one certainly cannot sell or transfer their AdSense account.Why is my AdSense revenue low? Q5. Why Is My AdSense Revenue Low? Ans: Drop in earnings can actually be caused by anything from the irrelevant ads being displayed to a drop in the CPC or even because of invalid clicks. The cause though must be determined on a site-by-site or account-by-account basis. Q6. Can I use AdSense From Youtube? Ans: AdSense is a Google program that lets its creators and allows them in the Youtube Partner program to get paid. To start getting paid on youtube, one must set up an AdSense account from within the YouTube Studio. To Wrap It Up!   Google AdSense is a place one should definitely consider investing in as that really helps out in getting a brand’s name out there. That was all for information regarding all one needs to know about Google Adsense Login. Thank you for reading up till here. I hope you found the information useful. Let me know in the comments your thoughts on the same. More Resource: Best SEO Tools For Ranking The Website How to Maintain WordPress Website for Free? 7 Advantages of Using Website Design Templates

READ MOREDetails
Google Play Cancel Subscription

Google Play Cancel Subscription: The Ultimate Guide To Managing Your App

Are you searching for how to cancel a subscription on Google Play? Well, you are not the only one. In the fast-paced digital age we live in, it's common for many of us to sign up for various app subscriptions. These subscriptions can range from streaming services to premium versions of our favorite apps. Thus promising a world of convenience and entertainment at our fingertips. However, as time goes on, we often find ourselves with a growing list of subscriptions, some of which we no longer use or need.That's why it is important to understand how to cancel these subscriptions on Google Play! If you were looking for a guide to the same, you have reached the right place! So, keep on reading this article till the end to learn more… Why Cancel A Subscription On Google Play?   The decision to cancel a subscription on Google Play is not one we can take lightly. There are several valid reasons why you might want to drop a subscription. Understanding these reasons can help you make an informed choice about your digital expenses. By understanding the reasons why you might want to cancel a subscription, you can make more deliberate choices. These can be about the services you choose to subscribe to. Thus, you can ensure that your money is being used to enhance your digital experience. Let us delve into the reasons behind why you might consider canceling a subscription on Google Play! 1. You No Longer Use It   It's common to download an app or sign up for a service with the best intentions, only to find that you rarely use it after the initial excitement wears off. Life gets busy, and our interests change. That fitness app you subscribed to a few months ago now collects virtual dust on your phone. Simply because you've found other ways to stay active.  Perhaps you subscribed to a news app but have since switched to other sources for your daily headlines. In these cases, canceling the subscription frees up your digital and financial space for services you value and use. 2. Financial Reasons   We all have to manage our finances, and sometimes subscriptions can accumulate to the point where they strain your budget. When you take a closer look at your bank statement, you might realize that you're paying for many subscriptions. Some of which you've forgotten about or no longer find valuable.  It's essential to focus on your spending. Canceling unused or less essential subscriptions can help you. How? Well, simply by redirecting your money to things that matter more. 3. Trial Period Ends   Many apps and services offer enticing free trials to get you hooked. While these trials can be an excellent way to test a service, they often automatically convert into paid subscriptions once the trial period ends. If you've tried out a subscription service during a free trial and found it's not what you were looking for, you'll want to cancel before it starts costing you. This prevents unexpected charges and ensures you're only paying for services you genuinely want. 4. You Got What You Needed   Sometimes, you subscribe to access specific content or features, and once you've obtained what you need, continuing the subscription may no longer be necessary. For instance, you might have subscribed to a streaming service to binge-watch a particular series. Once you've watched it, you've essentially achieved your goal, and there's no need to keep paying for the service. In such cases, canceling the subscription allows you to move on without ongoing costs. Understanding Google Play Subscription Types   To effectively manage your subscriptions on Google Play, it's essential to grasp the two main subscription types offered: in-app subscriptions and Play Pass. Each type serves a unique purpose and is billed differently. Let me break them down to help you make informed decisions about your digital subscriptions. 1. In-App Subscriptions   In-app subscriptions are the most common type of digital subscriptions on Google Play. They are subscriptions you buy through a specific app or service. Your Google Play account then bills these subscriptions. Examples of in-app subscriptions include streaming services like Netflix and music streaming platforms like Spotify Premium. Here's what you need to know about in-app subscriptions: App-Dependent: In-app subscriptions are entirely dependent on the app or service you're using. These subscriptions typically grant you access to premium features, content, or an ad-free experience within that specific app. Billed Through Google Play: When you subscribe to a service through an app, the payment is processed via your Google Play account. This means that your subscription charges are consolidated, making it easier to manage multiple subscriptions in one place. 2. Play Pass   Play Pass is a subscription service offered directly by Google. It provides subscribers with access to a curated selection of apps and games on the Google Play Store without ads or in-app purchases. Some of the apps and games available through Play Pass include Stardew Valley, Monument Valley, AccuWeather, and Pocket Casts, among others. Here are the key points to understand about Play Pass: Google's Subscription Service: Play Pass is a subscription service provided by Google itself. Unlike in-app subscriptions, it's not tied to a specific app or service but rather grants access to a variety of apps and games. Monthly Billing: Play Pass operates on a monthly billing cycle. You pay a fixed fee each month to access all the included apps and games. This fee is billed through your Google Play account. Diverse Content: Play Pass offers a diverse range of content, including games, productivity apps, fitness apps, and more. It's an excellent choice if you want to explore various apps without ads or in-app purchases. Free Trials: Google often offers free trial periods for Play Pass, allowing you to test it out before committing to a subscription. Accessibility: Play Pass can be accessed by multiple family members, making it a cost-effective option for households with multiple Android devices. Choosing The Right Subscription Type   Understanding the difference between in-app subscriptions and Play Pass is crucial for effectively managing your digital subscriptions on Google Play. Each type caters to distinct preferences and needs, whether you're looking to enhance a specific app's functionality or explore a curated selection of ad-free apps and games. The choice between in-app subscriptions and Play Pass depends on your specific needs and preferences: In-App Subscriptions: Opt for in-app subscriptions if you're particularly fond of a specific app or service and want to unlock its premium features. This is the choice for personalized subscriptions tailored to your unique interests. Play Pass: Consider Play Pass if you enjoy exploring a variety of apps and games and prefer an ad-free experience across multiple applications. It's an excellent choice for those looking for diverse content without additional costs. How To Cancel A Google Play Subscription?   Managing your app subscriptions on Google Play is a crucial aspect of responsible digital spending. Whether you're looking to cut costs, declutter your digital life, or simply unsubscribe from a service you no longer use, understanding how to cancel your subscriptions is essential. Here are some of the things that you can do to cancel your Google Play subscription: Method 1: Using The Google Play Store App   1. Open the Google Play Store: Begin by locating and tapping on the Google Play Store app icon on your Android device's home screen or in your app drawer. This opens the Google Play Store, your gateway to managing subscriptions. 2. Access Your Account: In the top-left corner of the Google Play Store app, you'll see three horizontal lines (often referred to as the "hamburger" menu). Tap on these lines to open a menu. Scroll down this menu until you find the "Subscriptions" option, and tap on it. 3. Select The Subscription: Inside the "Subscriptions" section, you'll see a list of all the subscriptions associated with your Google account. Browse through the list and locate the subscription you wish to cancel. Once you find it, tap on it to access its details. 4. Cancel Subscription: Within the subscription details, you'll see an option that says "Cancel subscription." Tap on this button to initiate the cancellation process. 5. Confirm: Google Play will prompt you to confirm your decision to cancel the subscription. Take a moment to review the details, including the date until which you'll have access to the service, and ensure it's the correct subscription. Once you're certain, tap "Cancel subscription" once more to confirm. 6. Done: Congratulations, your subscription is now canceled! You'll retain access to the service until the end of your current billing period, after which you won't be charged further. Using the Google Play Store app to manage your subscriptions offers a user-friendly and convenient way to cancel subscriptions directly from your Android device. It's a quick process that puts you in control of your digital expenses, ensuring that you only pay for the services you genuinely need and want. Method 2: Using The Google Play Website   Using the Google Play website to manage your subscriptions offers the advantage of a larger screen and may be more convenient if you're already working on your computer. It's a simple and effective way to keep your digital expenses in check and ensure you're only paying for the services that truly matter to you. Here's a step-by-step guide: 1. Visit The Google Play Website: Open your web browser and navigate to [play.google.com](https://play.google.com). 2. Login: Sign in to the Google account that is associated with the subscription you want to cancel. Make sure you're using the same account you used when you subscribed to the service. 3. Access Subscriptions: Once you're logged in, you'll see a menu on the left-hand side. Click on "Subscriptions." This will take you to a page that lists all your active subscriptions. 4. Choose The Subscription: Locate the subscription you wish to cancel from the list. It will display the app or service name, the renewal date, and the cost. 5. Cancel Subscription: Click on the "Manage" button next to the subscription you want to cancel. This will take you to the subscription details page. 6. Confirm Cancellation: On the subscription details page, you'll find information about the subscription and a "Cancel Subscription" option. Click on it. 7. Review And Confirm: Google Play will present you with the details of the cancellation, including when your access to the service will end. Carefully review this information. If you're sure you want to proceed, click "Cancel Subscription" once more to confirm. 8. Completion: Congratulations, you've successfully canceled your subscription using the Google Play website. You'll continue to have access to the service until the current billing period expires. Managing Multiple Subscriptions   If you're juggling multiple subscriptions, staying organized is crucial. Here are some tips to help you manage them effectively: 1. Keep Track: Make a list of all your subscriptions, including the renewal dates and costs. Apps like "Truebill" or "Bobby" can assist in tracking your subscriptions. 2. Prioritize: Review your list and determine which subscriptions are essential and which can be canceled. 3. Set Reminders: Use calendar reminders or apps to notify you a few days before a subscription renews. This gives you time to decide whether to keep or cancel it. 4. Bundle Or Share: Some services offer family or group plans. Consider sharing costs with friends or family members to reduce expenses. 5. Be Vigilant: Periodically review your bank or credit card statements to ensure you're not being charged for subscriptions you canceled. Troubleshooting Common Issues   While canceling subscriptions on Google Play is usually straightforward, you might encounter some issues. Here's how to address a few common ones: 1. Forgotten Account: If you can't remember which Google account you used for the subscription, check your email for billing receipts. This will often show the associated account. 2. No "Cancel" Option: If you don't see the "Cancel subscription" option, it might mean the subscription isn't billed through Google Play. Contact the app's support for assistance. 3. Refund Requests: If you believe you were charged for a subscription you canceled, contact Google Play support within 48 hours. They can investigate and possibly issue a refund. Wrapping It Up!   So, go ahead and take charge of your subscriptions. Cancel what you no longer need, enjoy the services you love, and keep your tech life in balance. Your wallet will thank you, and you'll have a newfound sense of control over your digital world. In case you were searching for ways to cancel your subscription to Google Play, I hope that this blog has been of help to you. If there are any other queries related to the same, feel free to let me know. All that you need to do is scroll down till you reach the bottom of the page. Then leave your comments and queries in the box below. And I will be there to answer them all for you! keep Reading About: Why Should You Look Into Google Drive Alternatives? These Music Streaming Services Can Get Your Groove On How Was Google In 1998? | Google 1998 Easter Eggs And More Everything You Need To Know About Google Play Refund In 2023

READ MOREDetails
How To Record Google Meet

How To Record Google Meet? Read This Blog To Know

With the increasing online communication and meetings, google meet is a common place to belong. If you are thinking about how to record google meet because you are missing out on important information, this article is for you. Everyone can access Google Meet; however, certain aspects must be kept in mind regarding it. Certain policies by Google Documentation are established, which must be followed only then the recording is allowed. You can't record google meet calls if you have a free Google account plan. Considering a free Gmail account does not have paid storage, it is not allowed to register from this account; hence, the first step to record a google meet is to have workplace access. Before you start recording, ensure everyone involved in the meeting is aware of it. Permission should be asked from everyone regarding the recording by sending participants a notification in the Google meeting. How To Record Google Meet? Read This Blog To Know   To record google meet, the first step as an administrator is to create a Google Workplace to access meeting recordings. Once a workplace is built on Google, an administrator can access the Google admin console. Then you can see Google Workplace in the apps present in the sidebar. When using Google for the workplace or school, users need an allowance from administrators; hence you need to email. The workplace admin usually allows and supports the access of recording. At times, users might not see the record button; the video is transcribed. You have to select the audio source of either an external microphone or a system microphone to record it. Users can use their voice to register, so using headphones is a better option to be used. You have to start and stop recording where it is automatically uploaded on the cloud account of the Vmaker platform. The meeting can be registered with necessary sections so that the subtitles and music can also be captured. The meet can be recorded with the help of Android phone settings and iOS settings reflecting an important aspect.  Can You Record A Google Meet Without Permission?    If you are thinking, about how to record google meet? Without permission, google meet can be accessed on Android and iOS by following certain steps. It is important to know that an Android phone has a screen recording tool integrated into it. That can be used to record google meet calls without using recording google meet. It is an effective solution if you do not have any permission. However, there must be enough storage in the phone. The screen recording tool is a replacement. If you are trying to record the google meet, you can open the one you want to record. Once it is done, you pull down the top of the Android phone's screen and select "screen recorder" in the menu. You have to click on the red button to stop the recording. For iOS phones, you can check whether screen recording google meet is allowed in the list. Once you can find "screen recording," click on "More Controls" and press the + sign to start recording the google meet.  Is A Transcript Available For The Recording?    If it is difficult to record the google meet record, you can create a transcript of the video. The application of Google Meet facilitates the live closed-captioning free. Hence, transcription can be acquired for all users. The first step is to Install the Tactiq extension, where you can create a free account and select google meet under the platforms. The attachment will be installed, and you can join the google meet meeting. You will start clicking on the Tactiq widget to find the captions. The captions can be downloaded and pasted into a Google doc that reflects the transcription, which is also timestamped. The speaker organizes the meeting so that all highlights can be summarized. There are tagged items as well in the summarization. Transcriptions can be summarized in Google Drive and accessed from the account holder. In the transcription, the speaker's name is highlighted, timestamped, and any saved screenshots.  How To Record A Google Meet?    4 steps can be followed to record a google meet recording that users need to follow to access. First, users must start "instant Google Meet," and then they can click on "Record meeting." If there is no record meet option, you need to enable the account to see the button. Once the recording is on, then you can start recording. Open the different options, and then click on the "stop." Once you are done and click to stop, you will receive an email with the record google meet. You will find the email in the "Meet Recording" folder in google drive. Accessibility is a significant issue in the google workspace. Apart from the steps, you must be aware of the Vmaker Mac application in the system; hence, at this point, you must select "screen" mode on the display screen. You have to select "current tab" mode, where the current meeting can be captured through system audio.  Google Policies For Recording    According to Google Documentation, certain types of accounts are allowed to record a video meeting. As a Google Workplace Administrator, it is important to enable meeting recording so everyone can access it. As a user, it is important to understand that meeting recordings can only be accessed if the account is of a certain type. The google meet can only be recorded with the following applicability. If you have a Google Workplace edition such as the following, you can record the video: Essentials Business Plus Enterprise standard Education plus Workplace individual subscriber Teaching Learning Upgrade Enterprise Plus Conclusion    Please read this article to learn about how to record google meet based on the features and steps on both iOS and Android devices. The article has information about different workplace editions based on the transcription available at the meeting. Comment below regarding your experience of google meet and how the recording of the Meet can be performed effectively. More Resources: Tips for Your Next Business Conference Why You Should Always Use Special Effects for Video Productions Google Meet Code 101: Learn All About The Platform’s Meeting Code

READ MOREDetails