












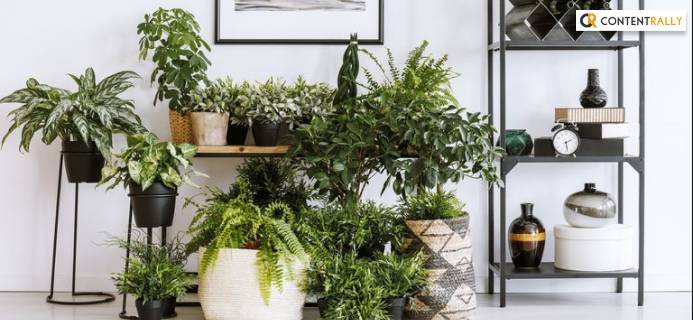
10 Best Aesthetic Plants To Buy In 2022

Published on: 28 March 2022 Last Updated on: 27 April 2022
aesthetic plants

Making a home habitable is all about decorating it with the right elements. The decoration needs to please your senses to make you feel comfortable with the proper sense of aesthetic decorum; above all, it needs to make you feel at home.

There is no better way of decorating your home than the touch of green. Many indoor plants help you decorate the house just the way you need.

They restore the life the brick and woods of your house were missing. Aesthetic plants are amazing because of their looks, but they also help you with several health benefits like refreshing the air indoors.

You can decorate your aesthetic bedroom with plants and bring nature home for a healthier, happier, and merrier life indoors.

So, if you are interested in making your indoors look incredible, you need to bring some indoor plants home and decorate the indoors more beautifully. This article has talked about several aesthetic plants that will help you do just that.

10 Best Aesthetic Plants

When I said aesthetic plants, I meant nothing but aesthetic. These plants look elegant in their beauty and versatility, and they are perfect for decorating your home properly. Here are some of the best plants for aesthetic home decoration.

1. Alocasia Silver Dragon
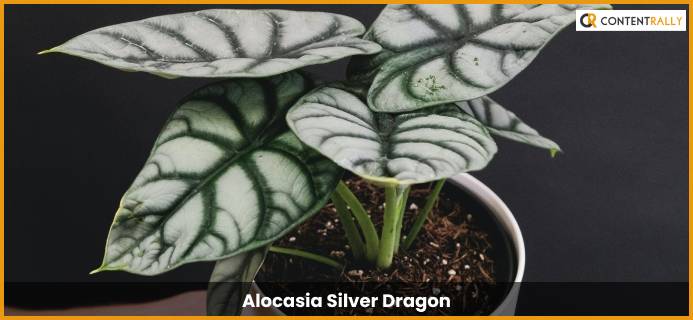
Alocasia Silver Dragon

Alocasia silver dragon is a beautiful aesthetic plant that adorns your home with its thick veined leaves. They are a famous variety of the Alocasia Baginda plant. The light to dark green leaves is just as pretty as aesthetic in looks.

If you plan to keep one of them on the table, you are making a good decision. You are going to love how good they look indoors. They require minimum sunlight, so you won't have much to worry about keeping them indoors.

Read More: Looking for a Gardener: 8 Questions to Ask Before Hiring a Professional

2. Bird Of Paradise

Bird Of Paradise

According to many, the Bird of Paradise is the queen of all indoor plants. The large and upright plant adds a glossy and clean feel to your indoors. This aesthetic plant will decorate your drawing room indoors and refresh the air indoors.

You can grow the Bird of Paradise in the low light, but they won't grow faster that way. So, I recommend keeping it somewhere the plant gets maximum sunlight through the window. You need to water the plant when the soil in the pot gets dry by fifty percent.

3. Foliage Houseplants
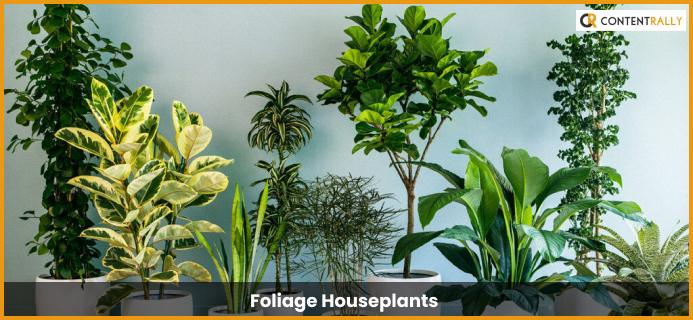
Foliage Houseplants

The decorative foliage is another aesthetic houseplant you can keep at home. Tropical foliage, calcium, and several other foliage aesthetic plants are incredibly pretty for decorating the indoors of your house. Having one or two of these plants in your drawing room will add more decoration and beauty to your house.

These plants need a medium amount of sunlight. So it would help if you kept in mind to put them somewhere the sunlight reaches them. Also, since the foliage plants are tropical, it would be better to keep the potting soil wet most of the time.

You May Like To Read This: Garden Edging for Beginners

4. Parlor Palm

Parlor Palm

NASA uses the Parlor palm plant as one of the most effective air cleansing plants. They are the ideal aesthetic plants for decorating the indoors of your house. Their size remains perfect even when you are growing them indoors. They grow around 2.5 ft in height.

The way the leaves of the parlor palm trees grow is a sight to look at. They are decorative and keep the indoor environment healthy at all times. When keeping one of these plants indoors, you need to keep in mind to make a good drainage system and keep the potting soil mildly wet.

5. Lemon Tree

Lemon Tree

This might sound like the craziest idea ever, but a lemon tree can also take the indoors and make it look more appealing to the spectators' eyes. Of course, many aesthetic plants may appeal more to you than a lemon tree, but a lemon tree will surely have the upper hand in giving the house the refreshment it deserves.

Your lemon tree needs an ample amount of sunlight and regular watering. Also, it would help if you remembered to let the soil dry out before you water it.

6. Rubber Plant
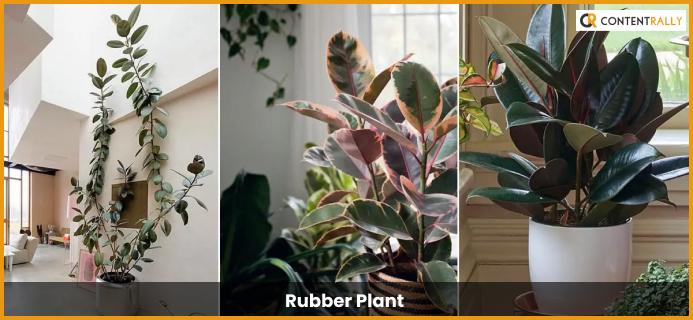
Rubber Plant

Rubber plants or Ficus Elastica are incredible for derating your indoors. Once you get one of these aesthetic plants for your indoors, you will understand how amazing they are in refreshing the indoors while also decorating the indoors properly.

When growing a rubber plant, you will need a minimum amount of sunlight (even indirect sunlight will do). There is no specific humidity level required. It would help if you watered them once or twice every week; also, let the soil dry before watering.

The rubber plant is a low-maintenance aesthetic house plant, so if you were looking for one such plant, we recommend buying them.

7. Calathea Aesthetic Plant
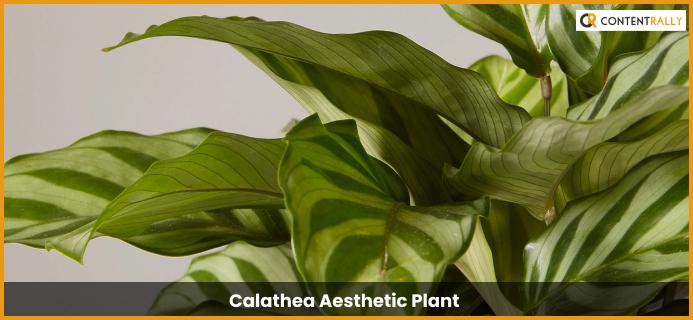
Calathea Aesthetic Plant

For a tabletop decoration, you can indeed choose the Calathea plant. The dual tones of the plant make your indoors look gorgeous with a dignified look.

It is a low-light plant so you can keep it inside without any problem. They also don't require lots of watering, and they are pet-friendly.

8. Boston Ferns
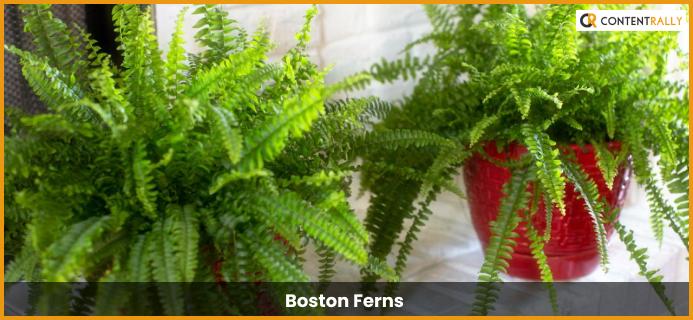
Boston Ferns

Ferns can be the pretty, perky, and adorable green aesthetic indoor plant you have been looking for. There is no match for a pot of fern on your table for indoor decoration. The green color of the ferns will look incredible in your house if you keep them for decoration.

If you want to use ferns indoors, you can opt for Boston Ferns. They need very little light so that they will be just fine indoors. But you need to regularly water the pot so that the soil remains moist.

9. Money Plant

Money Plant

A small aesthetic plant indoors that brings luck, fortune, money, and wealth in your life is the money plant. According to popular opinion, the money plant is an aesthetic plant that helps restore wealth, luck, and fortune if you keep them indoors.

As an indoor plant, the money plant requires lots of sunlight and regular water, so you need to be careful about them if you are growing any at home.

10. Heart Leaf Philodendron

Heart Leaf Philodendron

Heartleaf Philodendron requires bright and healthy light and needs regular care if you want to grow them. However, these are excellent choices for decorating your indoors because of their beautiful-looking leaves and flowers

It is important to provide them with the proper amount of moisture in the soil, regular pruning, and the required amount of fertilizers. There is plenty of caregiving that your heart leaf philodendron needs.

Conclusion

Aesthetic plants are an excellent addition to your home decor, and they add incredible value, beauty, and health benefits to your home. However, if you want to decorate your indoors with full potential, you need to consider keeping them in your home. Here, in this article, We have provided the names of a few of them to help you buy the right one.

Read Also:

  1. DIY Ways to Control Pests in Your Garden
  2. What Is the Fastest Growing Plant On Earth?
  3. 5 Tips to Keeping Animals Away From Your Garden

Shahnawaz is a passionate and professional Content writer. He loves to read, write, draw and share his knowledge in different niches like Technology, Cryptocurrency, Travel,Social Media, Social Media Marketing, and Healthcare.

View all posts

Leave a Reply

Your email address will not be published. Required fields are marked *

Related

Your House

How To Keep Your House Clean – A Beginner’s Guide

Starting the process of tidying up and arranging your home might feel overwhelming, but it's incredibly rewarding. A clean, organized space not only brings a sense of calmness but also sets the stage for enjoyable moments with loved ones.  This beginner's manual on cleaning and organizing equips you with the essentials to kickstart your journey towards a serene living environment. So, let's get started with it. Step - 1: Begin Your Journey with Something Small Beginning with a small area can help alleviate the overwhelming feeling of cleaning and organizing your home. For example, starting in just one room or a tiny section within a room can reduce the stress associated with the task.  Once you've tidied up and organized that small space, it tends to inspire further progress.  It's like a chain reaction— as soon as you initiate the process, you'll often find the motivation to continue. The sense of accomplishment from cleaning that initial space acts as a catalyst, propelling you to tackle more cleaning and organizing tasks. Step - 2: Declutter Your Rooms. All of Them! Before diving into organizing, it's crucial to declutter thoroughly.  Start with a smaller space like your fridge. Empty its content, discarding expired or inedible items. Clean all of the surfaces using a damp cloth and your preferred all-purpose cleaner.  When clearing out various areas in your home, prioritize keeping only the things you truly need or cherish. If it's challenging to part with certain items, remember they might serve someone else while giving you more room at home.  Consider donating or selling belongings you no longer adore. Discard broken, incomplete, or heavily worn-out items. Items that are no longer in use—like old toys, baby gear, clothes, or furniture—can find new homes through donation or sale.  This decluttering not only creates space for other purposes but also makes it easier to access and appreciate the things you genuinely value and use. Step 3: Get a Cleaning Caddy for Yourself Before starting your home cleaning routine, it's helpful to prepare a portable cleaning kit that you can easily carry around.  You don't need a multitude of cleaners or tools—just include what you'll actually use. Your cleaning kit can be as simple as a bucket, plastic bin, canvas bag with handles, or any larger container that suits your convenience.  Whether store-bought or homemade, the key is to have a portable solution that suits your needs as you move from room to room. Step 4: Keep the Surfaces Clean After completing the decluttering process, it's crucial to tidy up the space before organizing. Quickly cleaning the area will impart a fresh feel, enhancing the likelihood of maintaining its cleanliness for an extended period. Here are some cleaning tips that you might need… Create a cleaning caddy for easy access to supplies.  Then clean from higher surfaces downward to catch falling debris as you progress.  Utilize a vacuum attachment to clear drawers, shelves, cabinets, or closets of any remaining debris.  Use a damp microfiber cloth to wipe surfaces, ensuring thorough cleaning. Remove any items that don't belong in the cleaned area. Step - 5: Organize Everything The crucial element in home organization is to gather similar items together.  Whether it's your refrigerator, pantry, kitchen cabinets, bathroom, living room, kids' rooms, closets, or garage, arranging items of the same kind is essential for easy access and visibility. Scattered items make it difficult to locate what you need and can lead to clutter.  By grouping similar items, you create a clear system that helps in both finding items and guiding your family when it comes to tidying up. I: How to Organize Your Kitchen? It's beneficial to begin organizing your kitchen by focusing on a small area first, as this can inspire you to tackle other spaces. The kitchen often serves as the hub of a home and sees frequent use, making it a great starting point.  Once you've sorted out your kitchen, the task of taking care of the rest of your house becomes more manageable. A smart step in this process is to begin with your refrigerator. Streamlining your fridge organization can serve as a catalyst for organizing other areas. II: Organizing Your Fridge Arranging your refrigerator involves categorizing similar food items–together for better organization. With adjustable shelves and doors, along with additional bins, you can optimize the space quite easily. Clear plastic bins are particularly helpful as they allow easy visibility of their contents. They're convenient for accessing snacks, packing lunches, and planning meals.  Here are examples of foods that should be grouped together either in bins, on shelves, or in drawers for a more organized fridge... Bagged fruits and vegetables  Cheeses and lunch meals  Fresh vegetables and fruits Sauces and condiments  Salad dressings III: Organizing the Other Parts of Your House After you've sorted one area, take the same approach to the rest of your house.  Use the refrigerator organization tips as a template for each room: clear out unnecessary items, tidy up, and then arrange everything neatly.  Remember, the key is to tackle each room gradually to avoid feeling swamped, following the same method each time. If there are any similar types of items available in your house, group them together. Clean the area once you are done with the former step. Get rid of anything and everything that you don't want to use. Step 6: Disinfect the Surface Areas and Countertops Clean the hard surfaces around your home thoroughly, including countertops, appliances, cabinets, doorknobs, light switches, TV remotes, and phones.  Disinfect surfaces that are commonly touched to reduce the spread of germs.  Create a natural disinfectant by combining one-fourth to half a cup of white or apple cider vinegar with one cup of water. They'll work like magic for you. Make It a Group Activity Collaborating as a team is a top-notch method for swiftly tidying up a house. Plan ahead with your family for a designated time and distribute specific chores among everyone.  Joining forces not only injects some enjoyment into the cleaning process but also ensures a sparkling home in no time. You can also opt for a reputable cleaning service that can help you with the process. It can seem a little more expensive than usual, but it's much more sustainable per see. Read Also: Vancouver House Cleaning Services with Local Home Cleaners Near You What You Need to Look for When Hiring House Cleaning Service 5 Hotel Housekeeping Tricks You Need To Clean Your Bathroom

READ MOREDetails
Value Of Your Home

How To Increase The Value Of Your Home

Raising the value of your home can seem like an impossible task at first, particularly if you are working with a restrictive budget. However, it is not impossible. In this article, we will be looking into some of the simple ways that you can increase the value of your home with ease. Replace The Doors And Windows When looking to put your home on the market you want it to look its best. As a result, you may want to consider replacing the doors and windows, particularly if you are dealing with a draft of any kind. This will not only improve the curb appeal of your home, but it can also help to improve the energy usage of your home making it more appealing for those looking to purchase. Makeover The Kitchen And Living Room As the central hub of the home, the kitchen and the living room re the first two areas that you should consider modernizing. One of the easiest ways to do this is to paint the walls a neutral color. This will make the home more appealing to those hoping for a blank canvas, in addition to this, it is likely to brighten up the room as a whole. The living room can also be modernized and transformed by incorporating a custom-designed canvas using a next day canvas prints service for your home. Improve The Look Of Your Garden If you are lucky enough to have garden space, this needs to look the best that it can be at all times. By improving the front garden with flowers and taking care of the tress you are then making it seem more appealing to the buyer when they have a first impression. It is then time to consider the back garden. By mowing the lawn, tending to the flowerbeds, and removing any unwanted weeds in the patio, you can improve the curb appeal as well as the value of your home over time. Though this will take some man-hours, this will make it look more appealing to the listing. Create A Driveway The final way that you can boost the curb appeal for your home is to generate a driveway. If you have a vast amount of space outside the front of the house, sprucing up your driveway will make the home more appealing for those that have multiple cars or a family. Whether this is gated or just left open, this can help to limit on the road parking and raise the value of your home. IF you already have a driveway, it is recommended that you remove the weeds and clean the bricks or concrete to make it looks its best. Whether you are in the process of selling, or you are considering it in the near future, some of these small little tips can help you to raise the property value of your home and sell it for the full amount that you would like. Read Also: Top Home Cleaning Tips How To Pick The Perfect Flooring For Your New Home

READ MOREDetails
Repairing Your Roof

Repairing Your Roof – How Should You Get Started?

Your house's roof is its ultimate defense against harsh weather, pesky creatures, and infestations.  If your roof is not in top condition, your entire house is at risk. It's crucial to schedule roof repair as soon as you notice a leak, even if it's small, as it can cause significant damage.  Repairing your roof is more cost-effective than replacing it entirely and is vital to maintain its integrity.  Left unaddressed, roof leaks can cost you tens of thousands of dollars.  This article will discuss the basics of roof repair, what you need, and how to do it. Ensuring your roof is in top condition is essential to protect your home from the elements and ensure its longevity. Steps For Repairing Your Roof Given below are the steps that will guide you in the process of roof repairing at your home— 1. Examine The Damage Following a systematic approach is vital when searching for a leak in your roof. Begin by surveying the visible damage to your roof, including shingles, gutters, and roof edges.  It's essential to start with the most obvious issues and progress to less apparent ones. Once you've assessed the exterior, examine the interior for signs of water damage.  Look for indications of water stains, dripping water, sagging, pooled water, and dampness. Inspect during rainy weather, as some leaks are intermittent and only occur when there is enough rain.  Access the attic using a flashlight to locate the water source through the roof deck. Check around all rafters for indications of water.  Water can travel through the roof decking and rafters due to the force of gravity, which may result in dripping in different areas. If you observe water dripping, trace it back to its origin. 2. Find A Reliable Contractor After a thorough inspection of your roofing system by a professional roofing consultant, you will receive an accurate and detailed bid or estimate. The estimate will be based on the materials you choose for your roofing projects. Moreover, you must consider the unique measurements of your roof. The roofing consultant will also consider any special conditions that may affect the cost. This can include the complexity of the roof design or any existing damage that needs repairing. When evaluating your options, it can be important to take the time to vet contractors beyond just the numbers. Look for a company with a strong local track record. Checking online reviews, verifying licenses, and confirming they carry proper insurance can save headaches later. Whether you're working with a san antonio tx roofing company or a contractor elsewhere, these vetting steps apply universally and help ensure you're trusting your roof to someone reputable. Once you receive the bid or estimate, your roofing contractor should provide a written contract outlining the details. This contract should include a comprehensive breakdown of the costs, the expected timeline for completion, and any warranties or guarantees included. Therefore, you must carefully review and understand the contract before agreeing to any work to ensure everything is clear and fair for both parties. 3. Select The Suitable Material  It's crucial to have a complete set of roofing tools when undertaking any repair project. These hand tools have various uses throughout the house. They include the following: Roofing hammer. Pry bar. Nail puller. Utility knife. Shears. Tin snips. Handbrake. Tape measure. Chalk box. Roofing nails (also known as roofers). Speed squares. A pencil for notes or markings. A 10 oz clay gun. Choosing the right roofing sealant depends on the roofer's needs, but any kind will suffice.  While shingles are optional, matching them is optional. For flashing work, it's recommended to use aluminum coil stock, which is available in various colors at most box stores. A tape measure is recommended for all measurements and layout work, and a chalk box is ideal for snapping reference lines and general layout work.  Roofing nails, or "roofers," are recommended for their durability. The materials used for the roofing sealant, shingles, and aluminum coil stock are also essential. 4. Ensure That All Cracks Are Sealed Using an uncomplicated roofing sealant is important to seal any cracks on your roof.  To apply a sealant, you must pierce a thin aluminum membrane with the tube, allowing the sealant to flow.  Next, load the sealant into a caulk gun and aim it at the crack or hole to seal it.  The sealant will dry in a few hours and be set entirely in 24 hours without intervention.  Finally, you can cover the hole with shingles or flashing and move on to other projects. Ensuring that the roof sealant is compatible with your caulk gun is crucial. This is because some construction materials come in 28-ounce tubes that won't fit a standard 10-ounce gun. 5. Ensure The roof Is Insulated When planning to replace your roof, it's also a good opportunity to consider upgrading your insulation.  However, if you opt for new blown-in insulation, your roofing contractor will install it while they remove the decking.  This insulation process requires running a hose through the exposed roof and into your attic. It allows the insulation to be installed quickly and easily without causing any damage to your walls or ceilings.  Therefore, with the new insulation, you can enjoy improved energy efficiency and a more comfortable indoor environment. 6. Leave It Clean After the roofing crew installs your new roof, they should clean up any debris around your home. This includes loose shingles and nails and leaves them in their original condition.  They should also haul away old roofing materials for proper disposal. Additionally, you must ensure not to dispose of in landfills, which can contribute to pollution. The roofing expert must inspect the final product to ensure it meets all industry standards and building codes.  They should also check for potential leaks or damage and address any concerns. It is important to address any concerns and take steps to correct any issues. Therefore, ensure you’re completely satisfied with the new roof and its reliable protection for years. Can You Repair Your Roof Yourself? Understandably, as a homeowner, you may want to save money. Therefore, taking care of some home maintenance tasks can help you save a lot.  However, it is important to know your limits when it comes to your roof.  You may be capable of handling minor tasks such as replacing caulking or cleaning gutters. On the other hand, leaving any roofing projects to the professionals is highly recommended.  Moreover, roofing maintenance requires specific skills, knowledge, and equipment that only experienced and trained professionals possess.  Even a seeming DIY project can quickly spiral into a much bigger roof repair if something goes wrong.  Therefore, it's always wise to prioritize the safety of your home and family. Look for an efficient roofing service provider and explain the damage. You can get your roof cost-effectively repaired under expert supervision! Read Also: How Often Do You Need A Roof Inspection? Elevate Your Roof’s Health With Aerial Roof Inspections Choosing A Siding And Roofing Companies In Delaware

READ MOREDetails