The 5 Best Brita Alternatives For Water Filter Pitchers

Published on: 22 April 2021 Last Updated on: 31 December 2024
Water Filter Pitcher

A water filter pitcher is something everyone should have in their home. It’s one of the simplest ways to guarantee that the water you’re drinking is clean, safe, and deliciously chilled. Unfortunately, getting a great water filter pitcher isn’t as easy as you might think. Popular brands like Brita do a great job of filtering out substances like chlorine thanks to their activated carbon filters; however, they’re far from comprehensive.

The fact is, mass-produced, store-bought water filtration systems are a far cry from true filtration options. They’re limited by their simple filter media and only work when it comes to high-turbidity contamination—lots of suspended solids. These filters do almost nothing to neutralize VOCs or microbiological threats.

If you’re on the lookout for a water filter pitcher, you can do better than Brita. Here are a few of the best Brita alternatives for water filter pitchers and why they’re worth the investment.

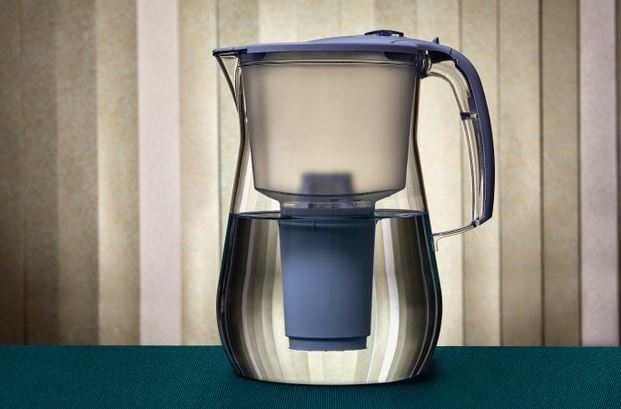
1. Aquaspace® Carafe® Pitchers

You might not even need to finish this list, because we’ve put the very best Brita alternative front and center, right at the top. There’s simply no beating the performance of Aquaspace® Carafe® Pitchers! Not only are there options for specific filtration such as fluoride, but there are also alkaline options for those who prefer the benefits of water with a slightly higher pH.

The specifications of these filters are second-to-none when it comes to filtration capabilities. First, there’s an amazing 500-gallon capacity on Aquaspace® filters—as opposed to a meager 40 gallons on most Brita systems. On top of this, there’s filtration power to consider. The Aquaspace® filter goes above and beyond any activated carbon filter, to deliver comprehensive filtration that spans both organic and inorganic compounds.

Need more proof that Aquaspace® comes out on top? Look at the pour-through funnel to the filter media, which ensures powerful filtration, instead of pass-through sieve filtration. If you’re going to spend the money on a water filter pitcher, there are few better options than Aquaspace®.

2. Pūr Classic 11-Cup Pitcher

One of the competitors to Brita that you’re likely to find in stores is Pūr. This brand is mass produced, but its filter media is a step above others on the market. It doesn’t just rely on activated carbon media; its MAXION® filter technology also addresses pharmaceuticals and industrial pollutants to provide a more encompassing level of cleanliness to water.

Like other store-bought filters, Pūr has some bells and whistles that make it worth looking at—including the LED filter indicator. While the filter lifespan is only a meager 40 gallons, an LED reminder will let you know when it’s time to swap in new media. Moreover, the filters themselves are relatively inexpensive.

One of the best things about this water filter pitcher is its convenience. It has a relatively low cost of ownership and is easy to fill, pour and clean. It’s also BPA-free. If you’re shopping in-store, it’s hard to do better than Pūr.

3. Travel Berkey Gravity-Fed Water Filter

If price isn’t an option, the Travel Berkey Water Filter is worth a look. We’re not kidding when we say it’s pricey, though—you’re looking at a $250 purchase price and $120 replacement filters. If you’re reading this aghast, take a moment to consider the benefits.

First off, the Travel Berkey Water Filter and its filtration media will cleanse up to 6,000 gallons before you need to replace the filters. This is enough to justify the cost of the filters themselves. As for the cost of the unit, it’s probably the most well-made on this list and features stainless steel that’ll last you a lifetime. The system itself is also a gravity-fed setup, which means you can expect superb filtration and extremely clean drinking water. Outfitted with the right filters, it’ll eliminate just about any contaminants in your water, including arsenic.

The downfall of this system? Well, it’s not exactly a pitcher and you can’t keep it in the fridge. It’s meant as a countertop option that holds 1.5 gallons, which makes it equally as convenient.

4. ZeroWater 6-Cup Pitcher

If you live in an area with heavy lead content in the water supply, this pitcher is an upgrade over Brita filters. While it only boasts a 6-cup capacity, the filtration power of the ZeroWater filter pitcher is well-worth the extremely affordable $20 price tag.

Thanks to its five-stage filtration capabilities, this pitcher does what only activated carbon filters can’t. Aside from the usual hard water culprits, this system also filters out compounds like fluoride, nitrates and other inorganics. This, in conjunction with its ability to filter out most unwanted organic compounds like arsenic and mercury. It’s one of the best filtration systems for the cost.

The unfortunate aspect of the ZeroWater filter pitcher is its 20-gallon filter lifespan. If you’re relying on it frequently, you could end up spending a fortune in filter replacement costs. This is an option best left for those who also have some point-of-use filtration system.

5. Clearly Filtered 10-Cup Pitcher

While its claim of being “the most powerful water pitcher on the market,” might be a little dubious, the Clearly Filtered pitcher is certainly a leader in its class. Sure, you’re going to spend more than the off-the-shelf filters on this list, but you’ll also get better performance.

First, you’ll love the 100-gallon filter capacity on this model. This, in combination with its powerful filtration capabilities, makes it a great everyday option. Its 10-cup capacity means you’ll need to replace the filter roughly every 10 times you refill it. When it comes to filtration quality, expect this system to remove more than 230 unwanted organics and inorganics, including fluoride, lead, plastics, hormones, and more. It’s a truly encompassing filtration option.

The only real downfall of this pitcher is that it’s a bit bulky and can be difficult to fit into a small fridge. Replacement filters aren’t cheap, either ($50), but they do offer good value thanks to their longevity.

Pay Attention to Pitcher Performance

When selecting a water filter pitcher, the best way to understand what you’re getting for your money is to look at the specifications of the product. What type of filter media does it use? How quickly does it filter? What’s the filter lifespan? These factors all matter when it comes to the clarity and safety of your water.

At the end of the day, a water filter pitcher is all about convenience—and health. When you pull that pitcher out of the fridge and pour yourself a refreshing glass of crisp, cool water, you should be able to enjoy every sip. It starts by having confidence in the filter pitcher you’ve chosen.

Looking for the best water filter pitcher available on the market? Look to Aquaspace for all your filtration needs!

Read Also:

Mashum Mollah is the feature writer of Search Engine Magazine and an SEO Analyst at Real Wealth Business. Over the last 3 years, He has successfully developed and implemented online marketing, SEO, and conversion campaigns for 50+ businesses of all sizes. He is the co-founder of Social Media Magazine.

View all posts

Leave a Reply

Your email address will not be published. Required fields are marked *

Related

how to harvest lemongrass

How TO Harvest Lemongrass: Tips AND Tricks FOR Growing AND Using This Versatile Herb 

Lemongrass is a tropical herb that has a fresh and citrusy flavor and aroma. It is one of the most essential herb that is people widely use in Asian cuisines. They especially use it in Vietnamese, Thai, and Indonesian dishes. It is also a popular ingredient in teas, soups, curries, salads, and marinades. Lemongrass has many health benefits, such as improving digestion, boosting immunity, reducing inflammation, and relieving stress. But did you know that you can grow and harvest your own lemongrass at home? Yes, you can! Lemongrass is easy to grow and maintain, and can thrive in pots, containers, or gardens. You can enjoy fresh and organic lemongrass all year round, and save money and time from buying it at the store. In this article, I will show you how to harvest lemongrass, and share some tips and tricks for growing and using this versatile herb. By the end of this article, you will have a better understanding of how to harvest lemongrass, and how to make the most of this wonderful herb. So, if that is something that you want to know, I have you covered! Keep on reading this blog till the end to learn more… How to Grow Lemongrass? Lemongrass is a wonderful herb that can add a refreshing and citrusy flavor to your dishes, drinks, and teas. It is also a beautiful ornamental plant that can brighten up your garden with its tall, graceful stalks and fragrant leaves. Lemongrass is native to tropical regions, but you can grow it in cooler climates as well with some care and preparation. Here are the steps and conditions for growing lemongrass successfully at home: 1. Choose a healthy lemongrass plant or stalk You can buy a potted lemongrass plant from a nursery or garden center, or you can start your own from a fresh lemongrass stalk that you can find in most grocery stores or Asian markets. Look for a stalk that is firm, green, and has some roots at the base. Avoid any that are dry, brown, or moldy. 2. Prepare a sunny and warm spot for your lemongrass Lemongrass loves full sun and heat, so choose a location that gets at least six hours of direct sunlight per day. If you live in a colder region, you can grow lemongrass in a container that you can move indoors during the winter. Use a large pot with drainage holes and fill it with rich, loamy soil that is high in organic matter. You can also add some compost, manure, or leaf mold to improve the soil quality and fertility. 3. Plant your lemongrass in the soil If you bought a potted plant, simply transplant it to the ground or a larger container, making sure to bury the roots well and leave some space between the stalks. If you are starting from a stalk, peel off any dead or yellow leaves and trim the top part to about six inches. Place the stalk in a glass of water and keep it in a sunny windowsill until roots start to grow, which can take a few weeks. Then, plant the rooted stalk in the soil, leaving about two inches of the stem above the ground. Space the plants about two feet apart to allow them to spread 4. Water and fertilize your lemongrass regularly Lemongrass needs moist soil to thrive, so water it frequently and deeply, especially during hot and dry periods. A good rule of thumb is to water it once a week or whenever the top inch of the soil feels dry. You can also apply a layer of mulch around the plants to conserve moisture and prevent weeds. Lemongrass also benefits from a monthly dose of liquid organic fertilizer during the growing season, such as fish emulsion or seaweed extract. This will help it grow faster and produce more leaves and stalks. 5. Harvest and enjoy your lemongrass You can start harvesting your lemongrass when the stalks are about a foot tall and half an inch thick. Cut the stalks at the base with a sharp knife or scissors, leaving about two inches of the stem in the ground. Additionally, you can use the whole stalk, or peel off the outer layers and use only the tender inner part. You can also harvest the leaves and use them fresh or dried for teas and infusions. Lemongrass can be stored in the refrigerator for up to two weeks, or in the freezer for up to six months. You can also dry it and store it in an airtight container for later use. How to Harvest Lemongrass? Harvesting lemongrass is a simple and satisfying process that can be done in a few steps. Here are the basics of how to harvest lemongrass: Choose the right time  The best time to harvest lemongrass is when the stalks are about 12 inches tall and 0.5 inches thick. This usually happens after 3 to 4 months of planting. You can harvest lemongrass throughout the year, as long as the temperature is above 40°F. You can also harvest lemongrass in batches, leaving some stalks to grow and regenerate. Cut the stalks To harvest lemongrass, you need a sharp knife or scissors, and a clean cutting board. Cut the stalks at the base, as close to the soil as possible. You can cut as many stalks as you need, or as many as you can use within a week. You can also trim off the leaves, as they are not edible and can be used for other purposes. Wash and store the stalks After cutting the stalks, wash them under running water, and pat them dry with a paper towel. You can store the stalks in the refrigerator, wrapped in a damp paper towel, and placed in a plastic bag. They can last for up to a week. You can also freeze the stalks, chopped or whole, in a freezer bag. They can last for up to 6 months. Dividing Lemongrass: What is It and How to Do It? Dividing lemongrass is a great way to propagate and maintain this aromatic and flavorful herb. Lemongrass is a perennial plant that grows in clumps of stalks and leaves. Over time, these clumps can become crowded, woody, and less productive. By dividing lemongrass, you can rejuvenate the plant, increase its yield, and share it with others. Here are the steps and reasons for dividing lemongrass: 1. When to divide lemongrass? The best time to divide lemongrass is in the spring, after the last frost date when the plant is actively growing and has new shoots. You can also divide lemongrass in the fall if you live in a warm winter climate or if you plan to overwinter the divisions indoors. Avoid dividing lemongrass in the summer, when the heat and drought can stress the plant and reduce its survival rate. 2. How to divide lemongrass? To divide lemongrass, you must dig up the entire plant and separate it into smaller sections. You can use a shovel, a sharp knife, or your hands to do this. Each section should have at least one inch of root and several healthy stalks and leaves attached. You can trim the leaves to about six inches to reduce water loss and make the divisions easier to handle. Discard any old, brown, or damaged parts of the plant. 3. Where to plant lemongrass divisions? You can plant lemongrass divisions in the same spot where you dug up the parent plant or in a new location with full sun, moist and well-drained soil, and plenty of organic matter. You can also plant lemongrass divisions in containers at least 10 inches deep with drainage holes. Space the divisions about two feet apart to allow room for growth. Plant the divisions at the same depth as they were before, with the crown just below the soil surface.  4. How to care for lemongrass divisions? Lemongrass divisions need regular water and fertilizer to establish and thrive. Water them deeply and frequently, especially during the first few weeks and during hot and dry periods. You can also apply a layer of mulch around the plants to conserve moisture and prevent weeds. Fertilize the plants once a month with a liquid organic fertilizer, such as fish emulsion or seaweed extract, during the growing season. Protect the plants from frost in the winter by moving them indoors or covering them with a frost cloth. 5. How to harvest and use lemongrass divisions? You can start harvesting lemongrass divisions when they are about a foot tall and half an inch thick. Cut the stalks at the base with a sharp knife or scissors, leaving about two inches of the stem in the ground. You can use the whole stalk, peel off the outer layers, and use only the tender inner part. Additionally, you can also harvest the leaves and use them fresh or dried for teas and infusions. Lemongrass can be stored in the refrigerator for up to two weeks or in the freezer for up to six months. You can also dry it and store it in an airtight container for later use. How to Use Lemongrass in Food? Lemongrass has a long, green stalk with a bulbous base and grassy leaves. It has a lemony taste with a hint of mint and ginger. Lemongrass can be used fresh, dried, or powdered, depending on the recipe and preference. Here are some ways related to how to use lemongrass in different ways: Fresh lemongrass Firstly, fresh lemongrass is the most aromatic and versatile form of lemongrass. You can find it in the produce section of most supermarkets, Asian markets, or online. To prepare fresh lemongrass, you need to peel off the tough outer layers and trim off the root end and the top third of the stalk. You can use a sharp knife or scissors to do this. The part that you want to use is the pale and tender lower part of the stalk. After that, you can slice it thinly, chop it finely, or bruise it with a pestle or the back of a knife. Slicing or chopping is good for salads, stir-fries, curries, and marinades, while bruising is good for soups, stews, and broths. You can also make a paste by pounding or blending lemongrass with other ingredients, such as garlic, ginger, chilies, and cilantro. A paste is great for adding flavor to meats, seafood, tofu, and rice. You can store fresh lemongrass in the refrigerator for up to two weeks or in the freezer for up to six months. Dried lemongrass Secondly, dried lemongrass is less potent than fresh lemongrass but still has a nice, lemony flavor. You can buy it in whole or sliced form or dry your lemongrass by hanging the stalks in a warm and airy place until they are brittle. Dried lemongrass is good for making teas, infusions, and herbal blends. You can also use it to flavor soups, stews, and broths, but you must soak it in hot water for about 20 minutes before adding it to the pot. Additionally, you can store dried lemongrass in an airtight container in a cool, dark place for up to a year. Powdered lemongrass Lastly, powdered lemongrass is the most convenient form of lemongrass, as it does not require any preparation. You can buy it in spice shops, Asian markets, or online. Powdered lemongrass has a mild and sweet flavor and can be used in baking, desserts, sauces, and dressings. You can also sprinkle it over salads, soups, and stir-fries for a touch of freshness. The shelf life of powdered lemongrass is also great. For up to six months, you can store powdered lemongrass in an airtight container in a cool and dark place. How to Use Lemongrass in Other Things? Apart from cooking, you can use lemongrass in many other ways. Some of the best and most popular uses of this herb are as follows: Beautifying You can use lemongrass to make your own beauty products, such as soap, lotion, or shampoo. You can infuse the stalks or the leaves with oil, such as coconut, olive, or almond oil. Moreover, you can also add other ingredients, such as honey, aloe vera, or essential oils. You can use the products to cleanse, moisturize, or scent your skin and hair. Healing You can use lemongrass to treat various ailments, such as headaches, colds, or infections. You can inhale the steam from boiling the stalks or the leaves, or apply the oil to your temples, chest, or throat. Additionally, you can also drink the tea, or gargle with the syrup. You can use the products to relieve pain, inflammation, or congestion. Wrapping It Up! If you want to know how to harvest lemongrass, I hope that this blog has been of help to you. If there are any other queries about the same, please feel free to let me know. All that you need to do is scroll down till you reach the bottom of the bottom of the page. Then leave your suggestions and comments in the box below. And I will be there to answer them all for you! Learn More About: Everything You Need To Know About Harvesting Basil Asparagus 101: When, How, And How Often To Harvest? How to Harvest Spinach the Right Way: A Step-by-Step Guide

READ MOREDetails
Locksmith in Chicago

How to Choose a Locksmith in Chicago?

Almost every person has locked himself/herself out of the house at some point in life. In such scenarios, the first thought of individuals is to ask for assistance from a friend or family member. Nevertheless, if nobody can deliver you a set of spare keys to enter the house, the next call you make should be to a local locksmith. If looking for the best locksmith in Chicago, follow the tips below. Check credentials The inceptive thing to do when choosing a locksmith in Chicago is checked their credentials. Illinois is one of the many US states requiring these professionals to be bonded and licensed. The Illinois Department of Financial and Professional Regulation is in charge of issuing such a license after verifying the qualifications of candidates. Candidates are required to be at least eighteen years of age, pass a criminal background history check, pass a licensing exam in theory and practice, and pay the required license application and examination fees. Nevertheless, there are not any requirements associated with having formal training or work experience. Additionally, to register a company, locksmiths in Chicago are supposed to get an agency license. Therefore, when hiring such an expert in Illinois, make sure you start the process by checking the credentials. Apart from providing proof of license, these specialists should also provide any professional certifications they have, which prove their skills and knowledge. Determine the types of services you need Another important consideration when hiring the best locksmith in Chicago is the type of service you need. Not all professionals offer the same service types, as they might specialize in residential, commercial, or auto services. Some providers perform all these services. For instance, most companies provide an installation of mechanic and electronic locks, both at commercial and residential properties. In addition, established locksmiths should offer lock replacement, lock repair, making duplicate keys, changing electronic access cards, etc. In terms of commercial services, they should supply, install, and service high-security commercial locks. Additionally, these experts are expected to fix components of biometric, keyless access control systems. Check out the most common types of door locksets. Check if the provider is indeed local Individuals should be extremely careful when checking whether a locksmith is indeed local as it claims to be. It often happens for some providers to advertise in your local phone book, even though they are not local at all. Some companies outside of Chicago might advertise as local by choosing a business name that is similar to the name of a local provider. Nevertheless, when you call the provided number, you will probably be connected to a call center in another town. Additionally, there will not be a shop at the listed address, meaning the company is a scam. In general, locksmith companies that claim to be local have a large number of separate listings in a telephone book with various names. Nevertheless, all the calls eventually led to the same number in another city. Even if you don’t suspect a scam in the beginning, make sure to ask for identification upon the arrival of the locksmith at your door. Licensed locksmiths are expected to have a Master Security License Number displayed on their photo identity card and vehicle. If the vehicle is unmarked or the worker claims to have forgotten his/her card, you should do no business with this person. Get an estimate Another helpful tip for finding a locksmith in Chicago is requesting a written estimate after the technician reviews the work.  These estimates should include two types of fees, service, and hardware fees. The former encompasses transportation fees and any additional charges for emergency service outside standard working hours. For instance, most handymen charge a flat trip fee that covers the time and cost of driving to your home and back to their shop. In contrast, the latter includes any fees related to the hardware. If a locksmith has to replace a lock, the cost of the new lock will be calculated in hardware fees. Follow this link, https://mydecorative.com/four-types-of-locksmith-services/, to see the most sought-after locksmith services. The bottom line Lockout situations and other locksmithing issues require professional assistance. Hire the best professional in Chicago! Read Also: 5 Tips to Safeguard Your Home From Intruders What to Do After an Auto Lockout? How To Find A Locksmith To Trust With Your Home Security, Locks & Keys

READ MOREDetails
Garden Railings

How to Maintain Your Garden Railings?

When it comes to property maintenance, it’s not uncommon to overlook garden railings, whether they are made of wood, iron or steel. They are outdoor fixtures that are often regarded as unessential and not necessitating care. To many, nothing significant changes if they are damaged or if they become structurally weakened. This way of thinking shouldn’t be the case, though. Railings in the garden are not only installed as decorative outdoor fixtures. Treat them as fences: Just like fences, you have to make sure that their structural integrity is maintained. They may not be there to provide security, but it’s important to make sure that they are as sturdy as they should be. Railings are installed for different reasons. For one, they could be used as protection for plants from pets or people who may unwittingly step on small plants. They will not be able to serve this purpose if they are weakened. On the other hand, railings also serve as occasional support structures for those who walk around the garden. If you lose your balance while strolling around, you will likely hold on to the railing if you see one. If the rail breaks with the slightest of pressure, it will aggravate accidents. Aside from not being able to support your weight when you lean on them, they may expose some sharp parts as they break or bend. These sharp pieces can result in wounds. Maintaining wooden railings: For garden railings made of wood, remove the vines that climb on them. These vines can hasten the disintegration of wood as it keeps moisture and prevents the sun from drying the wood. They can also serve as a hiding place for vermin. If the paint has already faded or peeled off, be sure to do a new paint job. Paint does not only improve the appearance of wooden rails. It also helps protect them from the elements. Maintaining steel or iron railings: One of the most important steps for garden railing maintenance is cleaning. Make sure nothing unwanted is stuck to the rails not only to keep them looking good but also to prevent damage. You’ll be surprised how the fecal matter of birds or the nesting of insects can speed up the wear and tear of your railings. Don’t let weeds cover the rails. Locate their origin, so they don’t quickly crawl back up again. Be on the lookout for rust. If corrosion develops, it means your coat of paint protection has been scratched. Scrape the rust off and repaint the affected portion. Examine the rest of your railings to see if there are other parts that could use a new layer of protective coating. If you use lawn trimmers or grass cutters, realise that the repeated strikes against your railing’s lower sections can become a starting point for severe damage. Strive to make your railings last long. They may not be an essential part of your property, but you spent good money on them. You may not feel like you lose anything if they are taken away, but those railings in your garden are there for a reason. Read Also: 5 Tips To Keeping Animals Away From Your Garden 5 Summer Garden Maintenance Tips And Tactics You Have To Know

READ MOREDetails