Exploring Ideas For A Biophilic Home Design

by

23 December 2023

Home & Garden

Biophilic Home Design

Biophilic design has become a popular global interior design trend. Pinterest Business reported a 100% increase in searches for “biophilic design bedroom” between 2019 and 2021. 

This design approach is rooted in biophilia, humans’ innate affinity with the natural world. 

Moreover, it has practical applications in design. Research indicates that it can positively affect productivity and well-being. 

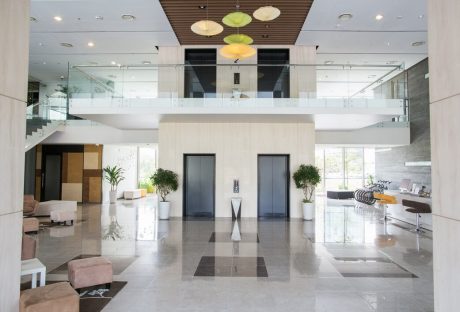
For instance, a study showed that people spent 11% more time in biophilic-inspired hotel lobbies. 

Similarly, schools in Washington State saw a 5% increase in student test scores and a 15% reduction in absenteeism with a biophilic design approach.

Let us explore what interior designers suggest for a biophilic home and ideas that you must explore!

Understanding Biophilic Home Designs

The modern world of technology has taken a new direction towards nature. Robotics, AI, and the Internet of Things (IOT) have caused urban architects to incorporate biophilic designs. 

These designs involve greenery and natural elements. It helps to improve air quality, airflow, circadian rhythm, heart rate, and human health. 

Biophilic designs stimulate visual connection and enhance the multi-sensory experience using indoor plants and natural patterns. 

Stephen Kellert and Edward O. Wilson, who founded biophilic designs, have made nature feel more accessible at home. He incorporates plants, sunlight, natural materials, and fresh air.

How To Make Your Home Biophilic?

Make Your Home Biophilic

Given below are the different aspects that you can add to your home for a biophilic design—

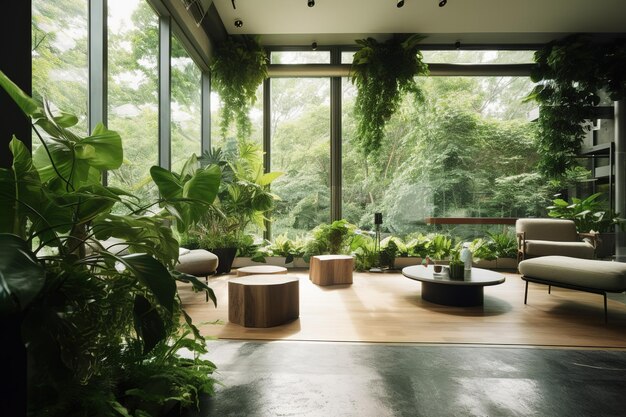
Add Plenty Of Greens

Integrating plants into your interior design can create a natural and inviting ambiance. Adding greens helps enhance the aesthetic aspects of a biophilic home, ensuring a calming environment. Moreover, indoor plants help purify the air inside your home.

However, this does not necessarily mean you must go overboard and transform your home into a tropical paradise. 

You can opt for potted plants, hanging baskets, or even a simple vase with fresh-cut flowers. Match your live elements with the color scheme of your decor. Most home designing experts advise you to get more succulents for your home. These plants require less watering but look amazing in every setting.

Alternatively, nature-inspired artwork, botanical prints, or murals can bring the outdoors in. 

The idea is to create a synergy between the artificial environment and the natural world. This home design can positively impact your mood, health, and well-being. 

Therefore, incorporating natural elements into your interior design can create a more harmonious and balanced living. This biophilic element can be functional and beautiful at the same time.

Enable Natural Lighting

Incorporating natural light into interior spaces has numerous benefits. 

Biophilic design emphasizes the connection between humans and nature. Therefore, it prioritizes light and space to create a healthier, harmonizing, and more comfortable environment. 

Biophilic home designs use different components of warmth and sunlight. Natural light can blend the boundaries between the interior and exterior of a space. 

For instance, large windows and skylights can allow sunlight to stream in, making a space more open and inviting.

Additionally, glass roofs and walls allow you to save electricity with natural lighting during the daytime. 

If you can reduce your exposure to artificial lighting, you say goodbye to stress and fatigue. It helps invigorate the body and mind. 

Therefore, we can design spaces incorporating biophilic principles to improve our well-being and strengthen our connection to nature. It creates spaces that promote well-being and encourage a greater appreciation for the natural world.

Use Organic Decor Items

Biophilic design is a concept that aims to connect people with nature by incorporating natural elements into the built environment. 

To create a peaceful atmosphere and promote a sense of well-being in your home, incorporate natural materials like leather, wood, and stone for your decor items. This brings a natural touch to the textures, colors, and forms around your home. 

Furthermore, using subdued and organic color schemes can also help to enhance the calming and stress-reducing properties of biophilic design. Handcraft your decor with jute ropes, 

Therefore, you can create an affordable and easy-to-maintain space with these decor items. That is aesthetically pleasing and enhances your physical and mental health.

Maintain The Patio

Biophilia is an evolutionary concept that suggests humans have an innate affinity for nature. This idea is gaining traction in outdoor architecture and design as well.

Biophilic design is a concept that aims to create a connection with nature and its resources. To achieve this in your outdoor space, you can incorporate some major additions like the following:

  • Eco-friendly composite decking.
  • Vertical gardens.
  • Green screens in small spaces. 

Native plants can help support wildlife and blur the boundaries between the territory and nature. Therefore, it is essential to consider factors such as sunlight exposure and irrigation when selecting plant species for your patio. 

Furthermore, incorporating water elements like fountains or cascades can help create a tranquil atmosphere. 

It is also important to choose outdoor furniture inspired by nature instead of plastic. Install fire pits made of natural materials like stone or metal. This can help create a comfortable and inviting outdoor biophilic space. 

Let The Air Flow

Achieving a biophilic home design involves paying attention to the air circulation within each room. 

You can start by determining the direction of the wind around your home. Next, open your windows accordingly to facilitate the flow of fresh air. 

Additionally, you can enhance the airflow in your home by ensuring that your rooms are spacious and free of clutter. 

Consider using furniture that provides ample storage space to keep your rooms organized and uncluttered. This allows the air to circulate freely throughout your home. 

By creating a well-ventilated and spacious environment, you can enhance the biophilic design of your home. Therefore, bring nature indoors and improve your overall well-being.

Add Water Features

Adding water features like cascades, fountains, or reflecting pools to your outdoor space can incorporate a biophilic design. It helps create a serene atmosphere. 

The sound and sight of water can instantly transport you to nature and induce a feeling of tranquility and relaxation.

You can go for a small pond or stream in your backyard if you have a generous budget. This addition can create a more natural and immersive experience. 

However, a small water fountain in your garden, patio, or deck can do the trick if you prefer a simpler option. 

It’s a quick and easy way to add elegance and calmness to your outdoor space!

Wrap It Up With A Fire Pit

Adding a fire pit to your outdoor space can significantly impact its ambiance and appeal. 

By creating a warm and inviting atmosphere, fire pits can make your outdoor area a more comfortable and enjoyable place to spend time. 

Furthermore, fire is a natural element that can uniquely evoke feelings of tranquility and connection with nature. 

Therefore, incorporating a fire pit into your outdoor design can help create a biophilic environment that promotes relaxation and well-being.

Read Also:

Ankita Tripathy loves to write about food and the Hallyu Wave in particular. During her free time, she enjoys looking at the sky or reading books while sipping a cup of hot coffee. Her favourite niches are food, music, lifestyle, travel, and Korean Pop music and drama.

View all posts

Leave a Reply

Your email address will not be published. Required fields are marked *

Related

Unveiling Littleton's Best Lawn Care Services

Uncovering Littleton’s Best Lawn Care Services

Regarding lawn care, Littleton's best services take a strategic and scientifically grounded approach that results in lush, healthy, and beautiful lawns. These lawns become the envy of neighbourhoods, stand out in the summer sun, and sparkle in the winter frost. One may wonder, "What's the secret to such beautiful lawns?" The answer lies in various lawn care strategies, including weed control & fertilisation, liquid aeration, overseed, revive, winter mite control, and weed kill in rock/mulch beds. Weed Control & Fertilization The Importance Of Weed Control & Fertilization Weeds are often the bane of any lawn owner's existence. They are hardy, pervasive, and can quickly overtake a lawn if not adequately controlled. Littleton lawn care services understand that effective weed control combines preventative measures and targeted treatments. Preventative Measures One of the keys to weed control is prevention. Instead of waiting for weeds to sprout and then trying to eliminate them, the best lawn care services take proactive steps to prevent weed growth in the first place. They do this by maintaining the right balance of nutrients in the soil and ensuring that the lawn is thick and healthy to crowd out any potential weed invaders. Targeted Treatments When weeds infiltrate a lawn, targeted treatments eradicate them without damaging the surrounding grass. This is where expert knowledge comes into play. Different weeds require different treatment strategies, and understanding this is crucial to effective weed control. Fertilisation Fertilisation goes hand in hand with weed control. It's all about providing your lawn with the necessary nutrients to thrive. Keeping your property well-fed makes it more resistant to disease, drought, and weed invasions. The best lawn care services understand that a proper fertilisation schedule is critical to maintaining a lush and healthy lawn. Why Liquid Aeration Is Essential Aeration is a technique that helps alleviate soil compaction, allowing your lawn to breathe, absorb nutrients and water more effectively. Traditional aeration methods can be labour-intensive and involve creating physical holes in the yard. However, Littleton's best lawn care services have adopted a more modern, less invasive approach: liquid aeration. Understanding Liquid Aeration Liquid aeration involves the application of a liquid solution that breaks up the soil at a molecular level. This process improves the soil structure and allows grass roots to penetrate deeper. The result is a stronger, healthier lawn with improved drought resistance. Overseed The Art And Science Of Oversee Overseeding is a technique used to fill in bare patches in a lawn and improve its overall density and colour. Overseeding can bring life back to a tired, worn-out lawn by sowing new grass seed over existing properties. Timing And Technique Matter When it comes to overseeding, timing and technique are crucial. The best times to overseed are usually in the spring and fall, when temperatures are moderate, and the new grass has the best chance of survival. The best lawn care services understand this, know the right amount of seed, and the best techniques for spreading it to ensure even growth. Revive Revive: A Rescue Operation Revive is a lawn care technique designed to bring back the vigour and health of a lawn under stress. This could be due to extreme weather conditions, disease, pests, or simple neglect. A Tailored Approach Revive operations must be tailored specifically to the condition of each lawn in Littleton. Littleton's top lawn care services excel at diagnosing issues plaguing properties and creating an effective revitalisation strategy; this might involve altering watering practices, changing mowing methods or applying specific treatments that address disease or pest issues. Winter Mite Control Battling The Invisible Foe Winter mites are an increasingly prevalent lawn pest in Littleton and can significantly damage during the cooler months. Feeding on grass, these tiny predators feed off it resulting in discoloured, thinner properties come spring. Preventing And Treating Infestations Winter mite control involves both prevention and treatment. Lawns can be treated with products designed to deter mites, while watering practices may also be adjusted to make lawns less inviting to these pests. Should an infestation develop, targeted treatments can be utilised to get it under control quickly. Weed Kill In Rock/Mulch Beds Maintaining The Beauty Of Rock/Mulch Beds Rock and mulch beds can be a beautiful addition to a landscape but can also become a haven for weeds. However, the usual weed control methods used for lawns aren't always suitable for these beds. Tailored Weed Control Strategies Littleton's best lawn care services have tailored strategies for weed control in rock/mulch beds. This might involve careful hand-weeding, using landscape fabric to deter weed growth, or the targeted use of weed-killing products that won't harm the desired plants. Conclusion: In conclusion, the secret to a beautiful lawn is professional knowledge, careful technique, and targeted treatments. By understanding and employing strategies like weed control & fertilisation, liquid aeration, overseed, revive, winter mite control, and weed kill in rock/mulch beds, the best lawn care services in Littleton can maintain and create lawns that are indeed a sight to behold. read Also: 5 Reasons Why You Absolutely Must Have Houseplants In Your Life How To Plant Grass Seed On Hard Dirt? – Latest Update 2022 10 Best Bedroom Plants To Buy In 2022

READ MOREDetails
how to harvest sunflower seeds

How To Harvest Sunflower Seeds: A Fun And Easy Activity For The Whole Family

Sunflowers are not only beautiful and cheerful, but they also produce delicious and nutritious seeds that you can enjoy as a snack or use in various recipes. Harvesting sunflower seeds is a fun and easy activity that you can do with your whole family. It is also a great way to teach your kids about nature, gardening, and healthy eating. In this article, I will show you how to harvest sunflower seeds in a few simple steps, as well as some tips and tricks to make the most of your sunflower harvest. If you enjoyed reading my blog on harvesting lettuce, you will enjoy reading this one! So, if that is what you are interested in knowing, I have you covered! Keep reading this blog till the end to learn more… How to Grow Sunflower Seeds: A Simple and Rewarding Gardening Project? Sunflowers are one of the most iconic and cheerful flowers in the world. They are also one of the easiest and most rewarding plants to grow from seeds. Sunflowers can brighten up your garden, attract pollinators, provide shade, and produce edible seeds that you can harvest and enjoy.  In this part of the article, I will show you how to grow sunflower seeds in a few simple steps, as well as some tips and tricks to make the most of your sunflower growing experience. How to Choose Sunflower Seeds? The first step to growing sunflower seeds is to choose the right seeds for your garden. Sunflowers come in a wide range of sizes, colors, shapes, and types. Some of the most common types of sunflowers are:  Giant sunflowers These are the tallest and largest sunflowers, reaching up to 15 feet in height and 12 inches in diameter. They produce huge and heavy flower heads that are filled with large and plump seeds. They are ideal for creating a dramatic and impressive display in your garden, as well as for harvesting large quantities of seeds. Some examples of giant sunflowers are Mammoth, Titan, and Kong. Dwarf sunflowers These are the smallest and shortest sunflowers, growing up to 3 feet in height and 6 inches in diameter. They produce smaller and lighter flower heads that are easier to manage and maintain. They are ideal for growing in containers, pots, or small spaces, as well as for adding a splash of color and charm to your garden. Some examples of dwarf sunflowers are Teddy Bear, Sunny Smile, and Little Becka. Colored sunflowers These are the most diverse and colorful sunflowers, ranging from yellow, orange, red, pink, purple, brown, and even green. They produce medium-sized flower heads that are attractive and eye-catching. They are ideal for creating a vibrant and varied display in your garden, as well as for cutting and arranging in bouquets or vases. Some examples of colored sunflowers are Autumn Beauty, Moulin Rouge, and Lemon Queen.  Things to Consider While Choosing Sunflower Seed When choosing sunflower seeds, there are several things that you need to keep in mind. For instance, you should also consider the following factors: Climate and season of your area Sunflowers are warm-season plants that need full sun and warm temperatures to grow and bloom. They are best planted in late spring or early summer, after the last frost, when the soil is warm and moist. If you live in a cold or frost-prone area, you can start your seeds indoors and transplant them outdoors when the weather is favorable. Soil and water conditions of your garden Sunflowers are adaptable and tolerant plants that can grow in most types of soil, as long as they are well-drained and fertile. They prefer slightly acidic to neutral soil with a pH of 6.0 to 7.5. They also need regular watering, especially during the germination and flowering stages. However, they can withstand some drought and dryness once they are established. Space and support available in your garden Sunflowers are large and sturdy plants that need ample space and support to grow and thrive. They should be planted at least 2 to 3 feet apart from each other and from other plants, to avoid overcrowding and competition. They should also be staked or tied to a fence, a trellis, or a pole, to prevent them from bending or breaking under their own weight.  How to Plant Sunflower Seeds? Once you have chosen your sunflower seeds, you can proceed to the next step. Planting sunflower seeds is a simple process that involves preparing, sowing, and caring for the seeds. Here is how to do it: Prepare the Soil Prepare the soil by loosening it with a fork or a spade. Ensure that you remove debris, weeds, or rocks. You can also enrich your soil by adding some compost, manure, or fertilizer, to boost its fertility and drainage. Make sure the soil is moist but not soggy, and has a temperature of at least 50°F. Sow the Seeds Sow the seeds by making holes or furrows in the soil, about 1 to 2 inches deep and 2 to 3 feet apart. You can use a ruler, a stick, or your finger to make the holes or furrows. Drop one or two seeds in each hole or furrow, and cover them lightly with soil. You can also sprinkle some water over the seeds to help them settle in the soil. Nurture Care for the seeds by watering them regularly, but not excessively, to keep the soil moist but not wet. You can also mulch the soil with straw, grass clippings, or leaves, to retain moisture and prevent weeds. You should also protect the seeds from birds, squirrels, or other animals, by covering them with a net, a cage, or a cloche. You should also thin the seedlings when they are about 4 to 6 inches tall, by removing the weaker or smaller ones, and leaving only the strongest and healthiest ones.  How to Grow Sunflower Seeds?  After planting your sunflower seeds, you can watch them grow and enjoy their beauty and bounty. Growing sunflower seeds is a rewarding and satisfying experience that requires minimal maintenance and care. Here are some tips and tricks to grow sunflower seeds successfully: Water Water your sunflowers regularly, but not excessively, to keep the soil moist but not wet. Sunflowers need about 1 to 2 inches of water per week, depending on the weather and the soil conditions. You can use a hose, a sprinkler, or a drip irrigation system to water your sunflowers. You should water them in the morning or evening, and avoid wetting the leaves or the flower heads, to prevent fungal diseases. Fertilizer Fertilize your sunflowers occasionally, but not excessively, to boost their growth and flowering. Sunflowers need a balanced fertilizer that contains nitrogen, phosphorus, and potassium, such as a 10-10-10 or a 20-20-20 formula. You can apply the fertilizer once or twice during the growing season, following the instructions on the label. You should avoid over-fertilizing your sunflowers, as this can cause them to grow too tall and weak, and make them prone to pests and diseases. Pruning Prune your sunflowers occasionally, but not excessively, to improve their shape and health. Sunflowers do not need much pruning, as they are naturally self-pruning and self-cleaning. However, you can prune them to remove any dead, damaged, or diseased leaves, stems, or flowers, to prevent infection and improve air circulation. You can also prune them to control their height and spread, by pinching or cutting off the tips of the main stem or the side branches. You should use clean and sharp scissors or pruners to prune your sunflowers and do it in the morning or evening when the plants are less stressed. When to Harvest Sunflower Seeds? The first step to harvesting sunflower seeds is to know when they are ready. Sunflowers typically bloom in the summer and their seeds mature in late summer or early fall. You can tell when your sunflowers are ready to harvest by looking at their appearance and feel. Here are some signs that your sunflowers are ready to harvest: Petals have fallen off or turned brown. The back of the flower head has turned yellow or brown. Seeds have developed black and white stripes. The seeds are plump and firm to the touch. If you are not sure if your sunflowers are ready to harvest, you can do a simple test by rubbing your thumb over the seeds. If they come off easily, they are ready to harvest. If they are still attached to the flower head, they need more time to ripen. How to Harvest Sunflower Seeds? Once you have determined that your sunflowers are ready to harvest, you can proceed to the next step. Harvesting sunflower seeds is a simple process that involves cutting, drying, and storing the seeds. Here is how to do it: Cut the flower heads from the stems using a sharp knife or scissors. Leave about 12 inches of stem attached to the flower head for easier handling. Place the flower heads in a dry and well-ventilated area, such as a garage, shed, or porch. You can hang them upside down or lay them flat on a screen or rack. Make sure they are not touching each other to prevent mold and rot. Let the flower heads dry for about two weeks or until the seeds are completely dry and hard. You can check the dryness by biting or cracking a seed. If it is crunchy and not moist, it is dry enough. Remove the seeds from the flower heads by rubbing them gently with your hands or a soft brush. You can also use a fork or a spoon to scrape them off. Discard any debris, such as petals, leaves, or insects. Store the seeds in an airtight container, such as a glass jar, a plastic bag, or a metal tin. Label the container with the date and the variety of sunflower. Keep the container in a cool and dark place, such as a pantry, a cupboard, or a basement. How to Enjoy Sunflower Seeds? Now that you have harvested your sunflower seeds, you can enjoy them in various ways. You can eat them raw or roasted, salted or unsalted, shelled or unshelled. You can also use them in salads, soups, breads, muffins, granola, trail mix, pesto, butter, and more. Sunflower seeds are rich in protein, fiber, healthy fats, vitamins, minerals, and antioxidants. They can help manage high cholesterol, blood pressure, and inflammation and boost your immune system, brain function, and mood. Here are some tips and tricks to enjoy your sunflower seeds: Roast To roast your sunflower seeds, spread them in a single layer on a baking sheet and bake them in a preheated oven at 300°F for about 15 to 20 minutes, stirring occasionally, until golden and crisp. You can season them with salt, pepper, garlic, onion, paprika, cumin, or any other spices you like.  Shell To shell your sunflower seeds, you can use your teeth, your fingers, or a nutcracker. You can also soak them in water for a few hours to make them easier to shell. To remove the shells, you can blow them away with a fan, a hair dryer, or your mouth, or you can shake them in a colander or a sieve. Sunflower Seed Butter To make sunflower seed butter, you need to blend the shelled and roasted sunflower seeds in a blender until it turns smooth and creamy. You can add a little oil, honey, salt, or vanilla to enhance the flavor and texture. You can use sunflower seed butter as a spread for toast, crackers, or fruit, or as a dip for pretzels, celery, or carrots. Pesto To make sunflower seed pesto, blend roasted and shelled sunflower seeds with fresh basil, garlic, olive oil, lemon juice, salt, and pepper in a food processor or a blender until smooth and thick. You can use sunflower seed pesto as a sauce for pasta, pizza, or sandwiches, or as a dressing for salads or roasted vegetables. Wrapping It Up! Harvesting sunflower seeds is a fun and easy activity that you can do with your whole family. It is also a great way to enjoy the beauty and bounty of nature, as well as the health benefits of sunflower seeds. By following the steps and tips in this article, you know how to harvest sunflower seeds in a few simple steps, as well as enjoy them in various ways. I hope you found this article helpful and informative. If there are any other queries related to the same, please feel free to let me know. All that yo need to do is scroll down till you reach the bottom of the page. Then leave your comments and suggestions in the box below. And I will be ether to answer them all for you!  Learn More About: Best Material for Garden Sheds: A Guide for Everyone Asparagus 101: When, How, And How Often To Harvest? Best Gardening Tips For Beginners: Adopting A Relaxing Hobby

READ MOREDetails
Messy Store Room

6 Smart Organizing Tips for a Messy Store Room

Imagine going into your bedroom wardrobe and not finding a spot to display your clothing or finding shelves or cabinets to wrap your folded garments, clothes, and accessories away? This won't be easy to keep the clothing sorted without the framework and storage structures in place. The same laws extend to warehouses! This often appears that the best thing about storerooms is their weakness: they always become a blank canvas. These become open space or closet deficient in organizing, sometimes resulting in being a drop zone and landing area for bins and things to build up over time. When it causes you a headache when you try to search and grab it, it might be time to arrange your storeroom and unpack it. Here are some of the tips you can consider to organize your storeroom. 6 Smart Organizing Tips for a Messy Store Room: 1. Categorize and De-clutter the area You want to arrange similar things together, close to having sorted in certain parts of your house. This physical activity can help you see just what you possess, how much of it, and what to consider when determining when to go in the garage. Gather your childhood mementos, gather your holiday decor, take out your luggage and travel supplies, dig out service pieces, etc. Categorize the things that you don't need anymore. While making the area clean, do not forget to spray a Responsible Pest & Scorpion Control medicine to make your storeroom pests free. 2. Widen the vertical space Don't confine yourself to a room on the board. Usually, the storerooms have relatively high ceilings, so step up. The more things that you can push into more upper shelving or shelves, the more floor room you can open up and bring in your work workers, which is also a bonus. 3. Make adjustable shelves They are perfect for tiny rooms because you can change the shelves' heights to match different storage requirements and wishes. Make some storage unit shelves to get things placed easily. This will give the room a more approachable and organized look. 4. Place the most important things in front When putting something, you need it more frequently in front of you, and you would be able to get to them faster. Often, moving boxes or objects further would then be needless to enter the purpose you seek. It does away with unnecessary confusion and discomfort. 5. Make Labels The trick to an efficient storage room has to learn where each object is. It's possible to lose track of where they are, no matter how beautiful the memory can be. Making labels for your room's storage choices allows it more accessible to easily find items and recognize where to place new products when you buy them. 6. Keep checking and Clearing your storeroom To stop the hoarding of products, periodically visit your storeroom to give away outdated goods or give away things that have not been used for more than half a year. It will keep the items from collecting in the storage room, which will motivate you to tidy up more effectively. Read Also: Small Kitchen Storage Ideas How to Decorate a Room with no Cost 5 Innovative Ideas To Lend Your Bedroom With More Space

READ MOREDetails