Published on: 27 June 2017
Last Updated on: 09 August 2019
If you’re unfamiliar with the spray drying process, you might be wondering what it’s used for and how exactly it works. Plus, you’ll learn about some applications you’re probably already using.
How does a spray dryer work?
A slurry is a mixture of liquid solution and other solid materials. Companies like Elan Technology use a spray dryer to produce dry, granular powders from this mixture. This is achieved by applying the spray dryer, which uses hot air coming from a rotating wheel or nozzle to rapidly dry the slurry.
Why is it used?
In simple terms, a spray dryer is used to turn a liquid into a powder. There is a multitude of applications for spray drying that stretch across many different industries. One application that you’ve definitely seen, heard of, and likely even used before is powdered milk products.
Milk is 80% to 90% water, which means spray drying is an effective way to reduce its bulk down and make it last longer on the shelf. Using spray drying for milk products allows milk to be taken to areas where it would otherwise be unreachable.
Spray drying is also used to make whey protein supplements and countless other products, along with instant coffee and corn starch.
Outside of the food industry, it is used in the manufacturing of soap products, detergents, fertilizer, resins, and mineral ores and clays.
Is it like dehydrating?
Spray drying is similar to the traditional dehydration process (usually used for solid foods) in that it applies hot air in order to remove the water from a substance. The liquid is rapidly dried out, producing a fine powder that will later likely return to a liquid when the end-user adds backwater (like with powdered milk).
How old is the process?
Spray drying is nothing new. And although still very prevalent today, the concept of it has remained unchanged for decades. It is a patented process and is traceable back to 1872. Samuel Percy is considered to be the inventor as he was the first to describe the process. However, it was 50 years before the process was fine-tuned and finally began being used in commercial manufacturing.
While it sounds simple, it does take a bit of science to get the perfect temperature to produce a usable end powder.
A certain amount of moisture has to be removed, or the powder will be clumpy due to some water being left over.
Spray drying is a very useful technique that is in place in countless industries. Without it, people would not be able to enjoy powdered milk, instant coffee, or many kinds of detergent—like the most common dishwasher and clothing detergent products.
Samuel may have been the first to invent the process, but thousands of companies use it today. While the machines have been upgraded to work faster and produce more product, the basic concept has remained the same, and thanks to 50 years prior to fine-tuning, it always will.
I enjoy writing and I write quality guest posts on topics of my interest and passion. I have been doing this since my college days. My special interests are in health, fitness, food and following the latest trends in these areas. I am an editor at Content Rally.
Many things can clog a drain in a tub or sink by blocking nooks and crannies in its plumbing system. The big benefit is that there are easy ways to eliminate different clogs, and you can achieve practical results by using the solutions in this guide.
Bent Hanger
A hanger can extract hair and goo that blocks a drain in a tub or sink. To use a hanger, you'll need to take it apart so that its hook can travel down the drain. When wiggling the hook around, ensure that it doesn't push the debris down the pipe. You can avoid this problem by maneuvering the hook around in a circle before pulling it up. The rotation will help you grab debris that's lodged against the walls in the drain. Once you've removed most of the debris, eliminate the lingering particles by running the hot water.
Baking Soda and Vinegar
A baking soda and vinegar solution can get rid of a general clog. To make the solution, mix 1/3 cup of vinegar with 1/3 cup of baking soda. When the mixture fizzes, pour it down the drain so that the bubbles can dissolve sticky grime that's causing the clog. If possible, let the solution set in the drain for 24 hours. Then, flush the drain thoroughly with hot tap water.
When a drain has a heavy clog, pour the baking soda down the drain first. Then, gradually pour the vinegar into the drain. This strategy will give the solution an opportunity to activate the source of the clog.
Vacuum
A wet and dry vacuum can pull up the is that's stuck in the upper portion of a drain. The suction power is very important as it can impact how effectively a vac extracts debris, to ensure that your vacuum has an efficient motor. To use a vacuum, adjust it to the highest setting. Then, place the hose over the drain. If the debris isn't too dry or stiff, the vacuum will remove it.
Tumbling Water
When your plumbing system has a clog that's tough to access, you can remove it by pouring boiling water down a drain. If you have a kettle, you can use it to bring the water to a boil, or you can boil water in the microwave.
While the water is boiling, pour it slowly down the drain in stages, and wait a few seconds between each pour. To avoid burn injuries, hover the kettle or pot close to the drain so that the water doesn't splash.
Caustic Soda
Caustic soda contains sodium hydroxide, which is a risky substance that can produce chemical burns. As a result, you must wear dense rubber gloves and protective goggles when using caustic soda.
Because caustic soda is strong, you'll need to combine it with ¾ gallons of cold tap water. For a general clog, you'll only need three cups of soda. To mix the soda, stir it around in the water with a wooden spoon. The mixture will begin to fizz as it heats up during this process. At this point, pour the solution down the drain, and let it sit there for about half an hour. Then, use boiling water to flush the drain.
Pipe Maintenance
General maintenance is an easy way to unclog a drain underneath a sink. Begin by placing a bucket below the trap. The bucket will capture water that spills after the trap is removed. To remove the trap pipe, gradually loosen it with a plumber's wrench. While the trap is detached, lift the housing, and rotate it until the trap is upside down. The source of the clog should drop on the ground. If nothing drops, use a tool to fish out the debris.
Salt and Baking Soda
Thick blockages will break down when they're treated with strong chemicals. The easiest way to create a chemical reaction that's powerful enough to destroy heavy grime is by mixing ½ cup of baking soda with ½ cup of salt in a drain. After the solution sets for about 20 minutes, rinse it down the drain with boiling water.
Dish Detergent
Dish detergent can eliminate clogs in a toilet bowl if it's mixed with hot water. The soapy suds are effective because they strategically break down dry debris. For an average clog, you'll only need to mix ½ cup of dish soap and a cup of hot water in the bowl.
Vinegar and Baking Soda
Tubs have the toughest clogs since a lot of dirt and grime travels through the drains each day. To get rid of thick debris, you'll need to loosen the goo, and the best solution for this task is made with a combination of baking soda and vinegar. To treat a clog, pour the solution down the drain. Then, cover the drain with a stopper. At this point, let the solution set for about 45 minutes, and pull the stopper off the drain. As the water exits the tub, the pressure will get rid of the blockage that was weakened by the vinegar and baking soda.
Plunger
Plungers can get rid of a clog in the toilet bowl. When using a plunger, totally submerge it underwater. The rubber portion of the bell should touch the housing in a sink or toilet. Once you have a good grip, push and pull the handle rapidly for about 20 seconds. Then, lift the plunger, and let the water escape out of the drain.
Whenever the process of unclogging a fixture is too complicated, seek help from a professional plumber. If you want great service options, considering working with Canberra Blocked Drains Definitive Plumbing.
Read Also:
The 7 Most Common Types Of Plumbing Problems
8 Plumbing Myths Busted
4 Tips For Finishing A Basement
The decision to pursue further education is a significant milestone for young adults, signaling a transition toward independence and self-exploration. Among the various accommodation options available, student apartments have gained popularity due to their appeal.
They share a mix of freedom, convenience, and community, enhancing the academic journey in diverse ways compared to traditional dorms or off-campus housing.
Benefits of Staying in a Student Apartment
As a student, you probably have two places to live — on-campus and off-campus. Now, most people tend to choose the first option due to the security it offers. However, if you ask me, I’d always choose the latter for five specific reasons.
Here’s what you need to know about them.
1: A Haven of Independence
Student apartments serve as sanctuaries of independence.
Unlike traditional dorms, these living spaces offer a heightened sense of autonomy, providing students with the freedom to curate their environment according to their preferences.
From choosing roommates to decorating the space, the core ability to personalize their living quarters fosters a sense of ownership and responsibility. Besides, it will also help you nurture essential life skills that transcend the academic sphere.
2: Communal Dynamics
Living in a student apartment is more than just securing a roof overhead; it's about building a vibrant community. Most of these spaces often house a diverse mix of individuals, fostering an environment ripe for cultural exchange and forging lifelong friendships.
The shared experiences, collaborative study sessions, and impromptu gatherings create an enriching social tapestry that contributes significantly to a student's holistic growth.
3: Enhanced Amenities and Facilities
Student apartments frequently come equipped with an array of amenities designed to cater to the modern student's needs.
From well-appointed study lounges and fitness centers to recreational areas and communal kitchens, these facilities are tailored to support students —
Academically,
Physically, and
Socially
Such conveniences augment the overall living experience, promoting both productivity and relaxation within arm's reach.
4: Proximity to Campus
Location plays a pivotal role in a student's life, and student apartments often boast strategic proximity to campus grounds. The convenience of being just a stone's throw away from lecture halls, libraries, and other academic facilities —
Not only save precious commuting time
But also fosters a stronger sense of connection to the university community.
5: Financial Prudence
While the prospect of independent living might seem financially daunting, student apartments often offer cost-effective solutions compared to other housing options.
Shared living arrangements and split rental expenses among roommates can also significantly alleviate the financial burden.
Moreover, some apartment complexes provide inclusive utilities or amenities, streamlining expenses and offering a more predictable budget for students.
How to Choose the Right Student Apartment?
Picking the right type of student accommodation as a new college student can greatly impact your university experience. Unlike standard rentals, student housing offers access to a lot of student-focused amenities, support systems, and opportunities to connect with peers.
Additionally, it tends to be a more budget-friendly choice. But, the question is — how do you choose the best option amongst everything that’s available out there? Let’s find out.
1. Location Matters
Location is paramount when selecting a student apartment. So, be sure to consider its proximity to your campus, amenities, and other essential facilities.
Living closer to campus can save time and money on commuting, allowing you to attend classes, access resources, and engage in campus activities more conveniently.
Additionally, a location with easy access to grocery stores, restaurants, and public transportation can enhance your overall convenience and comfort.
2. Budget Wisely
Establish a realistic budget before apartment hunting. Consider not only the monthly rent but also additional expenses like utilities, internet, and groceries.
Ensure your budget allows for these costs while also leaving room for unexpected expenses. It's advisable to prioritize affordability without compromising on safety and comfort.
3. Roommates and Space
Choosing the right roommates can significantly impact your living experience.
Discuss preferences, habits, and responsibilities beforehand to ensure compatibility. Additionally, consider the space offered by the apartment.
Ensure it provides enough room for privacy, studying, and relaxation.
4. Safety and Security
Prioritize safety and security when selecting a student apartment.
Look for various well-lit areas, and secure locks, and consider the neighborhood's safety track record. Research the building's security measures, like CCTV cameras, secure entrances, and emergency protocols, to ensure your peace of mind.
5. Amenities and Facilities
Evaluate the amenities and facilities offered by the apartment complex.
Look for features that align with your needs and preferences, such as laundry facilities, gym access, study rooms, and communal spaces. These can enhance your living experience and provide opportunities for socializing and relaxation.
6. Lease Terms and Flexibility
Review the lease terms thoroughly before signing any agreements.
Understand the duration of the lease, policies on subletting, maintenance responsibilities, and any additional fees. Ensure the lease terms are flexible enough to accommodate any changes in your academic or personal circumstances.
7. Visit and Inspect
Schedule visits to potential apartments before making a decision. Inspect the condition of the apartment, checking for any damages or maintenance issues.
Also, do pay attention to details like water pressure, heating, and cooling systems, as these can significantly impact your comfort.
8. Research the Landlord or Management Company
Gather information about the landlord or management company managing the property.
Read reviews and seek opinions from current or previous tenants to understand their reputation regarding responsiveness to maintenance requests, fairness in dealing with tenants, and overall professionalism.
9. Transportation and Parking
If you own a vehicle or rely on transportation, consider parking availability and transportation options near the apartment. Evaluate parking fees, accessibility to public transportation, and bicycle storage if relevant to your needs.
10. Trust Your Instincts
Ultimately, trust your instincts when choosing a student apartment. If something doesn't feel right or if you have lingering doubts, explore other options. Your living space should feel comfortable, safe, and conducive to your academic success and well-being.
Final Thoughts
The allure of student apartment living lies not just in the physical space but in the myriad of experiences and opportunities it affords.
Beyond mere accommodation, these spaces serve as incubators for personal growth, fostering independence, community, and responsibility.
By offering a mix of convenience, affordability, and flexibility, student apartments seamlessly complement the academic journey Embracing this specific lifestyle choice can prove to be a transformative and rewarding chapter in a student's educational odyssey.
Read Also:
Wooden Modern Desk: A Complete Guide
Brunswick Apartments For Sale: 4 Inspection Tips For Buyers
Real Estate Agents In Dubai: Your Gateway To The Luxurious Property Market
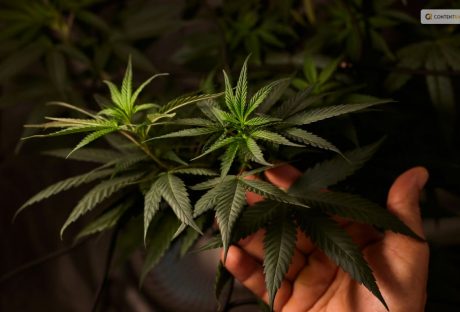
If there is one thing that most people try to know after searching for the legalities of growing weed, it is about “how to harvest weed?”
If this is something that you are searching for, I have you covered!
You see, weed, or marijuana, is a controversial plant to talk about. You might want to grow it for medicinal and recreational purposes. But the “What if people...” thoughts might put you off! This is because harvesting or growing weed is not like harvesting potatoes. There are several other things associated with the same.
But don’t you worry, my friend! If you are trying to search for the best ways to harvest weed, both indoors and outdoors, you need to look no further! Keep on reading this blog till the end to learn more...
Is Growing Marijuana Legal?
Marijuana, also known as cannabis, weed, pot, or ganja, is a plant that contains several psychoactive compounds. It can alter one's mood, cognition, and perception. Marijuana has been used for several reasons and purposes for thousands of years, ranging from medicinal to spiritual.
But its legal status has been a matter of debate and controversy in many countries. So, is growing marijuana legal?
The answer depends on where you live, how much you grow, and what you use it for. In some countries, such as Canada, Uruguay, and South Africa, growing marijuana for personal use is legal or decriminalized as long as you follow certain rules and regulations.
In other countries, such as the United States, Australia, and the Netherlands, growing marijuana is legal or tolerated in some states or regions but illegal or restricted in others. In many countries, such as China, India, and Saudi Arabia, growing marijuana is illegal and punishable by harsh penalties, regardless of the amount or purpose.
Various factors, such as the potential benefits and harms of marijuana use, the social and cultural attitudes towards marijuana, the economic and political interests of different groups, and the international treaties and agreements on drug control influence the legal status of marijuana.
The legal status of growing marijuana is also subject to change as new laws and policies are enacted or revised and further research and evidence are presented.
Growing marijuana is a complex and controversial issue that has no simple or universal answer. The best way to find out if growing marijuana is legal in your area is to consult the relevant authorities and sources, and to be aware of the risks and consequences of your actions. Remember, just because something is legal, does not mean it is safe, ethical, or advisable.
When Should You Plant Weed?
Spring is here, and you know what that means: it's time to get your marijuana seeds ready for planting outdoors.
This is the most important crop of the year because you can get the biggest harvest of all.
Some old-timers like to plant their seeds on the first full moon of March. They say this way, the seeds get some light at night and don't grow too tall too fast.
But sometimes, it's still too chilly in March, and not everywhere has the same weather. If you live in a colder place, your plants will grow slower and suffer from the cold and the wind. They will be weaker and more likely to get bugs and diseases
So, what should you do in this case?
Well, you can wait a month or two longer. A seed that sprouts in a nice climate from April onwards will grow bigger and better than one that sprouts in March in the same place
But growing plants for so long is not easy.
You must watch out for all kinds of things: bugs, diseases, nutrients, transplanting, pruning, training... It's a six-month-long job requiring constant attention
Things to Keep in Mind
If you want a good quality and quantity of weed there are several things that you need to keep in mind. Want to know what they might be? I have you covered! Here are some of the things that you'll need:
Fertilizers for growth and flowering: You can choose whatever fertilizers you like, organic or chemical. Organic ones, like humus, guano, and flower boosters, will give you a tasty and aromatic weed, but less of it. Chemical ones, like those from specific brands, will give you more buds, but less flavor.
Insecticides for insects like whiteflies, mites, or thrips: It's better to use them as a prevention, so you don't get any nasty surprises.
An anti-fungal product that works well against powdery mildew: Propolix or other chemical products are good, but you have to use them from the beginning.
Bacillus Thuringiensis: This is for caterpillars and other worms. Use it as soon as the flowers start to show, which is when these critters start to show up. Around May/June.
Stakes or wires to support the branches during the flowering stage.
Soil and Other Conditions to Grow Weed or Marijuana
It's obvious that this is the most common grow medium, probably because it's easy to find and has some nutrients already in it. Weed grown in soil is also more delicious and fragrant. And, no, it's not hard to grow in soil – just plant your (favorite) strain in the soil, and you're good to go.
That's it. Of course, there are different kinds of soil, and some are better than others. High-quality potting soil will make your life easier and faster. You might also want to add some extra nutrients to make your weed grow better.
Or you can make your own super soil. If you decide to buy soil, we suggest you go for the best brands, or at least those with a good soil mix. They should have things like earthworm castings, alfalfa meal, humic acid, etc.
Can You Grow Weed Without Soil?
Want to try something different? Go soilless. You'll see some quicker growth (and bigger harvests). And, conveniently, growing weed in soilless mediums is pretty similar to growing it in soil. The only difference is that you'll have to give the nutrients yourself because soilless mediums don't have any. Some examples of soilless mediums are coco coir, vermiculite, perlite, etc.
What About Hydroponic Grows? Is it Complicated?
No, hydroponic growth is not complicated. It's as easy as picking your setup (hydroponic system), getting your nutrients, and sprouting your seeds. And you'll get some amazing benefits: super-fast growth, huge yields, and super-strong weed.
Sounds good, right? Don't believe everything you hear because some information can mess up your growth. But with the right setup and care, you can be sure of a plentiful harvest.
What It Needs to Survive and Thrive: How to Grow Weed Plant?
If you want to grow the best weed possible, you need to know your plant well. Here are some of the main things that a weed plant needs to thrive, and how it works.
Light
Light is the fuel that drives photosynthesis and growth in a weed plant. The fan leaves are like solar panels that absorb light. The more light you give your plants, the more buds they will produce.
But be careful not to give them too much light. If you grow indoors, keep your lights at a safe distance from your plants, or you might burn them and ruin your nugs. And if your plants get too hot, they will dry out faster and need more water and attention.
Weed plants usually need at least six hours of sunlight a day when they grow outdoors. This is called “full sun”. When they grow indoors, they usually get between 12 and 18 hours of artificial light a day, depending on their stage of growth.
Weed is a photoperiod plant, which means that the amount of light it gets every day affects when it flowers and makes buds. Outdoors, this happens when the days get shorter in the fall. Indoors, you can make this happen by changing the light cycle from 18 to 12 hours a day.
Water
Water is essential for all plants, including weed. Water provides hydrogen for photosynthesis, and also carries nutrients from the soil to the plant through the roots, and throughout the whole plant.
Water also helps the plant stay firm and flexible, by creating pressure on the cell walls. This allows the plant to bend with the wind or reach for more light.
Plants also lose water through their leaves, like humans sweat, to cool down. This is called transpiration, and you can see it as droplets on the leaf tips.
This may sound obvious, but you only need to water the soil or the medium where your weed plant grows, not the leaves or the plant itself. We suggest that you water a lot, but not too often, rather than a little, but more frequently. This way, the roots can dry out a bit and get more oxygen from the soil.
Nutrients
A marijuana plant needs several nutrients to grow and flower. The main nutrients it needs are:
Nitrogen: Nitrogen helps a weed plant grow during the vegetative phase, when it makes more mass, stems, branches, and leaves. It is part of chlorophyll, the green pigment that helps the plant use light for photosynthesis.
Phosphorus: Phosphorus is important for storing and using energy, as well as for root growth and bud development. It helps the plant take up nutrients and build its structure.
Potassium: Potassium helps with many of the plant’s metabolic activities, such as respiration, transpiration, and enzyme activation. It also helps the plant fight off diseases and pests.
Calcium: Calcium is a minor nutrient, but it still plays a role in keeping the plant’s cell walls intact, and helping the plant absorb other nutrients.
Magnesium: Magnesium is part of chlorophyll, and helps the plant make glucose from photosynthesis. Without it, the plant can’t turn light into energy.
CO2
Plants breathe in CO2 through tiny holes in their leaves called stomata. During photosynthesis, plants turn CO2 into glucose, which they use to grow and flower.
Some indoor growers use a “CO2 burner”, which is a device that adds a little bit of CO2 to the air, to make the plants grow faster and bigger. But this is usually too much for home growers.
Wind/airflow
Wind or airflow is good for your plants, because it brings fresh air and CO2, which they need to grow.
Airflow also prevents mold and diseases, by removing moisture from the inside of the plant, so it doesn’t get too wet. You can also use a technique called scragging, which spreads out the branches and lets more air in.
Wind or airflow also makes your plant stronger and healthier, by making its stalks and branches thicker and sturdier. When a plant bends with the wind, it produces a hormone called auxin, which stimulates growth.
What to Keep in Mind While Harvesting Weed?
You probably know that different strains of weed need different amounts of time and sun to grow well. Sativas, which come from places near the equator, like a long and sunny summer to get fully ripe.
Indicas, which come from colder and harsher places, are usually faster to finish. But there are exceptions, of course. Some indicas are slow and some sativas are quick.
The best time of day to cut down your outdoor plants is in the morning, before the sun gets too strong. You don't want them to be wet from dew, but you also don't want them to be exposed to too much sunlight, which can ruin their flavor.
You can also harvest at night when it's cooler, but the morning is better because the plants are fresher and haven't been under the sun all day.
1. Watch the weather
As your buds get bigger and heavier and the season changes from summer to fall, the weather can change too. Depending on where you live, you might get some cold snaps or rainstorms.
These are not the end of the world, but you do need to pay attention to the weather and maybe decide on the spot when to harvest your plants, balancing their ripeness with the risk of losing them.
2. Harvesting in Lower Temperatures
According to sources, most weed plants can handle a light freeze—28-32°F for up to three hours—without any problem. But a hard freeze, anything lower or longer, can be a disaster.
Frost can make ice crystals form in the plant cells, hurting them. The leaves will look droopy and then turn dark and crunchy. The worse the frost, the more damage to the plant.
Remember that plants in pots are more sensitive to temperature changes than plants in the ground, so they are more likely to get frost damage.
3. Rainy Harvests
Rain is not a big deal by itself, but it depends on how long and how hard it rains. If it's going to stop soon and dry up fast, you can leave your almost ready plants outside. But if the rain is going to stay, mold is waiting—better to harvest sooner than later.
Covering your plants can help, but the air will still be humid. You can use some tall stakes and a tarp to cover them, but make sure to take them off when the rain or cold is over. In this way, the plants can warm up and breathe.
When to Harvest Weed Plant?
The type of plant growing determines when to harvest cannabis. Sativa, hybrid, and indica are the three primary kinds of cannabis seeds. Are you curious about the best time to harvest marijuana?
Let me break it down for you!
Sativa strain plants typically take longer to mature and give off a stronger cerebral height. However, Indica plants yield larger blooms and a more sedative, paralyzing high.
When an Indica and a Sativa are crossed, hybrids that enable flowers to have both traits are created. While Sativa cultivars blossom in 10 to 16 weeks (about three and a half months), Indica varieties flower in 8 to 10 weeks (about two and a half months) on average.
The cannabis plant can be found in hybrid form halfway between the two main species. It is important to understand that flowering times might vary based on environmental factors like temperature and duration of day.
Thus, the questions of when and how to harvest cannabis remain unanswered. Knowing what you want to achieve with your cannabis plants can help you decide when to harvest them.
Let's say you are growing cannabis for therapeutic purposes. Is there a unique method for harvesting cannabis in this case? If so, it is imperative to harvest the plant at the height of its cannabinoid content.
But if you are cultivating cannabis seeds for fun purposes, then it is best to harvest marijuana at its peak maturity.
How to Harvest Weed?
Once you've decided when to harvest your cannabis, it's critical to understand how to harvest cannabis plants correctly. It's simple to harvest cannabis; you just need to cut the stem off at the root. But it's best not to pull the branch out of the ground since this could damage it and reduce its yield.
It is crucial to properly dry the cannabis after harvesting it before stocking it. Hanging it upside down in a room with lots of ventilation and little light exposure is the best method to accomplish this, like a wardrobe. In order to efficiently dry cannabis, proper ventilation is necessary because it inhibits the growth of mold.
Before you proceed to store it, ensure that you let your cannabis rest for some time. This can range anywhere from three to seven days. This is a great way to ensure that the leaves are dried and ready for you to store.
Wrapping It Up!
In case you were searching for the best ways on how to harvest weed, I hope that this blog has been of help to you. If there are any other queries related to the same, please feel free to let me know. All that you need to do is scroll down till you reach the bottom of the page. Then leave your suggestions in the box below. And I will be there to answer them all for you!
More Resources:
Choosing a Medical Marijuana Dispensary
Marijuana Addiction Treatment: 5 Steps to Avoid Relapse
What Are Tarpenes? How Do They Work? – Cannabis Guide
Medical Marijuana Can Take New Dimensions in the Treatment of Pets