Published on: 24 June 2017
Last Updated on: 24 February 2020
Most moms are craving for sleep. The sleep that most of them won’t get. The sleep which you are about to give up for your newborn baby. The sleep which your tired pregnant body is craving desperately. Many moms-to-be might already search the internet looking for answers to the question on how to sleep during pregnancy.
When you are pregnant, it seems like a welcome break if you have a prescription to stay in bed. However, in reality, limitations on movement during pregnancy can cause challenges and even specific health risks.
Your body is tired at work, and having a good night rest can be difficult to achieve. It is a harsh truth about pregnancy. Just when you want the most sleep, you stay awake for a couple of hours.
Getting a new mattress in some mattress stores or Beds Online can be helpful, whether it is providing your growing body some more space or giving you the right support. For the best possible night’s sleep, you should place your focus on getting a comfortable mattress.
Questions To Consider To Find The Best Mattress For Pregnancy
Do you or your spouse have any health related conditions that you must take into consideration?
Is there a tendency that you feel cold or hot when sleeping?
What sleeping positions does your spouse prefer?
Do you want to feel supported as you stand up or sit on the edge of the mattress, or would you rather have mattress edges that can be flexible as you move on them?
Do you get up a lot at night?
Do you need a queen size mattress or just a single mattress?
Do some particular body areas ache when you’re sleeping, or when you wake up?
Do you currently get seven to eight hours of sleep at night?
Just make sure that if you’re discussing with a sales representative, you should speak up your thoughts behind these questions so they can assist you in narrowing down the selection of mattresses that are perfect for you and your spouse.
Type of Mattresses
Pregnancy and sleep are as different as chalk and cheese. It’s one of the moments in a woman’s life where sleeping should be a must, but ironically it is also the hardest times to get some sleep. It is not only because of your growing tummy which makes it difficult to be comfortable, but you also have an entire load of hormonal changes as well as thinking about the new baby.
Getting a suitable mattress can certainly help mitigate the substantial inconvenience of pregnancy, so what is the best mattress that you should consider when you are pregnant?
Spring
Spring mattresses can develop hollows and ruts, but they might not be excellent for supporting a pregnant woman since they present a fixed degree of firmness.
Latex
Latex is also not a good option because it can indent easily by body weight, creating hollows and ruts that push the body into specific sleeping positions. When you are pregnant, you should have a combination of support and comfort, and you should be able to sleep in the most comfortable position that you find.
Memory foam
Memory foam can mirror the correct posture and body shape of the sleeper, making a cradle in which they can sleep. It gives the perfect balance of support and comfort for the pregnant sleeper.
Memory foam is a supportive and comfortable option for expectant mothers. The pregnant woman should attain as much sleep and rest as possible, and a memory sleep can help accommodate the changing sleeping positions of women.
Takeaway
There are so many changes that you need to address when you are pregnant. From looking for the right mattress to body pillow for pregnancy that will fit you to get a good night’s sleep. Sleep is more vital than ever when you are pregnant. However, it is harder to get a good night’s sleep as you advance through your pregnancy.
It is not only because of your baby bump that causes most of the uncomfortable moments but because of hormonal imbalance and other factors alike. Also, adding to the list is your worry for the impending birth of your child. That’s why choosing the best mattress is very helpful for a good night sleep.
I enjoy writing and I write quality guest posts on topics of my interest and passion. I have been doing this since my college days. My special interests are in health, fitness, food and following the latest trends in these areas. I am an editor at Content Rally.
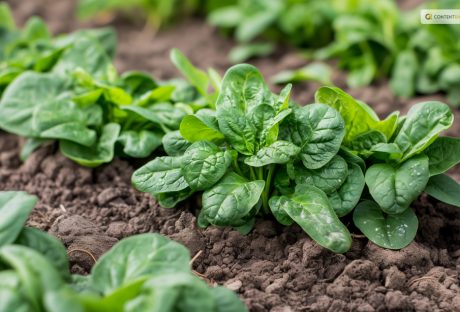
Being a gardener, I know Spinach is one of the most popular and versatile leafy greens you can grow in your garden. It's rich in vitamins, minerals, antioxidants, and fiber and can be used in salads, soups, smoothies, and more. But how do you harvest spinach the right way so that you can enjoy it fresh and crisp and make it last longer?
In this article, I will show you how to harvest spinach, so it keeps growing. I will also explain how to harvest spinach seeds, how to store and freeze spinach, and the health benefits of spinach. Additionally, I will also share some tips and tricks on how to grow spinach successfully and how to use it in delicious recipes.
Whether you're a beginner or an expert gardener, this guide will help you make the most of your spinach harvest. So, keep on reading till the end to learn more, and thank me later!
Driven by Benefits: Why are People Growing Spinach?
Spinach is not only tasty but also healthy. It's low in calories and high in fiber, vitamins, minerals, antioxidants, and phytochemicals. It can help improve various aspects of health, such as:
Eye Health
Spinach is rich in lutein and zeaxanthin. These are carotenoids that protect the eyes from age-related macular degeneration, cataracts, and glaucoma. Spinach also contains vitamin A, which is essential for vision and eye health.
Blood Pressure
Spinach is high in potassium, magnesium, and nitrates, which are compounds that help lower blood pressure and relax the blood vessels. Spinach also contains folate. This helps prevent homocysteine, an amino acid that can damage the blood vessels and increase the risk of cardiovascular diseases.
Bone Health
Spinach is a good source of calcium, magnesium, and vitamin K, which are important for bone health and density. Spinach also contains vitamin C, which helps the body absorb calcium and produce collagen, a protein that strengthens the bones and connective tissues.
Immune System
Spinach is loaded with vitamin C, which is a powerful antioxidant that boosts the immune system and fights off infections and inflammation. Spinach also contains vitamin E, which enhances the immune response and protects the cells from oxidative stress.
Digestion
Spinach is high in fiber, which helps regulate digestion and prevent constipation, diarrhea, and bloating. Fiber also feeds the beneficial bacteria in the gut. This improves the digestion and absorption of nutrients. It also supports the immune system.
Skin And Hair
Spinach is rich in vitamins A, C, E, and iron, which are essential for healthy skin and hair. Vitamin A helps maintain the moisture and elasticity of the skin and prevents acne and wrinkles. Vitamin C helps produce collagen, which keeps the skin firm and smooth.
On the other hand, vitamin E helps protect the skin from sun damage and aging. Iron helps deliver oxygen to the skin and hair cells and prevents anemia, which can cause hair loss and pale skin.
How To Harvest Spinach So It Keeps Growing
One of the best things about spinach is that it's a cut-and-come-again crop. This means you can harvest it multiple times throughout the season if you do it correctly. Here are the steps to follow to harvest spinach so it keeps growing:
Choose the right time to harvest
The best time to harvest spinach is when the leaves are young and tender. This is usually about 40 to 50 days after planting. You can also harvest baby spinach leaves earlier, about 25 to 30 days after planting.
You should harvest spinach before it starts to bolt. This is when it produces flowers and seeds and becomes bitter and tough. Spinach usually bolts when the days get longer and warmer. So, you should harvest it more frequently in the spring and summer.
Use a sharp knife or scissors to cut the leaves
You can either cut the whole plant at the base, leaving about an inch of stem, or cut individual leaves from the outer part of the plant, leaving the inner leaves to grow.
You should cut the leaves about an inch above the soil, to avoid damaging the crown and the roots. Moreover, you should also avoid cutting too many leaves from one plant, as this will weaken the plant and reduce the yield. A good rule of thumb is to leave at least half of the leaves on each plant.
Wash and dry the leaves
You should wash the spinach leaves as soon as possible after harvesting, to remove any dirt, bugs, or pesticides. You can use a colander or a salad spinner to rinse the leaves under cold water. After this, pat them dry with a paper towel or a cloth. Additionally, you should remove any damaged or yellow leaves, and trim any tough stems.
Enjoy or store the leaves
You can eat the spinach leaves fresh, or store them in the refrigerator or freezer for later use. We'll explain how to store and freeze spinach in the next sections.
How to Harvest Spinach Seeds?
If you want to save some spinach seeds for the next season or share them with your friends and family, you must let some spinach plants bolt and produce flowers and seeds. Here are the steps to follow to harvest spinach seeds:
Select the best plants to save seeds from
It would be best if you chose healthy, vigorous, and productive plants with the desired characteristics. Some of these are the flavor, size, color, and disease resistance.
Apart from these, you should also avoid saving seeds from hybrid varieties, as they will not produce true-to-type plants. You should look for open-pollinated or heirloom varieties, which will produce plants that are similar to the parent plants.
Isolate the plants to prevent cross-pollination
Spinach is a wind-pollinated crop, which means that it can cross-pollinate with other spinach plants or related plants, such as beets, chard, or quinoa, within a distance of up to a mile. This can result in seeds that have different traits than the parent plants. To prevent cross-pollination, you should isolate the plants you want to save seeds from, by either planting them far away from other spinach plants or related plants, or covering them with a mesh bag or a cage.
Let the plants flower and set seeds
You should let the plants bolt and produce flowers, which are small and yellow, and then wait for the seeds to form and mature. The seeds are round and black, and they are enclosed in a spiny husk. The seeds are ready to harvest when they are dry and hard, and the husks are brown and brittle, usually about four to six weeks after flowering.
Harvest and clean the seeds
You should cut the seed stalks and place them in a paper bag or a bucket, and then shake or rub them to release the seeds from the husks.
Furthermore, you should then winnow the seeds, which separates the seeds from the chaff or the husks and other debris. You can do this by blowing or fanning the seeds or using a screen or a sieve. You should end up with clean and shiny seeds.
Store the seeds
It would be best if you stored the spinach seeds in a cool, dry, and dark place, such as a jar, a tin, or a plastic bag. You should also label the seeds with the variety name and the date of harvest. Besides, you can store the spinach seeds for up to five years, but they will germinate better if you use them within two to three years.
How to Store and Freeze Spinach?
Spinach is best eaten fresh, as it loses its flavor and texture quickly. However, if you have a large harvest, or you want to preserve spinach for later use, you can store or freeze it. Here are the best ways to store and freeze spinach:
Store spinach in the refrigerator
You can store fresh spinach in the refrigerator for up to a week if you keep it in a perforated plastic bag or a container with a lid. However, you should avoid washing the spinach before storing it, as this will make it wilt faster. You should wash the spinach just before using it.
Freeze spinach raw
You can freeze raw spinach without blanching it, which is a process of briefly cooking and cooling the vegetables to stop the enzyme activity that causes them to spoil. However, freezing raw spinach will result in a mushy and watery texture and a loss of flavor and nutrients. To freeze raw spinach, you should wash and dry the leaves, and then pack them in freezer bags or containers, leaving some space for expansion. You can freeze raw spinach for up to six months, and use it in smoothies, soups, or casseroles.
Freeze spinach blanched
You can freeze blanched spinach, which will retain its color, texture, flavor, and nutrients better than raw spinach. To freeze blanched spinach, you should wash and trim the leaves, and then blanch them in boiling water for one to two minutes, depending on the size of the leaves.
You should then drain and cool the leaves, and squeeze out the excess water. You can then pack the leaves in freezer bags or containers, leaving some space for expansion. Furthermore, you can freeze blanched spinach for up to a year, and use it in salads, sandwiches, or quiches.
Things to Keep in Mind: How to Grow Spinach Successfully?
Spinach is a cool-season crop that grows best in the spring and fall, when the temperatures are between 40°F and 75°F. It can tolerate light frost but not heat or drought. Spinach also prefers moist, fertile, and well-drained soil with a pH of 6.0 to 7.0. Here are some tips and tricks on how to grow spinach successfully:
Choose the right variety
There are many types of spinach, but the most common varieties are savoy, semi-savoy, and flat-leafed. Savoy spinach has dark green, crinkly leaves that are great for salads and wraps. Semi-savoy spinach has slightly curled leaves that are more resistant to diseases and bolting. Flat-leafed spinach has smooth, broad leaves that are easy to clean and process. You can also choose spinach varieties based on their maturity time, bolt resistance, flavor, and color. Bloomsdale, Tyee, Space, Melody, and Red Kitten are popular spinach varieties.
Sow the seeds
You can sow spinach seeds directly in the garden, or start them indoors and transplant them later. The best time to sow spinach seeds is in early spring, as soon as the soil can be worked, or in late summer or early fall, for a winter harvest. You can also sow spinach seeds every two to three weeks, for a continuous harvest.
Besides this, you should sow the seeds about half an inch deep, and one to two inches apart, in rows that are 12 to 18 inches apart. You should water the seeds well, and keep the soil moist until they germinate, which usually takes seven to 14 days.
Thin the seedlings
When the spinach seedlings have two to four true leaves, you should thin them to avoid overcrowding and competition. You should leave about four to six inches of space between each plant, and eat or transplant the thinned seedlings. You should also weed the area around the spinach plants regularly, to prevent pests and diseases.
Harvest the leaves
Depending on the variety, you can start harvesting spinach leaves when they are big enough to eat, usually about 25 to 50 days after sowing. You can either harvest the whole plant or pick individual leaves from the outer part of the plant, leaving the inner leaves to grow.
Additionally, you should harvest spinach in the morning, when the leaves are crisp and fresh, and before the sun gets too hot. You should also harvest spinach before it starts to bolt, which is when it produces flowers and seeds, and becomes bitter and tough.
How to Use Spinach in Different Cuisines and Recipes?
Spinach is a versatile vegetable that can be used in many different cuisines and recipes. Whether you want to make a salad, a soup, a pasta, a pie, or a smoothie, spinach can add flavor, color, and nutrition to your dish. Here are some examples of how to use spinach in different cuisines and recipes:
Mediterranean cuisine
Spinach is a staple ingredient in many Mediterranean dishes, such as spanakopita, a Greek pie made with spinach and feta cheese wrapped in phyllo dough, or spinach and chickpea stew, a Moroccan dish flavored with cumin, paprika, and lemon juice. You can also make a simple spinach salad with tomatoes, olives, and feta cheese, dressed with olive oil and vinegar.
Asian cuisine
Spinach is widely used in Asian cuisine, especially in Chinese, Japanese, and Indian dishes. You can make a Chinese spinach and tofu stir-fry with garlic, ginger, soy sauce, and sesame oil, or a Japanese spinach and sesame salad with rice vinegar, sugar, and soy sauce. You can also make an Indian spinach and potato curry with onion, garlic, ginger, turmeric, and garam masala, or a spinach and paneer cheese dish with cream, tomato, and fenugreek.
Italian cuisine
Spinach is a common ingredient in Italian cuisine, especially in pasta, pizza, and lasagna. You can make a spinach and ricotta ravioli with butter and sage sauce, or a spinach and mushroom pizza with mozzarella and parmesan cheese. You can also make a spinach and cheese lasagna with béchamel sauce, or a spinach and artichoke dip with cream cheese and sour cream.
American cuisine
Spinach is also popular in American cuisine, especially salads, sandwiches, and casseroles. You can make a spinach and strawberry salad with almonds and poppy seed dressing or a spinach and bacon sandwich with mayonnaise and mustard. You can also make a spinach and cheese casserole with eggs, milk, and breadcrumbs, or a spinach and artichoke quiche with pie crust and cheddar cheese.
Wrapping It Up!
Spinach is a wonderful vegetable that you can harvest, store, and use in various ways. It's easy to grow, harvest, and store spinach, as long as you follow some simple steps and tips. It's also healthy, delicious, and versatile, as you can use it in many different cuisines and recipes. Spinach is a green treasure that you don't want to miss.
If you want to know about how to harvest spinach, I hope that this blog has been of help to you. If there are any other queries related to the same, please feel free to let me know. All that you need to do is scroll down till you reach the bottom of the page. Then, leave your comments and suggestions in the box below. And I will be ether to answer them all for you.
Read Also:
How to Harvest Lettuce: A Step-by-Step Guide for Fresh and Crispy Salads
Everything You Need To Know About Harvesting Basil!
Asparagus 101: When, How, And How Often To Harvest?
Starting the process of tidying up and arranging your home might feel overwhelming, but it's incredibly rewarding.
A clean, organized space not only brings a sense of calmness but also sets the stage for enjoyable moments with loved ones.
This beginner's manual on cleaning and organizing equips you with the essentials to kickstart your journey towards a serene living environment.
So, let's get started with it.
Step - 1: Begin Your Journey with Something Small
Beginning with a small area can help alleviate the overwhelming feeling of cleaning and organizing your home. For example, starting in just one room or a tiny section within a room can reduce the stress associated with the task.
Once you've tidied up and organized that small space, it tends to inspire further progress.
It's like a chain reaction— as soon as you initiate the process, you'll often find the motivation to continue. The sense of accomplishment from cleaning that initial space acts as a catalyst, propelling you to tackle more cleaning and organizing tasks.
Step - 2: Declutter Your Rooms. All of Them!
Before diving into organizing, it's crucial to declutter thoroughly.
Start with a smaller space like your fridge. Empty its content, discarding expired or inedible items. Clean all of the surfaces using a damp cloth and your preferred all-purpose cleaner.
When clearing out various areas in your home, prioritize keeping only the things you truly need or cherish. If it's challenging to part with certain items, remember they might serve someone else while giving you more room at home.
Consider donating or selling belongings you no longer adore. Discard broken, incomplete, or heavily worn-out items. Items that are no longer in use—like old toys, baby gear, clothes, or furniture—can find new homes through donation or sale.
This decluttering not only creates space for other purposes but also makes it easier to access and appreciate the things you genuinely value and use.
Step 3: Get a Cleaning Caddy for Yourself
Before starting your home cleaning routine, it's helpful to prepare a portable cleaning kit that you can easily carry around.
You don't need a multitude of cleaners or tools—just include what you'll actually use. Your cleaning kit can be as simple as a bucket, plastic bin, canvas bag with handles, or any larger container that suits your convenience.
Whether store-bought or homemade, the key is to have a portable solution that suits your needs as you move from room to room.
Step 4: Keep the Surfaces Clean
After completing the decluttering process, it's crucial to tidy up the space before organizing. Quickly cleaning the area will impart a fresh feel, enhancing the likelihood of maintaining its cleanliness for an extended period.
Here are some cleaning tips that you might need…
Create a cleaning caddy for easy access to supplies.
Then clean from higher surfaces downward to catch falling debris as you progress.
Utilize a vacuum attachment to clear drawers, shelves, cabinets, or closets of any remaining debris.
Use a damp microfiber cloth to wipe surfaces, ensuring thorough cleaning. Remove any items that don't belong in the cleaned area.
Step - 5: Organize Everything
The crucial element in home organization is to gather similar items together.
Whether it's your refrigerator, pantry, kitchen cabinets, bathroom, living room, kids' rooms, closets, or garage, arranging items of the same kind is essential for easy access and visibility. Scattered items make it difficult to locate what you need and can lead to clutter.
By grouping similar items, you create a clear system that helps in both finding items and guiding your family when it comes to tidying up.
I: How to Organize Your Kitchen?
It's beneficial to begin organizing your kitchen by focusing on a small area first, as this can inspire you to tackle other spaces. The kitchen often serves as the hub of a home and sees frequent use, making it a great starting point.
Once you've sorted out your kitchen, the task of taking care of the rest of your house becomes more manageable. A smart step in this process is to begin with your refrigerator. Streamlining your fridge organization can serve as a catalyst for organizing other areas.
II: Organizing Your Fridge
Arranging your refrigerator involves categorizing similar food items–together for better organization. With adjustable shelves and doors, along with additional bins, you can optimize the space quite easily. Clear plastic bins are particularly helpful as they allow easy visibility of their contents. They're convenient for accessing snacks, packing lunches, and planning meals.
Here are examples of foods that should be grouped together either in bins, on shelves, or in drawers for a more organized fridge...
Bagged fruits and vegetables
Cheeses and lunch meals
Fresh vegetables and fruits
Sauces and condiments
Salad dressings
III: Organizing the Other Parts of Your House
After you've sorted one area, take the same approach to the rest of your house.
Use the refrigerator organization tips as a template for each room: clear out unnecessary items, tidy up, and then arrange everything neatly.
Remember, the key is to tackle each room gradually to avoid feeling swamped, following the same method each time.
If there are any similar types of items available in your house, group them together.
Clean the area once you are done with the former step.
Get rid of anything and everything that you don't want to use.
Step 6: Disinfect the Surface Areas and Countertops
Clean the hard surfaces around your home thoroughly, including countertops, appliances, cabinets, doorknobs, light switches, TV remotes, and phones.
Disinfect surfaces that are commonly touched to reduce the spread of germs.
Create a natural disinfectant by combining one-fourth to half a cup of white or apple cider vinegar with one cup of water. They'll work like magic for you.
Make It a Group Activity
Collaborating as a team is a top-notch method for swiftly tidying up a house. Plan ahead with your family for a designated time and distribute specific chores among everyone.
Joining forces not only injects some enjoyment into the cleaning process but also ensures a sparkling home in no time.
You can also opt for a reputable cleaning service that can help you with the process. It can seem a little more expensive than usual, but it's much more sustainable per see.
Read Also:
Vancouver House Cleaning Services with Local Home Cleaners Near You
What You Need to Look for When Hiring House Cleaning Service
5 Hotel Housekeeping Tricks You Need To Clean Your Bathroom
Many people think that having a small yard doesn’t require that much work to maintain. This could be true, but only if you have enough help and the right outdoor power tools. However, if you have various plants, flowers, and some trees, then it will surely require more work than you have anticipated. If you want your yard to look flawlessly beautiful, you should commit to maintaining it regularly.
What if you don’t have the time to spend making your yard beautiful at all times? The best answer is to hire a reliable gardener. It will cost you some but will eventually pay off. With a beautiful yard, you can relax, entertain guests, and bond with your family. However, hiring the right gardener is crucial. Before you avail of their services, make sure you have asked them these questions:
1. What Are The Qualifications of the Gardener?
If you’re planning to engage in some special project, then a professional gardener is the one you need. Does the gardener hold horticultural or landscaping certificates? Do they have a license, like a landscaping contractor’s license?
These documents will indicate the quality of work the gardener can provide you. Also, ask them about their experience and the clients they have served. This will give you a good idea of the competency of the gardener and whether or not they’re right for your project.
Once you are able to assess the experience and qualifications, you will be in a much better position to make a selection. However, if you go for thorough professionals as garden or tree experts like Tree Service Syracuse, you can rest assured that you are hiring the very best. Experts from Tree Service Systems are put through extensive tests and taught the best tips and tricks of the gardening trade.
2. Do They Have References?
If your yard requires extensive maintenance, then you’d want references that can share with you their experiences with the gardening company. Did the company meet its expectations? Are they professional when working with you?
You can also check the yard of your neighbors. If you see something you like, you can ask them if they hired a gardener to take care of their yard. If yes, then ask for the contact details and discuss to see if they can meet your needs and wants.
3. Can They Manage Your Yard Both Organically and Sustainably?
If you are particular about being organic and sustainable, then it’s essential that you talk to the gardener about it. This has a significant effect on how they deal with weeds, fertilization, and pests.
However, you must take note that going organic and sustainable costs more than the traditional approach. Also, depending on your location, there are gardeners that are not that knowledgeable about organic and sustainable methods.
4. Do They Grow Vegetables?
It’s not common for gardeners or landscapers to grow vegetables for you. However, it’s worth asking as it’s a great way to save your budget for groceries. Today, healthy produce is quite expensive, and growing your own allows you to pick the freshest fruit or vegetable while cutting a huge chunk of your expenses.
5. If You’re Goal Is a Garden Makeover, Do They Provide Permeable Landscaping?
Permeable landscaping is a reliable and environment-friendly way of landscaping design. It allows water and air to reach inaccessible soil allowing it to breathe properly. Moreover, it makes more space for cultivation and attracts butterflies and birds, which will make your yard even more beautiful.
Soil that is topped with a non-permeable material, such as asphalt and cement, will eventually die. You might want to consider replacing your traditional walkway, driveway, or patio with permeable pavers. These look like traditional paving, except that they allow water to go through the soil.
6. Can They Provide an Itemized List of Expenses?
In addition to labor, are you charged with the supplies as well? Do they seem reasonable? These questions are really important as they prevent you from being overcharged. With an itemized list, you will see where your money is spent and if the expenses are accurately calculated.
7. Can They Provide a Time Estimate?
A professional gardener with solid experience can complete the project faster. They might cost more but if you consider the amount of time it requires them to finish the job, they are actually cost-efficient. You can also foresee whether they are efficient for the job or not based on the resources they have.
If you have a huge yard, do they have enough manpower? Do they have the right tools to stay organized, such as motorized pole saws, lawnmowers, motorized, or cultivators? If the job requires cutting down huge trees and removal of huge stones and other components, then mini wheel dumpers are a huge plus. Having the right resources guarantees you that they can complete the project properly and faster.
8. How Much Will They Charge?
If you only require simple yard work, such as lawn mowing, then the charge should not cost much. However, local rates are different depending on where you are located. A great way to make sure that you’re being charged fairly is to ask neighbors, friends, family members, and even colleagues who are also hiring gardeners to care for their yard.
Meanwhile, for special projects, such as proper pruning of roses and trees, then the charge will cost more. For larger projects, such as garden makeovers, ask for an estimate and compare it to other gardening companies to get the most cost-effective value.
Read Also:
How To Arrive At The Perfect Choice Of A Potting Bench For Your Gardening
DIY Ways To Control Pests In Your Garden
Edmonton Landscape Maintenance Tips