


Category: Home & Garden
ContentRally is a leading source of reliable news and trending topics on Home Garden. Get hard-to-find insights and advice on Home Garden from industry-specific leaders.

How to Solve the Biggest Problems in Blocked Drains
Many things can clog a drain in a tub or sink by blocking nooks and crannies in its plumbing system. The big benefit is that there are easy ways to eliminate different clogs, and you can achieve practical results by using the solutions in this guide. Bent Hanger A hanger can extract hair and goo that blocks a drain in a tub or sink. To use a hanger, you'll need to take it apart so that its hook can travel down the drain. When wiggling the hook around, ensure that it doesn't push the debris down the pipe. You can avoid this problem by maneuvering the hook around in a circle before pulling it up. The rotation will help you grab debris that's lodged against the walls in the drain. Once you've removed most of the debris, eliminate the lingering particles by running the hot water. Baking Soda and Vinegar A baking soda and vinegar solution can get rid of a general clog. To make the solution, mix 1/3 cup of vinegar with 1/3 cup of baking soda. When the mixture fizzes, pour it down the drain so that the bubbles can dissolve sticky grime that's causing the clog. If possible, let the solution set in the drain for 24 hours. Then, flush the drain thoroughly with hot tap water. When a drain has a heavy clog, pour the baking soda down the drain first. Then, gradually pour the vinegar into the drain. This strategy will give the solution an opportunity to activate the source of the clog. Vacuum A wet and dry vacuum can pull up the is that's stuck in the upper portion of a drain. The suction power is very important as it can impact how effectively a vac extracts debris, to ensure that your vacuum has an efficient motor. To use a vacuum, adjust it to the highest setting. Then, place the hose over the drain. If the debris isn't too dry or stiff, the vacuum will remove it. Tumbling Water When your plumbing system has a clog that's tough to access, you can remove it by pouring boiling water down a drain. If you have a kettle, you can use it to bring the water to a boil, or you can boil water in the microwave. While the water is boiling, pour it slowly down the drain in stages, and wait a few seconds between each pour. To avoid burn injuries, hover the kettle or pot close to the drain so that the water doesn't splash. Caustic Soda Caustic soda contains sodium hydroxide, which is a risky substance that can produce chemical burns. As a result, you must wear dense rubber gloves and protective goggles when using caustic soda. Because caustic soda is strong, you'll need to combine it with ¾ gallons of cold tap water. For a general clog, you'll only need three cups of soda. To mix the soda, stir it around in the water with a wooden spoon. The mixture will begin to fizz as it heats up during this process. At this point, pour the solution down the drain, and let it sit there for about half an hour. Then, use boiling water to flush the drain. Pipe Maintenance General maintenance is an easy way to unclog a drain underneath a sink. Begin by placing a bucket below the trap. The bucket will capture water that spills after the trap is removed. To remove the trap pipe, gradually loosen it with a plumber's wrench. While the trap is detached, lift the housing, and rotate it until the trap is upside down. The source of the clog should drop on the ground. If nothing drops, use a tool to fish out the debris. Salt and Baking Soda Thick blockages will break down when they're treated with strong chemicals. The easiest way to create a chemical reaction that's powerful enough to destroy heavy grime is by mixing ½ cup of baking soda with ½ cup of salt in a drain. After the solution sets for about 20 minutes, rinse it down the drain with boiling water. Dish Detergent Dish detergent can eliminate clogs in a toilet bowl if it's mixed with hot water. The soapy suds are effective because they strategically break down dry debris. For an average clog, you'll only need to mix ½ cup of dish soap and a cup of hot water in the bowl. Vinegar and Baking Soda Tubs have the toughest clogs since a lot of dirt and grime travels through the drains each day. To get rid of thick debris, you'll need to loosen the goo, and the best solution for this task is made with a combination of baking soda and vinegar. To treat a clog, pour the solution down the drain. Then, cover the drain with a stopper. At this point, let the solution set for about 45 minutes, and pull the stopper off the drain. As the water exits the tub, the pressure will get rid of the blockage that was weakened by the vinegar and baking soda. Plunger Plungers can get rid of a clog in the toilet bowl. When using a plunger, totally submerge it underwater. The rubber portion of the bell should touch the housing in a sink or toilet. Once you have a good grip, push and pull the handle rapidly for about 20 seconds. Then, lift the plunger, and let the water escape out of the drain. Whenever the process of unclogging a fixture is too complicated, seek help from a professional plumber. If you want great service options, considering working with Canberra Blocked Drains Definitive Plumbing. Read Also: The 7 Most Common Types Of Plumbing Problems 8 Plumbing Myths Busted 4 Tips For Finishing A Basement
READ MOREDetails
8 Steps to Move in Your New House
Moving, according to many, is a stressful process. They do not even know where to begin, which makes them more anxious. Apart from direct costs, there are some hidden costs of buying a home too that you need to plan for. Read to get an insight into such costs and make your plans accordingly. If you are also planning to move, and do not know how to start, don’t worry. This article will guide you in the right direction. Following are 8 steps to move in your new house: 1. Opt for a Place to Live Look for a place that is near your workplace or your children’s school. This will reduce the hassle of traveling long distances every day. 2. Notify Your Family about Your Move Moving is a nerve-racking task, especially when it is long distances. It can be difficult for both – the adults and the children of the family. Telling the kids that they need to goodbye to their classmates and school is difficult. Therefore, you should find a way to break the news positively. 3. Hire a Mover Many people plan to move on their own. However, this takes a lot of time and effort. Therefore, it is better to hire a mover, especially the one who does not have a hidden-fee. One such company is Atlant Movers: Moving Services in Sacramento, CA. The company provides a wide range of services to move locally, long-distance, and even for piano and office moving. They securely store the stuff by packing it themselves for their customers. If you are planning to move under a budget, this company is just right for you. 4. Set up a Budget Set up a budget to keep track financially and to know how much moving can eventually cost you. 5. Start Packing up If you do your own packing, make sure you have at least 6 weeks before your moving date. A careful plan will save you a lot of money, time, and hair-tearing. 6. Pack Room by Room Start from one room. Pack the stuff completely and then go for the other room. This way, you will know how much is packed and how much is left. This will help you pack all your stuff in no time. 7. Save Money If you are like other people, you cannot resist a garage sale. No matter what the reason is, a garage sale is something that people won’t see. This way, you will make money by getting rid of the bunch you have been willing to throw for a long time. 8. Finally, You have moved in! Once the moving truck is gone and you are at your home, start unpacking the boxes. Get your mail, newspaper, magazines, and milk, all delivered to your home. Connect your telephone and broadband. Be ready to live a new life. Moving can sometimes be a difficult process. However, once you have moved into your new place, you will feel different and will enjoy the new home. So, bid a goodbye to all the hassle and just think about the wonderful experience that you will have after you have shifted. Read Also: Moving House? Here’s The Ultimate Checklist Signs That It Is Time To Sell Your House Finally Motivational Tips To Kick Start Your Packing Process For The House Move
READ MOREDetails
The Beginner’s Guide to Landscaping Design: 7 Tips for New Homeowners
Buying a new home has to be one of your greatest achievements. But with owning a new home comes a lot of responsibility. Aside from the renovations and paintings, you surely can’t forget your garden. After all, people do first see the exterior before actually entering your home. And you want a stunning yard that matches your exquisite interior, right? If you’re new to landscape design, you might find the whole process intimidating. But we’re here to assure you that the creativity you displayed when arranging your rooms, is the same you can use outdoors. Below are a few ideas. What are Your Needs as a Family? You need to establish what your landscaping needs are as a family. Do you have any young children? If yes, then you need to ensure that you make provision for a kids’ play area. You don’t want all the space to be taken up by flowers, fountains, and trees. Do you plan on doing a lot of gardening? Then you’ll have to create ample space for your gardening projects. Use the Correct Equipment Make sure you use the correct equipment for the job. You may be a DIY lover, but chances are you may not have the right equipment to undertake the necessary project. This is when you can consider equipment hire. Seek the advice of reputable manufacturers to give you the best advice regarding the type of equipment you’ll need for a particular project. Location is Important The next thing you need to do is to determine the location where you want to place your different features: Where do you want your fountain to be? Do you want in a central position? Where will you place your patio? Before picking a specific location, it’s important to consider the weather and sun elements. Do you prefer having sundowners on your patio as the sun is going down? It’s a wise idea to first study how the position of the sun changes throughout the day. This way you’ll know where exactly to position your patio. You Can’t Do It All at Once It’s important to remember that the landscaping design process takes time. You certainly can’t achieve your desired landscape vision in as little as three days. So why not take it one step at a time? Start with a small bed of flowers then move on to the bigger tasks like creating a fountain. Creating several goals will let the project seem less overwhelming, especially if you’re doing this for the first time. Establish a Focal Point When it comes to landscaping, it’s important that you establish the area where you want to draw attention to. Rather than going about it in a haphazard manner, why not add a few stunning items to shift the focus to. You can incorporate the following ideas: Adding a stunning piece of sculpture An exotic plant A bunch of bright and beautiful colors An eye-catching pavement Terraced stone steps Coordination is Important You may probably have many ideas regarding what you want your yard to look like. But what’s important is to make sure that everything is coordinated to avoid your backyard from looking chaotic. You want to end up with a well put together look and you can try the following to achieve that: Design experts say that there’s something attractive about coordinating different shapes and sizes. This means you should avoid planting plants of the same size throughout your yard. Why not place tall plants behind a flat flower bed? You can also create a footpath that features a stunning combination of granite and marble. Make sure you have a theme in mind with regards to the color and type of flowers you use. This means you must ensure that you repeat certain colors and plants throughout your yard to achieve a coordinated look. But while coordination is important, the last thing you want is to make your yard monotonous. Here you can consider adding some unique pieces that are totally unique so that they can stand out. This can include anything from: Fire Pits Outdoor showers Stone fireplaces Budget-Friendly Plants You don’t always need to spend a lot of money to design your garden area or front porch. To save on costs while creating a stunning yard, you can incorporate the following ideas: Opting for heat tolerant plants that won’t wither away prematurely after being exposed o extreme heat. Purchase plants that have low water requirements. In other words, opt for plants that don’t need regular maintenance like watering. These types of plants will definitely last you longer than some others. Install pavers in the middle of your lawn. This means you don’t have to water as much of the surface area. Final Words: We’re certain the above-mentioned tips will give you the head start you need to embark on your landscaping journey with a positive mindset. Always remember that landscaping takes time, so a lot of patience is required on your part. Also, your tastes and preferences are likely to change as time goes by. A plant you thought was beautiful when you planted it may not look so appealing after a few months—and that’s okay. Be open to change and enjoy gardening for as long as you have the pleasure of staying there. Read Also: How To Maintain Your Garden Railings? 4 Essential Tools Needed To Maintain Your Garden In The Winter 5 Summer Garden Maintenance Tips And Tactics You Have To Know
READ MOREDetails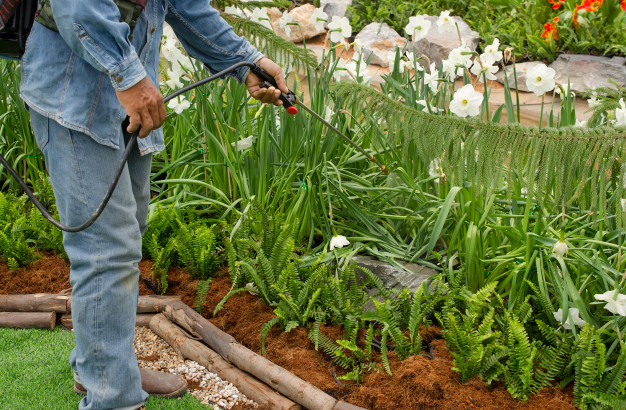
DIY Ways to Control Pests in Your Garden
Pests can be a menace and a mood killer. They dampen your spirits of developing a beautiful garden with their destructiveness. Many gardeners make frequent visits to the stores to buy insecticides to try and save their gardens. But did you know your home is full of natural insecticides that you could use to control the pest? Several items that you use in your home can also be used to control pests in the garden. So, if you are tired of the frequent visit to the stores or don’t have the time, here are several home items and products you can use to control pests in your garden. DIY Ways to Control Pests in Your Garden: One Hot Pepper Spray: Mix one gallon of water and about three spoons of hot pepper; if you are using fresh peppers, chop about ten peppers. Simmer the mixture or about 15 minutes and then let the mixture settle for 2 hours. Add a few drops of dish soap to the mixture. The soap helps the mixture acquire a sticky solution that can easily adhere to the plants. Garlic-Mint Insect Spray: To make this homemade pesticide, blend some mint leaves with garlic gloves. Add cayenne pepper and dishwashing soap. Boil the mixture and let it settle for 12hours. It should be ready to chase the bugs away. Apple Cider Vinegar Fruit Fly Trap: Flies are irritant and spread diseases very fast. Instead of waiting until it’s morning to buy some bug spray, you can easily make a homemade fly trap using basic kitchen products. Fill a bottle with apple cider vinegar and add a few pieces of chopped apple. The bottle top should be funneled shaped or have a shaker that allows the flies to get in but restrict them from easily getting out. Coffee Grounds: Do not throw away used coffee grounds if you have a pest problem in your house. Despite making you a cup of coffee, coffee grounds can be used as homemade pesticides. If there is an infestation of ants in your garden, place the coffee grounds in the spot they are originating from. Coffee grounds are fatal to many species of ants. Coffee grounds can also be used to control bugs, snails, and slugs. Eggshells: If a population of slugs and snails are wreaking havoc on your recently planted seedlings, you can easily win the war with eggshells. Eggshells make the ground rough, and the snails find it challenging to slither. Crash eggshells into tiny pieces and then spread the pieces on the ground. The shells also add value to your garden by adding calcium and other minerals to the soil when they degrade. Dust Mite Oil Repellent: You can easily make a pesticide to control mites and aphids that invade your home and garden with some few basic home items. To do this, mix either lavender, eucalyptus, peppermint, clove or rosemary oil with water. Pour the mixture into a spray bottle. Mites and aphids hate the smell of this mixture and will stay away from the sprayed area. You can add lemongrass and basil to repel lice and fleas as well. Egg Deer Repellent: Yes, a deer is also a pest. They can be a big problem for your garden, especially if you live near game reserves. However, you can keep the deer away from your plants by using a mixture of eggs and water. Mix several eggs with water and blend the mixture until it forms a solution. Pour the mixture into a spray bottle and then spray the solution on the leaves of your plants. The deer will be repelled by the smell and will stay away from your garden. Bananas and Tin Foil: Aphids are some of the most destructive pests in the garden. They can easily destroy a whole garden if they are not controlled. It is one of the best ways to Control Pests. To control aphids collects banana peels and chop them up into small pieces. Place the peels under the soil around the base of the plants. Aphids are repelled by the peels, and the peels add nutrients to the soil when they decompose. Foil can also be used to chase way aphids. The foil reflects sun rays to the underside of the leaves when placed at the base of the plants. The heat and light will chase away the destructive pests. Some people might wonder, “what if I meet banana spiders while spraying the garden?” Well, the best thing to do is to leave them alone. Banana spiders are pest controllers and will help you reduce pests in your garden. Majority of banana spiders are harmless to humans. Pests should no longer be a big problem if you use the home remedies above. Frequent visits to the store to buy pesticides will also be a thing of the past. Read Also: What You Should Expect From A Pest Control Visit 5 Tips To Keeping Animals Away From Your Garden 5 Essential Tips To Designing A Beautiful Front Yard Garden
READ MOREDetails
10 Fabulous Ways to Update Your Home Interior Using Wallpaper
Wallpaper is a versatile material. Its use is not restricted to simply covering walls so that home interiors can look more presentable. Home interior can be made fabulous when you are using the interior wallpaper. In a young adult novel by Judy Blume, a character named Rachel Robinson presented a clever hack with wallpaper — she used it as a beautiful cover for her school notebooks. Indeed, similar to this example, there’s no shortage of ways to get creative with wallpaper. So, if you are looking for an affordable way to update the look of your home, provided below are 10 exciting ways wallpaper can help you achieve this. Different Ways Your Home Interior Can Make Things More Attractive Multiple ways you can make your home interior look gorgeous is illustrated in this article broadly explained 1. Create an accent wall If you like the look of your painted walls, but you want one particular wall to draw attention, cover it with wallpaper or multiple designs of wallpaper. You can create a splash of color or bring in a luxurious texture just by using this stick-on wall cover, and you can even get this makeover project done in a day. 2. Create wall art Wallpaper comes in a wide range of designs, and you will find that some patterns look beautiful enough to be framed and displayed on a wall. Home Interior can be beautiful if the wall art makes sense with your requirement. If you feel like being extra creative in turning wallpaper into framed art, you can create a mosaic pattern by combining different designs. A clever Pinterest DIY-er even suggests using wallpaper on decorative plates, and it works. 3. Cover your tables If you like the look of continuity in the interior design of your home, how about using your wallpaper to cover the different tables throughout the house? This is a breeze to do. You just need to cut your preferred wallpaper to size and glue it on tabletops. If your tables have a glass top, you can just lay the wallpaper on the table and let the glass hold it in place. 4. Give drawers a fresh look Banged-up drawers can gain a fresh and more contemporary look if you cover them up with wallpaper. This is a popular trick you will find in Country Living, Martha Stewart, and other lifestyle magazines. Some people even like to use luxe fabric-like textured wallpaper; they are perfect not only as a cover-up but also for supporting the structural makeup of the drawers. 5. Replace old lampshades Again, if you want a look of a consistent or uniform theme in your home interior, use extra pieces of your wallpaper to decorate other home fixtures and features. Covering lampshades with wallpaper is another easy project that can elevate the appeal of your home further. 6. Jazz up your stairs If you have an eclectic style, consider creating funky stairs by covering the risers of your stairs with different designs of wallpaper. This is a quick and simple project that can instantly bring color and fun to your home interior. Another way to do this is by creating a stair runner using thick wallpaper with Afghan, baroque, and romantic designs. 7. Cover books on display Old hardbound books can look like new by merely covering them up with scraps of wallpaper. These make fancy decorative elements for offices and grand rooms. You can line them up on shelves, stack them to add height to vases and other decors, and even use these upgraded tomes to create floating shelves. 8. Decorate doors Give plain doors a more artistic and elegant vibe with wallpaper. Framed and panel doors, for example, can have a bit more personality or pizzazz if you lay wallpaper that’s been cut to size on the panels. Kamiseta Hotel in the Philippines decorated many of its doors this way, and it’s definitely one of the reasons why it’s been voted the prettiest boutique hotel in the country. 9. Create a new chair backrest Want to spruce up the design of an antique dining set? This is easy to do with a fresh coat of paint and wallpaper. You can wrap the slats of the backrest with wallpaper, or cut wallpaper to size to cover rectangular or circular backrests. 10. Line shelves and bookcases. Finally, if your shelves and book cabinets tend to blend into the background because of their color, you can turn them into complete eye-catchers by lining their interior with bright wallpaper. The impact is so charming and pretty. These wallpaper ideas are more than enough for your home design upgrade, but there are more than you can consider trying out. You truly are only limited by your imagination. So, keep a collection of your favorite wallpaper designs handy and, for sure, you will find new ways to use them for the improvement of your home interior. Read Also: 5 Health Benefits Of A Clutter-Free Home Find The Right Painters For Your Ann Arbor Home This Painting Season How To Choose LED Lights For Every Room In Your Home
READ MOREDetails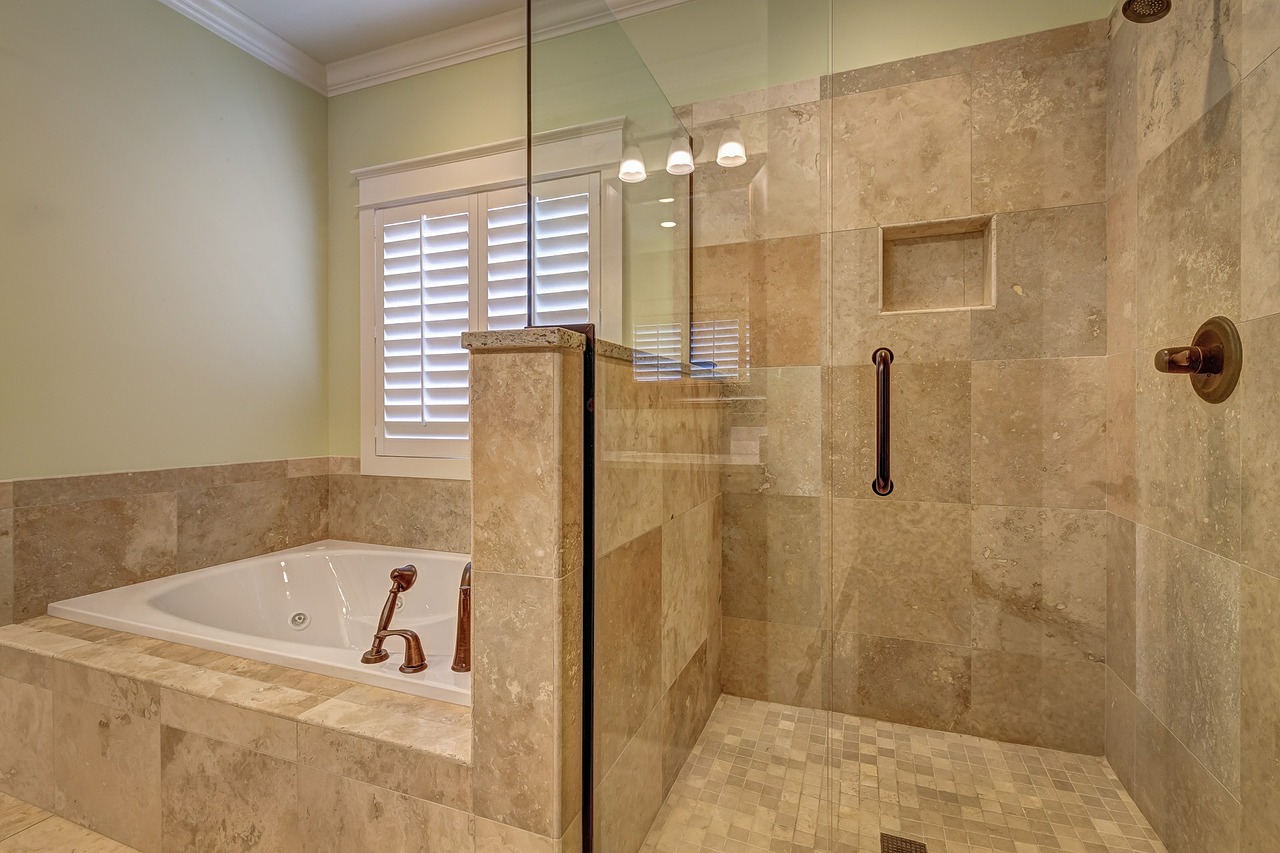
Considerations When Choosing the Ceramic Bathroom Tile
Covering floors means looking for an appropriate tile that will make the bathroom look attractive to give the person using the space to find peace and comfort. Ceramic bathroom tile comes in different sizes and shapes. You can opt for traditional or basic designs. Ceramic tiles add the missing attractive touch to the floors and walls of your bathroom. They are an ideal choice for the bathroom because they resist moisture and are available in different patterns. Depending on the type of taste you have for ceramic tile bathroom, there is always a guarantee that you will find one that will serve you for many years. Bathroom tiles are versatile in that they are appropriate in the shower, walls, around the bathtub, etc. their available in different materials such as ceramic or allow for beautiful mosaic designs. You can do a perfect mix and match to create a design that uniquely defines you. Why Do You Need a Ceramic Bathroom Tile ? Ceramic tiles are available in a wide range of colors and designs fit for any home. You can get the look that you need for that specific area at home without compromising the design or quality of materials. Water Resistance Ceramic tiles do not absorb water that lands on their surface and are naturally dry in wet and humid conditions. Durability Ceramic tiles are incredibly durable and not like to crack due to wear and tear. They have a lifespan of between 10 and 20 years. The strength makes it a popular material for many homeowners. They are affordable Other tiles, cannot offer the affordability and can take any form or design without a problem. A ceramic tile bathroom is durable and justifies the cost of purchase for which you can brag about. Tiles are Low Maintenance These bathroom tiles can be cleaned quickly by wiping away or mopping up dust with a liquid or stain remover. Using this low maintenance, tiles on the floor gives busy homeowners time to maintain a healthy and clean environment. Regardless of whether you are looking for simplicity, neatness, or detailed designs, here are ideas that could help in making the final decision. Color One striking feature that leaves a lasting impression on you and visitors is the color. Pick colors that define your purpose or the purpose of the room. From the choices of elegant shades to choose from, one color will fit your bathroom walls and floors. Price The price range depends on your budget. Some people will say that some features only money can buy and others have what you need but may not last long as expected. Play with what features you want to stand out once you get inside the bathroom and the amount of money you intend to spend on specific ceramic tile bathroom. Buying Bathroom Tile to Satisfy a Need Ceramic tiles can undergo customization to define the kind of interaction you want to have with it. The need could be determined by mixing shapes and sizes or playing with styles and designs to see what comes out as what you want. With all these in mind, you are bound to make the best decision when choosing an appropriate ceramic tile bathroom. Make sure to get a tile that will provide the service that you need. Read Also: Bathroom Remodeling Tips And Ideas Bathroom Upgrades You Should Consider Mirror Decorating Ideas To Style Your Bathroom
READ MOREDetails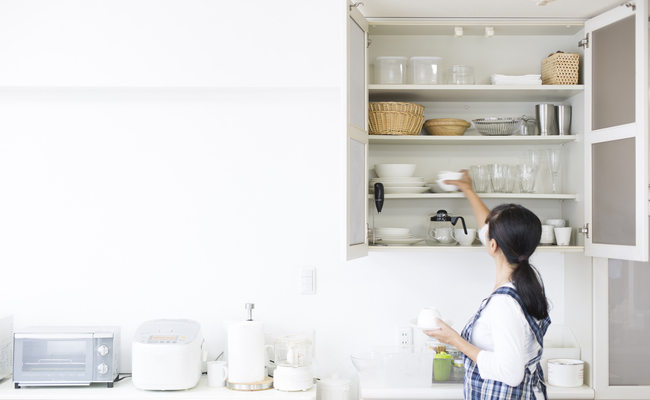
5 Health Benefits of a Clutter-Free Home
Are you sure that your home is thoroughly clean? Maybe, it's not! There are several reasons for having a clutter-free home. Perhaps, your home is looking clean, but have you checked all the hidden areas that you may not look adequately due to your hectic lifestyle? If you often feel stress and other health issues when looking at your messy home in Santa Cruz, then it's the right time to hire Anita's Housekeeping services in Santa Cruz; they'll clean it right away! Different Ways Clutter-Free Home Can Make Things Easier For You There are several ways Clutter-Free home can make things easier for you when you want to stay in your dream home. You Will Feel Peaceful: You may don’t realize the reason of getting stress and anxiety often. It is because of the huge mess inside your home as the level of stress directly linked to your area you are living in. Remember, visual chaos lead to mental stress. You may think to live with the piled on things, but they are most influencing intensely than you notice. Moreover, it is advantageous for your overall health as clean home drives no health issues in the long run. Thus, do plan and check to clean your home from time to time. Especially if you have a small area, you can go for self-storage units to put your random stuff inside it. Clean Home=Better Health: Your body has a natural tendency to crave for junk food when you are feeling stressed. What have you done so far to reduce these bad cravings? If nothing, then here's what you have to do: Your kitchen should be your priority to make sure that it is super clean so that you will feel encouraged to cook something healthy. Clutter and untidiness are stressful, cleaning up not only means to stop craves bad food but also really help encourages nutritious choices. The clutter-free home also doesn’t let insects, germs, pests, and bacteria to enter in that benefit your health. You Will Not Get Ill: If you don’t want to become sick often then cleaning and dusting your home regularly is a must. A tidy space gives no chance to bacteria and germs to hide. Adding to your carpets, bedding, and curtains carry most of the dust, so make sure to clean it regularly. Vacuuming should not be the only task; decluttering your floors is also essential. Try to keep fewer items in your home or organize them to their specific places. It makes your job easy to remove dust and sanitize open items. You Will Be More Active: Don’t you feel more energetic and productive when you find less cleaning work at your home? Disordered home makes it simple to procrastinate something you have seen. When everything is organized, you will think to do some other stuff, and you will less indulge yourself in cleaning. A clean home makes you physically involved in some tasks rather sitting in your bed. A clean home will make you active and productive throughout the day. You will be more proactive towards other work like cooking, watering plants, and other household work. Dust-Free Home Reduce Breathing Issues: It is not necessary that you should clean your home only if you have some health issues. Even when you don’t, keeping your home clean and area around like garages and basements is a must. Dust and dirt sitting on the floor or your things can drive allergic reactions, bad air quality, and encourage breathing problems. You are more likely giving scope to dust to enter if you have clutter all around on the floor. It actually helps you not to become sick if you clean your home regularly. Conclusion: We hope all of the above health benefits of a tidy home give you some motivation in your home-cleaning step. You will definitely feel the difference once you are done. Happy cleaning! Read Also: 7 Tips To Increase The Value Of Your Home 7 Benefits Of A Clean And Decluttered Workspace 5 Tips On Effectively Picking A Tile Floor Cleaning Machine
READ MOREDetails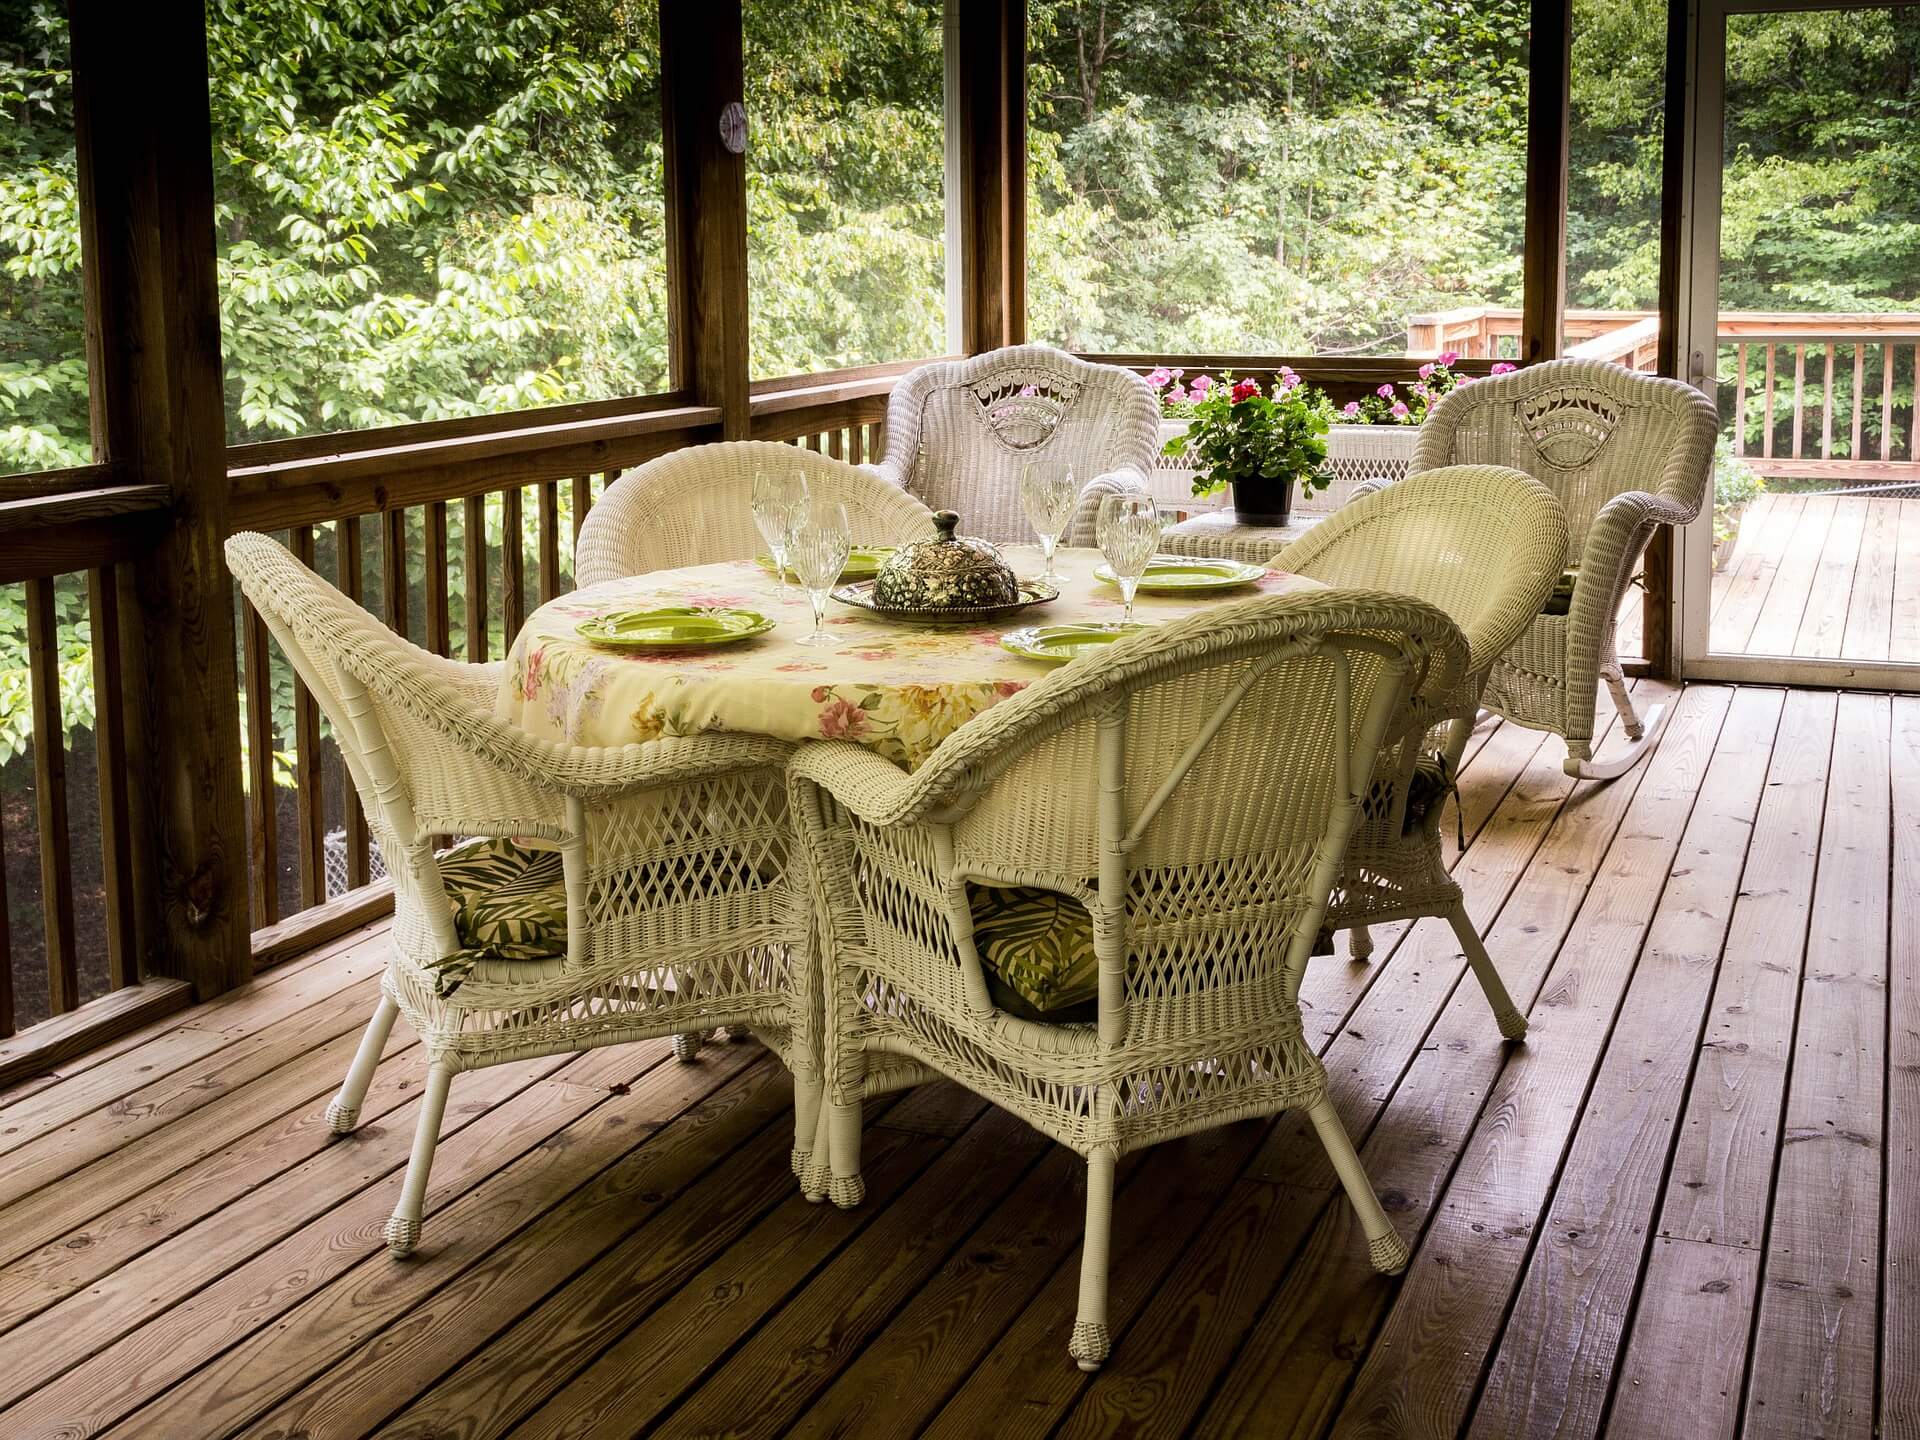
How to Make Your Screened Porch as Comfortable as Possible?
Outdoor living is in, especially during the sweltering summer months. Turn a staid, screened-in porch into a tranquil oasis with some comfortable furnishings and ambient decor. These are our favorite tips for creating a screened space you'll want to live in all year long. Treat It as Your Home: Don't be tempted to skimp on furniture for your screened-in porch. Many homeowners rely on basic patio furniture rather than adding comfortable cushioned couches and chairs that create an inviting space. Outdoor poufs are a versatile choice that does triple duty as extra seating, a footrest, or a convenient side table. Choose options with weatherproof fabric that provides easy maintenance and care. The cozier you are on the screened-in porch, the more likely that you (and your guests) will want to spend time there. Think of this area as a natural extension of your home. When choosing furniture, picture how you want to use the space. If you plan to entertain, are you envisioning cocktail parties or boisterous family dinners? Pick your pieces accordingly. Add Accessories: Those little details are a major part of making the patio feel like an extension of your indoor space. Think colorful throw pillows, durable rugs, side tables for snacks and beverages, and accent lighting. Choose colors that coordinate with your indoor palette for a seamless transition from inside to out. Pillows and throws in various textures will add visual and tactile interest. Potted plants add more life to space while emphasizing its natural elements. Keep It Cool: For a three-season porch, you can use from spring to fall, consider screened-in, porch-cooling options to see you through the hottest days of August. Ceiling fans are more effective than a window AC unit, and they create a cooling breeze that will provide relief. Evaporative coolers lower the temperature by using humidity. With these units, cold air is blown over water droplets that chill the air as they evaporate. You can also install shades that can be pulled down to keep the cool air in during the summer and to block the cold air out on chillier nights. Look for transparent versions that will preserve the outdoor feel of the porch. Promote Relaxation: Both real and battery-powered candles create a romantic light that enhances the porch's appeal. String lights provide a similar function. If your home is in a suburban or an urban area that tends to get noisy, consider outdoor speakers through which you can play relaxing ambient noise, such as ocean sounds or birds chirping. You can also plant a row of trees or shrubs to dampen the noise, provided it doesn't block your view. Consider adding a fireplace to your screened-in porch, which has the added benefit of allowing you to enjoy the space when the weather cools. By incorporating these design ideas to add life to your screened-in porch, you're expanding the usable square footage of your home and increasing its value. Best of all, you'll have a space your entire family can enjoy together for years to come. Read Also: 7 Ways To Add Character And Style To Your Home 7 Unexpected Ways To Use Glass And Wood For Your Home 5 Things You Should Know About Heating And Cooling Tiny Homes
READ MOREDetails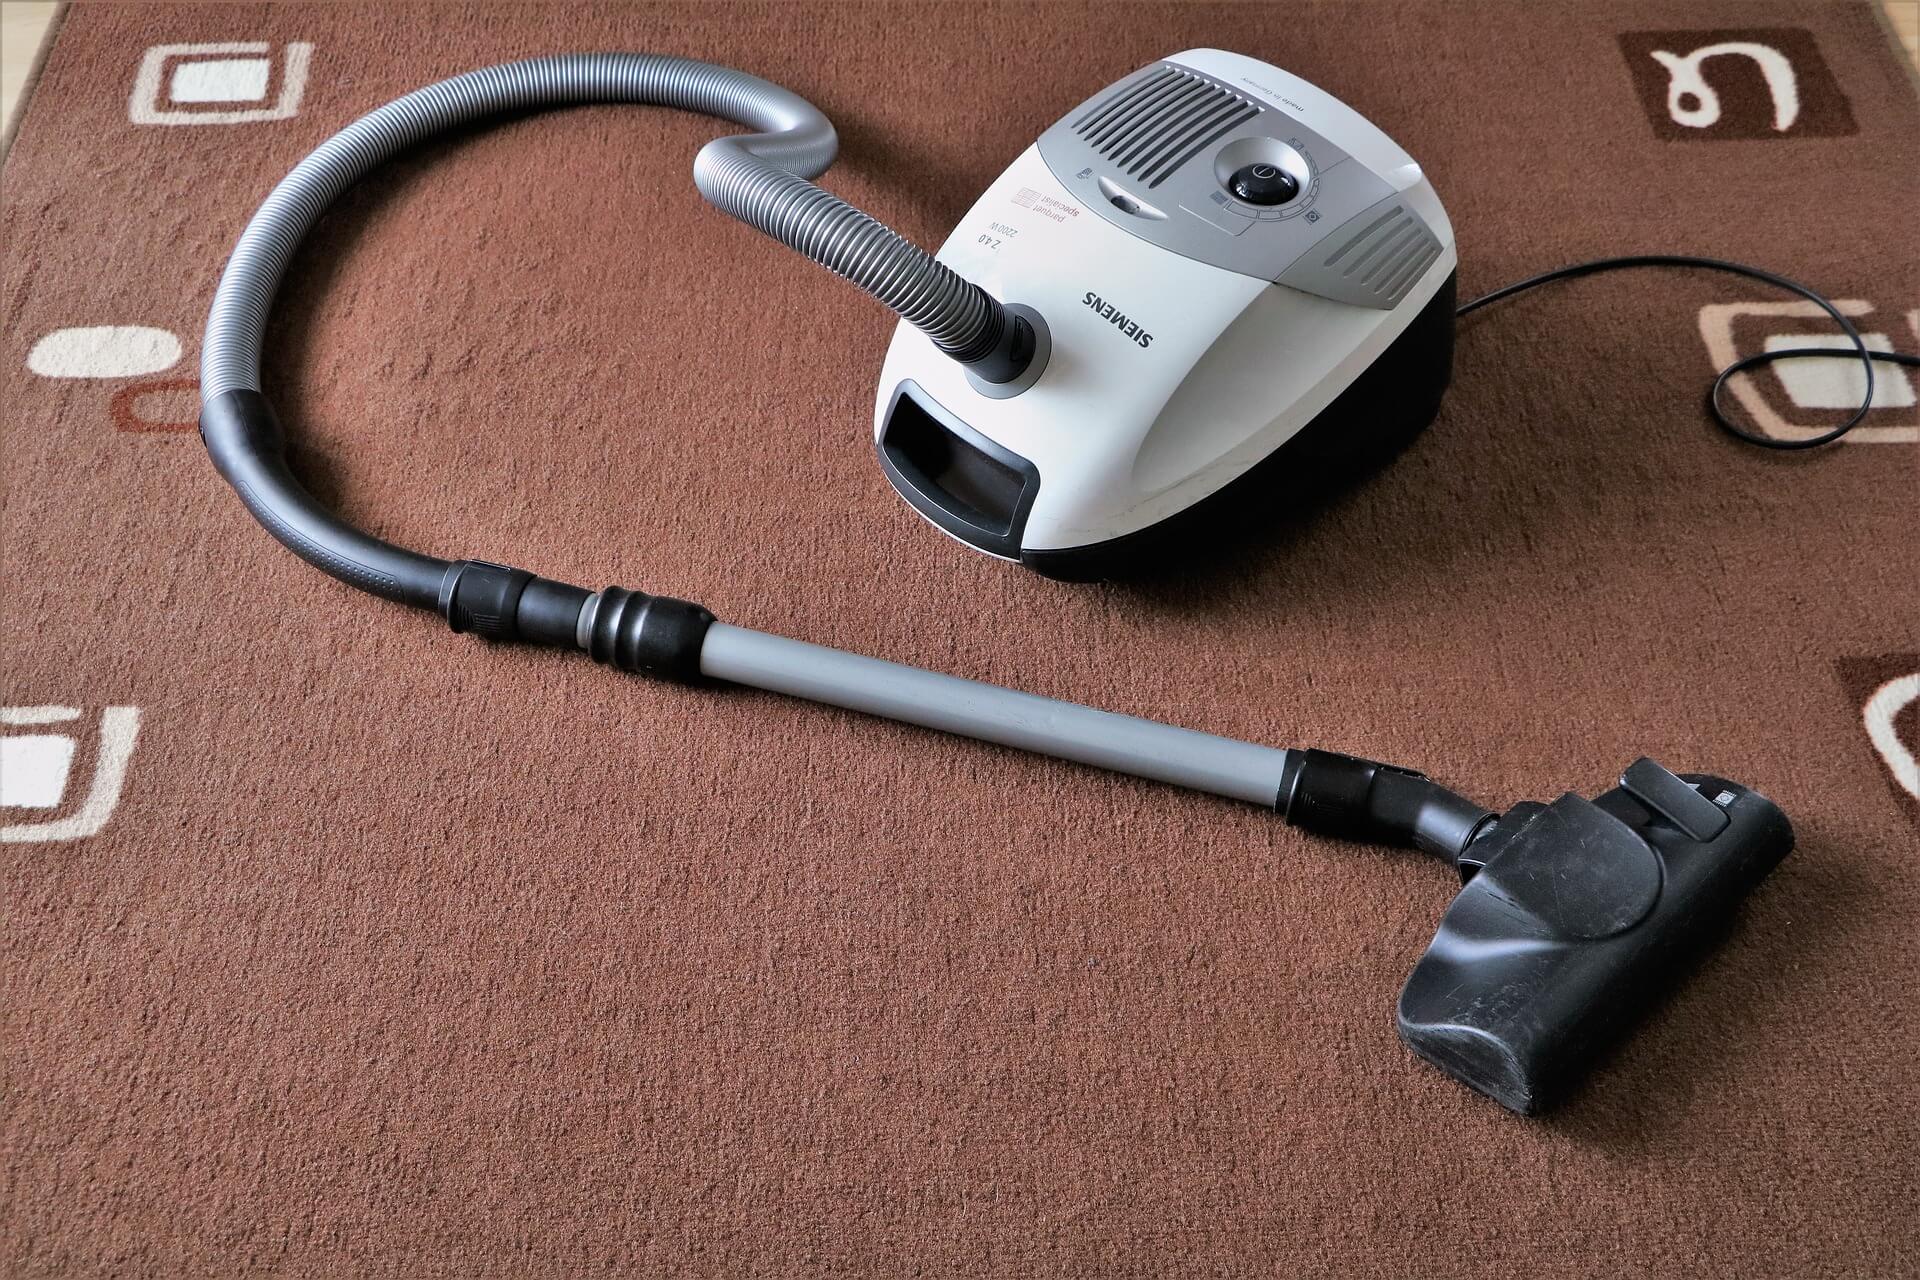
10 tips for preserving your carpet’s design
When carpets are new, they stand out because every fiber is clean and flawless. However, as people walk on carpeting, the condition of its fibers changes, and this makes the pile less appealing. Carpet cleaning Environmental elements can affect a carpet's beauty as well by covering various fibers with microscope contaminants. If you want to keep your carpet in optimum condition in order to maintain its beauty, you'll need to follow 10 steps. 1. Vacuum: Dust and dirt gradually build up on carpet material. If a dirt or dust layer is very thick, it will make a carpet dull. To extract dust and dirt, clean your carpet with a powerful vacuum twice a month. While vacuuming, push the vacuum horizontally. Then, position the unit so that you can clean the carpet again vertically. The number of passes will vary depending on the carpet's condition. Select the best carpet cleaning technique can make things easier for you. 2. Prevent Mud and Dirt Stains: Most shoes have grooves that produce mud stains. If mud dries underneath a pair of shoes, it turns into dirt, and these particles can ruin your beautiful carpets. This is why you must place a mat that has stiff fibers near the front door. If everyone brushes their shoes against the bristles before entering your home, the carpets will stay clean. The dense bristles on the mat will wipe away any mud or dirt that lingers on everyone's shoe soles. 3. Clean Spills Quickly: When someone spills a beverage on your carpet, clean up the liquid fast. If you wait until the beverage dries, you'll have problems removing the stain. To clean up a spilled beverage, grab a paper towel, and dab it on the carpet fibers. Don't rub the towel on the carpet because you'll push the liquid down into nooks and crannies around threads. Whenever you need help eliminating a tough stain, treat the spot with soapy water. Then, dab a clean paper towel on the stain. 4. Keep Pets Off Delicate Carpets: Pets that spend a lot of time outdoors shouldn't relax on your carpeting until they take a bath. The big problem is that pets have fur that holds dust and dirt. If contaminated fur touches tall carpet fibers, dirt will transfer onto the carpeting, and some particles may reach the bottom of the pile if a pet rolls or sleeps on the material. 5. Change the Furniture Layout Occasionally: Furniture that's very heavy can damage delicate carpeting. Typically, the degree of damage is influenced by the length of time that a piece of furniture stays in one spot. The legs on hefty furniture can cause severe damage; they usually create crevices that make carpeting unappealing. In order to keep the fibers springy, simply change the layout of your furniture twice a year. If you can't move your furniture because space is limited, invest in rugs with patterns that compliment your main carpeting. Place these rugs underneath the heaviest furniture to give your carpet a layer of protection. 6. Pull the Fibers: Over time, as heavy furniture is pushed around a space, some areas of a carpet will buckle. If a carpet is very weak, ripples will also develop in isolated zones. These problems won't go away until someone pulls the fibers. Whenever you find rippling or buckling, implement procedures to correct the problems before creasing occurs. Creases can make the most attractive carpets less appealing because they create elevated zones that are tacky. To get rid of buckles and ripples quickly, let a seasoned carpet technician tackle the job. A professional can stretch out the carpet safely and efficiently without damaging the material. 7. Paint Interior Zones Strategically: Paint can ruin a carpet if it drops on its fibers. You'll have to deal with bigger problems if you accidentally smear paint on the fibers or step on a layer of spilled paint. Once pressure is applied to paint, it will adhere to the fibers more efficiently, and the process of cleaning it up will be very challenging. Whenever you're going to paint the interior walls around your home, you must prepare the space for the job. Place your paint cans and trays on a high counter or shelf so that no one will accidentally spill paint on your carpeting. While painting elevated areas, never coat your brushes or rollers will excessive paint. This strategy will prevent splattering as you apply coats on the high ceilings and walls. 8. Lease Carpet Cleaning Equipment: Deep cleaning is an essential cleaning job. The equipment makes a carpet beautiful by washing soiled areas with a soapy formula. As the water soaks the fibers with rich soapy water, a brush loosens the dirt by spinning against the carpet material. After a carpet is deep cleaned, no dirt lingers on its surfaces because a deep cleaning unit extracts the dirty water into a convenient tank. 9. Replace Air Filters: Air conditioning equipment uses ducts that can direct pollution into a home. However, all air duct systems are able to block contaminants before they enter a home using filters. When a filter is dirty, it must be replaced in a timely manner. If you replace your air filter regularly, thin layers of dust won't generate on your carpeting. Filters are the best carpet cleaning technique to make proper use of it. Carpet cleaning can make things easier for you to achieve your objectives. 10. Hang Blinds: The sun produces very harsh UV rays that can damage delicate carpeting. If a carpet is a light color, intense heat from the sun can create noticeable spots on the carpet. By hanging blinds on multiple windows, you'll shield sunlight and protect your carpeting. Car cleaning can make your ambiance more aesthetic than before. Read Also: Run Cleaning In Dallas: Why A Professional Cleaner Is Better Five Ways To Improve The Air Quality Inside Your Home Benefits Of Having A Cordless Vacuum Cleaner At Home
READ MOREDetails
7 Smart Tips to Improve the Efficiency of your Refrigerator
Thanks to some home appliances such as air conditioners, fans, air coolers, inverters, and of course refrigerators; we can tolerate the summer easily. During the summer season, the amount of power used is directly proportional to the temperature. With an increase in mercury, the need for cooling appliances also goes up and so is the electricity bill. Talking about the fridge, it is not only storage for storing perishable items but also a savior during the summer season. Right from cold water to chilled shakes to ice creams to fresh fruits and juices, ice cubes, and more, it provides us with all. Nonetheless, with all this, it also leads to an escalation in the monthly electricity bill. A great example is with the residents of Texas for taking care of their electricity bills. They are able to choose the best and cheapest electricity plans from the most reputable electric companies in comparison websites such as HomeEnergyClub, where they can compare Texas energy plans side by side. In the same context, here are some simple tips that will not only increase the efficiency of your refrigerator but even help save power. Read on! Follow these Tips to Make your Fridge Efficient Want to make your refrigerator even more efficient, and sustainable for use? Follow these following steps. 1. Set the Temperature right Do you know that keeping the fridge at a high temperature consumes more energy, leaving you with a higher power bill? Hence, to make your fridge’s compressor work easily, keep the temperature lower between 0 and 5 degrees. 2. Don’t Let Your Fridge Face the Heat It is recommended to keep your refrigerator away from direct heat such as sunlight, oven, or stove heat. It is because the fridge will then use more energy to adjust the continuous heat on it to maintain the chill. On the other hand, if you place it under a shadow with proper ventilation, it will help in the reduction of energy. Proper ventilation is needed in smooth heat flow produced from the fridge. 3. Defrost the fridge often The defrost button on your refrigerator could be a lifesaver for it! Doing that on a frequent basis will help your fridge to maintain efficient cooling! Also, you will be able to save up to Rs.10 per day on the electricity bill. 4. Storing open containers is a no-no If you keep the already opened food containers and bottles in your fridges, then the internal moisture level will rise to force the compressor to work hard. It will reduce your fridge's efficiency and increase the power bill. 5. Regular fridge maintenance is a must It should be your duty to clean your refrigerator on a frequent basis if not daily. It can help the compressor to work even more efficiently. You only need to spare 30 minutes out of your busy schedule to do it, and your fridge will thank you by working powerfully. Also, you should ensure to get the condenser coils of your fridge cleaned at least once a year. You can do that by unplugging the unit and brushing or vacuuming the coils carefully. It will help to enhance the fridge’s efficiency by up to 30%. If you are unable to do that, you should get it done by a trained professional once a year. 6. Make room You should also make sure that there are a few inches of space between the wall and the fridge to maintain good circulation. It will also help your refrigerator to run without issues and proficiently. 7. Practice some smart habits You can also practice some smart habits so that your fridge gets some rest. Have a look: Try to open your refrigerator less frequently Cool the hot foods before keeping them in the fridge Cover foods Label the leftovers Ensure to keep your freezer full Buy a new fridge this summer and grab savings and cashback You can continue having your refrigerator working for years at its optimal level if you can follow the tips discussed. If you are ready to buy a brand-new refrigerator, then you don’t have to stretch your budget by paying the entire amount of your purchase in one go. Instead, you can divide the cost between a tenor; pay only a fixed amount and nothing extra. This way, you won’t need to handle paying additional charges other than EMI and save more. The easy EMI facility is offered by Bajaj Finserv EMI Network across India. Bajaj Finserv is also here to offer the Special Summer Offer on refrigerators and more. This way, you can buy an LG fridge, Godrej fridge, Haier fridge, Hitachi fridge, and more on easy EMIs to indulge in a hassle-free shopping experience. Tips for First-Time Renters on Using a Refrigerator Efficiently First-time renters, especially those new to managing a home, might find it tricky to keep their energy bills low. All the while keeping their fridges running efficiently. While the original tips are great for everyone, this section is specifically for renters likely dealing with space constraints, older appliances, or tight budgets! Here are some additional tips and tricks to keep your fridge in good shape and your energy costs down! Adjust the Fridge According to Your Space Renter-friendly kitchens are often small, and sometimes, you must make do with what you have. Also, suppose your fridge is fully cramped in a tight space next to a heat-generating appliance (like an oven or microwave). In that case, it works harder than necessary because of the proximity and exertion of excess heat. If possible, make sure your fridge has some space between the wall and other appliances to allow for good air circulation. Keep the Fridge Balanced Believe it or not, an unlevel fridge can impact how well it runs. Often, rentals are equipped with old or slightly wobbly fridges. If your fridge is tilting one way or the other, just use simple shims or small pieces of cardboard to level it out. A balanced fridge guarantees that the doors seal properly and that the cold air doesn’t escape. In fact, it also helps alleviate extra stress on the compressor, decreasing its energy consumption over time. Therefore, keeping it on a good stand is important. If you cannot buy a new fridge, at least buy the right equipment for it. Organize Smartly for Efficiency When you rent a home or an apartment, specifically if you choose to live in shared apartments, you don’t have an entire fridge for yourself. So, it is crucial to keep it clean but also to be able not to keep the fridge open for that long. I use little baskets or containers within my fridge so I can easily grab things without having to have the whole front spend open for too long. Use Electricity at Non-Peak Times If your rental has smart meters or time-of-use rates, then try to use the electricity that isn’t charged at a premium rate. Running the defrost cycle, cooling hot foods, or restocking the fridge during non-chargeable hours also helps. Insurance or Maintenance Plan on Rental Appliances Most landlords have maintenance plans, but it’s something renters tend to overlook. Before you start calling a technician over minor issues such as a cracked door seal or noisy motor, find out if your lease includes repairs/maintenance or insurance on the appliances. A well-functioning fridge also consumes a lot less electricity. Temporary Fridge Fixes for Old Units Rentals often come with older appliances. If your fridge lacks modern energy-saving features, there are small tricks you can apply. For example, adding a seal strip around the door can improve insulation. A simple thermometer can also help you keep the internal temperature just right—no need to run it colder than necessary! Be Mindful of Sharing Fridge Space If you’re sharing a rental with roommates, make sure everyone understands fridge usage. An overstuffed fridge can cause airflow problems, which means the food will cool unevenly and the appliance will use more energy. Also, ask others to keep things clean and remove old food when necessary. Final Thoughts for First-Time Renters Sure, everything has a learning curve, and running a home is no different. But hopefully, these extra tips will help you avoid energy-draining mistakes. (I’m talking to you, not throwing out anything that’s expired). Little choices can add up—your fridge will run more efficiently, and so will your wallet! Read Also: Important Things To Know Before Starting A Home Improvement Project Home Sweet Home Improvement: How To Find The Best Home Improvement Loans 10 Tips To Pick The Best Table Saw For Home Improvement Projects
READ MOREDetails
How to Choose LED Lights for Every Room in Your Home?
The lighting you choose for every room in your home impacts the overall mood and appearance of the space. In the same way that light from the sun energizes your body, the light coming from bulbs inside your house will also affect your focus and energy. Therefore, in choosing lighting fixtures for your home, you need to consider the purpose of each room and the most suitable lighting to install. How to Choose LED Lights for Every Room in Your Home: 1. Brightness and color of LED lights: There are LED bulbs that emit blue light which helps increase focus and alertness. Those that emit yellow light, on the other hand, induces a feeling of relaxation and calmness. LED bulbs with lower temperatures typically produce a warmer, yellow light and in contrast, lamps with higher temperatures have a cool white glow similar to the appearance of daylight. 2. LED lights for bedrooms: Bedrooms are supposed to be more relaxed and peaceful. In choosing an LED bulb to retrofit a bedroom, look for bulbs with a color temperature from 2,700 to 3,000 K. These tend to be warmer and produce a calming atmosphere. If you are unable to fit an entire room with new LED bulbs, you can retrofit an old lighting fixture using an LED bulb that is compatible with the existing installation such as an E27 LED bulb. 3. LED lights for a home office: In a home office, you will want lighting that helps in maximizing productivity. As mentioned earlier, LED lights with a touch of blue help you feel more alert and awake. That is why in most office and commercial spaces, bright white LED lights mimicking daylight are often used. In selecting a place for installing LED bulbs, make sure that these are not directly above computer screens to avoid unwanted shadows or glare. 4. LED lights for living rooms: The living room is typically a multi-purpose space used in entertaining and relaxing. As such, there needs to be a mixture of light sources to create the proper atmosphere and ambiance depending on the occasion. As much as possible, avoid bright LED lights for living rooms and try to incorporate features such as dimmer switches and spotlights. If you will be adding adjustable spotlights or recessed downlights, install them near walls and corners to avoid shadows. 5. LED lights for dining rooms and kitchens: Dining room lighting should not be too bright as it can be too distracting to the diners. Install LED lights with warmer temperature and dimmable features to adjust the ambiance of the room according to the time of day. On the other hand, kitchen lighting needs to be functional; thus, blue-light LED bulbs are perfect for kitchens. Adjustable spotlights are also perfect if you want them over specific work areas so that you can concentrate bright light only when needed. If you have a breakfast bar or a small dining area in the kitchen, make sure that there is separate lighting overhead to have a layered lighting scheme that complements the purpose of each area. Read Also: A Rundown Of The Basic Led Lighting Las Vegas Electricians Share Fun Lighting Ideas For Your Home Unique Military Hardware Concept Integrated Into Lumitact Flashlights Create A Stunning Outdoor Space With These Residential Landscape Lighting Tips
READ MOREDetails
Best options of House siding and its characteristics
Siding option is the best idea to modernize the home exteriors. Consider the important things of durability, affordability, style, and maintenance included in the requirements of siding material. With the unique climate of rainy, humid winter, a sunny temperature in Vancouver knows the quality and the different siding characteristic to fit in the roof of residential. There are different sidings products are available in the market to hold up against the appropriate weather conditions. The factors of the siding will make a difference in front planning and long-run. Here the tips to choose the best siding among the different materials are explained below. What are the types of siding is available and it is suitable for? The following types of siding offer a vast array of visual styles to roof with different impacts. Make research before choosing the upfront siding material and installation requirement. A strong base of siding material and understanding their differences will affordable to protect home along with the beautiful look. Fiber-Cement Siding: Fiber siding method includes the material of cellulose fiber, fiber-cement, cement and sand for exterior siding provides the result of strong durability and comparatively affordable than other siding materials. There is lap, shingle, vertical and panel siding methods are available in the good range of colors with styles in the fiber siding. Vinyl Siding: Choosing vinyl siding for home is the ideal choice to get a great balance and affordability in the roof. Its durability provides leading to share roofs by the method of vinyl service, gutters, and roofing characteristic. There is some tip to choose the ideal vinyl siding as listed below Doesn’t need to Scrapping and repainting Improved Exterior insulation Free maintenance of color from fading Durability Vitality Metal Siding: A moderate upgrade from vinyl siding that gives enhanced durability with low maintenance in stylistic choices. It’s eco-friendly material and easy to recyclable than vinyl. Metal siding is made up by the combination of an aluminum material comeback and brings it with the several steel styles. The process of appealing the metal siding takes less time than wood siding. Wood Siding: Wood siding types are the most common siding types used as an Ideal siding Vancouver, which consist of pine, Western Red cedar, and Douglas fir. Cedar Siding – Instantly connotes timeless for a warm house with the natural look. Wood siding needs commitments on maintenance. Stone Siding: Stone siding is made by the constant style it never seems to go out from the manufactured veneer. Installing this siding takes a long time but it gives the absolute look of rustic articulate. The polyurethane molded stone siding is advanced by the technology and competitive for real stone siding. Stucco and faux siding: Stucco is a plaster mater for siding made-up with cement, limestone, and sand. It restricts the damages caused by insects and fire. Faux stones are blocks of cement blends with iron oxide pigments to provide the thing as cultured stone. Mortar-less stack stone options are available in the faux stone siding, durability and half the weight from stone siding makes to work easier in installation. Read Also: 7 Unexpected Ways To Use Glass And Wood For Your Home Top 5 Motorhome Tips 7 Tips To Increase The Value Of Your Home Home Decor Is An Art Itself – Things To Know
READ MOREDetailsPopular

Technologies For Creating A Startup Idea
20 Feb 2023

How to Download Facebook Videos on Android?
07 Feb 2019

7 Rules of Effective Ecommerce Web Design
28 Jan 2021
