Non-Serrated Steak Knife Set: A Buyers Guide

Published on: 06 September 2019 Last Updated on: 07 September 2019
Non-Serrated Steak Knife

The first thing that you need to know about steak knives is that they are different from ordinary knives. Steak knives are specifically designed to cut through steaks easily. If you use a regular knife to cut a steak, you will most likely get shredded pieces of meat instead of evenly cut slices.

Using the wrong knife can turn what should be an enjoyable dining experience into a frustrating one. So if you want to enjoy your steaks, you need to get yourself a good quality steak knife set.

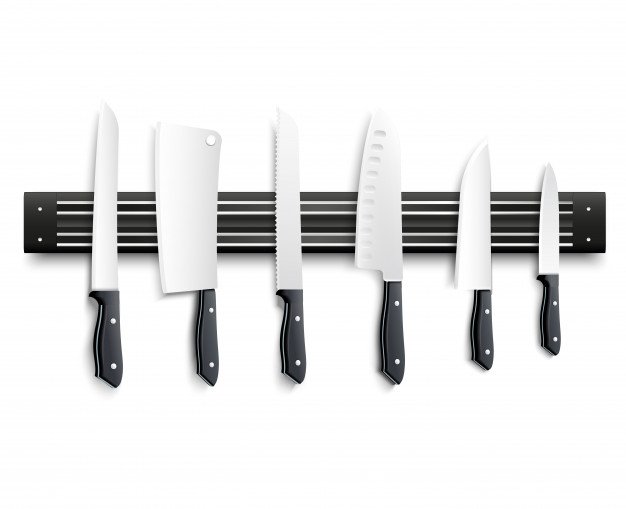
Many prefer straight or non serrated steak knife set over a serrated one, especially those who are particular with the appearance of their steaks. Unlike serrated blades, straight blades do not have jagged edges, so you get perfectly cut steaks every time.

Also, you can sharpen non-serrated steak knives frequently so you will always have a sharp knife.

Here are some other things you need to consider when buying a non-serrated steak knife:

The Knife Should Fit Your Hand Well:

If you’re buying a non-serrated steak knife set for yourself, then you need to make sure that the handle can fit in your hand comfortably. This is why it’s advisable to check the handle and test the knife first before buying it.

Of course, this would be difficult if you are buying a set online. What you can do is to check the size and dimension of the handle and determine its shape. The presence of curves and edges can sometimes provide a better grip for a knife.

It’s essential to feel comfortable while holding and using the knife to make your experience of eating steak more pleasurable.

What is the Blade Made Of?

It’s also essential to determine the material of the blade. The best steak knives are those that are made from carbon steel. These knives are very durable, and they are also effortless to sharpen. However, they can be quite costly, so they are not ideal for people on a budget.

A cheaper alternative is a set of knives made from stainless steel. The best thing about stainless steel knives is their ability to resist rust. Stainless steel knives are also very durable and do not easily break. 

A Set that Looks Good:

Last but not least, you should get a set of non-serrated knives that you will be proud enough to show off. If you like having guests over for steak dinners, then you should get a set of good looking knives that shows your exquisite taste and good aesthetic sense.

After all, eating steak is a multisensory experience. You should not only feed your mouth and tummy, but you should also take care of your eyes as well. The best non-serrated steak knife sets are real works of art. You will not mind displaying it in your kitchen.

Getting the best non-serrated steak knife set is vital if you value a good dining experience. A good set of steak knives will surely make eating steaks more enjoyable.

Read Also:

Content Rally wrapped around an online publication where you can publish your own intellectuals. It is a publishing platform designed to make great stories by content creators. This is your era, your place to be online. So come forward share your views, thoughts and ideas via Content Rally.

View all posts

Leave a Reply

Your email address will not be published. Required fields are marked *

Related

Home Safe

Here Is How I Stay SAFE! Top 10 Effective Tips to Keep Your Home Safe

A burglary occurs every 18 seconds in the United States. These statistics are scary! Even safe neighborhoods experience crime from time to time, so you need to be prepared. The good news is that there are several ways you can go about making your home safe. Some may require that you purchase equipment while others may not. The more you can thwart a burglar's plans the safer your home will be. Tips that will Help you to Keep your >H>ome >Safe</span&gt;  When thinking about improving overall safety, do not forget to follow the following tips.  1. Change Your Locks: Did you just buy a new home?  Don’t be so excited to get the keys that you forget to change all the locks. No matter how wholesome the previous homeowners may seem, you never know who is unscrupulous and who isn’t.  You also never know who they may have given a key to in the past. It could have been a distant relative, a nanny, a house cleaner, or a handyman, to name a few.   The point is, you don’t know if a shady character doesn’t have a copy of the keys to your new home. The best thing to do is to hire a locksmith to change the locks.  2. Get An Alarm System: Sure, you may not want your home to feel like a high-security vault, but it is never a bad idea to be prepared for the worst.   There are literally dozens of safety systems you can choose from. This makes it more likely that you will find something that is within your budget.  There are also some security systems that you can install yourself. However, if you do get a high-tech security system the security company will have to install it for you.  Once you have installed your security system, put a security sign in your front yard or place security signs on your windows to deter criminals.  If you think that an advanced security system is something you will not be able to afford, you can always go for robust roller shutters.   Roller Shutter People are leading installers in Sydney that states that installing these on windows and doors can be a simple, yet time-tested and effective way to keep burglars out of your house and maintain safety.  3. Vacation Wisely: Criminals like to target homes when people go on vacation. Protect your home when you are away by setting timers on your television and your lights.  These timers make it easy for you to have your lights and your television on at specific times. When criminals think someone is home, they are deterred from committing crimes.  4. Get Smart: These days you can monitor your home from anywhere using smart security cameras. Some of these cameras are so tiny the average person might miss them, and you can control them from your smartphone or tablet.  Smart lights should also be a major part of your security plan because you can turn them on or off whether you are just down the road or in another country.  5. Exercise Mail Control To Keep Your Home Safe:&lt;/strong&gt; If you are going to be away for a while, then it is usually a good idea to get a friend or neighbor to take your mail and any delivered packages off your front porch at least once per day.   If your front porch or doorway is flooded with mail, it is a dead giveaway to criminals that no one is home.  You can also go to your local post office in Gainesville FL and explain that you will be away for a while and ask them to hold all your mail.  6. Rethink Your Landscape : Did you know that the landscape edging of your home can either deter or attract criminals?  Overgrown bushes and untrimmed hedges can provide places for thieves to hide so that neighbors and passersby cannot spot them.  Trim bushes and hedges to at least three feet in height. Plant thorny bushes near your windows with gravel nearby so that it is easier to hear footsteps.   The more you can make it difficult for criminals to gain entry, the more secure your home will be.  7. Motion Detector Lighting: Motion detector lighting shines the spotlight brightly on anyone who may try to get onto your premises. As soon as an intruder moves so does the light.  You should install motion detector lights at the back and the front of your home, for added protection you can add them to the sides as well.   One of the many benefits of this kind of lighting is that it saves energy since it is only activated when it detects motion.  8. Get A Video Doorbell: You can get a video doorbell to keep your home secure. A video doorbell will let you see who is at your door before you open it.  Astonishingly enough, many thieves ring your doorbell to get a feel for who is home or not before attempting a burglary. A doorbell camera will give you the upper hand should a thief decide to rob you.  Installing Rodann door chimes is also another security feature you can use. The chimes will alert you when anyone is within a certain distance from your door.  9. Get A Dog: With all the high-tech security systems mentioned so far, getting a dog may seem like a low-tech way to safeguard your home from intruders. However, if you can get a dog then do so, since burglars tend to avoid homes with dogs.  When a thief wants to rob a home, they want to be in and out as quickly as possible, and a barking dog attracts too much attention and is an unnecessary complication.  10. Watch What You Post On Social Media: Social media has become a place where you can share the daily happenings of your life with family, friends, and neighbors.   However, if you go on vacation or are away for a weekend, it is not a good idea to announce your absence from home on social media.  This is especially true if you don’t know everyone in your network. Announcing you are away and posting pictures of your getaway is an announcement for anyone with bad intentions.  Literally telling them that you will be far away , and they should break into your home.  Top Safety Measures in a Rented Place  New job, and new rented house!  Everything is exciting about such a prospect, but how to ensure the utmost safety in a new place & home.  Moving into a new rented apartment can be an exciting time with new opportunities and a fresh start in life.   While you are excitedly packing and planning, taking stock of your security is essential when moving into another person’s property.   Here are seven safety tips to keep you safe during this transition.  Locks Don’t forget to lock all the doors on your first day of entering your new home or apartment. Additionally, never assume that previous tenants have returned all sets of keys.   So, if needed, get the locks changed upon consulting with your landlord.  Smoke Detectors Next, test the smoke detectors. You might assume they work, but never leave this to chance.   Press the test button on each detector to ensure they function properly. If you don’t hear a sound, replace the batteries or request your landlord to do so. Safety from fire hazards is non-negotiable.  Carbon Monoxide Detectors While you’re at it, check for carbon monoxide detectors, too. Not all places have them installed, but they’re lifesavers—literally.   Carbon monoxide is a silent killer, and having a detector can alert you to any dangerous leaks. Consider purchasing a portable unit if your new home doesn’t have one.  Check Windows Another important thing to do is to check the windows. They should open and close easily. You will also want to ensure that they have locks on them as well.   In case of an emergency, such as a fire, you will need a quick and easy way out of your apartment. If you live on the ground floor, being able to lock your windows is important for safety reasons.  Lighting your Outside You should also make sure that everything outside the apartment is well-lit. If something seems too dim or amiss, then tell your landlord about this right away.   If there are any lights outside, ask your landlord to replace them or put in some more lights. These include spotlights upon entrances or even motion sensor lights around corners.  Know your Area Finally, get to know your surroundings. Spend some time walking around, getting acclimated with the neighborhood, and pinpointing any places that might not seem safe, specifically at night.   Get to know your neighbors, as they can give you the lowdown on both the area and potential safety issues.  By doing these in the process of moving, your new rental will truly be a sweet home right off the bat. So you’ll feel better about unpacking those piles of boxes.  Hopefully these tips will help you feel more secure in your new place!  If you would like more lifestyle tips, please visit our website. You are sure to find helpful tips for making your life better. Read Also : 5 Tips To Safeguard Your Home From Intruders 5 Ways A Home Maintenance Plan Can Prevent Disaster Relax In Style In The Comfort Of Your Homes

READ MOREDetails
kitchen-2619008_960_720

Installing A Kitchen Tile Splashback – The Basics

Adding wall tiles to a backsplash can be a really simple and effective way to spruce up your kitchen sink area, as well as protecting the surface as well. Here we look at the basics. Home improvements needn't be expensive, all it takes is a little research and time and you can make a significant difference to the house you live in. Choosing tiles for a kitchen splashback can be a really simple and effective way to spruce up your kitchen sink area, as well as protecting the surface as well. For a project like this, you are likely to need little more than a couple of days to complete it, and a minimal amount of money to achieve a great result, depending on the equipment you already have. Before You Start Prepare The Wall Before you start, clear everything out of the way that may obstruct the job and/ or get broken or damaged while you work. You should also check that the wall is good for tiling as well – chances are you will choose porcelain tiles, which are heavier than more traditional ceramic tiles so the walls need to be up to support their weight. If there is any level of condensation you must wait for the wall to completely naturally dry out before you begin tiling. If the drywall you're working with isn't sound, you must repair it before you do any tiling. Plan The Design You'll need to plan your design before you can purchase your equipment or begin the project. Measure how high you want the backsplash to be from the countertop and consider the type of tiles you would like to use. If you are unsure, take a look at sites like Pinterest for inspiration. Get Your Equipment When buying your equipment, especially your wall tiles, try to start with more than you need. With porcelain floor tiles or wall tiles, it is always good to have extras in case some get damaged during the job or even years after and you need a replacement tile that matches. In order to determine how much tile requires you need to measure the length and width of the area, you are putting a backsplash on. Simply multiply the length by the width to get your desired wall tile amount. If you don't know what type of equipment you need for the job, speak to an advisor at the shop or warehouse and they will be able to advise you on the best tools for the job. Read also: Close Look At Top 5 Roofing Materials – Pros And Cons Install Once you have done all the correct preparation, it's time for you to install your backsplash. Safety First The first thing you need to do is make the area you are working in safe. All electrical appliances nearby should be either turned off if they are permanent fixtures, or moved away if they are temporary. Read also: Making Your Office Safer For Workers Clean The Area Using a clean cloth, gently wipe the area with warm water and let it dry naturally. Apply The Adhesive Using the manufacturer's instructions, apply your tile adhesive using a tile trowel. Make sure the adhesive is spread thinly and only apply enough adhesive for the area you are tiling, or it will dry before you have applied all the tiles. Lay The Tiles Place the first tile at the bottom of the backsplash in the middle. Firmly push the tile on to encourage it to settle into the adhesive and use a level to make sure it isn't wonky. Use a spacer or piece of cardboard on each corner of the tile and push them into the adhesive well. Continue to lay the tile's row by row, taking care to remove any adhesive that pushes up through the tile gaps. Ensure you are leaving enough room for grout and checking constantly that the tiles are level. Cut Tiles Away In A Separate Area Depending on the equipment you are using, you need to ensure you follow all safety procedures to ensure you are working safely. Ensure you only score tiles where the scored section won't be showing, and only score tiles when you need to, as the measurements needed may change as the job progresses. Wipe Once all the tiles have been laid you can wipe away any adhesive that has seeped out using a clean, damp cloth. Leave The Tiles To Dry You must leave the tiles to dry according to the time stated by the adhesive manufacturer. Trying to skip this process will result in an uneven backsplash and tiles that will not remain stable. Grout When mixing grout you should be wearing appropriate safety equipment such as gloves, goggles and a mouth mark. Grout the tiles precisely and carefully, taking care to wipe away any excess once it becomes firm. Once the grout has dried, you can then wipe the tiles off completely. Well Done! You should now have a fancy new backsplash to enjoy in your kitchen! Remember, if you take the time to do the job right, you should end up with a well-done backsplash that will look fantastic and last for years to come.

READ MOREDetails
led_flood_lighting

A Rundown of the Basic Led Lighting

“This blog shares some basic options available for LED lighting a house.” What is LED? The term LED refers to “Light-emitting diodes”. When these lights first made their appearance in the market, people were skeptical about their use as they emitted a bluish-white light, a bit unconventional for homes. But things have changed now. Advancement in technology and continuous researchers have made this high-efficiency LED lights to produce, the warm yellow hue that homeowners prefer in their interior. Read also: Secrets to the Perfect Bedroom Light People, worldwide have now shifted from the traditional incandescent bulbs to LED lighting in spite of their high initial cost, because of their efficiency. This high efficiency LED home lighting, ensures lower power bills, better quality of lighting and last much longer than a normal lamp. The other feature of these lamps is their versatility, which has made people switch from traditional bulbs to LED lighting. These lamps offer a varied range in lighting- from soft, cool lights to warm and crisp ones. They come in a wide range of designs and lets you play with the interior lighting scheme. Some of the variety in which LED lights are available for home décor are:  Tape, Ropes, Smart Bulbs, Pucks, Panels, and more. Here is a quick rundown of the basic options that you get with High-Efficiency LED Home Lightings inside your home:  LED Tape Lighting A flexible lighting option that can be used in two shades to create a light and shadow ambiance in a room, preferably bathrooms and kitchens. Use the usual “white” LED tape above the kitchen cabinets for a bright glow and stick “soft and warm” LED tape under the cabinets for warm illumination. LED tape light is a flexible tape of circuit boards with LED chips come with a self- adhesive back for easy installation anywhere. The tape can be cut according to preferred size. The chips are the lights that come in a range of brightness options. Read More: The Right Light Set-Up For Your Band LED Panel Lights The LED Panels are multiple of LED light chips, enclosed within a metal channel covered by a transparent acrylic case. They are brighter than the LED tapes as more LED chips are included in one space. The Panels come in a wide range of color options and can be dimmed and brightened as preferred. The LED Panels are of great use in bathrooms, for illuminating a bathroom vanity. Attached along the entire length of the mirror below and above, they give a soft, dramatic look. These panels are ideal for bathroom use as they are protected additionally by the acrylic case. LED Smart Bulbs The latest technology has brought LED Smart Bulbs in the market. The “smartness” factor in these bulbs comes from their management through smartphones, and other similar gadgets or the Wi-Fi network of a home. They allow the use of a wide spectrum of colors in lighting and also the control of the light warmth.  Use LED Smart Bulbs with Industrial Steampunk Pipe Light fixtures and change the look of your home. Ideal for a kitchen with a modern, minimalist look. Create a dramatic atmosphere by using these Industrial Steampunk Pipe Light Fixtures above the kitchen island to brighten up space and highlight it as well. You can also use this light fixture to lighten up the kitchen working space. Other than a kitchen, Industrial Steampunk Pipe Light Fixtures with LED Smart bulbs can also be used in studies as well as the poolside with appropriate interior planning. LED Puck Lighting LED lights create a pool of light in an area and let off less heat than Xenon puck lights. They are ideal for illuminating inside the cabinets and small corner spaces. The discs are ideal for creating a drama with light and shadow as the areas that fall outside the light focus, are left in the dark. You can get LED Puck lights in individual units or in kits as well. LED Ropes Ideal for outdoor lighting of a home, for patios, poolside, walkways LED Ropes to offer a soft bluish light. These are actually LED chips encased in a round plastic tube. The durability of the plastic and its waterproof nature makes LED Rope a better option of outdoor lighting. Read More:  Create A Stunning Outdoor Space With These Residential Landscape Lighting Tips Secrets To The Perfect Bedroom Light

READ MOREDetails