How to choose and install the right fog lights tint?

Published on: 16 August 2017 Last Updated on: 29 May 2021
fog lights

Fog lights, which are installed to ensure that the driver can see the road even through dense fog and climate conditions, usually come in limited color options. The most popular ones being white. In some of the best fog lights available; one would either use the blue fog light tint or yellow fog light tint. If you are confused as to which is better, you should read more.

Fog lights tint popular colors:

1. Yellow Fog Lights Tint

Yellow Fog Lights Tint

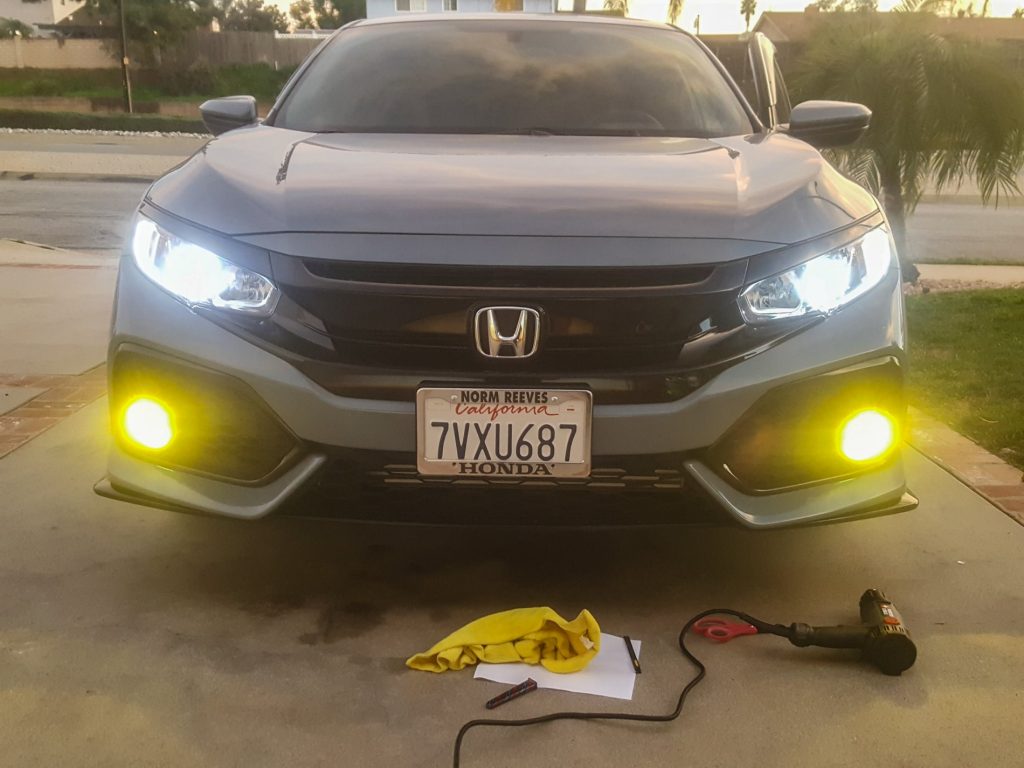
The drivers might prefer yellow for the lights as it pierces through the fog easily and even in rain and darkness. A lot of people prefer replacing white lights with yellow bulbs or try to use super bright and powerful white lights. However, yellow is considered the best for fog and rain to aid the driver’s invisibility.

The main cons of this colored tint are that once you switch the lights off, the yellow flashes remain for a while and it is not ideal for daylighting as it is really warm for a sunny day.

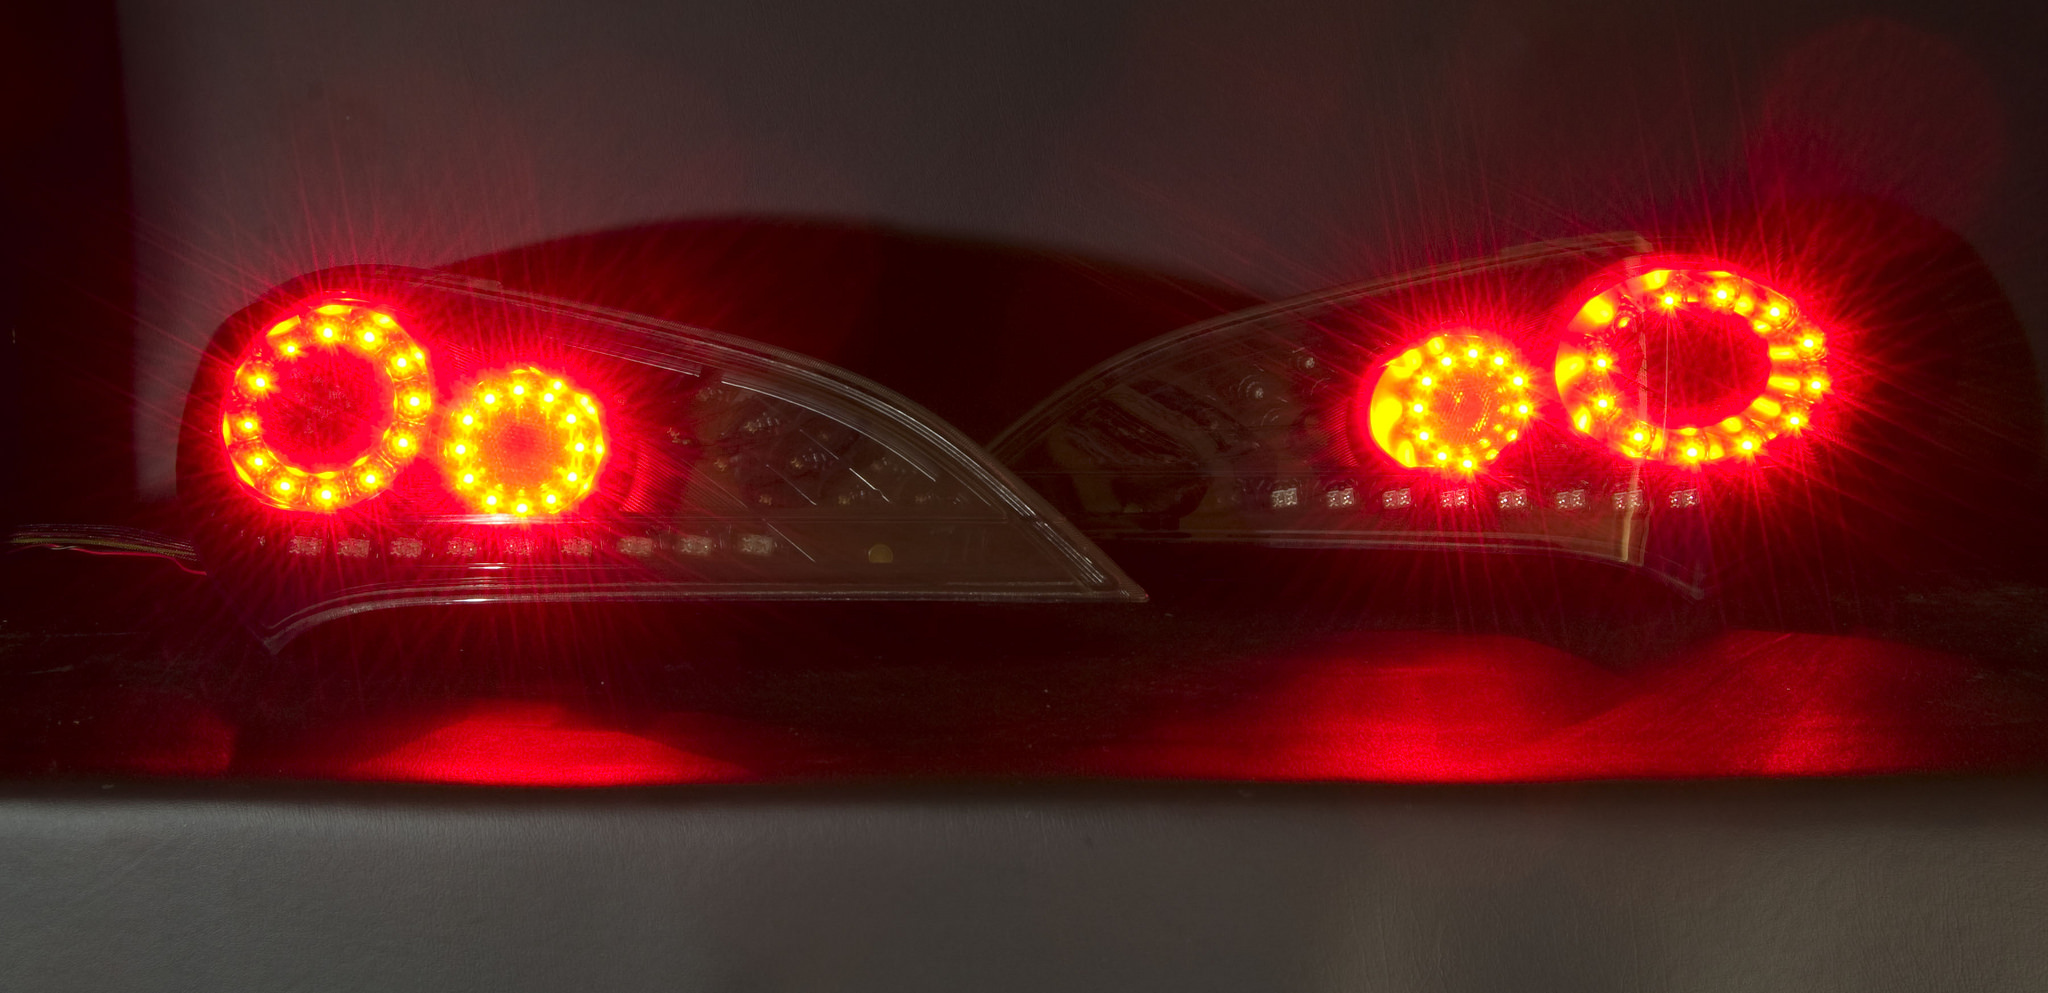
2. Blue Fog Lights Tint

The Blue tint will give a bright color and are very popular in European regions. Blue Lights are considered useful as it cuts through fog, rain and bad road conditions. They are better than halogen lights and are considered highly energy-efficient and consume low power.

However, they take time to power up. Blue lights will take a little time to reach their maximum brightness. At times, blue lights, if powerful can be blinding and takes a while to do away with the flashes which may affect the driver while driving.

You should always choose the tint for your lights depending on how and where you want to use them. It is always simple to tint your existing led fog lights if it’s one of the best fog lights available with a yellow or blue vinyl film which is easily available in your nearest hardware store or even online. Also, it is a super cheap alternative and provides you with the option to change it as per your liking. It can be easily peeled off. In addition to this, the vinyl film will also protect your lights and are resistant to corrosion.

This helps you to change your fog light color in case you decide otherwise. Tints are easy to install and since they are not that expensive, they can be replaced in case you are not happy with the finish.

Install a tiny film in 6 easy steps by yourself

Step 1: Purchase the right colored film

Evaluate your weather conditions and your usage of the vehicle. Ask your friends if they have used a tint before to see what color is the best. Also, keep in mind the traffic laws. A lot of traffic regulation certain colors as it can be blinding.

Step 2: Gather your tools

You will require a cut-kit, which is simply a collection of different sizes of blades to help achieve the perfect finish. You will need a clean cloth and cleaners to clean your lights, a dry cloth, a water spray, and a hairdryer.

Step 3: Clean your headlights

It is very important that you clean your headlights well. If there is any dust left, you will end up getting it stuck on your headlights. Clean it using a cleaner liquid and ensure it is clean and that there are no dust particles left behind.

Step 4: Position your film

Remove the back of the tint film and uncover the adhesive part of the film. Now place t carefully on the flat side of the headlight so that you get a good start on the film.

Step 5: Apply the film uniformly.

You can spray water on the top of the film so you can easily glide it through the entire headlights. Once you position your film, try to swiftly but steadily cover your entire headlights.

In order to cover the curved areas of the lights, use a hairdryer to heat the tint so t can easily get curved out as per your need. Make sure that you do not use too much heat as it might just damage the vinyl film.

Step 6: Trim the excess Vinyl Film

After you are done applying the film, ensure that you trim the excess parts carefully using adequate sized blades with clarity so that it looks neat. Seek help if needed.

Check if there are any bubbles and then try to use heat on them with a hairdryer such that the bubbles go away. You can also choose to pop the bubbles with a needle if required.

Now that you know more about the different colors of tint and how to install them, you can decide which color is most suitable. Also, choose a good quality tint for the best fog lights that you purchase. On the other hand, always buy extra tint because you might not get the perfect finish in the first attempt. You can also buy hella fog lights or motorcycle fog lights if you want.

Image source

Read More :

Abdul Aziz Mondol is a professional blogger who is having a colossal interest in writing blogs and other jones of calligraphies. In terms of his professional commitments, he loves to share content related to business, finance, technology, and the gaming niche.

View all posts

Leave a Reply

Your email address will not be published. Required fields are marked *

Related

Car Rims

What Do You Need To Change Car Rims?

If you’re a regular car user, changing your car rims is something that you might only do if they either get scratched by a pavement, or they get completely worn out.  For car enthusiasts though, this is a completely different story. Car lovers are known to tweak certain things about their cars just to make things look, sound or even feel better. Most of them do it as a hobby and are even prepared to spend top dollar in their quest to alter or improve the condition of their cars. If you think that this is a hobby that you could easily take to, then one of the parts of your car that could be easier, to begin with, is your car rims. For those that are completely clueless about cars, a rim is the cylindrical outer edge of a wheel that supports and holds the tire to it. They are definitely among the most noticeable parts of a car. For any true car enthusiast, having a set of rims that complement the car’s aesthetic appeal is very important. You might choose to have them off-the-shelf or get customized diamond-cut alloys. In fact, you can opt to design and personalize your own from scratch thanks to modern-day technology. Wheels vary in size and style, and this can adversely affect the type of car rims. Bigger wheels are considered sportier and are ranked higher, but they also come with their fair share of cons. Be ready to experience a change in fuel consumption, steering performance, speedometer reading, and quick tire wear if this is what you’d like to go for. A good rim is one that fits well in the tire. As it rotates around the tire nods, the contact that occurs produces friction that helps the wheel turn. You don’t want to have a set that interferes with your wheel turns, so it is advisable to seek help from a rim professional before purchasing any set. This will ensure that you get the most worthy set for your car. When it comes to types of rims, the steel rims are more affordable and are usually covered by a hubcap to make them more appealing. They are also heavier than other rim materials. The aluminum rims are stylish and durable, while the carbon-fibered ones are newer, durable and light-weighted. This helps a lot in the conservation of fuel. Simple steps to guide you when replacing your car rims: Installing new rims isn’t hard, but it requires careful execution and the right set of tools to make sure it’s done correctly. Be sure to follow these simple steps to guide you when replacing your car rims at home. 1. Select and buy New Rims The whole rim replacement process begins by purchasing a new set. You can do this by visiting various local auto parts dealers in your area. You can also opt to check online from a well-known shop that offers stylish yet durable rims. You’ll also have to give a bit of thought into the color. Red rims tend to provide a more personalized look while chrome rims give your car a nice and noticeable shine. Black rims tend to be more popular within the younger generation as it gives the vehicle a darker curbside appeal. Don’t forget to check the weight of the rim as this affects your vehicle’s overall performance. Also, be sure to match your new rims to your current tires. The diameters of the new and old set should be equal. You’ll also need to check whether the bolt patterns and bore circle diameter are similar in order to perfectly fit. Collision might occur if the rims aren’t fitting. 2. Make sure the Vehicle is Stable. Ensure you have a flat and level spot to park. For automatic cars, be sure that the car is in the park and the emergency brake is secured. We don’t want the car to accidentally roll forward or backward. Instances where the vehicle rolls are very common. This is especially when you end up rushing the process without paying much attention. This often happens to people who are removing a wheel for the very first time. You can use a piece of wood, a rock, brick or any other firm item that is a few inches high to support the wheel. 3. Lift the car and Remove the Wheel You’ll need to start off by removing the hubcap using a screwdriver. Similar to changing a tire, look for notches or grooves under the car where you can safely place the car jack. Take the car jack and use it to slowly raise the wheel until a bit of the weight has been taken off the wheel. Slightly raising prevents the whole wheel from turning as you loosen up the nuts. Apply force while removing the lug nuts as they’re usually tightened up pretty good. Before you loosen the nuts all the way, pump the jack and completely lift the wheel off the ground, but do not overly suspend it in the air. Then, use a socket wrench to turn the nuts counterclockwise. Make sure not to lose the bolts as they will be used with the new rims. Remove the wheel and lay it flat on the ground. 4. Remove the Old Rim Let the air out of the tire because it’s harder to remove the rim with all of it still in there as it will require more effort and take more time. Insert a tire lever on various points of the wheel; be careful not to damage the tube. Once done, go ahead and pry the old rim off the tire. You can also apply oil around the edges of the rim to make it easier for it to pop out. Make sure to do it evenly so as to prevent the rim from bending. Cheaper rims tend to bend easily and this makes them unable to be re-used once damaged. 5. Attach the New Rim Be sure to remove any dust from the side tubes and tires by using a wire brush. This will provide a clean and even mounting surface. After attaching the new rim, re-inflate the tire by using an air compressor. Carefully place the tire back on the hub and align the rim with the car’s wheel bolts. You can use your hands to screw in the nuts before you pick up the torque wrench. It is important to note that each vehicle has different torque specifications that are set by the manufacturer. So before you purchase one, make sure you look for one that is compatible with your car. They are a bit pricey and if you want a quality wrench you might have to spend close to $100. The car jack is used to apply a specific force to a bolt and prevent over-tightening. They make sure the wheel nuts are neither too tight nor too loose. These torque wrenches come in four styles; dual beam, bending beam, digital beam, and the click style. For the clicker, you’ll hear a click sound from the wrench once the required torque is attained. After you’re done be sure to reset the wrench to zero. This will help keep it calibrated for longer, but in case you happen to damage it, you can get it repaired by taking it to your nearest auto dealer shop. 6. Carefully Lower the Car to the Ground After you’re sure that everything is well in place, slowly lower the car to the ground until the tires have taken back the vehicle’s weight.  Afterward, proceed to gently remove the jack. Once done, attach the hubcap and repeat these steps on the rest of the wheels. When all the rims have been replaced, you’ll need to check the alignment of each wheel. You can do this through a test drive to be sure that the rims won’t pop off. Try and keep a low speed as you do so. In case the vehicle isn’t stable, you can go to your nearest shop and have a professional fix the issue. For all automobiles, the right set of rims is important.  This is because they contribute towards whether your ride will be smooth or rough. Comfort and durability come first for many drivers.  As you might have seen from the outlined steps, replacing an old rim isn’t necessarily difficult. Yes, it might take time, but the final result will be worth it. Be careful not to damage the rims or puncture your tires during the whole process as this will end up costing you, instead of saving your coins. If you still feel like you can’t manage the rim change on your own, remember, asking for help is always an option. Don’t hesitate to ask for assistance from people who are more familiar with such situations. It’s better to have it done well and ensure the durability of the car rims. Cars can say a lot about their owners. What does your car say about you? Read Also :  Useful Tips About Mobile Car Detailing To Avoid Any Costly Maintenance And Repair Issues Washing Your Car: 7 Dos And Don’ts

READ MOREDetails
Truck Clean

Keeping The Truck Clean After Off-Roading Trip – Effective Tips

Off-roading can make your truck extremely dirty. You might see mud, dirt, and small rocks stuck in different places. Cleaning the truck immediately after the trip is extremely important if you want to avoid rust and any permanent damage to your vehicle. Most people act lazy and end up working harder than required to truck clean. Sometimes you may have to take it to professionals for stubborn stains. Checkout Four Simple Ideas Help You To Truck Clean After Off-Roading Trip: If you want to avoid extra expenses, here are some effective tips to truck clean after an off-roading tour. 1. Pressure Wash As Quickly As Possible When you get back to the road after an adventurous trip in the rough terrain, make sure you take your truck for a pressure wash. You can do it yourself at home or take your truck to the cleaning station where professionals will thoroughly truck clean. Pressure washing will remove the dirt, mud, and debris from every nook and corner. A regular wash might not be as effective as a pressure wash. If you keep your truck covered with mud and dirt for too long, its body may be damaged and you might end up increasing your expenses. 2. Inspect The Vehicle Thoroughly After the pressure wash, you will be able to see a neat and truck clean. Now you can inspect your truck thoroughly. Make sure you check the underbelly, the exterior body of the truck, engine, and radiator, and other sensitive parts that might have a chance of damage in rough terrain. This thorough inspection can help you fix the problems before they become bigger issues. You might have doubted some trouble during the trip, now would be a good time to get it checked and fixed before it gets worse. 3. Use Surface Protectant Pressure washing your vehicle is not enough. You need to polish the entire body of the truck with a surface protectant. You can explore the market and look for the perfect sealant for your truck before you take it on another adventure. When choosing the surface protectant, check out its ingredients. A silicon dioxide formula would be great for window shields, paint, and wheels. It also lasts longer than simple wax. Apply the seal on cold and wet surfaces. Clean with a microfiber towel to avoid water marks. 4. Clean The Interior Completely Cleaning the interior of your truck is just as important as the exterior. When you are on an off-road trip, the majority of your time is spent inside the truck. You might eat and sleep in the truck. Therefore, it might get dirty. Oil, sweat, and food crumbs can make the interior dirty and smelly. You can vacuum clean the interior by yourself. Make sure that you are using car floor mats rubber instead of carpet. Rubber mats are much easier to clean and they look as good as new after every wash. Moreover, they will not trap any smell as a carpet does. Read Also: How Crane Trucks Can Drastically Improve Project Efficiency4 Things You Need To Know About Commercial Truck InsuranceWhat to Do if You’re in an Accident with a Placarded Truck in Tampa

READ MOREDetails
Motorcycle Safety tips

5 Most Important Motorcycle Safety Tips All Riders Need to Know

Your helmet's off, your hair's blowing in the wind, and you're cruising down the highway with the sun setting in bright oranges and reds. Life is good, right? As good as life may be in the moment, you may be putting your life and others at risk through reckless driving and ignoring basic rules. Even if you mean well, it's important to know how to ride a motorcycle safely, so today we'll take a look at five critical motorcycle safety tips. 5 Most Important Motorcycle Safety Tips All Riders Need to Know According to the National Traffic Highway Safety Administration, motorcyclists are 27 times more likely to die in traffic accidents than any other vehicle. Being a single rider going upwards of 75 miles per hour in the fresh air leaves you open to so many dangers. Not only that, you're potentially putting the lives of other drivers and passengers at risk. In fact, if you've experienced the loss of a loved one through a motorcycle accident and don't know what to do, learn more here. But if you're going to be proactive and learn some motorcycle driving tips, let's get into some of the most important ones now. 1. Always Wear the Proper Gear: Never ever go for a ride on your motorcycle without safety gear. Please know that buying this is very easy as you can buy motocross gear from an online store with a single click. This will help you stay safe in the event you get into an unfortunate accident. You've heard it since you were five years old and learning to ride a bike with training wheels, and maybe you're sick of hearing it, but ALWAYS WEAR A HELMET. Riding a motorcycle without a helmet can certainly feel nice, but it is by far the most protective piece of equipment you can (and should) be wearing. Other important gear includes: Face shield Eyewear (even prescription glasses or sunglasses counts for something) Padded jackets Padded gloves Padded pants Riding boots Heavy-duty riding boots are good for grip when using the clutch and keeping balance. The rest of the clothing protects you from the elements when you're out in the open and gives you that much more padding if you were to go flying. 2. Drive Carefully and Defensively: Motorcycles are fast compared to other vehicles. You're just a single person on a smaller, aerodynamic vehicle able to rip through traffic. Make sure to always obey all traffic rules, though, such as speed limits, yield signs, and more. It's especially important for you as a motorcyclist to drive defensively as it may be more difficult for people in larger, enclosed vehicles to see you. 3. Always Be Visible: Speaking of being seen, make sure to wear colors that make you stand out and to drive in a way that you're easily seen by other drivers. Avoid black and dark brown clothing and stick to brighter colors or use neon strips and tape. Avoid other driver's blindspots if you can. 4. Be Awake and Be Sober: This is true for anyone operating any kind of vehicle, but make sure you don't drive when you are tired or intoxicated. You may be focusing more on the sober aspect than the awake aspect, but it's crucial to only drive when you're fully awake and alert. Being sleepy can reduce your reaction time to obstacles and potential accidents. 5. Start Your Ride the Right Way: Every time you hop on your motorcycle, remember to follow procedures beforehand so that you can ride safely. In particular, do these every week: Check tire pressure Check for oil leaks Test your headlights, taillights, and signal lights Check all hydraulic and coolant fluid levels Also, do these every time you ride: Check that clutch and throttle are smooth and operational Adjust mirrors Test the firmness of your brakes Test that your horn works These are basic checks that shouldn't take you any time at all and could prevent massive amounts of damage, injury, and maybe even deaths. Seeking More Advice and Tips for Riding Safely Riding a motorcycle is thrilling, and if it's something you enjoy, you should certainly take advantage of the open road. But it's especially important to follow basic motorcycle safety tips since you are at much more risk than drivers in other vehicles. If you'd like to see more riding tips or more advice on vehicles in general, check out our other automotive blog posts! Read Also: Along For The Ride: Passenger Rights In-Vehicle Accidents How To Choose The Right Motorcycle Tires For The Motorcycle

READ MOREDetails