Everything You Need to Know About Dedicated Server Hosting

by

04 June 2022

Technology

Server Hosting

Are you tired of sharing the same server with other websites? The number of visitors to your website is growing, and you fear that your website will slow down.

Of course, you need more storage space as your website needs are outgrowing the present shared hosting plan. It’s time that you have thought about subscribing to dedicated server hosting.

With a dedicated hosting plan, you can have entire server space for your eCommerce store or website and applications – it is dedicated to you exclusively.    

You don’t have to share your server and its resources with others. Instead, it allows your business to have an optimal workload and be in complete control of it.

With several dedicated server hosting providers online, you can find a suitable one with the best plans for both managed and self-managed servers. Upgrading from shared hosting to dedicated server hosting offers ultimate experience, reliability, scalability, security, and high performance. 

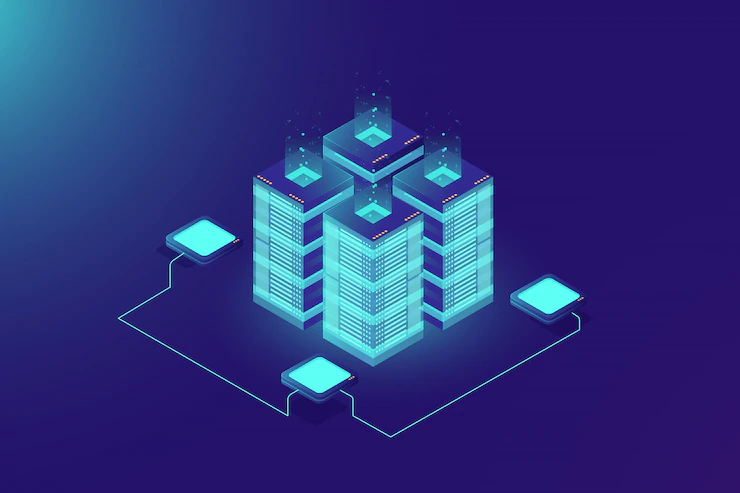
What Is Dedicated Server Hosting?

When you hire a physical server for your website to use to itself, you call it dedicated hosting.

Other than not having to share the space with other websites, you don’t share the RAM, bandwidth, and disk space with others. You can optimize the server depending on your business needs.

edicated Server Hosting

By choosing the best hosting provider, you can have the ultimate dedicated server power, which can deal with the heaviest workloads. They can also support you with advanced hardware and protection against malware for guaranteed performance. 

With dedicated hosting, you can choose any server management level, like managed, managed-pro, and self-managed. Through managed and managed-pro servers, the service provider takes care of the application installation, upgrades, backups, email configurations, patch management, and technical support.

As with managed pro servers, you get additional services related to the customization of database software and installation of anti-malware tools. 

By opting for unmanaged hosting, you are provided only the initial software setup, and the rest of the things are managed by you based on your requirements.   

Some Benefits Of Choosing A Dedicated Server Plan

Your business is developing and your website receiving more and more organic traffic. right?

This is the right time to upgrade your hosting plan to a dedicated server for completer access to system resources and benefits.

Some prominent benefits include:

Overview:

  1. High speed
  2. Install anything you want
  3. Have advanced security
  4. Quick scalability

1. High speed

With a single-tenant infrastructure, your website will experience high speed. There are no other websites to slow down your website when there are traffic spikes.

You also get to benefit from some hosting providers offering the fastest storage using SAS technology that spins the disk at 15000rpm. It helps load web pages ten times faster than before. 

Your website’s performance will affect when traffic spikes and if you fail to use an appropriate hosting service. With a dedicated server, you can easily deal with sudden traffic spikes and avoid site downtime and revenue loss. 

2. Install anything you want

With complete root-level access, you are permitted to install any plug-ins, library, applications, and server components. Thus you can change the hardware and software configurations by adding more storage space, processing power, and bandwidth and customize the server to suit your website requirements

3. Have advanced security

If you want customers to come again to your website, you need to ensure that your website is secure. Opting for a dedicated hosting service, you get to have advanced security.

Most hosting service companies offer Distributed Denial of Services (DDoS) protection, which safeguards your online store or website from downtime.  

4. Quick scalability

A dedicated server allows you to shift to a larger server space, as well as a smaller space, seamlessly without moving files and reconfiguring applications. 

To conclude, if your business profits from shifting to a dedicated server, you should consider it.

Additionals:

SEO Website Design Tips for Small Businesses

7 Advantages of Using Website Design Templates

The Beginners Guide To Dealing With Website Downtime

How do you choose an SEO-friendly theme for your website?

Content Rally wrapped around an online publication where you can publish your own intellectuals. It is a publishing platform designed to make great stories by content creators. This is your era, your place to be online. So come forward share your views, thoughts and ideas via Content Rally.

View all posts

Leave a Reply

Your email address will not be published. Required fields are marked *

Related

Internal Logistics

Why Automate Internal Logistics?

Internal logistics can be overwhelming and expensive. Any organization that wants to raise its bottom line must institute policies to improve logistics processes. One of the key ways to optimize internal logistics is by adopting automation tools. If your goal is to increase revenue and decrease the cost of operation, you have to embrace automation development.  Since the first industrial revolution, the production and movement of goods have been improving through technological breakthroughs. And you should use these modern technologies. 5 Advantages Of Using The Internal Logistics Today, more advanced technology has given birth to automation solutions that offer minimal human intervention and maximum efficiency. That said, here is the reason you should automate internal logistics: 1. Reduction In Cost Of Operation Automation tools decrease the number of workers you need to execute tasks. For example, if a task requires 10 workers for manual execution, about 5 persons can perform the same task within the same time frame using automation solutions. As a result, you can reduce the cost of operation since you will not need human resources as much as before.  Every industry is spending around 30% of its total revenue on its internal logistics. This is a pretty high amount. At the same time, you start to spread your business. When you adopt automatic systems, you can eliminate these increased costs. At the start of installing the automatic system, you have to spend a bulk amount of money. But it proves to be a more cost-effective solution in the long run. 2. Increase In Efficiency Why are you using the employee resources for moving the materials around? You can automate these tasks with maximum efficiency and make the process even faster. Automation tools like robots are programmed for internal logistics function in a certain way. Once they are set up, you are sure of fast and efficient delivery.  They work based on algorithms and other cutting technologies; all things being equal, they can be trusted.  Robots effectively replace humans and get things done intelligently. For instance, AMR robots are super intelligent and built to help companies optimize their logistics systems effectively. 3. Boost In Productivity With automation internal logistics solutions, you can have your workers focus on higher-value activities. After replacing humans with robots at various units, you will have to deploy them to other departments to work on productive tasks requiring only humans.  By automating the materials carrier, your company can optimize the company productivity and schedule the product deliveries more effectively. And on the other hand, you can reduce production costs and make the process even fast and more accurate. 4. Plant’s Safety Concern In manual internal logistics functions, the whole system is less safe. This means safety is always a big issue. This is the reason plant safety concerns are a big headache for every company. The loss of human life is a big disaster and directly impacts the company's reputation. When you are adopting an automatic system, you are reducing your plant’s operational cost. Along with the operational cost, your plant’s safety factors are also increasing. After the pandemic, this is required to reduce the worker's numbers in the plants. Every plant has to maintain safe distance protocols. The accident chances are also decreasing as every machine is starting to run on the basis of the programming. Auto shut-off options are always there.  5. This Is An Error Free Process: Mismanagement in internal logistics costs a considerable amount of money loss. This is the reason when you are adopting an automatic system. Your systems are going to be a much more error-free process. The excessive workforce in a plant is making things more complicated. And not only that, for monotonous work, robots are always the best solution. Yes, the breakdown is always possible. But those numbers are very low. And you can easily bear that excess cost. Your plant production is getting higher. So it is always possible to bear those extra costs. Wrapping Up: Every plant needs a well-functioning internal logistics system. And if your plant has an automatic system, you can quickly improve your production numbers. For monotonously repeated works, this process is proved to be more profitable. What is your goal for the internal logistic system? Let us know through the comment sections. Read Also: Top 10 Features to Have in Marketing Automation Platforms Why Sensors are Essential in Machine Automation The Rapid Growth In The Global Industrial Automation Market Factory Automation and Why It Has Been a Cause for Major Job Security Concerns

READ MOREDetails
Practices for Visual Regression Testing on Cloud

A Beginner’s Guide To Playwright Inspector

As the world continues to shift towards a more digital landscape, the significance of quality web applications has become progressively apparent. Given the vast array of tools and technologies at the disposal of web developers, determining an appropriate starting point can prove challenging. Debugging is the method of identifying and fixing bugs or errors in software. It is a vital aspect of web automation testing as it contributes significantly to the dependability and precision of the automated test results. Playwright is an open-source cross-browser testing framework released by Microsoft in 2020. As stated by Systems Sciences Institute, the expenditure of addressing an error or bug discovered after product release was 4 to 5 times higher than pinpointing it during the configuration phase. The detected value during the maintenance phase can be exceeded by up to 100 times. Playwright developers operate at the API level and offer comprehensive tooling through the integrated Playwright Inspector. Playwright Inspector is a powerful tool that authorizes developers to efficiently test and debug their web applications. Also, it facilitates creating automation scripts by furnishing auto code generation capabilities. Playwright Inspector allows you to inspect the Document Object Model (DOM) structure of a webpage, interact with web elements, and inspect CSS styles utilizing the Playwright API. It authorizes stepping through tests, picking locators, editing live locators, and seeing actionability logs. This blog will dive into the basics of Playwright Inspector and explore its many features. So if you're ready to take your web development skills to the next level, buckle up and dive into the world of Playwright Inspector. Before that, let's have a brief understanding of Playwright. What is Playwright? Developed by Microsoft, Playwright is an end-to-end open-source web testing and browser automation framework. Playwright offers outstanding cross-browser compatibility and convenient features. This makes it a perfect choice for automation and quality assurance purposes. The playwright is a flexible, robust, and efficient framework. It supports multiple languages like JavaScript, Java, Python, C#, and TypeScript. Playwright utilizes a single automation API. This makes it steadfast and quick and produces consistent outcomes while running cross-browser testing. It provides a powerful set of testing features. These features can be utilized to simulate end-user interactions with the web application. Also, the framework authorizes testing complex scenarios such as file uploads, login flows, and other interactions. These test scenarios can be tough to test with other testing frameworks. The software platform furnishes developers with a comprehensive selection of standard and personalized locators. This facilitates the straightforward and effective identification of elements on web pages. These locators can pinpoint elements based on a variety of attributes, including text content, position on the page, and other distinguishing features. With Playwright locators, developers can confidently identify elements on the DOM, ensuring the creation of substantial and steadfast test suites. What is a Playwright Inspector? Playwright Inspector is a Graphical User Interface based tool that helps testers and developers record scripts and debug Playwright tests. The tool helps generate boilerplate code. This can be a suitable starting point for building codes. Also, it assists developers and the Quality Assurance teams save time when writing the test script from scratch. Software developers can utilize the time saved to comprehensively understand the codebase and make informed modifications, as required, to enhance the efficacy of the testing suites. The Playwright Inspector simplifies the process of debugging web applications. It is a browser-based development tool that facilitates developers to inspect, debug, and troubleshoot web applications. The tool authorizes developers to record user interactions, capture screenshots, and inspect HTML elements, CSS styles, and JavaScript code. Playwright Inspector furnishes a console for developers and testers to run arbitrary JavaScript code in the context of the inspected page. To scale Playwright Inspector, an AI-powered test orchestration and test execution platform like LambdaTest offers an online farm of 3000+ browser and OS combinations to execute the Playwright test. You can effortlessly test your application as its scalable cloud infrastructure enables parallel test execution where you can run test cases altogether. It can also integrate with your existing testing infrastructure. It effortlessly plugs into your Playwright tool, eliminating the need for complex configurations. LambdaTest's Playwright Inspector  empowers you to debug and analyze Playwright scripts effortlessly. Inspect element properties, verify page behavior, and optimize automated tests using this user-friendly tool. Installation and Setup Instructions Installation and setup instructions are crucial for any software tool, and Playwright Inspector is no exception. As a beginner, it's essential to follow these instructions carefully to ensure that you can start using the tool without any issues. To install Playwright Inspector, first, you need to make sure that you have Node.js installed on your computer or laptop. Once you have Node.js, you can install Playwright Inspector through npm by running the command "npm i -g playwright-inspector" in your terminal. Upon successful installation, the tool can be initiated by executing the command "playwright-inspector" in your terminal. You can also use Playwright Inspector with other browsers like Firefox and Safari by installing the corresponding browser extensions. Following these instructions will give you a smooth and hassle-free experience of using Playwright Inspector, authorizing you to debug and troubleshoot your web applications with ease. How to Inspect Elements in Playwright Inspector If you are new to Playwright Inspector, you may be wondering how to inspect elements within your web page. Fortunately, Playwright Inspector comes equipped with a number of useful tools and features to assist you in efficiently identifying and inspecting elements on your web page. To start, simply launch Playwright Inspector and navigate to the web page you want to inspect. Once you are on the page, right-click on any element within the page and select "Inspect element" from the context menu. This will bring up the Playwright Inspector pane, where you can view the HTML and CSS code for the selected element. You can also view any associated styles and properties. From there, you can use the various tools and features within Playwright Inspector to further inspect and manipulate the element, making it easier than ever to identify and troubleshoot any issues within your web page. Benefits of Playwright Inspector The Playwright Inspector tool presents lots of benefits. Let us consider a few pivotal benefits of the Playwright Inspector: 1. Easy Debugging: Playwright Inspector facilitates the process of debugging Playwright scripts by furnishing a visual interface. This authorizes developers to inspect the page, make alterations to its state, and swiftly identify the cause of issues. 2. Record and Replay: The tool presents a record and replay feature that authorizes testers and QA teams to record end-user activities on the page and replay them for debugging purposes. The record and replay feature can help pinpoint issues that may occur only during specific user interactions. 3. Robust Logging: Playwright Inspector presents robust logging abilities that authorize testers and QA teams to outline the execution flow of the test script. This helps swiftly determine issues and fix them, thereby enhancing confidence in the code and application itself. 4. Intuitive Interface: The Playwright Inspector boasts an intuitive and user-friendly interface that is simple to navigate and operate, even for testers and QA teams who are new to the Playwright platform. 5. Cross-Browser Support: The Playwright Inspector facilitates the testing and debugging of applications across various platforms as it supports multiple Chromium-based browsers such as Chrome, Edge, and Firefox. This enables developers to ensure their applications perform optimally on different browsers. 6. Breakpoints: The Playwright Inspector tool is designed to enhance the testing process for software testers and QA teams. With this tool, users can set breakpoints in their test scripts, enabling them to pause test execution at specific points and thoroughly investigate the page's state. This increased level of control and visibility allows for improved efficiency and effectiveness in the testing process. Best Practices for Using Playwright Inspector The Playwright Inspector tool furnishes developers with an intuitive solution for testing web applications at scale. With the help of Inspector, developers and testers can debug their web automation scripts, view page elements and attributes, and pinpoint issues that may be causing the tests to fail. To make the most out of this tool, it is paramount to follow the best practices for using it. Here are eight best practices for using Playwright Inspector: ●        Familiarize yourself with the Inspector UI. ●        Utilize the search feature to swiftly pinpoint page elements. ●        Utilize the highlight feature to visually locate elements on the page. ●        Utilize the console to test JavaScript code and interact with the page. ●        Utilize the network tab to inspect network requests and responses. ●        Utilize the performance tab to pinpoint performance issues. ●        Utilize the snapshot feature to capture a snapshot of the current page state for later analysis. ●        Utilize the playback feature to replay test scripts and identify errors. By following these best practices, you can utilize Playwright Inspector to its full potential and optimize your web automation testing process. Conclusion Playwright Inspector is a powerful tool that can help developers troubleshoot issues and enhance the quality of their web applications. With its user-friendly interface and wide range of features, Playwright Inspector is a prominent addition to any developer's toolkit. By following the steps outlined in this beginner's guide, you can start utilizing Playwright Inspector today and take advantage of its many benefits. Whether you are a seasoned developer or just starting out, Playwright Inspector is a must-have tool for anyone looking to enhance their web development skills. Read Also: Mobile Testing With Appium On Lambdatest 10 Reliable Free Currency APIs For Your Business Using Tracking Code, Google Analytics Can Report On Data From Which Systems?

READ MOREDetails
Avast UI failed to load

Top Easy Way To Fix Avast UI Failed To Load Error In 2024

Avast Antivirus is the most famous Antivirus in the world. It is so popular among PC users because it offers both a Free Version and a Premium Version, which can be used in computers such as desktops and laptops. There is an Android version of this application as well. If you are not so tech-savvy, let me first tell you in short what Antivirus is. An antivirus is software that protects your system from viruses, malware, and Spyware. Ever since the Windows 10 update, people have been reporting that they are getting an error message saying Avast UI failed to load. Windows is infamous for providing buggy updates. The same thing was reported in Windows 7 as well as Windows 8. It's quite sad to see that Windows, even after becoming the most used Operating System on the planet, has failed to achieve proper security, and adding to that, most of their updates are quite buggy.  However, they fix the bugs in later updates. But the avast UI failed to load has been bothering people for quite some time now. In this article, we will suggest a few troubleshooting methods, following which you can sort out the issue.  What Causes Avast UI Failed To Load? Here are some of the root reasons listed below for this error. There is a good chance that this error pops up because of some error in the configuration of Windows.  Another reason for showing Avast UI Failed to Load pop up is that you might be using more than one antivirus simultaneously on the same device. The last reason we could think of is if there is any problem with your system's Remote Desktop Services. How Can You Fix Avast UI Failed To Load Issue? In order to fix the "Avast UI Failed to Load" issue, you need to check a few things first. Make sure that you have exited the Antivirus. Restart Avast Antivirus. But still, if the issue is not fixed, you can follow these procedures to say bye-bye to this issue.  Procedure 1: Turn On The Remote Desktop Services What you need to do is press the Windows key and R simultaneously. This will open up the RUN box.  After having that box on your screen, you have to type 'services.msc' in that box and press the enter key. Now check for the Service Page. After finding the Service Page, you have to search for Remote Desktop Services. After you have found the remote desktop services, what you need to do is right-click on it and then select the option of 'Properties.' After clicking on properties, you have to double-click on the button that says start and set the startup type to automatic. After you have done that, click on 'OK" to confirm the changes you have made. Now, you have to close the services page and manually restart your PC, laptop, or whatever you are using. It will complete the process. If you are still facing Avast's problem, UI failed to load, then kindly follow the next procedure closely.    Procedure 2: Try Repairing The Avast Antivirus Software Kindly follow this procedure closely to repair. You have to go to the Control Panel Section. You can find the Control Panel in the settings section of your computer. If you do not know how to open the control panel. Click on the start button and type the control panel. After opening the Control Panel, search for the Program & Features option, find it, click on it, and look for Avast Antivirus software. Now, you need to right-click on Avast; you will get the option to uninstall/change.  Be very careful while doing this, as a single mistake can uninstall Avast from your PC. Select the option to repair after having clicked on change. Now, you need to wait for Avast to repair itself, and after Avast completes its repair, reboot your PC. If the error of avast UI failed to load persists, kindly follow the next procedure. Procedure 3: Uninstall And Reinstall Avast Antivirus Software  If any of the above methods did not work for you, then you try to uninstall Avast Antivirus. To uninstall Avast Antivirus Software, you need to open the Control Panel. You can open Control Panel by merely typing Control Panel in the Run dialog box; another way to open Control Panel is by searching the control panel after clicking on the Start button.  After opening the Control Panel, go to the programs and features section and find the Avast Antivirus software. Right-click on it and select uninstall this time instead of selecting change as you did in the previous procedure.  Please wait for some minutes for Avast Antivirus Software to completely uninstall itself from your computer. Reboot your computer as the final step of the process. Switch back on your computer, download Avast from the official website, and install it again as a whole new software. Make sure you do not do anything else on your computer while Avast Antivirus is being installed, as it puts extra pressure on the computer's RAM. After the installation process, open Avast and check if the Avast UI failed to load the error persists. If it does, kindly follow the next procedure.  Procedure 4: Get The Recognition Issue Fixed If the error of Avast UI failed to load persists, you could follow the last and final procedure.You need to look up from the Avast icon on your desktop and Open the shield's control. In shields control, right-click on the Disable to disable the shields. You will get the option to disable it for 10 minutes to an hour. Disable it for 10 minutes, wait for 10 minutes, and check if the 'avast ui failed to load' issue persists. If the error is still showing, then try out some other methods. Press the Windows Button and R buttons simultaneously. It will open up the Run dialog box. Type cmd in that box so that it opens the Windows Command Prompt Box. Type 'winmgmt/verifyrepository' on the search field and hit the enter button.  If it shows the status as inconsistency, you need to type 'winmgmt/salvagerepository' in the search field and press the enter key to finish the process. If the result shows that the Windows management instrument was consistent, you need to type 'winmgmt /resetrepository.'  After doing that, Windows will send you a message showing that the WMI repository has been rebuilt successfully. Finally, you need to reboot the system and start Avast antivirus, and hopefully, it will not show the error of Avast UI failing to load. We are sure that after trying all these steps, your Avast Antivirus will run just fine. But still, if the error exists, we suggest you contact Avast Customer Care as soon as possible. Procedure 5: Update Your Avast Software Most of the time, what can fix such an error message is a simple update. Fortunately, you can update the app without the hassle of having to re-download the app. Redownloading can be a viable option if you cannot access the interface at all. Here is how you can update Avast Antivirus as well as other Avast applications that offer easy updates to its users. Press the Windows+X keys at the same time, then select the app and features from the context menu. Find the Avast Antivirus or any other app that is causing you to see the UI failure arrow. Click on it, and from teh options that unfold, choose Uninstall. Click the Update button and wait for the software to locate any new updates that might be ready to download. It will automatically install the latest version, which will take quite a bit of time, depending on the configuration of your system. When the repair process is complete, launch the Avast app that you were having trouble with. This should get your app up and running. It is possible that updating the Avast app the way mentioned above will fix the internal corruptions or missing files, thereby restoring the UI. But if you are still facing the same issue, try speaking to Avast Customer Support. Conclusion Avast is one of the best antiviruses in the market. The story of avast goes way back to 1995. Initially, it did not offer the best of services, but they have been improving their services year by year. It's one of the few antiviruses that offer a premium version and a free version as well.  Do not think that the free version has limitations like other antivirus software because it's not so. The free version provides a few premium features, which include a WIFI inspector and ad blocker, etc. However the recent trend of Avast showing that the Avast UI failed to load is not what users are expecting. Whether it's the fault of Avast or Windows 10 is yet to be found out. Rest assured, you can try the above procedures to get rid of the issue. You May Also Like: Is InterServer The Best Web Hosting Platform What Are The Things You Need To Know While Choosing Antivirus Software? How To Allow Chrome To Access The Network In Your Firewall Or Antivirus Settings?

READ MOREDetails