Top Ways Why It’s Important To Convert Your Film To Digital

Published on: 24 January 2023 Last Updated on: 30 January 2026
Slide film

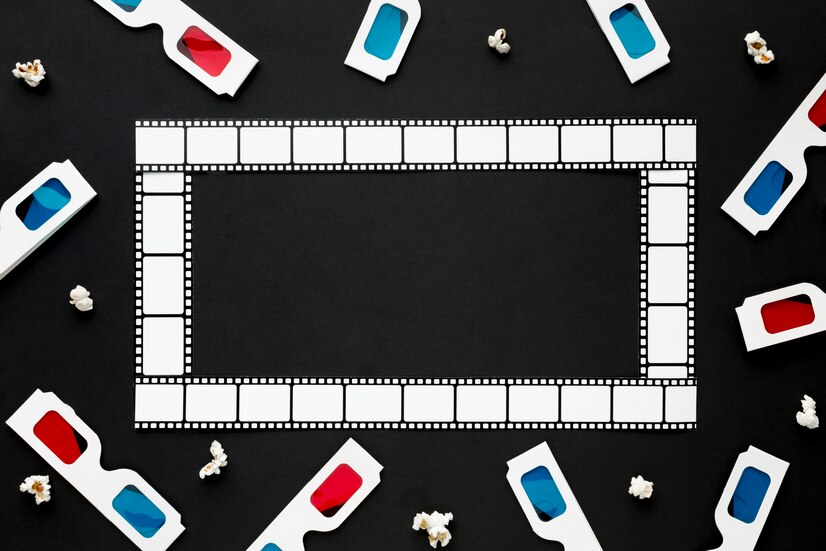
There are many reasons why it’s important to convert your film to digital. These benefits include saving time, improving image quality, and preserving your memories.

Slide Film Lasts Forever

If you are looking for a way to preserve your photos, you may want to consider preserving your old slides. Unlike negative film, which needs to be printed differently, slide film is stored forever and can be viewed for many years without loss of color or contrast.

Most slide film is daylight balanced and provides excellent grain. Color slide film is typically found in a 50 to 400 ISO range. It can be developed at home or in a lab. The E-6 process is also available for the color film but is more sensitive to temperature than the B&W processes.

The color of a slide is determined by the film type you choose and will depend on the sun’s position and the amount of light in the room. A bright day will yield the best results, but you can use unexposed film with decent results.

Slides can be scanned straight, or they can be cross-processed. However, cross-processing can produce a variety of odd colors. Some people use Instagram filters, which are created by cross-processing.

To get the most out of your slides, it is important to understand how to clean them. This is the first step towards preserving them. You can buy slide film cleaner to apply to the entire slide. Once you’ve cleaned the slide, let it air dry.

One common problem with expired slides is that they can become stained with dust and debris. Mold can grow on them, as well. These can lead to a number of problems, including uneven grain, spotting, and streaking.

You can store the slide in a dark closet, but a better option is to place it in a box with a lid. In this way, you’ll be able to protect the slide from moisture.

When it comes to storing slides, a lot depends on how long you intend to keep them. If you plan on displaying them, it is recommended to clean them after you take them out of the box.

If you’re planning on scanning your slides, you’ll need to have a scanner that can handle the image. The more pixels, the larger the print can be.

Preserves Memories

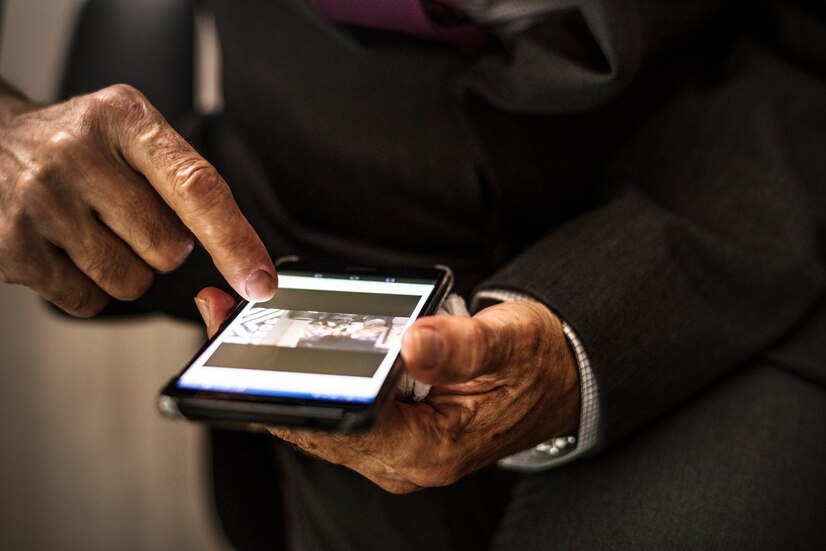
If you are in need of a quick and easy way to preserve memories then the best bet is to transfer film to digital media. A digital video or file will allow you to watch your video or picture whenever you like.

It is also a safe way to store and share your digitized memories. You can also convert old films or videos to DVDs for a safer and easier way to access your memories.

The first step in the process is to consider where you have stored your videos or pictures. Old media can degrade over time, making it difficult to retrieve and play back your favorite memories. However, digital media is more durable, allowing you to safely store and preserve your precious memories.

In addition, a digital copy of your old memory is easier to share with others, and it is more likely to remain intact for future generations to enjoy. Digital files can be stored on your computer, hard drive, or in the cloud. Using a flash drive or USB device is a great way to transfer your digitized memories from your hard drive to someone else’s.

As you can see, preserving your old home movies is an important part of preserving your memories. Converting your films to DVD or digital media allows you to easily share and view your memories, and to have them for years to come. By using a professional media conversion service, you can ensure that your memories are properly preserved.

While it is true that converting your films to digital media is not the easiest task, it is not the most complicated either. In fact, it is quite simple to do. Just be sure to follow these simple steps to ensure that you make the most of your old photos and video.

The biggest benefit of digital conversion is that you can now safely share your memories with anyone you choose, anytime you want. In addition, digital files can be shared over the internet, which makes it possible to share your favorite videos or pictures with friends and family.

Improves Image Quality

The film-to-digital transfer is no longer a novelty. Its many advantages include reduced storage costs, the ability to view images in their original form, and a plethora of viewing options. However, it still requires a light source and exposure in a camera. Luckily, there is a plethora of companies offering the film to digital conversion services.

Although there is no single best way to go about the process, a bit of careful thought will ensure a successful and memorable transfer. A little research will also ensure a hassle-free experience. This is particularly true if you are converting an existing home theater system. You might even be able to enjoy your favorite movie on the cheap. For instance, a quality 8mm film to digital transfer is around $5 per foot of film. In addition, you may be able to save a bundle by opting to convert it to a DVD. Alternatively, you can have your favorite films and television shows transferred to Blu-ray Discs, which are available for less than a hundred bucks.

One of the most difficult parts of the film to digital transformation is deciding which software to use. Fortunately, there are a number of companies that offer the most up-to-date technology, and the most competitive prices. Most of them offer a money-back guarantee and are available in a wide variety of formats. Choosing the best provider will ensure a smooth transition from old to new-school cinematic experiences. From there, you can decide whether or not you want to stick with one medium or move on to the next.

Read Also: A Digital Asset Management Solution Overview

Saves Time

Saves Time

If you want to preserve your family’s cherished memories, consider converting film to digital. There are several ways to accomplish this, and the process doesn’t require much of your time. In fact, you can convert your film into DVDs or files on your computer, and you can even send them via email or through the cloud. You don’t have to buy special storage for your movies, and you can share them with your friends and family members.

Unlike digital formats, film and VHS tapes aren’t going to last forever. They degrade by up to 20% every 10 to 25 years. This means that if you don’t want to lose your old footage, you need to start transferring your films to digital files as soon as possible.

If you’ve been storing your films on an old reel, you may need to invest in a converter box. The best ones will be able to accommodate various formats, including 16mm, Super 8, and 35mm. When you’re ready to begin, you’ll need to connect your device to a PC or Mac. Once the conversion is complete, you’ll be able to store your films on your computer or flash drive.

It’s important to keep in mind that your film can also collect dirt, fingerprints, and other elements. So, you need to clean it out before converting it. Also, make sure you back up your files on an external hard drive or a cloud service.

Taking the time to transfer your films to digital files can help ensure your favorite memories are protected and will stay that way. It can also save you a lot of space in your home.

Depending on your budget and the type of digital format you choose, you can have your video converted to a DVD or stored on a hard drive. If you’re unsure about whether or not your video will work, you can hire a professional to convert your movie for you. Some companies even offer a free conversion kit, which can be a great option if you don’t have the money to spend on conversion.

Converting your film to digital can be a fun and nostalgic experience. But, it isn’t as simple as it sounds. Before you start, you’ll need to scan the negatives.

Read Also:

Abdul Aziz Mondol is a professional blogger who is having a colossal interest in writing blogs and other jones of calligraphies. In terms of his professional commitments, he loves to share content related to business, finance, technology, and the gaming niche.

View all posts

Leave a Reply

Your email address will not be published. Required fields are marked *

Related

MS Outlook Pii Errors

What are MS Outlook Pii Errors? 3 Secret Ways to Fix Them

Before fixing MS Outlook Pii Errors, you must know what exactly Microsoft Pii is, and then you can find ways to fix them. Read further to know more. There are few PII error lists that can destroy your online experience to a great extent. There can also be a large amount of knowledge that can be used unitedly to identify someone. Now, let’s know what exactly MS Outlook Pii Errors are. What Are MS Outlook Pii Errors? MS Outlook Pii Errors is the data that is used for identifying a particular person. For example, phone numbers, social security numbers, postal and email addresses are regarded as personal information. PII stands for Personal Identifiable Information and with the rise of advanced technologies, PII is growing simultaneously. On the other hand, Pii errors can be due to several reasons and these are described below: i). Your app is not downloaded from a reliable source. ii). Using an outdated version of MS Outlook. iii). Large Cache files. iv). Using various email IDs at the same time. How To Fix MS Outlook Pii Errors? PII errors can make your task complicated. However, there are several ways to fix MS Outlook Pii Errors and these are described below. 1. Change Port Number Particular port numbers are kept to distinguish specific services so that an arriving packet can be quickly forwarded to a working app. By changing these numbers, most of the errors can be solved significantly. One of the best ways to fix the Microsoft Outlook Pii Error is by changing the port number. To do this, you need to follow certain steps that are described below: Open MS Outlook. Click on ‘Account Settings’ Select ‘More’ and then click on ‘Internet Email Settings’ Modify the SMTP port number from 465 to 587. Click ‘OK’ 2. Reinstall MS Outlook If you are not comfortable changing the port number, you can view another option on our list, i.e., Reinstalling MS Outlook. Keep in mind; you must have the latest version of MS Outlook. You can download this version from the official website of Microsoft office. Moreover, to understand in a proper way, you can follow the below steps: Go to Google and type Microsoft’s official website. Click on Microsoft’s official website. Click on ‘Install’ Install it with the default settings, and all your Pii email errors will be solved automatically. However, if you are still facing PII errors and are not satisfied, then you can go to the below step. 3. Eliminate Several Accounts From MS Outlook Now, the last step to eliminate several accounts from MS Outlook is by eliminating several accounts from MS Outlook. Using several accounts in MS Outlook can give rise to MS Outlook Pii Errors. At the same time, your MS Outlook can malfunction with multiple accounts. Here are the steps to follow for this issue: Open a new tab and go to MS Outlook Accounts. Logout of all the accounts. Then, log in with a single email account. List of All Microsoft Outlook Pii Errors You must be aware of all Microsoft Outlook Pii Errors so that you can solve them easily. Here I have listed all the major Pii Errors. [pii_email_654fbfc0ac64aec32e9c] honor society [pii_email_491af3a6264a7d75cbc9] [pii_email_b354aaf30dd14fba6a62] [pii_email_4dd09cddea0cd66b5592] [pii_email_57bde08c1ab8c5c265e8] [pii_email_cd4b80dbd951adb0d4dd] [pii_email_9adeb2eb81f173c673a5] [pii_email_9f2fe6037cc1578fa726] For more ms outlook PII errors, read here: https://hubpost.org/what-are-microsoft-outlook-pii-errors-and-how-you-can-fix-them/ Read also: What Is SMS Gateway And How It Works Which Of The Following Items Is Not A Component Of Quality Score?

READ MOREDetails
Chromecast source not supported

5 Ways To Fix Chromecast Source Not Supported Error

Modern smart televisions are designed to connect with several external devices in order to enhance our entertainment experiences. And casting videos from your mobile devices to your Tv is one of the most popular options. You also can cast any content from your laptop or computer. But in case your television does not support this feature, you can use streaming devices for establishing the connection. Now, let’s begin to solve the issue “Chromecast source not supported”.  Google Chromecast is a device that fulfills a similar purpose. It is packed with many streaming applications. With the help of this device, you will be able to cast content from the Google Chrome browser as well. And in case you are using this device and facing an issue like Chromecast source not supported, here I will guide you with the techniques to eliminate them.  Fixing Chromecast Source Not Supported Error  Here are the ways that you can try to fix the Chromecast source not supported error in your device. There can be several reasons behind this issue, so here are all the solutions for different kinds of reasons that are causing this issue.  1. Enable Mirroring Service Suppose you are using The Chrome browser in your system and unable to cast to the Chromecast. Then you need to check whether the Mirror service option is enabled or not. The users mostly recommend this method as it is really effective in solving the source not supported Chromecast issue.  Here are the steps to enable Mirror Services to eliminate the Chromecast source not supported the issue. Open the search browser, Google Chrome. Into the browser, type chrome://flags. Hit the Enter button. Press CTRL + F on your keyboard for bringing up the Find tool. Type in Mirroring, that we are searching for. Hit the Enter again. Find Mirroring Service option. On the right side, click on the drop-down menu. Now select it as Enabled.  Close the Chrome Browser completely and again Open it so that the changes are saves.  Now you can check whether the issue is resolved or not. Try to cast something from your system to your television using Google chrome. And check whether the issue is still there or not.  2. Restart your Chromecast, Wi-fi Router, and Computer Restarting your Chromecast also can solve your Chromecast source not supported issue. But for added measure, it is also recommended to restart your Wi-fi router and your computer also. This will make sure that if there is an issue that is causing the error will get resolved at the same time.  Here are the steps to do that, Firstly, you need to power off your TV, with which your Chromecast is connected. Unplug your Chromecast from your television. Also, unplug the power cord of the Chromecast device. Now leave it unplugged for 1 minute at least. Now, you need to power off the router or modem, depending on whatever you are using. Wait for 1 or 2 minutes.  Power on your router or modem. Now is the time to restart your system. After your system restarts back, connect it again with the WiFi.  Give your Chromecast sometime to reset up everything. Now try to cast something and check.  3. Turn Off all VPN and Ad Blockers Ad blockers generally block pop-ups and prevent Javascript from running. This sometimes causes the Chromecast source not supported error. So, you can try turning off the add blockers and also any VPN if you are using them.  Here are the steps to disable those Google Chrome browser extensions. Open Google Chrome browser. Click on the three-dot icon. A drop-down menu will open.  Select More tools. Click on Extensions. The Extension page will open. Search for the add blocker that you are using. To turn off the extension, Toggle the blue switch.  Close your browser completely. Reopen it and try to cast.  4. Enable the option of Cast Media Route Provider Though you have enabled Mirroring service options, you also can try enabling the option of Cast Media Route Provider. This will also can solve the Chromecast source not supported error that you are currently facing.  The process is similar to the enabling process or Mirroring Service. Here are the steps.  Open the Google Chrome search browser. Into the browser, type chrome://flags. Hit the Enter button. Press CTRL + F on your keyboard for bringing up the Find tool. Type in Cast Media Route that we are searching for. Hit the Enter again. Find Cast Media Route Provider option. On the right side, click on the drop-down menu. Now select it as Enabled.  Close the Chrome Browser completely and again Open it so that the changes are saves.  5. Check The App You Are Using To Cast There is a reason behind the Chromecast source not supported issue, and that is the app that you are using. Maybe the particular app that you are using for casting is not working properly at that very moment.  So what will you do in this case?  You can check by restarting the spp. In case you are trying to cast from your desktop or laptop, you can simply close the app and start it again. But what if you are casting from your Android device? You can restart the app by using the “Application Manager.” before you start the process, there are some things that you should know.  In case the particular app is not storing your user settings online, everything might get reset after this process. You may also need to log in with your credential once the process is completed. So, just make sure you have all those details.  Open the folder, Apps. Tap the icon, Settings. Open the Application Manager. Scroll down and search for the application with which you are facing casting issues on your TV.  Tap the app. The app menu will open. Tap Force Stop. Go to the Storage Section. Tap on Clear Data. Go to the Cache section. Tap Clear Cache. Now back to your Home screen. Restart the app.  This will solve the issues if it is caused by the app instability.  Final Tips In case you are done with all the above-mentioned steps and the Chromecast source not supported, the error is still there. There are some other ways you can try installing the latest version of chrome. I believe the issue will get resolves. But in case the issue persists. Lastly, you can factory reset the Chromecast device. It will lose all the previous data, and you will also need to log in again with your credentials.  Read Also: How Many Jobs Are Available In Real Estate Investment Trusts? 2021 0123Putlockers And Servers – Watch Movies Online How to Download Game Of Thrones Putlocker Online for Free? Is Real Estate Investment Trusts A Good Career Path? REITs Pros And Cons How to Plant Grass Seed on Hard Dirt? – Latest Update 2021

READ MOREDetails
Someone's Imessages Without Their Phone

How To See Someone’s Imessages Without Their Phone

In today's digital age, where communication largely takes place through smartphones, the ability to access someone's iMessages without having their phone in hand can be quite appealing. Whether you're a concerned parent wanting to monitor your child's activities or someone who suspects their partner of foul play, this guide will explore various methods to see someone's iMessages discreetly and legally. Also, you can visit MobiPast and find more specific articles. Introduction iMessage, Apple's proprietary instant messaging service, is known for its end-to-end encryption, which means it's not easy to access someone else's iMessages without their permission. However, there are legitimate scenarios where you might need to do so. Let's delve into these situations and explore the options available. Is It Legal? Before proceeding, it's essential to understand the legal implications of accessing someone's iMessages without their consent. In many jurisdictions, unauthorized access to another person's private messages is illegal and can lead to severe consequences. Always ensure you have the necessary permissions or legal justifications. Using iCloud One way to see someone's iMessage is by using their iCloud account. If they have iCloud Backup enabled, their messages may be stored there. However, you'll need their iCloud credentials to access this information. Read More: Why Should You Look Into Google Drive Alternatives? Using A Monitoring App Another method is to use a monitoring app designed for this purpose. These apps are often used by parents to keep an eye on their children's activities or by employers to monitor company devices. Be aware that installing such apps without consent may have legal implications. Contacting Apple Support If you have a legitimate reason to access someone's iMessage, you can contact Apple Support. They may be able to assist you in retrieving messages, but they typically require a valid reason and proper documentation. iMessage Forwarding If the person you want to monitor has their iMessages set up to forward to another device, you can access those messages on the receiving device. This method requires access to that specific device. Asking The Person Directly In some cases, the simplest approach is to have an open and honest conversation with the person whose iMessages you want to see. They may be willing to share their messages voluntarily. Understanding The Risks It's crucial to be aware of the potential risks associated with trying to access someone's iMessages without their consent. Legal consequences, damage to relationships, and breaches of trust are all possible outcomes. Ensuring Privacy If you decide to use any of the methods mentioned, always prioritize privacy and data security. Make sure your actions are in line with ethical and legal standards. Alternatives To Imessage Remember that iMessage is just one messaging platform. If your goal is simply to monitor communication, consider discussing alternative messaging apps or platforms with the person in question. Conclusion Accessing someone's messages without their phone can be a challenging endeavour, and it's essential to approach this issue with caution, legality, and respect for privacy. Always seek legal advice if you are uncertain about the legality of your actions. FAQs Is it legal to access someone's iMessages without their permission? It's generally illegal to access someone's messages without their consent. Ensure you have legal justifications or permissions. Can Apple Support help me access someone's iMessages? Apple Support may assist you if you have a legitimate reason and proper documentation. Are there monitoring apps available for accessing iMessages? Yes, there are monitoring apps designed for this purpose, but their use may have legal consequences. What are the risks of trying to access someone's messages without their consent? Risks include legal consequences, damage to relationships, and breaches of trust. Should I consider alternative messaging apps? If your goal is simply to monitor communication, discussing alternative messaging platforms with the person involved may be an option. Additional: How To Delete A Page In Google Docs What Data Does Google Analytics Prohibit Collecting? How Does Google Ads Generate Responsive Search Ads?

READ MOREDetails