Published on: 20 July 2016
Last Updated on: 29 May 2021
In the olden days, when land and construction prices were not as high as this time and age, it was common for people to build large homes, regardless of their needs and requirements. As the time went by, and land became scarce, while the construction prices kept rising, making the most of lesser space and building small yet efficient houses is becoming a norm for people living in metropolitan.
Using the available space in a smart and efficient manner is not only an option for people looking to build a house from scratch. Even if you are living in an old home, you can look around and convert some spare area into usable space. Following are some rooms or areas, which are often ignored, and how you can convert them into living space.
Loft Conversion:
Starting from loft conversions i.e. converting your loft or attic into a living space, but remember that not all lofts or attics can be converted into living rooms. However, majority of homes in the UK and its adjoining areas have the construction style that allows for a loft conversion. You can get your loft surveyed or look out for professional advice to see if you can convert your loft. In case the answer is in yes, you can easily add a bedroom, study area, home office, or recreational room to your home. Loft conversion will cost a little more than simply converting a store or basement into a living space (because it involves quite some construction and installations), however, you will add quite some value from loft conversions to your property, making it worth investing your money.
Garage Conversion:
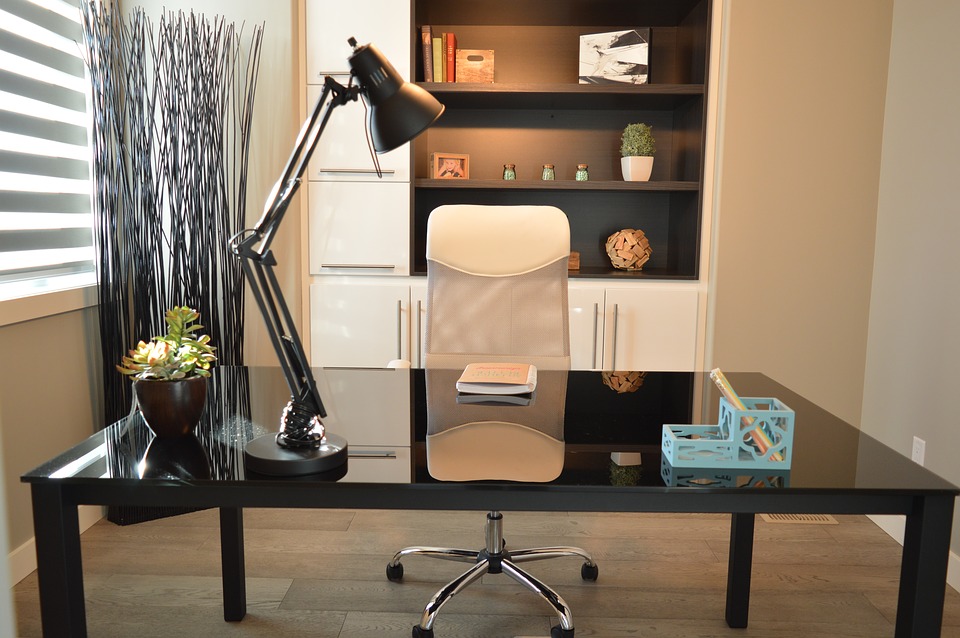
Many homes have internal garages, which are seldom used for cars. In case you have an internal garage and you are not regularly using it for car parking, you have got some excellent space to be used for just about any purpose, from kitchen to gaming room, depending on the available space and your budget. Not to forget that internal garage can be an ideal space, if you are looking for a home office, where you will be having visitors every now and then.
Basement Conversion:
Basements use to be a dark and dingy area that was very rarely used as a living space in the recent past. Now, basements can provide you with ample space, a lot more than what you will be getting from garage or loft conversion. Again, you can use your basement for just about any purpose, in fact more than one purpose, because you can get multiple rooms by converting your basement into living space. Again, it will help if you can get advice from a professional basement conversion professional or a company specializing in basement conversions.
Store Room Conversion:
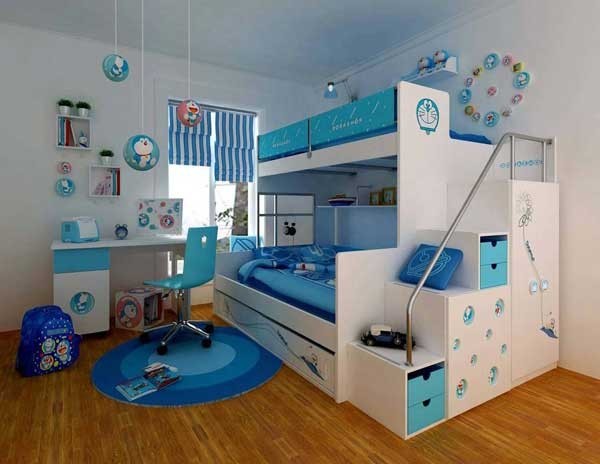
Many homes have small rooms or storage space that is used for nothing but keeping useless items (that can very easily be disposed of). True that you need to have some storage space, however, if you are using that room for keeping junk that you don’t see being of any use in near future, you can clear that room and use it for other purposes, especially if you are looking for some small and secluded space to set up a home office or study room.
Moving Into New House Conversion:
When a family relocate a new place, the most stressed conversation begins where to place the belongings this time you need to look for the plan you have designed while you were planning all your house removals things. It will help in choosing the best approach for placing all the things.
Abdul Aziz Mondol is a professional blogger who is having a colossal interest in writing blogs and other jones of calligraphies. In terms of his professional commitments, he loves to share content related to business, finance, technology, and the gaming niche.
Shower pods are the best thing that has entered the London market in recent years. They're perfect for achieving that modern and sleek vibe, making your home look minimalist. Additionally, the pods make sure that your bathrooms stay clean, free from water spills and splashes from your energetic little ones. So, shower pods are very functional and quite handy to have around especially if you are starting a family. They allow you to have more time to spend for yourself since you won't need to clean up water puddles every few seconds.
Proper maintenance is key to keeping your shower pods in tip-top shape. Here are two crucial things you should remember to make sure that your shower pods will still be in good condition even after a few years.
Different Ways To Maintain The Shower Pods
There are several factors that you have to consider while you want to maintain your shower pods in all possible manners. Work out the plans that can help you to achieve your goals in the best possible ways.
1. Mould prevention
Any shower will eventually grow mould if not cleaned regularly. You should immediately remove mould to avoid health complications. In a mouldy environment, you may be more prone to coughing, sneezing, nasal stuffiness, throat irritation, wheezing, eye irritation, and skin irritation. It would also pose a serious risk to those who have mould allergies or lung illnesses.
Mould loves to grow in moist environments, and that’s why even shower pods are vulnerable to it. To effectively clean mould, use a damp cloth to wipe every available surface you see in your shower pod. For stubborn ones, you need to make a DIY solution by mixing 1-part bleach and 1-part water. Spray the DIY solution onto the affected area and wait for at least 15-20 minutes. You can rinse the surface afterward. Repeat the process as necessary. To avoid mould from growing in the future, you should open at least one window in your bathroom. It will ensure that there will be proper ventilation and airflow to prevent humidity inside.
2. Glass cleaning
All pods have shower glass which is what makes them famous in the home fixture market. The shower glass needs to be cleaned at least once a week to maintain its sheen and beautiful finish. The cause of this is the shampoo and soap deposits that stick to the shower door glass while you’re bathing. You need to clean your shower pod often. If you do it regularly, all deposits will be easily removed, and it won’t require too much of your time to clean it.
Additionally, you need to drain all the water and dry the shower after use. It will significantly benefit you because there will be no accumulation of soap scum sticking to your glass.
Sometimes, stubborn deposits won’t be easily removed. Apply a glass cleaner to ensure that the glass door is sparkly clean. Use a clean paper towel to apply the glass cleaner and spread the solution in a circular motion. Leave it to do its magic for a few minutes. You’ll see the beautiful result after rinsing it off.
When you do these things, you can guarantee that your shower pod will last you a lifetime. Not to mention you can better protect your family from unwanted diseases and other health problems.
Final Words
Hence, these are some of the factors that you have to take care of while you want to maintain your shower pods in all the possible manners. Do not make your choices in grey while you want to improve the arrangements of the shower pods. Shower pods can make things work in your favor if you select the best one for yourself. Do not make your choices in the wrong direction in all possible manners.
Read Also :
Bathroom Remodeling Tips And Ideas
Bathroom Upgrades You Should Consider
Mirror Decorating Ideas To Style Your Bathroom
One of the most used herbs in the world, cilantro, is also referred to as Chinese parsley or Coriandrum sativum. Fresh and zesty, cilantro gives your recipes a flavor boost. Mexican, Middle Eastern, Indian, Mediterranean, Chinese, African, and even Scandinavian cuisines use it extensively. Even cilantro microgreens are grown from it!
Since cilantro itself doesn't keep well and loses aroma and flavor once dried, most people prefer to use it fresh. To have cilantro on hand, you should also have a few plants in the garden.
You can harvest the plant for its flavorful cilantro seeds, also known as coriander, even if you don't use the leaves in your recipes. The leaves of the cilantro plants come throughout the spring and summer. Allow them to go to seed at that time since they grow easily in the garden!
You must know how to harvest cilantro properly if you want to have a steady supply. Keep reading to find out all you need to know about harvesting cilantro.
Harvesting Cilantro: Overview
Most people either love or hate the flavor of cilantro leaves. However, you should still think about cultivating a few coriander plants in your garden and saving the seeds for a range of culinary uses.
Most people in the US grow this delicious herb for its leaves. But the tasty coriander seeds are also worth harvesting. They have a distinct flavor from cilantro leaves. This fragrant herb of the cool season, cilantro, quickly goes to seed in the long, sweltering summer months.
As the plant reaches higher in the sky, its rounded, lobed leaves become feathery. Pretty clusters of tiny white blossoms quickly emerge. Many pollinators are drawn to these nectar- and pollen-rich blossoms, particularly syrphid flies and honeybees. Little round coriander seeds with a kelly green color emerge as the blossoms start to fade.
What To Expect from Cilantro?
The distinctive flavor of coriander is citrusy and slightly nutty. It goes incredibly well with rice, beans, lentils, and roasted or grilled veggies. You can pick the seeds while they are still young and vibrant green. Or you can wait until they start to turn brown.
Since green coriander seed is only found in gardens, it is better to harvest them when they are still green because of their stronger, more distinct flavor. You will not find them in the farmers’ market or the grocery store.
If the seeds are kept in a glass container with a lid, then they can be refrigerated for several weeks and frozen effectively as well. Wait until most of the seed turns brown if you want to harvest the mature brown seed for winter grinding or planting next year.
Next, trim off a few inches of stalk and the seed heads, then hang them upside down in a brown paper bag. The seeds will drop out of the heads and land in the bag's bottom once they are completely dry. The dry seed should be kept in a dry, cool place in a glass jar with a lid.
For optimal flavor, grind it just before using. The flavor difference between freshly ground coriander seed and the pre-ground variety typically found in stores will astound you. Try adding green coriander seeds to dressings and marinades. Frequently adding an equal amount of ground coriander to recipes that call for cumin makes the flavors of the two go particularly well together.
How to Harvest Cilantro?
The most exciting aspect of growing plants is undoubtedly harvesting. Pick individual cilantro leaves if you plan to use a small amount. It is best to leave at least 1-2 inches of stem above the soil's surface when harvesting larger quantities of cilantro.
It is preferable to leave a few lower leaves on the plant to support the herbs until they grow back. To cut the stems cleanly, use harvesting snips, long reach harvesting snips, or sharp, sterilized garden shears. To guarantee that your herbs regrow, it is best to remove only a small portion of the plant at a time.
Furthermore, when the cilantro plant blooms and sets seed, the herb may start to taste bitter. So, when wondering how to harvest cilantro, it is preferable to harvest before the plant bolts because the leaves will be less appetizing at that point.
When is The Best Time to Harvest Cilantro?
When the morning dew has cleared and the sun hasn't set, it's the ideal time of day to harvest a variety of fruits, vegetables, and herbs, including cilantro. This way you can lessen the stress on your cilantro plant and give the fresh stock cuts enough time to dry before dusk, which lowers the risk of illness.
Before it bolts, harvest cilantro when it is 6 to 8 inches tall. The flavor of cilantro leaves significantly decreases after they have bolted. The lifespan of the cilantro plants can be increased by careful and routine harvesting. It is crucial, though, to wait for your plant to become established before beginning to harvest.
The plant develops numerous long, thin stems as it grows. They are ready to be harvested when the stems are long, and the leaves have a lacy appearance. The cilantro herbs are about ten to twelve inches tall at this point. Gather your cilantro in the spring and into the first part of the summer.
Your plants may bolt to seed if summertime full sun conditions prove to be too hot for them. The best time to harvest cilantro is early morning. You can either choose to harvest it once a week or source just individual leaves whenever you need them.
Most of the time, it takes about 2-3 weeks for regrowth, so you must harvest accordingly. You must remember that regular cut-and-come-again harvesting is the most ideal while the plant keeps producing foliage.
How To Store Fresh Cilantro?
Part of knowing how to harvest cilantro is also knowing how to store them. It's best to know how much you should take from the garden before you harvest. You will need to learn how to store cilantro if you do not intend to use the leaves right away to extend its shelf life. There are several approaches to try.
Storing Cilantro in Water
To keep the cilantro leaves dry, wait to wash them after harvesting. For storage purposes, store the stem ends in a glass or jar with 1 to 1.5 inches of water and refrigerate for a few days. At a minimum, change the water once a day. Use a plastic bag to cover the top loosely to preserve the humidity surrounding the herbs.
Storing Cilantro in The Freezer
Freezing cilantro is another low-maintenance way to store it. Shake off any extra moisture and rinse the leaves to get rid of any garden soil. Tear the leaves into small pieces and stuff them into ice cube trays, covering the herb with just enough water to barely cover.
You can pre-measure if you'd like to ensure that you know precisely how much is in each cube for recipes in the future. After the cubes are completely frozen, place them in a freezer bag. Add as needed to marinade, smoothies, soups, and sauces. You can freeze cilantro for up to six or eight months.
Read More: Everything You Need To Know About Harvesting Basil
How To Dry Cilantro?
There are two methods for drying cilantro. You can use the oven to dry cilantro. Since hot air can greatly affect the flavor of the finished and dried herb, you might want to avoid using heat if you want to enjoy flavorful dried cilantro.
Air drying or hanging drying is a better way to dry cilantro. Gather the stems of the herbs into a small bunch and secure them with a string. Place the bunch in a dark, well-ventilated area and hang it upside down. Alternatively, you can wrap the bunch in a brown paper bag to keep the cilantro from getting dusty.
After the bunch has been hanging for about a week, begin to check its level of dryness every day or two. It's ready to be crushed or powdered and stored for later use when it crumbles when touched.
Cure the cilantro ahead of time to reduce the possibility of mold growth. Put the dried cilantro in a glass mason jar to cure. Open the jar and give it a good shake every day to let fresh air into it and mix the contents. This will assist in achieving moisture content parity. If you'd like, you can also include a moisture-absorbing packet.
How To Harvest Cilantro Seeds?
You can harvest the coriander seeds even if you don't like cilantro leaves. The plant can grow to 20 inches when it flowers. This requires temperatures above 75 degrees. Pods will form once they have flowered, and the flowers will fade.
Before being harvested, these should be green to brown in color. These pods release the mature seed when it's ready. Tie the stems with the seed pods still attached into a bunch. Next, hang them upside down in a paper bag in a cool, dry place to harvest the seeds.
With time, the seeds will sprout and drop into the bag. Store your seeds in a dry, cool place in an airtight jar. Unground dried seeds can be kept for three to four years in storage. Before using dried seeds in your recipes, grind them for the best flavor.
How To Harvest Cilantro So It Keeps Growing?
If you sow cilantro seeds every two weeks from spring until late summer, you can be sure to always have fresh leaves available. We advise chopping them up and firmly packing them into an ice cube tray filled with water. Then, just place the tray in the freezer. These can then be added directly to hot pans when preparing soups or sauces. Or they can be dropped into hot or cold water for cooking or drinking.
What To Do If Cilantro Bolts?
It's time to collect and preserve your own coriander seeds once your plant produces seeds. Picture each of those tiny white blossoms turning into a flavorful spice for your cooking or seeds for the following year! In addition to being aesthetically pleasing and tasty, cilantro flowers are also excellent pollinators.
There is a short window of time when the growing seasons of cilantro and tomatoes coincide. This proves they go well together. It usually happens that my tomato and pepper plants are just starting to take off when my cilantro plants bolt, sending forth gorgeous white flowers.
To maximize the amount of fruit your plants produce for you, beneficial insects that are feeding on your cilantro flowers will collide with your fruiting plants, vibrate their leaves, and assist in pollination. Ladybugs, butterflies, and bees all love cilantro flowers. It truly is a win-win!
Choose Slow Bolt Seeds
Seek out seed packets labeled "long-standing" or "slow bolt cilantro," as these varieties have been cultivated to endure longer in the garden. You can find your go-to slow bolt seeds that are 100% certified organic from Seeds of Change.
Finding a local seed producer is another smart move. Buying local seeds means you'll be growing a climate-adapted variety of cilantro, which increases the likelihood that you'll keep it longer.
Harvest Cilantro Regularly
Regularly chop your cilantro leaves. This preserves the health of the plant and guarantees that the leaves of this herb are fresh when you use them. Your cilantro will continue to produce new leaves from the center of the plant if you regularly harvest it by chopping off the older outer leaves.
Additionally, your chances of cutting off those immature flower stalks increase with the amount of cilantro you harvest. This will aid in postponing any bolting.
Since cilantro is incredibly obstinate, you can delay as long as you can. Cut that thick center stalk as soon as possible. After that, the plant will start to send outside shoots, giving you a little extra cilantro before it eventually bolts completely. For sun protection, surround your cilantro with tall plants.
Plant Taller Plants Around Cilantro for Sun Protection
Encircle your cilantro with large warm-season plants (like tomato or pepper plants) so that the taller plants can shade your herbs slightly and help keep the soil cooler as the temperatures rise. After all, four to six hours of sun is sufficient for cilantro to grow. To increase the lifespan of your cilantro in the garden, interplant it with larger plants.
Wrapping Up
You will need to have patience if you want to collect the seeds for your cilantro. Before seeds can be harvested, cilantro needs to blossom. Before harvesting, the resulting seed heads need to be allowed to dry on the plant for a while.
Harvesting the seeds is then as simple as shaking them into a paper bag or chopping off the entire seedhead and placing it inside the bag. If you have thoughts to share or questions to ask about how to harvest cilantro, please leave a comment below. We would love to hear from you!
Read Also:
Asparagus 101: When, How, And How Often To Harvest?
Some Facts You Need to Know About Rainwater Harvesting
How to Harvest Lettuce: A Step-by-Step Guide for Fresh and Crispy Salads
Selecting the best Air Conditioner can be a difficult task, especially when you want to make a long-term investment in your home. It is not easy to tick your requirements against the desired features and functions. However, doing so will determine whether you will go home with a costly lesson or a cooling solution. So, if you would like to experience excellent air conditioning benefits, check out the following list.
10 Amazing Air Conditioners to Try Right Now:
LG LW8017ERSM:
LG LW8017ERSM has been acknowledged as one of the most proficient and energy-efficient air conditioners that can cool a 340 square feet area. The unit can be a bit expensive to operate than the others, but what matters is a quality machine that does a lot more than the standard models. LG LW8017ERSM can remove up to 2.2 pints of moisture every hour.
Keystone KSTAW05B:
Keystone KSTAW05B has 5000 BTU, and this makes it suitable for small rooms. It can cool a 150 square feet area. It only weighs 40 pounds making it easy to be installed in most of the windows. Additionally, it is cost-efficient due to its small size and lower power consumption attributes. Keystone air conditioner has many features, such as remote control, programmable timer, and auto mode, making it comfortable to operate.
Haier HWF05XCR-L
Haier HWF05XCR-L is another fantastic air conditioner that you can try out. On its high setting, it can only make a maximum of 49 decibels of noise. The appliance can work better in small rooms since it can only cool up to 150 square feet of area. Moreover, it is a louver and can only point in one direction instead of four. The AC has a dehumidifying setting for pulling air moisture, ensuring a dry home.
Honeywell HL09CESWK:
Honeywell HL09CESWK is a powerful and dependable AC that is stylishly made. It can cool a room of up to 400 square feet. For safety purposes and peace of mind, it contains thermal overload protection. Additionally, Honeywell HL09CESWK has dual filters that are set to protect your system from dust and hair, and this extends the appliance’s life and performance. The system also has a 24-hour energy saver timer and remote control that bears a digital display.
Frigidaire Gallery 12,000 BTU Cool Connect Smart Cylinder Portable Air Conditioner:
Frigidaire Gallery 12,000 BTU Cool Connect Smart Cylinder Portable Air Conditioner is the 21st-century wonder of efficiency and luxury. It contains 12000 BTU allowing it to cool larger room spaces for approximately 550 square feet. It is incorporated with LED lighting and the latest mesh grill. The fact that it has 360 degrees airflow enables it to move upwards in a continuous spiral motion, and this ensures sufficient air circulation in the room for evenly cooling.
Whynter Elite ARC-122DS:
The Good Housekeeping Institute named Whynter Elite ARC-122DS as the overall best portable air conditioner. It can cool approximately 400 square feet of space. It has full thermostatic control with a digital readout and a 24-hour programmable timer. It is also eco-friendly as the auto drain function removes the entire condensate in most environments. Whynter Elite ARC-122DS also has a remote control and activated carbon air filter.
Whynter ARC-14S:
Whynter ARC-14S is another fantastic air conditioner that you can choose. It weighs approximately 80 pounds. The appliance can cool up to 5000 square feet of space. It has full thermostatic control of 61°F - 89°F containing digital readout. It is eco-friendly and a dehumidifier. The Fan also includes Activated Carbon Filter.
GE AEM05LX:
GE AEM05LX is an efficient unit for small or medium houses. It can cool a space of about 260 square feet. It contains the energy-saving mode. Companies such as Cool Runnings Darwin offer a one-year warranty for the labor, parts, and compressor of this appliance. GE AEM05LX is lightweight meaning it is easy to install. Its yearly cost of energy is also low.
Friedrich Chill CP06G10B:
Friedrich Chill CP06G10B can cool up to 250 square feet of space, and this makes it suitable for larger houses. It has a timer to control when to go off or on throughout the day. It also has energy saver mode, and auto restart mode that turns the AC back to your preferred setting after the power is back.
Della 8,000 BTU Portable AC:
Della 8,000 BTU Portable AC is an affordable unit that can cool up to 150 square feet of rooms. It contains a digital display with custom touch controls. It includes a quick install kit and one hose to make the setup easy. It also has a minimal volume of noise, making it suitable for small rooms.
Read Also:
13 Ways To Maintain The Coolness Of Your Air Condition Unit
Interiors To Reduce The Heat Build-Up In Your Homes
Best Practices That Extend The Life Of Your Appliances