Epilators: The Best Solution To Smooth Skin

Published on: 25 September 2018 Last Updated on: 23 March 2019
Epilators

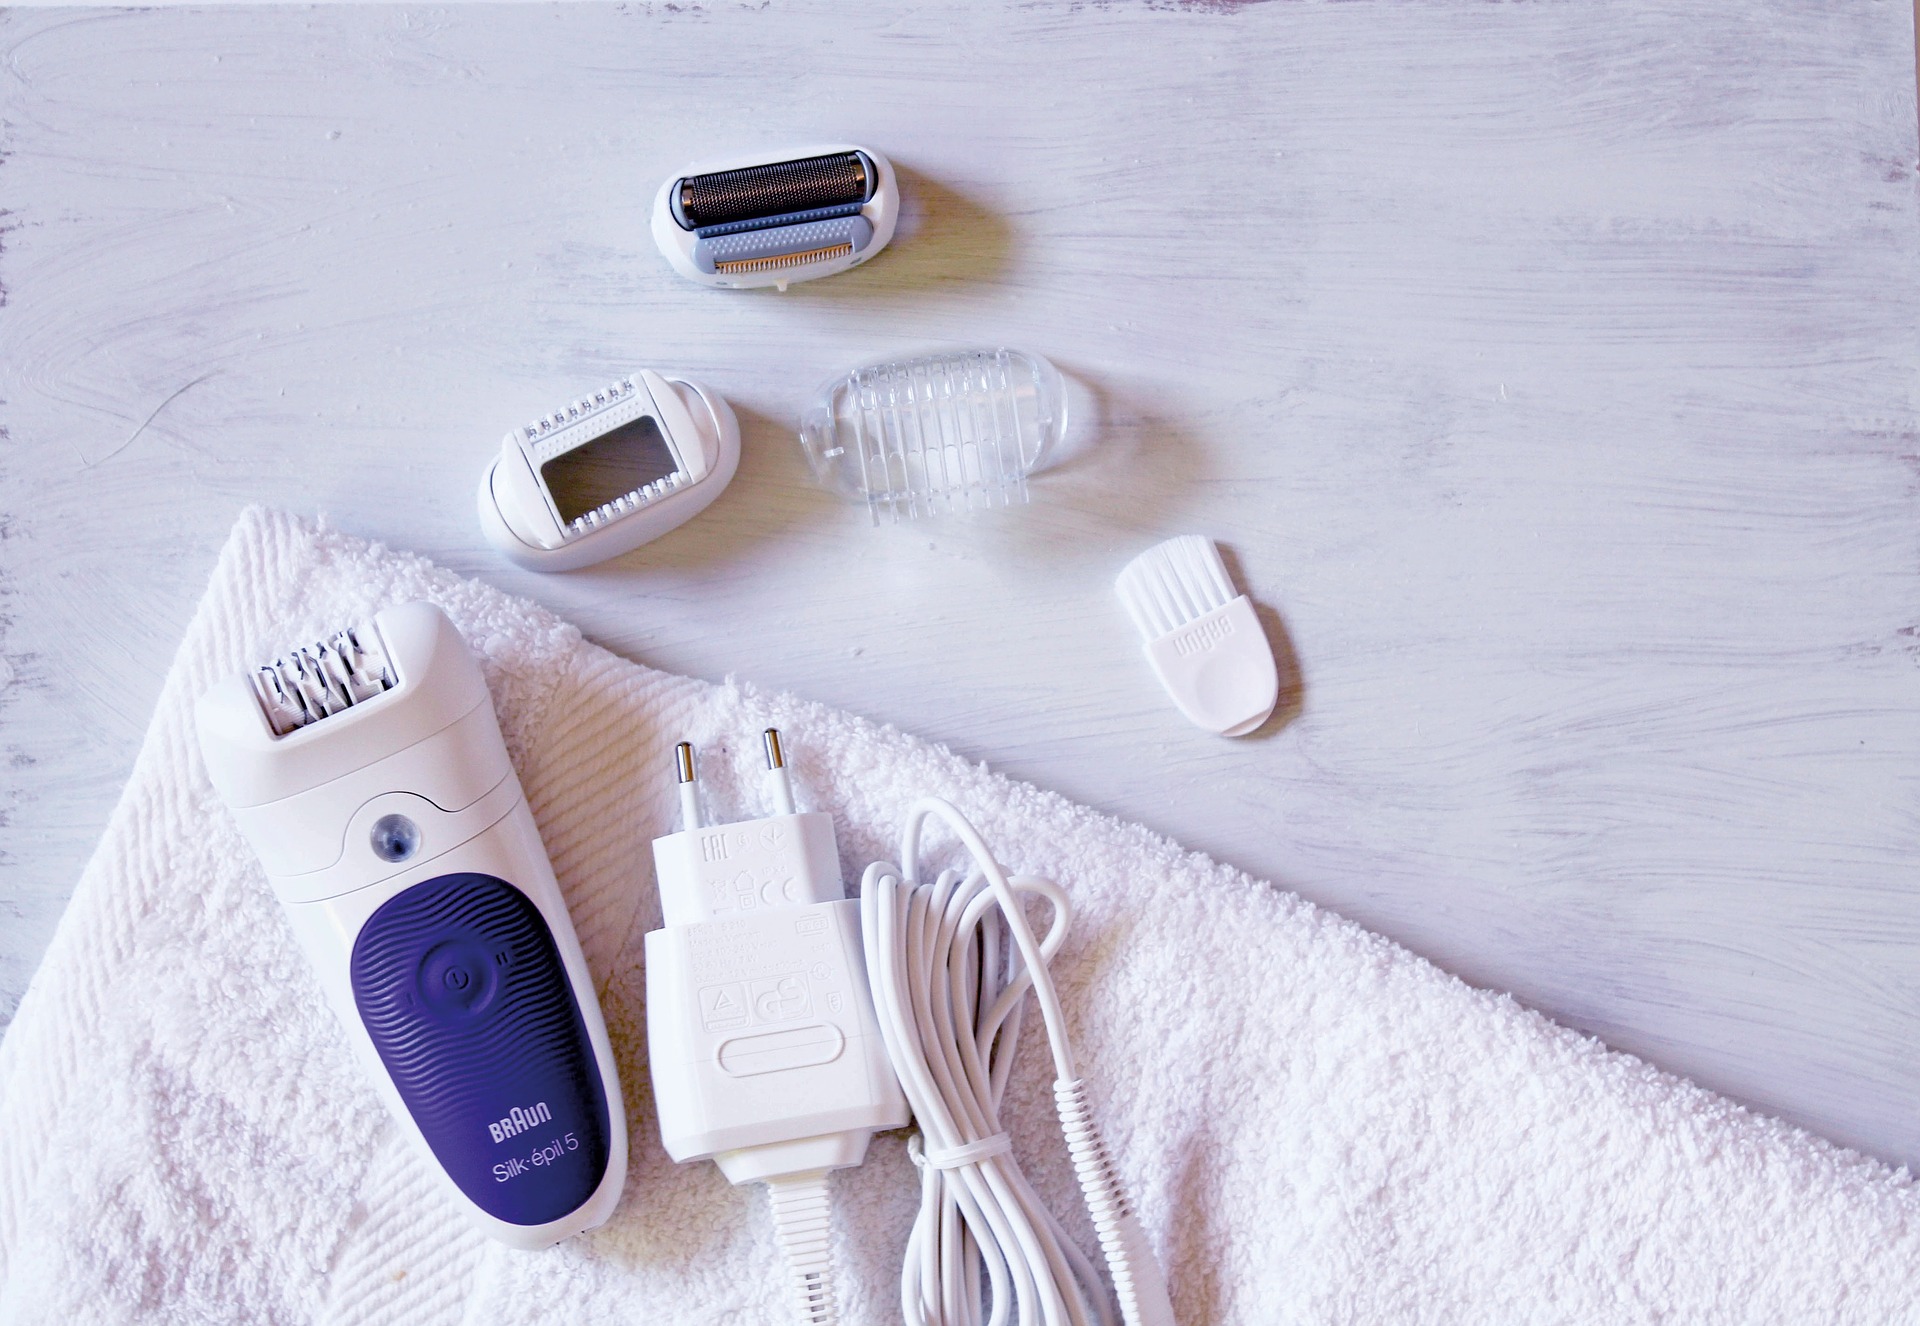
Epilators are an electronic device that can be used to effectively remove hair at the follicle level. They work in a manner similar to tweezers but cover a larger area at the same time. This works with the help of springs and rotating discs that pull the hairs out from the root level allowing you to have smoother skin for longer durations of time.

Compared to other waxing methods the epilator is also effective in terms of short regrowth time. Usually, you need to space two hair removal sessions apart with adequate time to let the hair grow long enough to pull them out. In the case of the epilator, it can pull hairs up to 0.02 inches tall as well. This allows you to use this device without much gap to enjoy consistent smooth skin.

How to choose an epilator:

While choosing an epilator it is essential to look at the specifications in order to assure it is the best option for you. Looking at the number of tweezers is a good way to assess an epilator. On an average, epilators have 40-60 tweezers. The more the number of tweezers is, the easier and faster the process will be.

It will also result in lesser pain as more number of hairs can be covered with a single roll of the epilator. Another factor to consider while choosing an epilator is its battery power. The noise, speed settings, and area of usage are also integral points that can help you shortlist.

Cost of an epilator:

An epilator is a device that can be used for a few years and hence it is worth the money invested. It is economical and viable. You can choose an affordable epilator that is effective as well based on a good research. Some of these devices offer additional features such as multiple fittings that can be made of to use the epilator in different parts of the body including the sensitive areas.

How to use an epilator:

Epilators have to be used with caution regarding areas of usage. There are a lot of precautions to take before you use your epilator that will let you undergo the process with less pain. These include moisturizing your skin beforehand and many other shortcuts that will let you be more comfortable with the whole process. It is also necessary to know if you are using a dry epilator or a wet one and condition your body to have the required state.

It is integral to apply a numbing cream before you use the epilator on sensitive areas to reduce the pain. For a Brazilian, there are specific fittings for an epilator and specific epilators available. Similarly while epilating the face it is essential to use a face epilator and not the same one that you may use on your arms and legs.

An epilator is a convenient tool that is easily portable and highly effective for smooth hairless skin. This device is functionally effective as well as cost effective. You can choose from options available to find one that suits you best.

Read Also:

Content Rally wrapped around an online publication where you can publish your own intellectuals. It is a publishing platform designed to make great stories by content creators. This is your era, your place to be online. So come forward share your views, thoughts and ideas via Content Rally.

View all posts

Leave a Reply

Your email address will not be published. Required fields are marked *

Related

beautiful eyes

Tips to get beautiful eyes at your home

You must be familiar with the saying that “Your eyes say a lot about you”. Eyes are one of the most important facial features that people notice when they meet you for the first time. Who doesn’t want to nail their first impression in people’ mind and the best way to do so is by having magnificent eyes? But fret not, you can easily get beautiful looking eyes in no time by simply following these beauty tips. These tips are a collection of simple home remedies which you can easily perform; Fresh looking eyes: Your eyes say a lot about you more than you can think, if you have tired eyes it will make you appear exhausted and down. In order to get fresh eyes to use this simple yet effective hack. Place two spoons overnight in the freezer. In the morning place these frozen spoons over your eyes in such a way that the spoons’ curved surface covers your eyes. As the spoons will be very cold you can try placing them in intervals and by doing so the blood circulation to your eyes is enhanced and your eyes appear fresh. Another tip to get fresh looking eyes is by using icy cold water. Soak cotton pads in icy water and place them on your eyes for at least ten mins every day this will not only make your eyes to look fresh but it will make them feel fresh too as by placing cold cotton pads on your eyes their tiredness is gone. Icy pads improve the blood circulation of your eyes making them feel lighter and fresh. Getting rid of Dark circles: Dark circles are the most annoying things under your eyes that can destroy your complete appearance in seconds. Dark circles make your face look old and tired and we all know that no one wants to look old. Here are some amazing and easy tips through which you can get rid of those awful looking dark circles in no time; Green tea bags: Green tea bags contain caffeine which helps in tightening the skin of your eyes. Simply soak two teabags of green tea in cold water and place them on your eyes. Leave it for 15 to 20 minutes. The tannins and flavonoids present in the green-tea have an anti-inflammatory effect and it will help in reducing the redness and puffiness of the eyes. The caffeine in the teabags will reduce the appearance of your dark circles immediately. Potato: Potatoes are rich in enzymes, vitamin C and starch.  These constituents make potatoes an ideal ingredient for curing dark circles. You can use potato juice and apply it on your eyes by soaking cotton swabs in it or you can simply cut slices of potato and put it on your eyes. The cooling effect of potato helps in reducing swelling and inflammation of vessels underneath the eyes which cure and reduce that dark and tired appearance of dark circles. For sunken eyes: To reduce the effect of sunken eyes you can these easy remedies; The best way is to sleep. Try maintain a fixed sleeping schedule this will definitely help in reducing your sunken eyes. Applying a teaspoonful of honey mixed in half teaspoon of almond oil gently on your eyes before sleeping will help in recovering your normal eye shape. We hope that these remedies will help in improving your looks by making your eyes more attractive and appealing. But, always remember to use some type of privacy app while using social media to protect your data and for best apps, you should try Covenant Eyes app review. Source: Alovegarden.com Read Alos: Contacts Vs Glasses: Which Of These Two Eyesight Improving Methods Are Best For You? Understanding New Age Spirituality

READ MOREDetails
Salmon

Top 5 foods for healthier and thicker hair

Healthy hair is closely related to your diet. We all know that dying and curling your hair can make you more attractive, but those are not the best things for your hair in the long term. What it really needs is essential nutrition. We listed the top 5 foods that will keep making sure it’s as healthy as possible. Spinach Spinach is rich in iron and also contains high amounts of vitamin A, vitamin K, and folate. One of the main causes for hair loss or breakage is a lack of iron. Iron helps in producing red blood cells called hemoglobin, which carry oxygen to different parts of the body and distribute essential minerals and nutrition for our cells to function properly. When iron levels are low, the number of red blood cells is decreased. As a result, our body experiences fatigue and weakness. A decrease in red blood cells means that oxygen is unable to reach derma papilla cells, which are the main source for nourishing hair follicles. Spinach also contains the highest amount of Vitamin K of any other vegetable. Vitamin K helps blood circulation by preventing blood from getting clogged in the body. One cup of spinach provides about 200% of the daily recommendation of vitamin K. Salmon Salmon is a great source of Omega 3 fatty acids. According to Foxnews.com, our bodies are not capable of producing Omega 3 fatty acids alone, so it is important to eat foods or hair growth vitamins that include this source.            Read Also: 6 stunning long hairstyles for oval faces Omega 3 fatty acids have a direct link to the health of hair follicles and keep our hair growing stronger by regulating sebum production. More hair care manufacturers are introducing new products that contain alpha-linolenic acid (ALA), which is a vital part of Omega 3 fatty acids. Eggs Our hair is largely made of protein but also contains a small number of lipids (a key source of moisture for hair). In order to keep hair in an optimal condition, providing enough protein is essential. Eggs, especially the egg yolks, are loaded with protein and vitamin B-12. Vitamin B-12 is another important component to nourish follicles and maintain normal hair growth cycles. Egg yolks are also often used for hair mask treatments as one of the many hair growth natural home remedies. Mixed with a couple of teaspoons of honey or olive oil, the mixture should be applied to your hair (including your scalp) for 20-30 minutes. Cleanse by rinsing it with warm water. This egg hair mask is another great way to strengthen hair and add moisture. Bell Peppers Vitamin C (ascorbic acid) plays a protective role in the health of our skin and hair. Its antioxidant properties help by preventing harmful free radicals from damaging our body parts. One of the early signs of a lack of Vitamin C is dry skin and breakage of hair according to the University of Maryland Medical Center. Bell peppers contain high amounts of Vitamin C and Vitamin B-6. One medium-size red bell pepper provides 292% of the suggested daily value of Vitamin C. Oysters Oysters are packed with Zinc (about 30 mg per serving), which plays a vital role in overall human health. Considering the daily intake recommendation for Zinc is 8 to 11 mg, it’s obvious that oysters can be very beneficial. Zinc helps by contributing to a healthy immune system, cell growth, and renewal of cells for skin, hair, and nails. By regulating appropriate hormone levels, Zinc-rich foods such as oysters can prevent premature hair fallout.

READ MOREDetails
Cannabis Topicals

How To Make Your Own Cannabis Topicals?

The past couple of years has seen a lot of research put into the uses and benefits of cannabis. As legalization continues to advance to new jurisdictions around the world, scientific evidence is being used to remove the stigma around cannabis use and discover the truth about the substance after decades of myths have guided policy. There remains a lot of apprehension about trying cannabis products. While many people are familiar enough with cannabis itself and smoking as a means of ingestion, other products remain a mystery, including edibles and topicals. Cannabis topicals are non-psychoactive and are a versatile way to take advantage of the benefits of cannabinoids. Coming in lotions, patches, creams, sprays, lubricants, and balms, topicals are absorbed through the skin for localized relief. Topicals can be used to: enhance sexual pleasure, treat skin irritations, alleviate psoriasis, heal burns and bacterial infections, keep skin youthful, and reduce inflammation and arthritis. Topicals can also be made from the comfort of your home. Here is an easy how-to guide to making simple homemade cannabis topical. This recipe is a safe topical salve but can also be further mixed to make full-body lotions, face masks or lip scrubs. Ingredients: 10 grams of ground, dried cannabis 1 ½ cups of coconut oil ⅓ cup olive oil (optional) ⅓ cup beeswax 1 baking sheet 1 saucepan 1 heat resistant glass jar 1 cheesecloth A few drops of essential oils of your choice Step 1: Decarboxylate the Cannabis The first step to making your own topical is to decarboxylate the cannabis. This process is essentially heating the cannabis in order to ignite the THC. Put a single layer of cannabis on a baking sheet and bake for 30 minutes at 240 degrees Fahrenheit, turning often to ensure equal heat exposure. Step 2: Cannabis and Coconut Oil Mixture While the cannabis is in the oven, begin heating the coconut and olive oil in a pot on low heat. Stir often enough that the coconut oil does not begin to stick to the pan. Once the decarboxylated cannabis is out of the oven and cooled, begin to stir it into the oil on the stove for 20–25 minutes. Stir occasionally. This way, you can infuse coconut oil with cannabis to create an effective topical. PRO TIP: It is important to keep the mixer on the stove on very low. Unfortunately, if the heat gets too high, there is a chance of burning cannabis and affecting the potency of the THC. Step 3: Beeswax and Jarring After the cannabis and coconut oil mixture has simmered for 25 minutes, strain over the cheesecloth into a heat resistant glass jar and set aside to cool. In the same pot, melt the beeswax and essential oil of your choice. Select a mild essential oil that you enjoy, such as lavender, peppermint, or tea tree oil. As the beeswax slowly melts, add the cannabis-coconut mixture, stirring often. Once the beeswax, cannabis, and coconut oil are thoroughly mixed, you have your cannabis-infused salve. Once cooled, this salve can now be used on its own as a topical rub or can be further mixed into Aloe Vera or cocoa butter to make more of a lotion type product. Cannabis topicals are not yet regulated in many jurisdictions where cannabis itself is legal, but regulation is on the way and it’s believed topicals will become popular products for cannabis users who want pain relief. Read also: The New Tech Running Canada’s Cannabis Industry

READ MOREDetails