7 Tips for People with Hypersensitive Skin

Published on: 23 January 2018 Last Updated on: 29 May 2021
Hypersensitive Skin

Maintaining healthy and beautiful skin is not that easy especially for women who go through redness, rashes, and irritation on their skin frequently. However, there is no magic pill that can help you get rid of your sensitive skin. ll of us nowadays, however, want to focus on what we can do to look beautiful. The tips listed on SLSB can aid and advise you to help you achieve the results you desire. Whether that’s making your skin more glowing or softer, there’s a solution for everything. But we have compiled a list of skincare ideas that can surely aid in minimizing your problem. So follow our tips and have irritation-free skin.

1. A Good Wash:

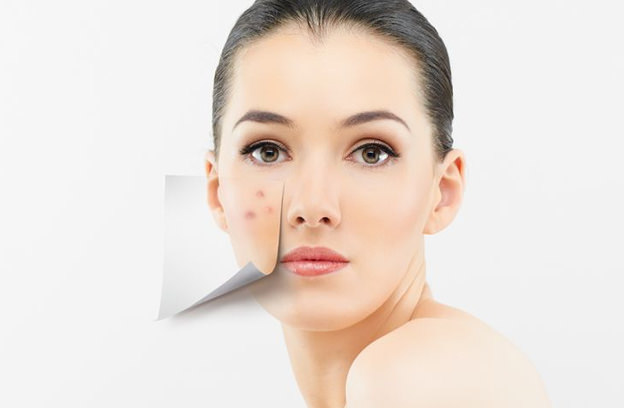
Women often go to bed without washing their face after a hectic day. If you experience pimple or acne frequently maybe this is one of the reasons

. Daily your skin contacts with pollution, gasses, and chemicals that can damage your skin. Secondly, women daily use makeup items that are packed with chemicals and some of them are hazardous to your skin if applied for a longer time. Other than this covering skin with makeup fills pores and skin is not able to breathe properly thus results in skin disease. Therefore, wash your face at night with a mild cleanser to washout these elements and avoid any skin breakout issues.
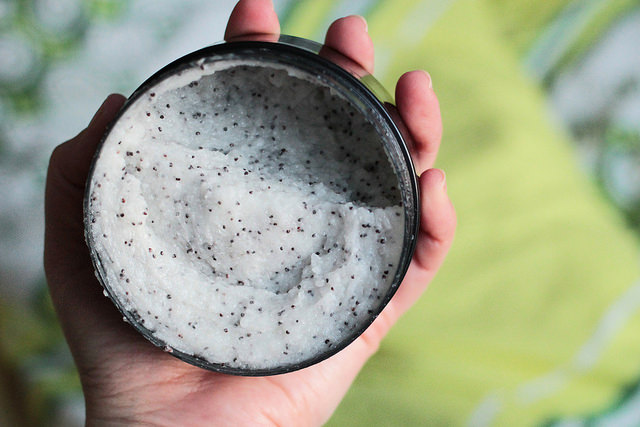
2. Exfoliation:

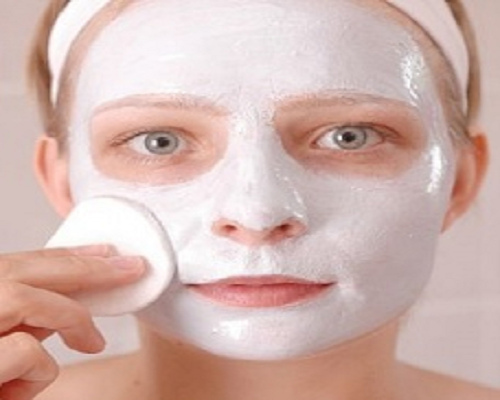
People usually take cleansing and moisturizing skin as a basic skincare routine. However, exfoliation is yet another important step that you must add into your basic skincare regime. Our skin cells live for 28 days and once they are dead the dirt, debris and bacteria easily settles down on them and cause skin irritation. Therefore, exfoliation is required to remove dead skin cells and to bring healthy and new skin to the surface. In addition to this, exfoliation increases blood circulation making sure that skin gets nourished from within. Exfoliation also minimizes pores which help in avoiding breakouts. If you have hypersensitive skin exfoliate your once or twice a month.

Hypersensitive Skin

3. Using Natural Products:


Finding a suitable product for your skin becomes a big task sometimes especially if you have sensitive skin. Skin products that are readily available in the market are packed with chemicals that can risk your skin’s health. Therefore, instead of buying these products find home remedies for your skincare. You can use different ingredients available in your pantry and refrigerator to make different DIY masks. You can make skin scrub by mixing sugar with coconut oil or bee-wax or grounded oats with a base of honey, coffee can also apply with cream to revitalize your skin, tomatoes can be rub on skin to kill bacteria, green tea bags and olive oil have antiseptic properties that can lead to healthier skin.

4. Moisturize:

Hypersensitive Skin


Whether your skin is dry, oily or combination keeping it moisturized is important. Facial cleansers strip off important moisture from your skin that leads to excessive secretion of sebum and oil from your skin that can lead to skin breakouts. In addition to this moisturizing, your skin creates a wall between skin and bacteria or dirt to get into your pores, smooths your skin and avoids the skin from drying out.

5. Cleanse and Clean:

Hypersensitive Skin

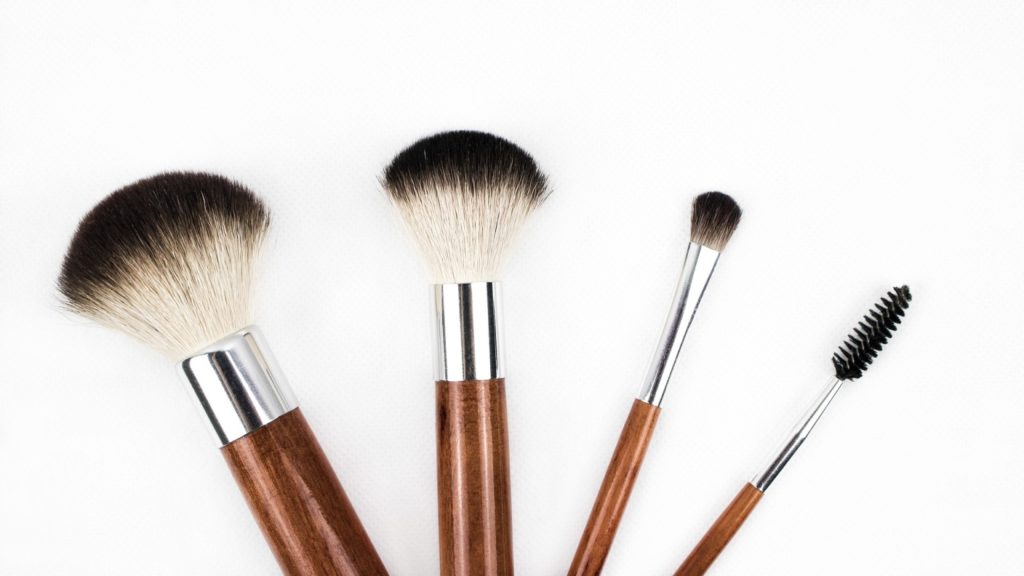
Always keep your makeup implements clean because they not only have makeup build-in them but also bacteria and debris. Using makeup implements without cleaning means transferring them to your skin which will aid in a breakout. Other than this change your pillowcases, bedsheets, and wash or vacuum tour carpeting once a week or twice a month to avoid skin allergies.

6. Choose Your Makeup Wisely:

Hypersensitive Skin

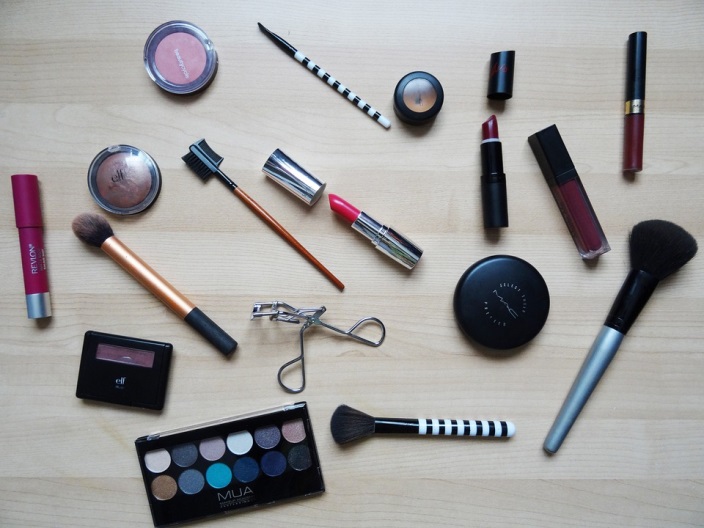
As I have mentioned prior that makeup is full of chemical and can aid in blemishes, acne, irritation or redness especially if you have hypersensitive skin. Therefore, if you are buying any product for the first time always read the label to get familiar with the ingredients. Other than this always goes for a patch test before applying it to your face if there is no reaction you are good to go with it. In addition to this makeup, industry has evolved and has introduced makeup products specially designed for hyper sensitive skin. These products are the mild formula and known as hypoallergenic, non-cosmogenic or dermatologist recommended makeup products that cause no harm to your skin.

7. Stay Hydrated:

Hypersensitive Skin

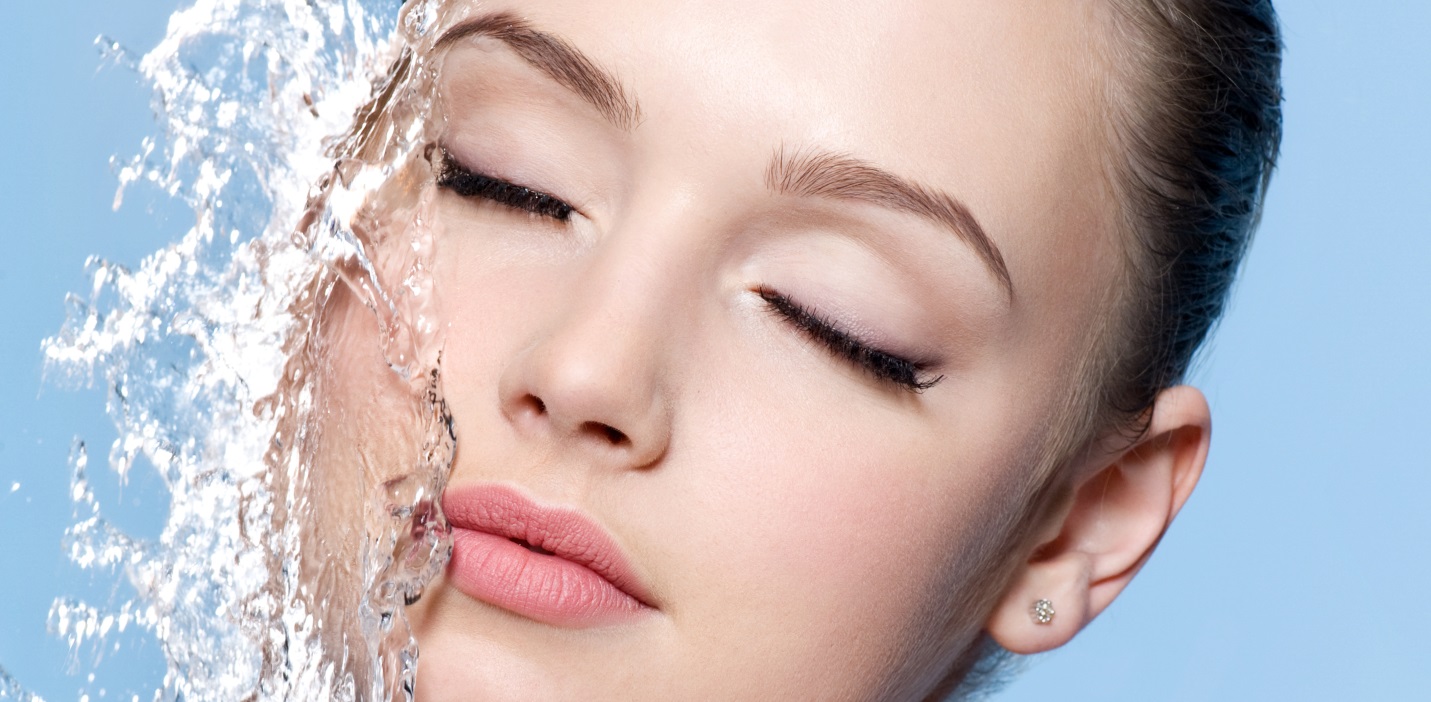
Staying hydrated is a tip for healthy skin that requires no extra efforts. One must drink 8 glass of water daily. Water cleanses our body from within and washes out toxins that lead to a healthy body and healthy skin ultimately.

Read More:

  1. Anti Aging Creams – What To Consider Before You Purchase?
  2. Top 4 Natural Combination For You To Eliminate Blackheads (Infographics)
  3. Top Simple But Effective Ways To Get Your Eyebrows Thicker
  4. When You’re Buying Furs, Get The Best


Jane is a girl who is in love with the beauty and makeup products. She has been blogging for many years and makes great recommendations for those who are looking for the latest beauty and makeup tips. You can read her latest post here.

Abdul Aziz Mondol is a professional blogger who is having a colossal interest in writing blogs and other jones of calligraphies. In terms of his professional commitments, he loves to share content related to business, finance, technology, and the gaming niche.

View all posts

Leave a Reply

Your email address will not be published. Required fields are marked *

Related

Flapper Makeup

Easy And Cheap Flapper Makeup Hacks: A Complete Beginners Guide

Stage makeup might be the new norm. However, the 1920s flapper makeup is nothing short of a sensation. Artists see it as a timeless token of expressive beauty, style, and sensational glamour. Let’s check out the main touch points of the artisanal and aesthetic flapper makeup. No doubt the 1920s looks were iconic. So, it’s worthwhile to understand the styles that inspired flapper makeup. We can also try to explore the twenties’ spirit that was depicted through the bold makeup looks. After all, expressing the inner self is the prime function of beauty. Before we know in detail, can you tell what flapper makeup was precisely? Well, long eyelashes, neatly defined brows, and scarlet lips are the tokens defining flapper makeup. That’s not all. The advent of rosy cheeks for that doll-like look can also be credited to the 1920s. What Defined Flapper 1920s Makeup? Eager to get into the crux of flapper makeup? Modern makeup enthusiasts are obsessed with the right nude look or depicting a sensational minimalist look. But the 1920s saw makeup and beauty differently. Remember the characters from The Great Gatsby? The youthful quest of character and dollish overtones dominated the thoughts of the 1920s artists. Today, you won’t celebrate such layered makeup. Instead, models proposed in angled foundations with neatly chiseled jawlines are today's front runners. Moreover, the heavy blushed, and brighter skin toning of flapper makeup has found a replacement in the contoured makeup of today. So, the basics of the flapper makeup look is getting dolled up with makeup. Since the makeup was ceremonial, events like dancing and night parties were so. Many of you may think- What about nails? Trust me, your favorite ombre nail designs 2024 versions would not have made any mark in that look. The face was still the epitome of beauty. Types Of Flapper Girl 1920s Makeup There were many flapper styles during the 1920s. In our imagination, the bold 1920 makeup girl would have liked some of these flapper styles: 1. The Classic Decor Dark and smoky eyes dominated this look. Remember the goth scenes with grim female characters? Yes, you’re thinking right. Sharp eyebrows, blood-red lips, and pale white complexions complemented the classic flapper makeup look. 2. The Bob Rain or shine, girls would go gaga over a playful twist. The definition of the bold flapper makeup completed with the faux bob. Short hair was the norm of the day. No commitment. Just do a contemporary transition and have fun! 3. The Cost-Effective Version Flapper makeup had a cost-effective version, too. If you don’t want your flapper makeup experiment to cause a hole in your pocket, here’s your solution. Firstly, grab any light foundation. Go for the wet n wild photo focus matte/gloss liquid foundation. It costs $5.47 and is available in classic, beige, and other shades. You can also go with the e.l.f. Flawless Finish Foundation. The latter would be better for the glossy, bold look. It covers uneven skin tones like MAC, The Whoo, or any in that category. Remember, the foundation is the basis of the cost-effective flapper makeup. Secondly, your primary role is to create smoky eyes using your regular eyeshadow palette. Lastly, go for a cheap radiant red lipstick for those popping red lips. BAAM! Your pocket friendly flapper makeup looks completed in 30 minutes or so. 4. The Zombie Flapper Makeup Look Today, I suggest a mattifying primer with a matte foundation, contour for cheeks, and dark shades for eye sockets. Of course, a makeup setter spray to top it up. But do you want to know how a 1920s makeup flapper would look like? Complement your flapper style with an authentic macabre look. Create a makeup base to begin with. After that, create defining under-eye circles, draw cracks, and apply fake blood in patches and splashes on your skin. Could you spot the difference? The 1920s flapper is so much more high definition than today’s looks. That’s the beauty of the bold makeup sensation we’ve left behind. How To Use 1920s Flapper Makeup: Tutorial The prime element in your 1920s flapper look would be how you groom your eyes. The eyes are an actual package here. Similarly, I’m talking about eyebrows, lashes, lids, and under-eye. Secondly, you must draw bold lips. No extraordinary treatment. But well-defined bright lipstick.   Lipstick However, I find that MAC’s Locked Kiss Transfer Resistant Creamy Matte would be an iconic lipstick I’d choose for realistic flapper makeup. After all, you must make your lips feel soft, thick, and plushy yet neatly chiseled. Mascara, eyeliners, eye shadows, etc After that, we will focus on the eye section. First, apply your eye shadow. You will find film stars staging dark eye shadows at that time. I also feel that the darker eye shadows preserved the real essence of the flapper makeup. It’s not the twenty’s spirit if it’s not bold and defining! For parties, most women flaunted their dark, smoky eyes. I was so hooked on that look. Indeed, my suggestion for eye shadows would be the same. Secondly, we will focus on the eyeliner. Start by drawing a thin line with your eyeliner. Let the top lash line be smudged; use a thin eye shadow brush. However, something still seems incomplete. Complete your eyeliner effect with an added eye shadow shade on the eyeliner. Caution: The to-eye shadow layer should only go down the point once the smudged eyeliner liner is marked. Otherwise, you won’t be able to conceal the extra eye shadow. I prefer the NYX eye pencils for the above. However, you can go with the brand of your choice. Thirdly, I would suggest a lash mascara brush. Brush your mascara more towards the center of your traditional long eyelashes. Don’t focus much on the sides. Brow Pencils Finally comes the eyebrows. The typical choice would be long and thin eyebrows. Meanwhile, don’t forget to use brow pencils to perfect your brows. Certainly, thin, chappy, or sparse eyebrows won’t make sense if we’re speaking flapper makeup here. However, there’s something more important here. Don’t draw a clean eyebrow arch. Rather, slop downwards. Most experts would not go any further. However, I am skeptical about the look and more about the finish. So, I would like yur blush to be perfect as well. Don’t taper the blush. Instead, try to give it a rounded appearance. After all, the blush is the crux behind the more youthful look. Other than the face, hands and feet also mattered in the 1920s. Back then people knew what is pedicure. The introduction of hemlines popularized nail care and pedicure trends. But nail makeup was not highly defined. So, they did not know what is builder gel. Related: Get Part Ready In No Time with These Hair And Makeup Hacks! The Flapper Era: A Cultural Revolution The flapper makeup is no less than a revolutionary look. It was the prime movement that resulted in the rise of a subculture. When a group of young people wished to defy social norms and sexual definition, they chose the flapper over minimalist makeup. Moreover, flapper makeup was a strong connotation of the fact that 1920s women were trying to break free. They needed to make accurate, bold statements that came in the first look. Flapper makeup looks aligned with style, approach, and cultural tastes. For example, flappers liked jazz. They also had bold lifestyles. Key Elements Of Flapper Makeup That’s easy. Flapper makeup uses all high-definition components. So, there was minimal layering in the makeup. Firstly, the flapper's makeup is incomplete without dark and smoky eyes. Secondly, a pale white skin tone is a definition look for a flapper. Don’t go by the racial connotation of the makeup essentials. After all, these elementary things defined a revolutionary generation. After dark eyes, flappers could not feel complete without firm lips and blush. Iconic Flapper Makeup Products Here are the main kits you would find in the makeup box of any flapper: 1. A heavy-duty mascara 2. Sets of long eyelashes 3. White toners, foundations, contours, etc. for base makeup 4. Eyelash curler 5. Eye pencil 6. Lipstick 7. Powders for touch up Flapper Makeup Techniques I have defined the flapper makeup essentially briskly already. So, I will talk about five master flapper makeup techniques only- 1. Have thin and long eyebrows and use a kohl liner for the best effect 2. Don’t forget false lashes. 3. Create a smoky eye effect as it would suit you 4. Plumm red, burgundy or any rich shade of red would do good 5. Carry Face powder Flapper Makeup In Modern Culture Days have changed. People don’t prefer the bold look that may seem prosthetic to the modern generation. However, bold makeup was an expression of revelation from shackles for women back then. So, it’s natural that the essence of flapper makeup still exists today. If you’re curious too, here are two unmistakable things that have become timeless. Firstly, the smoky eyes look. Women still use the smudgy and messy eye-shadowed look for that bold statement. Secondly, we see the cupid’s bow lips quite often. That is another gift of the flapper makeup era. If you want to know more about flapper makeup or want to offer tips, comment your doubts or queries in the following section. I will check the comments in no time! Additional Resources: Polish Your Creativity: A Colorful Journey into Self-Care With Nail Polish Smashbox Primer: Use It To Make Your Makeup Last Longer Essential Eye Care Tips That Can Improve Eyelash Hygiene

READ MOREDetails
Natural Stain Remover

8 Effective Natural Stain Remover

As daunting as laundry maybe, it’s more challenging for you to do it when your clothes have stubborn stains. Some stains will not even budge with the usual stain remover you use, and it is not the best way to use laundry detergents with harsh chemicals. What about natural ingredients for removing stains? Are they an effective method? You need to be patient in removing stains with natural ingredients. It takes time than using a one-size-fits-all stain remover. If you use the natural ingredients correctly, it will be a highly effective method. As we go further, remember, always treat stains from the back and avoid rubbing the stain. Your cupboards or cabinets are filled with these natural ingredients. Start removing tough and stubborn stains with natural and environmentally-friendly stain removers. Keep them in your green laundry routine. Here are some of the commonly available effective natural stain remover for daily usage: 1. Lemon Juice: Lemon juice has similar properties to bleach. That’s why you should be careful and handle it properly as you may damage your clothes. You can best use lemon juice to remove food stains on white clothes. Simply cut a lemon in half, wet the cloth, and squeeze it on the stained area. Let the lemon juice settle on the fabric for 30 minutes or more, depending on the stain. Rinse the clothes before you launder the clothes. The lemon extract provides a refreshing scent making it one of the best natural deodorizing agents. 2. Baking Soda: Baking soda has several purposes, and it is an excellent option to remove tough stains. Since it is a mild alkaline, it can sip through the fabric and remove the strong stains. There are two ways to apply baking soda on stained clothes. You can add the baking soda into the water of a laundry load, or you can create a paste out of it. Creating a baking soda paste only requires you a small amount of water. If you opt for the paste method, apply it to the stained area. You can scrub it gently to prevent damaging the fabric. 3. Borax: It’s silly to think about the misconception about borax. Some thought it is a harsh chemical because it is associated with the 20 Mule Team. However, borax is a naturally occurring mineral made of oxygen, water, sodium, and boron. Although it has no toxic fumes and is environmental-friendly, it can cause skin irritation and not ingest it. If you have hard water, it is best to add borax to the laundry load to soften the water, boost the detergent’s performance, and control the odor. You can see borax in the ingredients of most homemade laundry detergent. 4. Dishwashing Liquide:   Although it is unlikely for some to use dishwashing liquid as stain removers, it is an effective one. It can break down grease and stubborn stains. Stains that are made from greasy foods can break down the oil. If you are fond of gardening, dishwashing liquid and hydrogen mixture can effectively remove grass stains. It’s easy to use the dishwashing liquid, squirt enough amount of soap on the stained portion. Scrub the dish soap gently and rinse. Launder the clothes in the usual manner. You can also soak your clothes in soapy water for hours, then rinse and launder them the usual way. 5. Distilled White Vinegar: Another effective natural ingredient to remove stubborn stains is white vinegar. It’s the perfect alternative for chemical-based products. But since it is an acid-based ingredient, you have to handle your clothes with care. Mix the white vinegar with water to make it less acidic. Treating stains with vinegar needs the help of dishwasher detergent to scrub off stubborn stains. Wet the stained part of your cloth, place enough dishwasher soap, and gently rub it with an ice cube. The tough stains will come off. There will be leftover stains, applying the distilled white vinegar to cut through the stain. Rinse the cloth and launder it in the usual way. 6. Salt: The most accessible natural ingredients for stain removal is salt. You can have it almost anywhere. If you are out for a lovely dinner and a sauce spilled on your favorite dress, you only have to ask the waiter for a salt. Let’s say a tomato sauce dripped on your dress, remove the sauce with a tissue and place a pinch of salt on the stain. The fresh stain will disappear after 15 minutes. If there are still residues on the cloth, damp a napkin and gently tap on the stain. Moreover, salt is not only an excellent stain remover. It can also brighten the color of your clothes. You can wash your regular clothes with a saltwater solution to bring life to your faded wardrobe items. 7. Hydrogen Peroxide: Remember the bubbly oxidizing agent in your medicine cabinet? Hydrogen peroxide is an excellent alternative to chlorine bleach. You do not have to use a harsh chemical to whiten your clothes. Since hydrogen peroxide is an oxidizing agent, it can break down water and oxygen, making it safer for the environment. If you are having trouble with yellowish discoloration in the underarm and stains from curry, red wine, or nail polish, hydrogen peroxide is the best solution. 8. Meat Tenderiser: If you do not know, your meat tenderizer in the kitchen is an effective stain remover! It works best for protein-based stains. Did your baby vomit on her bib? You only have to wet the stained clothing and sprinkle the meat tenderizer on it. Let it settle for half an hour before your launder it in the usual manner. Meat tenderizers break down meat proteins to make them tender and more comfortable to chew. Thus, stains from body fluids such as vomit or blood are easily broken down because of their protein components. There you go! 8 natural ingredients to effectively remove the stubborn stains you are dealing with without using harmful and harsh chemicals. Single-handedly remove the stains. However, if the stains happened in delicate fabrics, it is best to bring your clothes to dry cleaning. Read Also: Different steps on how to clean pet stains on the couch 10 Trends About Homemade Carpet Cleaner You Should Know 10 Tactics To Maintain Clear Windows

READ MOREDetails
Cannabis Topicals

How To Make Your Own Cannabis Topicals?

The past couple of years has seen a lot of research put into the uses and benefits of cannabis. As legalization continues to advance to new jurisdictions around the world, scientific evidence is being used to remove the stigma around cannabis use and discover the truth about the substance after decades of myths have guided policy. There remains a lot of apprehension about trying cannabis products. While many people are familiar enough with cannabis itself and smoking as a means of ingestion, other products remain a mystery, including edibles and topicals. Cannabis topicals are non-psychoactive and are a versatile way to take advantage of the benefits of cannabinoids. Coming in lotions, patches, creams, sprays, lubricants, and balms, topicals are absorbed through the skin for localized relief. Topicals can be used to: enhance sexual pleasure, treat skin irritations, alleviate psoriasis, heal burns and bacterial infections, keep skin youthful, and reduce inflammation and arthritis. Topicals can also be made from the comfort of your home. Here is an easy how-to guide to making simple homemade cannabis topical. This recipe is a safe topical salve but can also be further mixed to make full-body lotions, face masks or lip scrubs. Ingredients: 10 grams of ground, dried cannabis 1 ½ cups of coconut oil ⅓ cup olive oil (optional) ⅓ cup beeswax 1 baking sheet 1 saucepan 1 heat resistant glass jar 1 cheesecloth A few drops of essential oils of your choice Step 1: Decarboxylate the Cannabis The first step to making your own topical is to decarboxylate the cannabis. This process is essentially heating the cannabis in order to ignite the THC. Put a single layer of cannabis on a baking sheet and bake for 30 minutes at 240 degrees Fahrenheit, turning often to ensure equal heat exposure. Step 2: Cannabis and Coconut Oil Mixture While the cannabis is in the oven, begin heating the coconut and olive oil in a pot on low heat. Stir often enough that the coconut oil does not begin to stick to the pan. Once the decarboxylated cannabis is out of the oven and cooled, begin to stir it into the oil on the stove for 20–25 minutes. Stir occasionally. This way, you can infuse coconut oil with cannabis to create an effective topical. PRO TIP: It is important to keep the mixer on the stove on very low. Unfortunately, if the heat gets too high, there is a chance of burning cannabis and affecting the potency of the THC. Step 3: Beeswax and Jarring After the cannabis and coconut oil mixture has simmered for 25 minutes, strain over the cheesecloth into a heat resistant glass jar and set aside to cool. In the same pot, melt the beeswax and essential oil of your choice. Select a mild essential oil that you enjoy, such as lavender, peppermint, or tea tree oil. As the beeswax slowly melts, add the cannabis-coconut mixture, stirring often. Once the beeswax, cannabis, and coconut oil are thoroughly mixed, you have your cannabis-infused salve. Once cooled, this salve can now be used on its own as a topical rub or can be further mixed into Aloe Vera or cocoa butter to make more of a lotion type product. Cannabis topicals are not yet regulated in many jurisdictions where cannabis itself is legal, but regulation is on the way and it’s believed topicals will become popular products for cannabis users who want pain relief. Read also: The New Tech Running Canada’s Cannabis Industry

READ MOREDetails