Everything You Need to Know About Self-Parking Kiosks

Published on: 24 January 2019 Last Updated on: 09 August 2019
self-parking kiosks

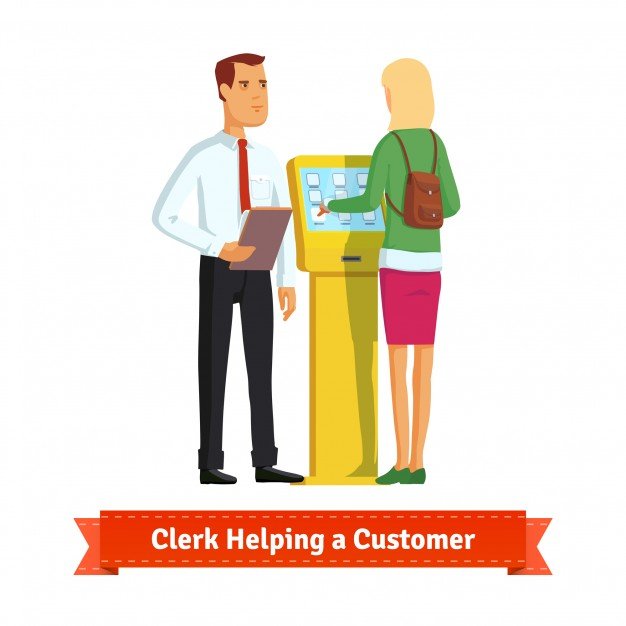
Self-parking kiosks make managing carparks easier and better than the usual parking facility. The main advantage of parking kiosks for business owners is their ability to make the customer’s parking experience better. Long parking queues are eliminated, and payments are always secured. Additionally, modern self-parking kiosks like Aria are made interactive to address customer needs better.

Here’s everything you need to know about this amazing technology.

Offers Secured Way of Paying:

Self-parking kiosk systems vary from one manufacturer to another, but one thing remains the same—their level of security. These kiosks are made to provide secure payment solutions not just for the customers but for the business who owns the machine.

Payments can be made through a mobile application, via credit card, or by scanning the barcode on the ticket. Because most people are now leaning towards a cashless economy, it only makes sense to offer cashless payment options.

Here’s how credit card payments are processed:

  1. The customer selects the duration of stay.
  2. The customer inserts or swipes the credit card into the machine.
  3. The customer waits for the machine to dispense a parking ticket.
  4. The customer collects the parking ticket and places it on their dashboard so attendants can easily spot them.
  5. Customers who wish to cancel the transaction can do so by pressing cancel before the machine dispenses a parking ticket.

Here is how mobile payments are processed:

  1. A customer selects the duration of stay and chooses a mobile payment option.
  2. They wait for the machine to dispense the parking ticket.
  3. They can scan the barcode on their ticket using their smartphone.
  4. The barcode should direct the customer to the mobile application or to a website where they can pay for the parking fee or apply validations.

These steps may vary, but this is essentially how these payments are being processed.

Customer Service Ready:

A reliable self-parking kiosk should offer a system where businesses can manage parking customers. The system’s dashboard gives parking supervisors and attendants an overview of the parking traffic and how many tickets are dispensed. Moreover, the dashboard also generates reports when you need them.

Some self-parking kiosks have cameras and speakers installed into them so that attendants can quickly assist customers who encounter a problem. The system can also take a photo of the car for future references and security reasons.

Here are some other customer-service-related tasks you should be able to do on your dashboard:

  • Offer online reservations
  • Change parking rates
  • Open and close parking gates manually
  • Review transaction history
  • Customize data views
  • View other parking garages with self-parking kiosks

Gives You Important Data:

In this day and age, data is everything. When you have data, you have power over your business. You might be wondering as to what information a self-parking kiosk can provide. Data such as wait times, duration of stay, occupancy rate, and payment types can be gathered from these kiosks. These data can be correlated to customer behaviors.

For example, if you have a hotel business and have installed a kiosk in your parking garage, you can get the data as to when there is a high demand for customer parking. You can then use this historical data to create a more effective pricing strategy just like what you see with ride-sharing services who react based on the demand present.

Customizable:

These things aren’t just a large metal box hanging out in your parking garage. You can customize your kiosks so that it reflects your branding and shows your logo.

Having a customized kiosk will prevent confusion from your customers, especially if your parking facility is in a high-traffic location. Here are other things that you can customize:

  • Screen idle display – You can customize the idle display so that it uses your branding colors and shows your logo. This kind of customization helps increase brand awareness and reliability.
  • Advertisements – You can also place ads on the screen while the kiosk prints out the ticket. Customization like this helps you generate additional income.
  • Text and button sizes – Establishments who frequently cater to senior citizens or persons with disability will benefit significantly with this kind of customization. They can make the text sizes on the screen bigger and make the buttons easily understandable for their parking customers.

Conclusion:

Parking is part of the overall customer journey, and if your customers’ parking experience is poor, they may have a bad impression of your establishment already even before actually doing business with you. It’s time to take your business to the digital age and start employing self-parking kiosks. They don’t just make parking more comfortable. They also help elevate the customer experience.

Read Also:

Content Rally wrapped around an online publication where you can publish your own intellectuals. It is a publishing platform designed to make great stories by content creators. This is your era, your place to be online. So come forward share your views, thoughts and ideas via Content Rally.

View all posts

Leave a Reply

Your email address will not be published. Required fields are marked *

Related

use video animation on your website

How to use Video Animation on your Website

Using video animation services is an essential strategy for improving customer engagement and can have a direct impact on increasing the value of your website. It can help you to communicate more effectively than text and so helps your business to communicate more effectively with your target audience. Plus, it marks you as forward-thinking, contemporary, and higher-tech than your competitors. There are several possible uses for animation on your website, from full video to small, functional motion animations. Keep in mind that animation should always be used for a purpose. Visitors have little patience with video content that doesn’t have a point or moving items that slow down navigation and functionality. Product/service animations detail the features and benefits of the product or service in question. Your website already has some kind of text description of your offerings. Add video to connect with potential customers who may not have the patience or inclination to read descriptions, and to add nuance and detail. A good product/service video engages potential customers and gives them a sense of you as a company and what the experience of using your product or service will be like. Explainer videos walk viewers through a process and can be invaluable in helping potential customers really understand and envision how they will engage with your product or service. This raises confidence and makes them more likely to take the next step because they get a more thorough sense of what’s being explained. Explainer videos can also help existing customers operate or troubleshoot a product with greater clarity and confidence. A good explainer video can cut down on service and support calls, and please customers. You can take this one step further by producing teaching videos that become their own product. Storytelling videos take viewers on a journey and create an experience around your brand. These are often used on landing pages, in the “about” section, and in the “team” or “careers” sections. They focus less on a specific product or service and more on who you are as a company or team. They might talk about history, values, locations, or key team members. These tend to be some of the most creative animated and video content on the site and offer a chance to really showcase your brand. One key area to use video on your website is in the career or hiring sections. Using animations to better connect with job seekers gives you an opportunity. You can reach the right candidates by giving a better sense of culture, style, and ethos. There are better ways to make your own animation than ever before. While creating an online video used to require high-powered computers, expensive professional software, and extensive specialist skills, online video tools make it fast, accessible, and simple to create your own animations. Use templates, stock content, and your own creativity to create an effective, professional video for your website on demand. There are many parts of your website that could benefit from animations, and that’s before considering the power of their use on blogs and social media. Start repurposing content into video today to connect more effectively and with a wider range of visitors. Read Also : Information Technology And Business Success: The Things That Connect Them How Does Modern Technology Propel The Success Of Your Business? How To Create An Effective FAQ Page For Your Website Top 5 Graphic Design Trends For 2017

READ MOREDetails
how to turn off chromecast

Fix: How To Turn Off Chromecast? – Latest Update 2021

Are you the regular users of the Chromecast devices? Then you already notice sometimes the Chromecast turning off is becoming very troubling. Turning off the Chromecast helps you to hide the connected device’s presence when people start searching in your network. In that respect, the most important question which comes to your mind is how to turn off Chromecast? As Chromecast sometimes gives you more sweat than the usually hot summer weather can. As every one of the users is aware of these facts, the Chromecast does not come up with an on and off switch.  Many users are preferring the Chromecast device showing in their home network while it is not being used. But many of the regular users do not prefer the Chromecast device showing in the home network. How To Turn Off Chromecast In Television? The easiest method of turning it off is just to unplug the device. Or the easiest answer is just to disconnect the wifi connections of the Chromecast. But both of these ways are not the fully authentic and technical way to stop working. Before asking how to turn off Chromecast, you have to learn about the Chromecast turning off technical functions. How to turn off Chromecast on tv is a very common question when you are accessing multiple television connections with the Chromecast. For your better understanding and knowledge, here is the step-by-step guide on how to turn off the Chromecast device from your home network, android phone, and Television. Turning Off The Chromecast By Switching Off The Plug As we told you, switching the power off is the easiest method to turn off the Chromecast devices. Chromecast is coming with a separate power port, which was connected with the main switch. You have to plug in the wall charger to get the connection. If you can unplug the charger from the port, the device is automatically getting disconnected from the network. If the Chromecast device is connected with your television, you can switch off the television. But that move does not turn off the Chromecast device. If you face a problem turning off the main power switch, you can use the aromatic switch to get the operation done automatically. But still, then the Chromecast device is connected with your home wifi networks. And the Chromecast device is still showing in the available connected devices like the android phones. How To Turn Off Chromecast On Android? In many Chromecast devices are getting used in the single house, then most of the time the android phone users are facing more trouble turning off the devices. If you are using the Chromecast devices, then turning off the Chromecast on android is the common question arising in your mind when you are facing the interruption in the middle of your streaming videos.  Most of the users want to turn off the Chromecast to preserve the phone’s safety-related concerning issues. And most of the users are facing problems during the streaming of the video because, in the middle of your streaming video, some content can pop up. You can simply stop the casting by simply enabling the Chromecast device from your android phones. And this is the simple process of how to turn off Chromecast. Step 1: Just click on the image of the Chromecast device from your android phone. Step 2: Open the file of the Chromecast devices. Step 3: Click on the settings of the Chromecast devices options and open the setting options. Step 4: After entering the setting of the disable Chromecast option, let others control your cast media. Step 5: And you can turn off the Chromecast from the android devices. How To Stop Casting To Chromecast? If you want to stop the casting of the Chromecast, as you already know, there are many apps that are getting compatible with the Chromecast. Still, if you are using these apps to operate the Chromecast, then you lose control over the Chromecast. And if the remote control over the Chromecast is disabled, then your manual controls are also limited. How to turn off Chromecast is a common feature of turning off the multiple connectivities of the television. But if you lose control over the Chromecast, the volume bar to pause button everything is in a non-functional state. For these purposes, you can use google chrome. Here is the step-by-step process to stop the casting of the Chromecast. To stop the interference from popping up, casting closer is an essential task. Step 1: Go to the google chrome browser settings. Step 2: Then go to the cast options after opening the browser setting options. Step 3: If you see the Chromecast options in the blue color mode, which means the Chromecast is now in the functional state. Step 4: You have to make it white by disabling the options. Step 5: After disabling the options, then cross the chrome and restart your device. Step 6: After restarting your device, recheck the casting option after opening the browser. Step 7: You can also shut down the Chromecast casting from your google homepage. Bottom Line If you are using the Chromecast in multiple ways and the different devices, switching off the devices and turning off Chromecast is necessary. How to turn off Chromecast is a common question that has multiple ways of solving.  If you ask us why you need to turn off the Chromecast devices, here are the answers. If you want to preserve your device security and are eager to close the outside’s external interference, then turning off the Chromecast is the easiest solution.  When you are connected with the Chromecast devices, you automatically see how many other devices are connected with the network, and this causes interference and trouble in the network. More Resources: Headphones vs Earbuds: How to Choose for the Best Music Experience. Your Guide In Buying Kid-Friendly Gadgets. Alexa Voice Assistant: Why It Succeeds Where Others Fall

READ MOREDetails
Remote Working

Try These Mac Screen Recording Software For Your Next Webinar

Sometimes, it's better to show than tell. That applies perfectly to your webinar. Maybe you want to show webinar attendees how to use your new product. Or perhaps, you plan on showing graphs and charts to drive a specific point home. Sure, you can describe these to your audience with the Mac screen recording software. But wouldn't it be better to show them instead? And suppose you are planning on using automated webinars to promote your products or services, establish industry authority, and build trust between your company and your target consumers. In that case, you'll need to find the best screen recording tools for webinars. Here's a brief rundown of the best screen recording software to choose from. A Few Important Things To Remember Before You Record A Webinar In the last few years of the pandemic, teachers, for example, have been forced to become aware of online streaming platforms and webinars. They have to hold sessions, take classes, become part of conferences and more. A good idea would be to learn from webinars for teachers and get the necessary knowledge to do better when you hold one on your own. Before choosing a webinar  Mac screen recording software, you should understand a few things out of the way. First, new things incorporating are always good when you are well aware that your work’s software is becoming simpler. For starters, you need to decide whether you are just going to share your screen with your viewers or if you are going to show your face on the screen. Most screen recording tools allow you to show your face while you are sharing your screen. Deciding on this is critical. It may take some trial and error to set the best configuration if you choose to show yourself while sharing and recording your screen. Next, you'll have to decide whether you are going to share a slide deck with your audience or just yourself while doing a presentation. For the former, you'll need to use presentation software like PowerPoint and Keynote. Alternatively, you can just display images on a slideshow using software like Canva. Finally, you have to make sure that you have everything that you need to record a webinar, from a good microphone to the right location that's free from unwanted background noise and other distractions. 5 Top Screen Recording Software To Choose From With these prerequisites out of the way, it's now time to choose the right  Mac screen recording software for the webinar recording. Here's a brief description of each option. 1. Camtasia Camtasia is a screen recording software that works with both macOS and Windows. One unique advantage of this software is that you can work on a project on either operating system. For example, you can record your screen on your Mac and then have someone who's using a Windows computer edit and polish your recording. With Camtasia  Mac screen recording software, you can record your whole screen or just a portion of it. Camtasia is also available on mobile, enabling you to use media stored on your smartphone. Camtasia also has video editing capabilities, enabling you to polish your recorded webinar before publishing and sharing it with your target audience. 2. Screenflow Screenflow is another good  Mac screen recording software that is a perennial favorite of people who host webinars. And there are a few reasons why. For starters, the software is affordable, making it accessible to small business owners. The software is also versatile. Aside from using it to record your screen, you can also use it to record your webinars. Other notable features include annotations, filters for both audio and video, zoom and pan motions, and more. 3. Screencast-O-Matic Screencast-o-Matic is a browser-based screen recorder. Before you can use this software to record a webinar, you will need to download and install an application and get an annual membership subscription. After installing the software and creating an account, you can then record your upcoming webinar. Although the software has a few nifty features like zoom and drawing on the screen, you have to take note that you can't record your entire screen. Instead, you can only record an area on your screen. 4. Tiny Take If you're bootstrapping, Tiny Take is one option you should strongly consider looking into. Although this  Mac screen recording software used to record a webinar may seem basic to some people, it's free and does an adequate job of recording your screen. It comes with basic features like zooming, panning, and a bunch of special effects. 5. Zoom Over the past few years, Zoom has emerged as a popular platform for holding meetings online. But unknown to some users, you can also use Zoom to record your screen. Plus, it has a free screen recorder feature, perfect for smaller businesses looking to minimize their expenses. You can then save your recording in mp3 or mp4 format. Take note that mp3 is audio-only. Meanwhile, the mp4 format records both audio and video, which you can polish through video editing. Webinar Recording For Your Next Show And Tell Showing yourself in front of an audience is a great way to humanize your company. Instead of just showing a product or a service, your prospective buyers can see and identify with another person who faces the same problems as they have. But sometimes, showing yourself in front of the audience is not enough. To explain and make a complex idea more accessible or to back up certain points, you might need to use a robust Mac screen recording software for your screen. Read Also: Top 10 Apps for Team Communication and Remote Work Top Utility Tools You Need For Your Website Why You Should Always Use Special Effects for Video Productions

READ MOREDetails