How To Choose The Best Cloud Diffuser: Your Guide To Creating A Relaxing Atmosphere

Published on: 30 October 2023 Last Updated on: 29 October 2024
Cloud Diffuser

In today’s fast-paced world, creating a calm and soothing environment at home has become more important than ever. One effective way to achieve this is by using a cloud diffuser. Cloud diffusers not only add a touch of tranquility to any space but also provide a range of health benefits. If you’re in the market for a cloud diffuser, this guide will help you select the best one for your needs.

Here, we’ll explore the qualities to look for in a cloud diffuser, the different types available, and some popular options like the [Weljoy Zen Raining Cloud]. With the right diffuser, you can create a relaxing atmosphere and promote a sense of wellness in your home. 

What Is Meant By A Cloud Diffuser? 

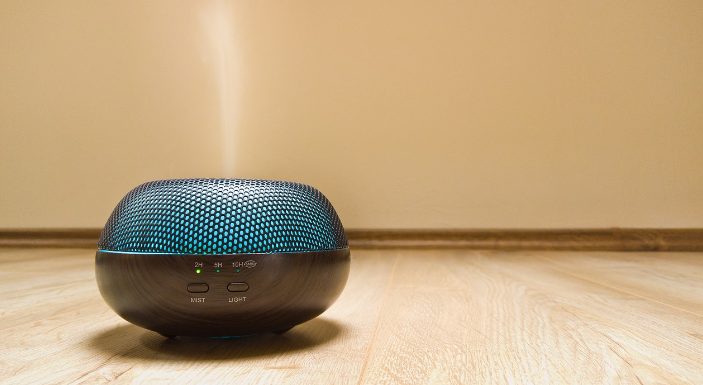
In order to understand the essentialities of a diffuser, one must first know what it is all about. A diffuser lets you experience the advantages of safe aromatherapy where inhalation is possible. Simply put, essential cloud diffusers help by purifying the air and making the ambiance pure. 

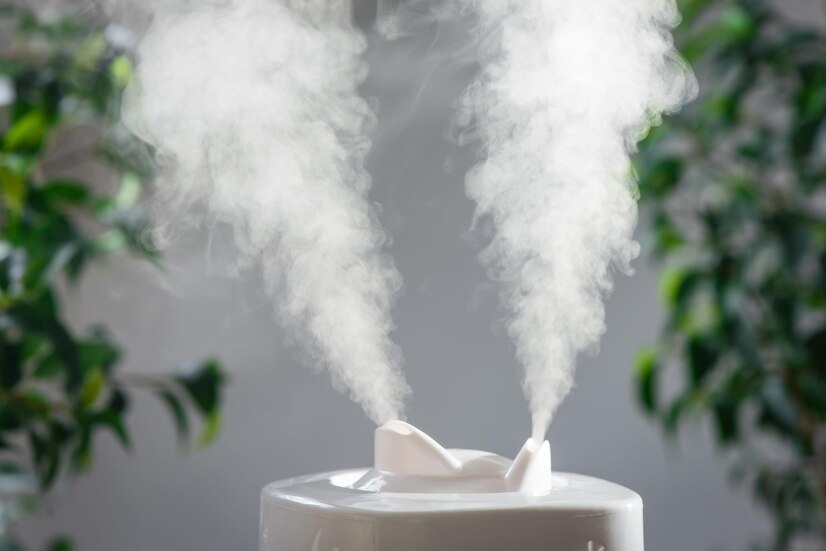
People generally confuse cloud diffusers with humidifiers, but they are quite different. While the former mostly boosts the humidity level and improves health, cloud diffusers are exclusively meant for improving the mood. So, if you are thinking of getting a cloud diffuser for yourself, here are a few things to consider.

The Qualities to Look for in a Cloud Diffuser

A good cloud diffuser should have a few key qualities that set it apart from the rest. If you want the best results, it is better to search the listed qualities before purchasing. Hence, look for these features when making your selection:

1. Water Capacity

The size of the water tank determines how long the diffuser can run before needing a refill. Opt for a cloud diffuser with a larger water capacity if you want to enjoy continuous mist for an extended period. Diffusers are responsible for releasing fragrance into the air, so it is a good idea to determine their water capacity. 

2. Mist Output

The mist output determines how much fragrance is dispersed in your space. Some cloud diffusers offer adjustable mist settings, allowing you to customize the intensity as per your preference. A lot of newbies are not acquainted with the various diffuser types available in the market. Hence, do not forget to consider the mist output as well. 

3. Timer Settings

The option to set timers can be a great addition to your cloud diffuser. It allows you to control the duration of diffusion, ensuring that it aligns with your daily routine. Apart from the timer, you might also want to consider the noise it produces. Generally, cloud diffusers do not produce sound, but if they do, try not to purchase them!

Types of Cloud Diffusers

Cloud diffusers come in various types, each with its own unique features and benefits. Here are a few popular choices:

1. Raindrop Cloud Humidifier

This type of cloud diffuser mimics the appearance of raindrops falling from a cloud. It creates a soothing visual effect while diffusing your favorite essential oils. Those who find solace in raindrop sensations after a long, tiring day should definitely opt for this cloud humidifier. The good news is that it is quite cost-effective in nature. 

2. Raining Humidifier

With a design inspired by rain, this cloud diffuser creates a calming atmosphere. It is perfect for bedrooms, living rooms, or meditation spaces. Let’s admit, who doesn’t love rain? People with troubled sleep and extreme stress should consider buying this. Almost 94% of consumers said that after the use of this humidifier, they could experience better sleep.  

3. Weljoy Zen Raining Cloud

This unique cloud diffuser combines the calming effect of a rain cloud with the functionality of a night light. It provides a multi-sensory experience, making it ideal for relaxation and unwinding before bed. There is nothing to worry about for sinus patients because this cloud diffuser relieves congestion, too. Relieves symptoms of depression, stress, and anxiety, along with providing relief.

The Qualities to Look for in a Cloud Diffuser

When it comes to cloud diffusers, the market offers a wide range of options to choose from. Here are a few popular choices to consider:

1. Rain Cloud Humidifier and Oil Diffuser

This versatile humidifier not only adds humidity to your space but also works as an essential oil diffuser. It combines the benefits of aromatherapy with the soothing visual of rain clouds. Bring it today to experience what it feels like to be in the open space on a cloudy day. With the first use, you can experience the changes in your sleep as it offers heightened mental peace. 

2. Cloud Diffuser with Rain

This cloud diffuser features a unique water drip design, simulating rain falling from a cloud. It creates a tranquil atmosphere that is perfect for relaxation or meditation. They are completely noiseless and promote healthy living by purifying the ambiance. Experience the calm of nature with rain-type cloud diffusers. Further, it doesn’t even block your nose or something- so sleep and relax peacefully!

3. Cloudy Melatonin

This innovative cloud diffuser combines the calming effects of a cloud with the sleep-inducing properties of melatonin. It is designed to help you unwind and promote a restful night’s sleep. If somebody is seriously sick, just place it near their room, and they might feel a lot better. Most cloud diffusers come with features that relieve cough, headaches, and body pain.

In conclusion

A cloud diffuser can transform your space into a peaceful haven. By selecting a cloud diffuser that aligns with your needs and preferences, you can create a soothing atmosphere that promotes relaxation and well-being.

Whether you choose a raindrop cloud humidifier, a Weljoy Zen Raining Cloud, or any other type of diffuser, the key is to prioritize quality and functionality. Invest in a cloud diffuser that brings you joy and enhances your overall well-being.

Read Also:

  • Hosted Mail Service That Runs on the Cloud

Content Rally wrapped around an online publication where you can publish your own intellectuals. It is a publishing platform designed to make great stories by content creators. This is your era, your place to be online. So come forward share your views, thoughts and ideas via Content Rally.

View all posts

Leave a Reply

Your email address will not be published. Required fields are marked *

Related

MySQL

Top 10 MySQL GUI MacOS

Databases are the primary data storage location for all software applications. For instance, when someone conducts a web search, logs into an account, or completes a transaction, a database system maintains the information so users can retrieve it whenever they choose. A relational database, on the other hand, organizes data into tables, rows, and columns. Furthermore, it combines tables and creates a link between the data, making it simple to acquire insights into the relationship between multiple data points. Among the different relational databases, MySQL is the most popular. It supports different OS like Linux, Windows, and even macOS (Apple). In addition, it powers several popular web applications, including Twitter, Netflix, Uber, and Facebook. There are several MySQL GUI for macOS. However, this blog article will discuss the top 10 MySQL GUI Clients for MacOS. 10 Most Popular MySQL IDE for MacOS 1. dbForge Studio for MySQL dbForge Studio for MySQL is a MySQL GUI for macOS. It is used to create, maintain, and design databases. dbForge Studio for MySQL allows you to build and execute queries, develop and debug stored procedures, and manage database objects. Furthermore, it has a user-friendly UI and consists of intelligent coding features like code completion, enabling you to write SQL queries easily and effectively. PROS Code completion Automatic run-time query Visual Query Builder, which helps you create queries using drag-n-drop Simple to debug Simple backup and restoration CONS The free edition has limited functions It is compatible with only MySQL and MariaDB dbForge Studio for MySQL cannot be used offline. Price: 30-day free trial, $179.95 for a perpetual license of the premium edition. 2. TablePlus TablePlus is a native MySQL GUI application with an easy-to-use interface. Its native architecture enables speedier processing of SQL queries. As a result, you can quickly build, query, edit, and save databases. Furthermore, TablePlus has an appealing user interface that enables you to manage numerous relational databases at the same time, such as MySQL, PostgreSQL, SQLite, Microsoft SQL Server, Redshift, MariaDB, and others. PROS It executes queries in split seconds It consists of a simple UI It only consumes a little space - about 180MB to install no code query features you can connect to multiple databases simultaneously code formatting features CONS The free version limits you to 2 opened tabs and 2 opened windows No rollback button Price: $79, $99, and $49 for basic, standard, and custom license, respectively. 3. DBeaver DBeaver is a graphical database administration tool for database developers and administrators. It is a free and open-source tool that supports popular DBMSs like MySQL, PostgreSQL, MariaDB, SQLite, and Oracle. Aside from MacOS, it also works on Windows, Solaris, and Linux. DBeaver is highly functional and user-friendly. It consists of the typical features one should expect from a GUI database management tool. Features like code completion, code formatting, data editing, database analysis, SQL editor, and so on PROS Can connect and work on different databases simultaneously It has easy navigation through the Schema object tree It saves coding time through code completion CONS The free edition has limited functions It consumes a lot of RAM space You cannot install it without Java Price: The community edition is free, and the Enterprise edition is $10/month. 4. Sequel Ace Sequel Ace is a popular Mac database management tool for MySQL and MariaDB databases. It serves as a replacement for the longtime MacOS tool - Sequel Pro. Sequel Ace allows easy writing of custom queries, easy accessibility to all your databases, and a filtering system to find what you need quickly. PROS It rarely crashes It is fast and easy to install It has flexible connectivity CONS It does not support multiple result tabs for multiple queries The query editor window is slow 5. SQLPro Studio SQLPro Studio is a high-end database management software for Postgres, MySQL, Oracle databases, and Microsoft Management Studio. It is well-known for its smart features, such as syntax highlighting, the ability to execute several queries simultaneously, autocomplete, keyword inclusion, and exporting files as CSV, among others. PROS The table filters are easy to use It can install plugins You can easily connect it to local Docker containers CONS It is a little bit slow It does not have NoSQL DB management It crashes randomly. Price: $99.99 per year. 6. DataGrip DataGrip is a multi-engine database management tool. It is compatible with MySQL, PostgreSQL, Microsoft SQL Server, Oracle, Sybase, SQLite, and so on. DataGrip is characterized by many amazing features, such as code auto-completion, bug detection, and version control integration, among others. In addition, it provides a query console for performing and profiling queries. PROS The interface is user-friendly and very easy to understand. The support is substantial, and the tool deployment is highly authentic You can manage multiple databases simultaneously. CONS It consumes too many computer resources, which slows down its performance. If you plan using of MySQL DB only, its functionality is poorly Price: $199 per year 7. Beekeeper Studio Beekeeper Studio is an open-source SQL editor and database management tool for MacOS, Linux, and Windows. It has a friendly user interface and is very easy to understand. Also, Beekeeper studio is GPL licensed, which makes it free to use. The tool is characterized by various smart features, such as a tabbed interface for multitasking, keyboard shortcuts, query history, code auto-completion, and syntax highlighting, among other features. PROS It has keyboard shortcuts It enables users to multi-task You can use the tool without the internet You can save your queries to visit them later CONS It takes a while to load multiple tables in a database The UI could be better Price: $99 8. Adminer Adminer is a PHP-based database data editing tool that is both simple and user-friendly. It is appropriate for general users because it allows for high-level data manipulation. Adminer was previously known as phpMyAdmin. It does, however, have a simpler and more user-friendly layout. PROS The security features are top-notch It is fast in executing queries It restricts the number of connection attempts to prevent cyberattacks CONS The user interface could be more user-friendly It is not easy to move database schemas across the workspace Price: it is free 9. Navicat Navicat is a graphical front-end database administration tool that allows you to connect to several databases simultaneously, including MySQL, MariaDB, SQL Server, Oracle, PostgreSQL, and SQLite. Navicat allows you to create and manage database objects, move data between databases, synchronize, and deploy updates. Furthermore, its efficient functionality allows you to quickly complete complex jobs, such as importing a large number of file data into a database table without interruption. PROS It is beginner friendly It runs SQL queries very fast You can easily move data across different tables and databases. CONS The subscription is very costly It has a short free trial period (14-day free trial) Price: $69.99 monthly subscription, $1399 for a permanent license. 10. Querious Querious is a new MySQL database management software for MacOS. It is precise and simple to use, giving you complete control of your work. Furthermore, Querious is beginner-friendly and comes with smart features that enable users to view, edit, search and structure their data how they deem fit. PROS A simple user interface It executes queries quickly Complete control over user privileges It rarely crashes CONS Autosuggestion can only suggest table names It only supports MySQL It is available only on MacOS Price: $25. Read Also: Quality Of E-Commerce Data Entry Services- Whether You Should Invest In Them? Is Computer Software Prepackaged Software A Good Career Path? Best Practices For Replicating Data

READ MOREDetails
Python For Robotics

Python For Robotics: Programming And Controlling Intelligent Robots

In the dynamic world of technology, the synergy between programming and robotics has paved the way for incredible innovations. Python, a versatile and user-friendly programming language, has emerged as a powerful tool for programming and controlling intelligent robots. This article delves into the fascinating realm of robotics powered by Python, exploring how this language is transforming the field and enabling the creation of advanced robotic systems. The Role Of Python In Robotics Python's popularity in robotics is attributed to its readability, simplicity, and rich ecosystem of libraries that streamline development. As robots become more sophisticated and capable of handling complex tasks, the need for a programming language that can handle diverse functionalities becomes paramount. Python fits this requirement perfectly by offering libraries that cover everything from machine learning and computer vision to control systems and sensor integration. Creating Robot Behaviors With Python One of the fundamental aspects of robotics is programming robots to exhibit desired behaviors. Python's concise syntax and extensive libraries make this process intuitive and efficient. Through libraries like pyRobotics and ROS (Robot Operating System), developers can write code to control robot movements, manipulate objects, perceive the environment, and interact with humans. Python's adaptability is particularly evident in simulation environments like Gazebo and V-REP, where developers can model, test, and visualize their robot behaviors before deploying them to real hardware. This iterative process helps in refining algorithms and reducing errors during the physical implementation. Computer Vision And Perception Python's prowess in computer vision has revolutionized robotics' ability to perceive and understand the world around them. Libraries like OpenCV and scikit-image enable robots to process images and videos, enabling tasks like object detection, tracking, and even facial recognition. With these capabilities, robots can interact with their surroundings, identify objects, and make decisions based on visual data. For instance, Python's computer vision capabilities are instrumental in applications like autonomous vehicles, where robots need to detect and interpret traffic signs, pedestrians, and other vehicles to navigate safely. As the field of robotics continues to expand, finding skilled Python developers who can harness these capabilities to develop innovative robotic systems is crucial. If you're seeking to build a team of adept Python developers for your robotics projects, you can explore potential candidates at https://lemon.io/hire-python-developers/. Machine Learning And Robotics Machine learning is a driving force behind many robotic advancements, from teaching robots to learn from their experiences to enabling them to adapt to dynamic environments. Python's libraries, including TensorFlow, PyTorch, and sci-kit-learn, empower developers to implement complex machine learning algorithms for tasks like motion planning, object manipulation, and even natural language processing in human-robot interaction. Reinforcement learning, a subset of machine learning, is particularly valuable for robotics. Through reward-based learning, robots can learn optimal behaviors through trial and error, making them adaptable to unpredictable scenarios. Python's support for reinforcement learning libraries like Stable Baselines and RLlib facilitates the development of intelligent, learning-based robotic systems. Sensor Integration And Control Systems Efficient robotic systems heavily rely on accurate sensor data and precise control mechanisms. Python's compatibility with hardware interfaces and sensor libraries makes it a suitable choice for integrating sensors such as LiDAR, cameras, ultrasonic sensors, and more. Python's simplicity extends to control systems as well. Whether it's creating PID (Proportional-Integral-Derivative) controllers or implementing complex feedback control algorithms, Python's mathematical libraries and its real-time capabilities allow developers to fine-tune and optimize robot movements and responses. Robotics Simulation And Rapid Prototyping Python's role in robotics isn't limited to physical implementation. Simulation environments like Gazebo and V-REP enable developers to create virtual replicas of robots, test algorithms, and refine behaviors in a risk-free environment. This approach drastically reduces development time and costs by identifying potential issues before they occur in real-world scenarios. Moreover, Python's scripting capabilities enable researchers and developers to automate simulation scenarios, making it easier to conduct large-scale experiments and gather data for analysis. Challenges And Future Prospects While Python offers numerous advantages for robotics, it's not without challenges. Real-time constraints, which are critical in robotics, can sometimes limit Python's performance. However, advancements in libraries like Cython and the use of Python in conjunction with languages like C++ help mitigate these challenges. As technology evolves, the future of Python in robotics looks promising. With ongoing developments in libraries, frameworks, and hardware interfaces, Python's role in creating smarter, more capable robots is set to expand further. Can I Enable A Robot Along With Python?  Up till now, we took you through the basic concepts. But it is time to see how Python is actually helpful for actualizing a robot. Our instances will consist of the following: Python Frameworks Use Case A Vision-based robot for mobile navigation It is easier to use the prebuilt Python and its Robot Programming runtime environment, particularly for Linux or Windows. The Python scripts above are responsible for controlling the robot. The latter can be assembled in various ways.  Robot Assembly It is important to arrange the wheels arranged exactly like a usual vehicle. However, it is equally important to fit ultrasonic sensors at both the front and rear of the chassis. Hence, the camera is mounted at a slightly elevated position right at the chassis front. Do not forget to connect it directly to the Nano. As for motors, there must be a proper interface along with a motor driver.  Robot Programming  Start working on the Raspberry Pi after the installation of the Programming environment. Your primary Python script must import the sonar modules, motor, and camera. We have to utilize a model that already comes with training in the OpenCV-Python association. It helps in detecting multiple images at a single time. Conclusion The marriage of Python and robotics has redefined the boundaries of what robots can achieve. From enhancing perception with computer vision to enabling learning through machine learning algorithms, Python has become a linchpin in the creation of intelligent robotic systems. It has a user-friendly syntax, expansive libraries, and compatibility with various hardware interfaces. This places Python as an ideal choice for both novice roboticists and seasoned experts. Read Also: How to Become a Hacker: X Steps to Follow 7 Advantages of Using Website Design Templates About FuseLab Creative

READ MOREDetails
Scan

How To Scan From Printer To Computer?

Even been assigned the task to edit a file and scan it back? You might have wondered how exactly you would do that. The question of how to scan from a printer to PC can be tricky and you might need a little assistance in this aspect. Scanning a file from a printer to your PC can be an easy task for you if you follow the instructions given below. The following are the steps you need to follow to easily scan a document from your printer to your PC or laptop. Multifunction Color Laser Printers are the best when it comes to printing colorful images. Connect your computer to the scanner: First of all, you need to make sure that your PC or laptop is connected to the scanner. If it is not connected, then connect the scanner to your computer. Both the machines should be connected to a cord, as well as both of them, should be connected to your WiFi. Place the file on the scanner: Now you have to place the document, which you wish to scan, face-down on the scanner. Once you have properly placed the intended document, close the lid of the scanner. Open ‘Fax and Scan’ on your computer: Now, using your PC or laptop, select ‘Start’. You can find the ‘Select’ option on the lower-left corner of your screen. Now navigate to desktop apps and open ‘Fax and Scan.’ You can also open ‘Fax and Scan’ by typing this name on the search bar. Checking if the printer is correct or not: Once you have opened the ‘Fax and Scan,’ navigate to the ‘New Scan’ tab and click it. You can find the ‘New Scan’ tab on the upper left corner of the screen of your PC or laptop. A new window will be opened when you will click on the ‘New Scan’ tab. Now you need to make sure that the printer is correct. Navigate to the upper left corner of the newly opened window and check whether the printer is correct or not. If the printer is not correct, click on the ‘Change’ option, and choose the correct printer you want to use. Picking the right settings: Now, you need to pick up the right settings before scanning your file. Firstly, select the right type of file. You can choose the file type in the ‘Profile’ section. Now choose whether you want to print a ‘black and white’ document or a ‘colored’ one. Now choose the type of file you want your file to be saved as such as the PDF or JPEG format. Now, you can adjust other settings such as brightness, resolution, and contrast etcetera, if you want to. Scan the document: After you have picked the right settings, make sure that you preview the file before scanning it. If something does not look right, you can adjust it now. If you want to make any changes right now, you need to repeat the process to ensure that the document is completely right before you scan it. Finally, click on the ‘Scan’ option and your document will be scanned. If you want to find the scanned document, open file explorer, and navigate to the Documents folder. You will find the Scanned Documents folder in the Documents folder. Read also: Paper Authority: Basic Tips in Purchasing a Printer 7 Ways To Stop Spending So Much On Printing In Your Business Advance Copier: Printing Quality Business Cards On Your Own Computer

READ MOREDetails