How To Fix “Facebook Message Sent But Not Delivered” Error?: A Complete Guide

Published on: 07 February 2023 Last Updated on: 04 September 2024
facebook message sent but not delivered

Billions of people use social media on a daily basis. Among all the social media platforms that are used by people on the internet, Facebook is the most popular one. However, despite being highly popular and efficient, Facebook still has many issues. One of the most common messages that people face in Facebook Messenger is the error of Facebook message sent but not delivered.

In this article, we will discuss what it means when a Facebook message is sent but not delivered, as well as the best ways to fix this error through the Facebook website and the Facebook Messenger app. Furthermore, we will also discuss why the error is happening as well as different ways of fixing the error so that you can deal with the problem quickly.

Facebook Messenger Message Sent But Not DeliveredA Few Reasons

Facebook Messenger Message Sent But Not Delivered – A Few Reasons
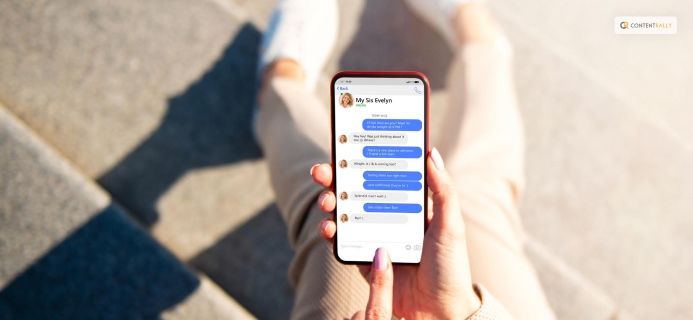
Since millions of people use the Facebook social media platform, as well as the Messenger app of Facebook, it is bound to get some glitches. Hence, it happens that many messages do not get delivered. This can get annoying sometimes when you are in a hurry and want to send an urgent message to a friend or a family member through Messenger.

Facebook Messenger Message Status
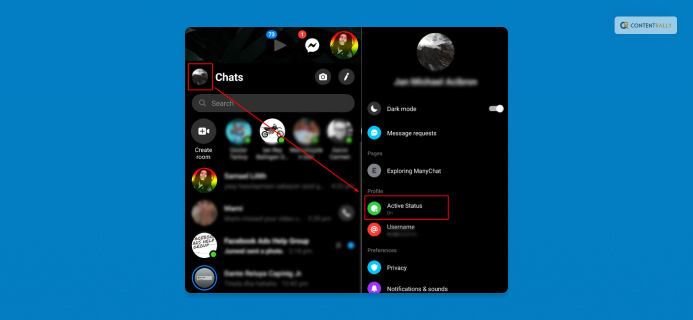
Facebook Messenger Message Status

When you hit the send button on Messenger, the app shows different symbols at the end of your message to indicate its status at the moment. Make sure that you are aware of the message status on Messenger:

As you are now aware of the different statuses of your message, it is time now for you to get an idea of the reasons why you are facing the problem of a Facebook message sent but not delivered:

1. The Recipient Might Be Ignoring You
The Recipient Might Be Ignoring You

It might be that the person to whom you are sending the message is not in the mood to chat with you. The recipient might have seen the message in the phone notification and decided not to open Messenger. However, your message status will show delivered.

2. The Recipient Deleted Your Message
The Recipient Deleted Your Message

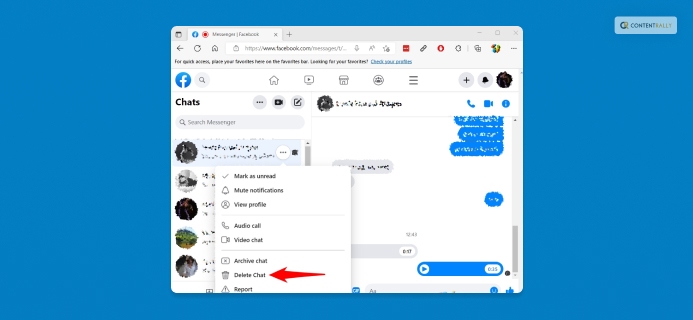
The recipient also has the option to delete the message without opening it through Messenger. After looking at the message through notification, the recipient might have opted to delete it so as to ignore chatting with you.

3. Your Message Got Marked As Spam
Your Message Got Marked As Spam
Image Source: wikihow.com

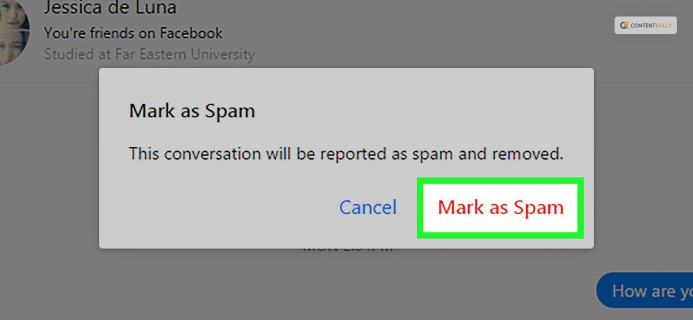
Your friend might have accidentally marked your message as spam. Hence, the message got stored in the Spam folder of Messenger. Your message got deleted from the inbox of the recipient as a result.

4. The Recipient Is Logged Out Of Facebook Messenger
The Recipient Is Logged Out Of Facebook Messenger

If the recipient is not logged in to the Messenger app or might have uninstalled the app from his/her phone, your message will not get delivered as a result. Once the person logs in to the Facebook account, your message will indeed get delivered.

5. The Message Is Stored In The Message Request Folder
The Message Is Stored In The Message Request Folder

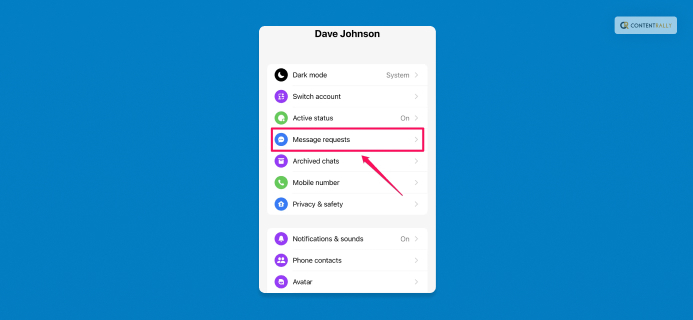
If the person to whom you are trying to send your message is not on your Facebook friends list, your message will not get delivered. This will, in turn, get stored in the person’s Message Request folder.

Facebook Message Sent But Not Delivered – The Best Solutions
Facebook Message Sent But Not Delivered – The Best Solutions
Image Source: cdn.windowsreport.com

One of the most common reasons for the case of a Facebook message being sent but not delivered is that a glitch is happening due to many people using the app at the same time. There might also be some delay in the network, as the message is not getting sent at the right time. Apart from that, there might be a problem with the Messenger server at the moment.

1. Try Messaging Using The Facebook Website
Try Messaging Using The Facebook Website
Image Source: icebergwebdesign.com

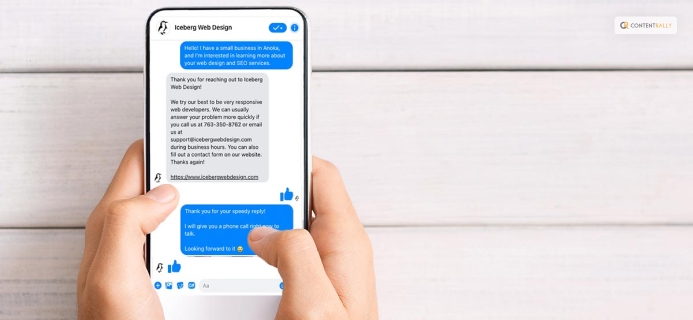
If your message is not getting sent through the Messenger app, you will need to log in to your Facebook account using your web browser, either through your phone or a computer. Check whether you can send a message through Facebook chat or not.

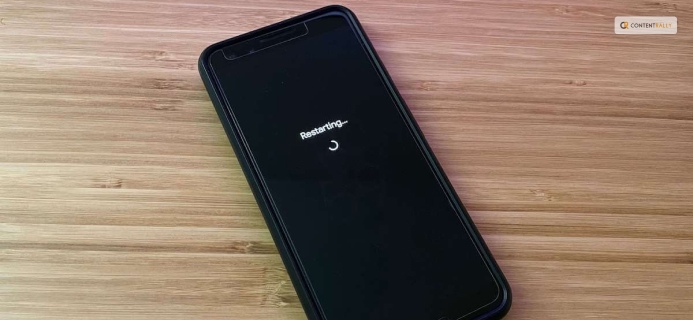
2. Your Phone Needs A Restart
Your Phone Needs A Restart
Image Source: gotechtor.com

Smartphones also experience glitches sometimes. If you restart or reboot your device, all the network issues get solved. See whether the problem is still there or not.

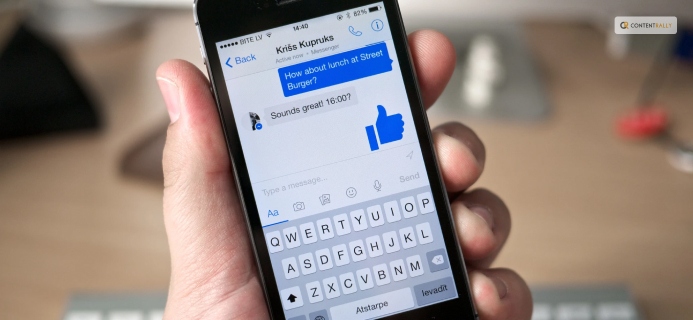
3. Try Messaging Others
Try Messaging Others
Image Source: resources.stuff.co.nz

You can check your Messenger app by messaging other friends on your friend list. If you can send messages to other friends, and your message shows delivered, then you are probably blocked by that friend. If other friends do not receive your message, there might be other problems.

4. Facebook Message Sent But Not Delivered – Restart Your Messenger

Facebook Message Sent But Not Delivered – Restart Your Messenger

You can switch off the Messenger app by going to app management on your phone settings and restarting the app. This way, the data flow through the app becomes better, and it will probably fix the problem.

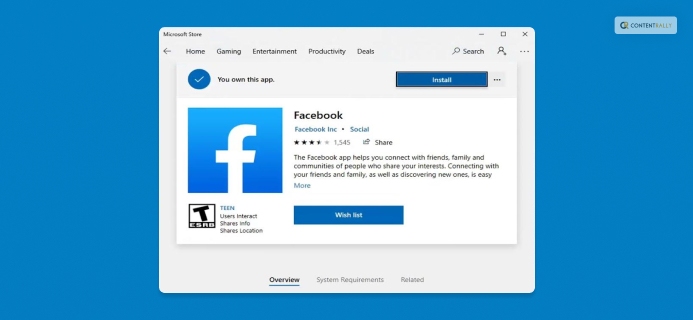
5. Try Reinstalling The App
Try Reinstalling The App

If restarting the app is not working for you, try uninstalling the Messenger app. Go to the App Store or Play Store and install Messenger again to see whether the problem is solved or not.

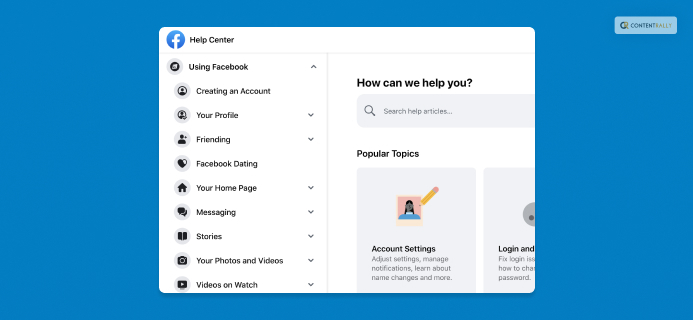
6. Reach Out To Facebook Support
Reach Out To Facebook Support

If none of the solutions mentioned above worked for you, try going to the “Help & Support” section on your Facebook app and clicking the “Report a problem” option. There, you must select the option named “Something went wrong.” In this way, you can share your problem with Facebook’s support.

Troubleshooting Tips From Facebook  

Facebook has three possible reasons to account for why your messages are not getting delivered:

  • “You sent a lot of messages recently.
  • Your messages went against our Community Standards. This may cause your account to be temporarily restricted and prevent you from replying.
  • There may be problems with your app, device or internet.”

Facebook’s own website has apt solutions in cases where your message does not get delivered.

Here is what it says:

  • “Update your Messenger app to the latest version.
  • Connect to a reliable Wi-Fi network.
  • Make sure your device has enough storage.
  • Close your Messenger app and restart your device.
  • Make sure the person you’re replying to hasn’t deactivated or deleted their account.
  • Make sure you haven’t blocked the person you’re replying to and they haven’t blocked you.
  • If you’re replying to a group chat, make sure the other members haven’t left the conversation.”

In cases where you may be blocked by Facebook from sending messages, here is what Facebook says:

  • “This block is temporary.
  • You can still connect with your confirmed friends through the Facebook app or www.facebook.com while you’re in this block by leaving comments on posts, posting on your profile, or using other Facebook features.
  • If you can’t send messages, you may also be temporarily blocked from sending friend requests.
  • If one of your messages was removed and you think it follows our Community Standards, tap on the notification about the message removal. You may be able to let us know that you disagree with the decision. Learn more about requesting a review.”

To be able to send messages in the future, Facebook has the following tips:

  • Use the name you go by in everyday life to help the people you’re messaging recognize you.
  • “Once your block is over, please send messages and friend requests only to people you know.
  • Learn more about our policies from our Community Standards.”

Summing Up

These aforementioned solutions are enough to get your problem solved in a few minutes. However, if you still face the problem, just wait for a few days, and try these solutions again. The reasons for these problems can be anything. All you need here is to find out what problems you have and use these solutions to solve the problems you have in your Messenger app. In addition, you can also resend the message to the recipient again to see if this time the message is received by the person or not. Thereby, you can find out whether the problem is still there or not.

Read Also:

A passionate writer and an avid reader, Soumava is academically inclined and loves writing on topics requiring deep research. Having 3+ years of experience, Soumava also loves writing blogs in other domains, including digital marketing, business, technology, travel, and sports.

View all posts

Leave a Reply

Your email address will not be published. Required fields are marked *

Related

how to create a poll on facebook

Voice Your Choice: A Quick Guide To Crafting Polls On Facebook

Companies are constantly searching for innovative approaches to connect with their target market. Engaging audiences can lead to deeper connections, which is one of the main advantages of social media and digital marketing in general. A company can create a stronger sense of trust and favorable associations with its brand by initiating an online conversation. Additionally, having frank conversations with your followers on social media gives you a better understanding of the messages that appeal to your ideal clients. Establishing communication channels with clients and potential clients is made easier with interactive content. Facebook polls are another simple way to produce interactive content and keep your audience interested. Using Facebook's poll feature is an easy and efficient way to establish this kind of connection with your audience. Now, without further ado, let's explore how to make a Facebook poll, why local businesses find the tool so useful, and what questions to ask to maximize the effectiveness of the polls you create. What Are Facebook Polls? Facebook surveys are advantageous to your company in the same manner as Facebook competitions or giveaways. Users are drawn in and encouraged to engage with your business through polls. Facebook surveys are brief, so taking part doesn't require users to spend much time on the site. Additionally, they allow respondents to view the responses of others. Finding out whether other people share your opinions or not is half the fun of answering a survey. Facebook surveys can also assist you in gathering valuable input from your audience regarding your company, the kinds of content you post, and your goods or services. Lastly, Facebook surveys can serve as a springboard for a more extensive discussion. Individuals frequently leave comments on the poll they just completed, offering their ideas or viewpoints on the subject. You have the option to reply as a brand and even initiate a conversation. Engaging in a friendly dialogue encourages followers to return to the poll to view other answers. Furthermore, it gives them a favorable impression of your company if you respond with kindness. When putting your social media marketing strategy into action, this is exactly the kind of brand-nurturing work you want to accomplish. Not every social network user has access to the Facebook poll feature. You can: Create a poll on your Instagram or Facebook Stories. Make a post in a Facebook group and hold a poll. How To Create A Poll? As part of a post in your Instagram Stories or Facebook Feed, create a poll inside a sponsored Facebook advertisement. You cannot currently add a poll to a post for your business page, even though you might see one available in Publishing Tools for your business page (it did show up for some of the accounts we tested, but not all). For this reason, the previously mentioned choices, especially Stories, are beneficial. Next up, it's time to come up with a concept for your poll now that you know where on Facebook you can post them. Facebook polls can be entertaining for your audience, and they should be. But they can also have a practical use. By conducting an audience survey, you can gather insightful data regarding the kinds of goods, content, or other initiatives that your target market would like to see from your company. To find out more about using your Facebook poll for audience research, continue reading through our list of inventive poll ideas below. Selecting the ideal location for your poll on Facebook or Instagram ought to be simpler once you've decided on its content. Is the subject of this Facebook poll exclusive to your neighborhood? Posting the article in a local Facebook group is a good idea. Keeping in mind all these pointers, make polls to boost your audience interaction and grow your business. How To Create A Poll On Instagram Stories? You can share the Facebook post on your company's Facebook page or Instagram Stories. If you think that the question is better answered by current clients than by potential ones, polls help. It makes sure it is seen by those who are already familiar with, supportive of, and involved with your company. You can now create the Facebook poll itself after deciding on its content and the preferred sharing location. Just go to your app's Story feature and select "Create" if you want to share your post there. After deciding which image, background, or video to use, you can add a poll by choosing the poll creation tool from your sticker collection. You can add your questions as well as responses to the poll to make it uniquely yours. Facebook also provides a brief video explaining how to create a poll. These polls are based on Stories, just like the ones you can make and post as Facebook ads. How To Create A News Feed Poll? If you want your audience to be from among those who appear on the news feed, here is how to share a poll on your news feed. Open Facebook and navigate to your profile. Your inventiveness is invited to fill in this familiar "What's on your mind?" box. Press within the enclosure. There will be a ton of options; look for the "Poll" option. Everything is in place! Create your question, select the options, and decide how long the poll will last. When you finally hit "Post," you're live! Real-life example: Food blogger Jane used to write, "Which dish should I make next? Is it paella or pasta?" This led to her making dishes that her audiences voted for. A delicious Paella recipe even went on to become a trend. How To Create A Poll On Facebook? To access the stories arena, tap your profile icon (the "+" sign) from the home page of Facebook. Let's now establish the mood. Select a background image, GIF, or even a quick film. Select "Poll" by tapping on the stickers icon, which resembles a square smiley. Formulate your query, select your options, and viola! The 24-hour poll has ended. Wrapping Up In the vast context of social media, polls may appear insignificant. As we've uncovered, though, they're also incredibly useful tools for feedback and engagement. They're priceless for businesses. They're entertaining as well as captivating for casual users. He, look! You are no longer a poll rookie now that you have read this guide. You are now prepared to confidently create, introduce, and interact. We hope you benefit from this guide in order to gain access to social media insights. This should also help you make more data-driven decisions. As you can see, Facebook surveys are a quick and simple approach to learn more about your audience and boost social media activity for your company. Remember these five pointers to create a Facebook poll that truly gets results: Decide where to publish your Facebook survey. Orient the content of your Facebook poll to the poll's location. Select a topic for the survey that is interesting, entertaining, as well as pertinent to your industry. Engage with people who leave comments on your survey. Apply any insights gleaned from your survey to assist you in making more informed business choices. If you have thoughts to share or questions to ask, please leave a comment below. We would love to hear from you! Learn More About: How to Get Help Through Facebook Chat Support? Why And How To Access Facebook’s Full Site In 2024 What Is Facebook Touch? Everything You Need To Know About It

READ MOREDetails
Selling On Facebook

All That You Need To Keep In Mind Before Selling On Facebook

Facebook is the most popular social media platform right now with over two billion active users and this number just keeps going higher. With cheaper Internet plans all over the world, more users are connecting and using Facebook extensively. It’s no wonder that selling on Facebook is one of the best ways to expand your reach and increase your revenue. However, there are a few things that you need to be aware of and understand before you start the process of selling your products on Facebook. Facebook Pages For Business: Don’t confuse Facebook pages with Facebook that you use to interact with friends and family. Facebook pages are something completely different as it’s made for businesses solely. It provides you a way to understand your customers better and to help build an audience that’s interested in your products. Facebook pages enable you to start selling on Facebook. Here’s how you can create a Facebook page for your business. Step 1: Sign Up Your Business: When you open Facebook you will find a ‘create a page for celebrity, band or business’ button placed below the ‘Sign Up’ button. You need to click on that and this is the Facebook Page that will help you sign up your business. Fill in all the required details to continue. Step 2: Choose Business Category: Next, you will need to specify your business’ niche before you start selling on Facebook. Choose the category ‘Brand or product’ if you have an online store as this will give you the flexibility you need. If you have a physical shop then you can choose ‘Company’ or ‘Local business or place’. Then choose the appropriate category of products that you’re selling. You will then need to name your Facebook page and then click on ‘Get started’. You can link your personal Facebook account with the new store page you created. If you don’t have a personal account yet then create a new one Step 3: Setting Up Facebook Page: You should then start setting up your business’ Facebook page. In order to do this, first, add your business’ logo and write an amazing description. You may want to add some pictures as well. For starters, add all basic information and whatever you feel is important to your page. You can change, upgrade or add more content later on. Step 4: Maintenance of Facebook Page: You need to ensure that whatever you post on Facebook is important because you will be directly communicating with your customers and it will make selling on Facebook easier. Ensure you always post something valuable. For example, you can tell them about new cool products, information such as amazing facts and so on. The idea is to connect with people. The content that you post should be rich but don’t forget that Facebook is all about interaction as well. Word-of-mouth advertising is one of the strongest advertising and you want to make sure that people love your Facebook page so they can recommend you to others. Don’t forget to share comments that praise your business. This will enable others to see it on your page. The Newsfeed is another way in which you can share content such as upcoming events and other types of updates. Your customers will be able to see it as well. Remember, the more people engage with the content you create, the better. How Shopify Makes Selling On Facebook Easy: Shopify makes it simple for you to sell your products directly on Facebook. When you have a Shopify store, you can start selling on Facebook immediately. Shopify’s Facebook integration can be downloaded from the app store for free. You can then log onto your Shopify account and connect the Facebook page of your store. Then simply load the products that you want to sell. The setup is similar to Shopify setup which makes it intuitive, simple, and quick. Make sure you post on a regular basis so that your customers and followers know what you’re up to. Encourage customers to ask questions and answer their questions. Acknowledging the positive comments is a great way to build a strong relationship with your customers as well. Facebook keeps rolling out cool new updates and features for business owners. So make sure you’re always ready to adapt to these new changes so your customers can have the best online shopping experience. Read Also: 10 Of The Best Facebook Pages To Follow Now How To Remove Pname Com Facebook Orca The Definitive Guide To Market Your Business On Facebook Digital Marketing: Utilize Facebook To Support Your Hospitality Business

READ MOREDetails
How-To-Recover-Deleted-Facebook-(feature-i-mages)

How To Recover Deleted Facebook Messages Using Com.Facebook.orca? – With Pictures

Have you deleted your Facebook messages recently and want them back at any cost? If yes, then this article is for you! Missing important messages can be annoying, especially if you know that it is going to be a tough task to recover them. In this world, it is very difficult to undo most of your actions. But there is a chance to recover your deleted messages on Facebook on both android and PC by using Com.Facebook.orca.  I understand that many important chats and conversations take place on Facebook Messenger. Facebook is one of the most used social media platforms, with more than 2.7 billion individuals using it all over the world.   What Is Com.Facebook.Orca? Com.Facebook.orca is basically a folder that belongs to the Facebook traveler app. In Com.Facebook.orca folder, all plug-ins, cache, videos, audio files, photos, and other varieties of information are stored. However, you don’t have to create or download this folder. If you have Facebook or Messenger, this folder is created automatically. You must view the size of the folder from time to time because it takes a huge space on your phone’s storage.  Thus, if you wish, you can delete this folder by uninstalling the Facebook Messenger app from your Android device. But keep in mind, after deleting this folder, if you wish to recover your deleted messages, you may have to delete your Facebook or Messenger app and reinstall it. This is done to create Com.Facebook.orca folder automatically.  Will Com.Facebook.Orca Harm Your Device? As already discussed above that Com.Facebook.orca is a folder that is already installed by default on your device. This folder is created by Facebook Messenger. However, if you have deleted this folder and wish to reactivate it, then you have to reinstall your Messenger. Now, the main question that arises here is ‘Will Com.Facebook.orca harm your device?” and the answer is absolutely not. It’s just a folder to recover your deleted messages and not a virus that can harm your device. How To Recover Deleted Facebook Messages On Computer? The steps to recover deleted Facebook messages on a computer will differ slightly from recovering deleted messages on a laptop. Thus, the steps listed below are some of the steps that you need to follow for the same. i). Use a USB cable, and connect your mobile or tablet with the same. Now, go to MyComputer, File Explorer, or ThisPC, depending on your Windows version. ii). You need to double-click the device to access the file. Again, double click on the internal storage. iii). Click on a folder named Android and then click Data folder. iv). Go to the Application folder. v). Search Com.Facebook.orca, and double click on this. vi). Then, you will find fb_temp in it. Copy it. vii). First, uninstall Messenger and then again reinstall it. viii). Don’t log in to your Facebook Messenger at the moment. First, you need to paste the fb_temp in the cache folder. ix). Now, it’s time to login using your Facebook account. At the same time, if you get the cache, open the fb_temp file and then select the messages that you would like to be recovered and paste. That’s all set! All deleted messages will now be displayed on your Messenger app, and you can view this at any time you want to.  How To Recover Deleted Facebook Messages On Mobile? If you want to recover messages on mobile, then the steps will differ from the above-listed ones. Recovering deleted messages on mobile is far easier and simpler, and you will love the steps below for sure. i). Go to the File Explorer of your device. Don’t use the default file messenger. It is preferred to take the help of a third-party app, such as ES File Explorer.  ii). Go to SD Card or Storge in the file explorer, depending on your device’s storage location, to recover deleted messages using Com.Facebook.orca. iii). Click on the Android folder and then tap on Data. Again, click on the Application folder and then on Com.Facebook.orca.  iv). Then, you will be able to view the cache, and then you can proceed to open that specific folder. v). Copy fb_temp that you are able to view right now. Create a folder and paste it over there. vi). Uninstall Facebook Messenger after completing the above steps.  vii). You can go to the Cache folder after installing the app—paste fb_temp in the cache folder. viii). Then, again reinstall it using your Facebook account. Soon, you will be able to see and access all your erased messages. Steps To Fix Com.Facebook.orca Error Sometimes, you may face Process Com.Facebook.orca errors as this may have stopped working. The process could end abruptly or shatter whenever there is an issue. This error generally occurs when an app or any technical issue affects the smooth running of the Facebook or Messenger apps. Now, to fix Com.Facebook.orca error, you need to follow the below steps. Have a look! Open Settings on your android device. Find Applications on Setting and click on it. Use the Search bar to find this folder.  In the Application folder, you will get an option of All Apps. Then, search for the Messenger app on the listed apps and then select ‘Clear All Data.’ You may be required to restart your Android device and open your Facebook or Messenger app and use them like before without any difficulties.  Thus, this indicates that Com.Facebook.orca error has been solved. Another way to solve this error is to install the app and reinstall it from your Google Play Store. Can You Recover Deleted Facebook Profile? You can, of course! The company has increased the grace period for deletions from two weeks to thirty days.  This implies that you have approximately a month from the time you delete your Facebook account to change your mind. Facebook later extended the grace period because, according to the company, they saw many users attempting to recover their deleted accounts even after two weeks had passed. As a result, users must now wait up to a month for the account and all of its contents to vanish forever. Frequently Asked Question Q1: Is There Any Difference Between Facebook Katana And Facebook orca? Facebook Katana is a codename for the Facebook applications on Android devices. Orca is for messenger applications. And Facebook. Katana is the code name for a Facebook application. This is the difference between the Facebook Katana and the Facebook Orca. Q2: Can Anyone Retrieve The Facebook Secret Conversations? Any type of secret conversation has the keys for encryptions. It can disappear after a certain time. But Facebook can still have access to the decryptions. The secret conversions of Facebook can be retrieved. Q3: How To Know That Someone Has A Hidden Message On Messenger? If someone has hidden messages, you can easily tell by seeing their message bubbles. Usually, the message bubble's colors are blue. But when you have the secret chats, the colors turn black. By seeing the colors, you can tell if the messages are hidden or not. The Final Thoughts Facebook accounts are reflections of our lives, memories, and relationships in the wide world of digital interactions. Even though it might seem difficult to recover an account or even a message that has been permanently deleted after 30 days, it's important to keep in mind that there are procedures and safeguards in place to help. Make sure you are always aware of the consequences of the decisions you make online. In the event that you encounter a comparable circumstance once more, consult this guide and act quickly. Always remember to stay informed, stay connected, and protect your digital memories. Now, you know pretty well how to use Com.Facebook.orca to recover your deleted Facebook messages on both your computer and PC. So, now you know that there is a secret folder (Com.Facebook.orca folder) lying on your Android device. Hence, the above steps will help you to get your lost messages on Facebook easily. Read Also: How to Plant Grass Seed on Hard Dirt? YouTubNow: An Honest Review Top Easy Way To Fix Avast UI Failed To Load Error 2 Easy Steps to Change the YouTube Channel Name

READ MOREDetails