Chat With Your Friends Group: How To Create A Group Chat In Messenger?

how to create a group chat in messenger

So you have been on Facebook for some time now – we all have been on the platform for some time, right? Being a part of Facebook also means using it primarily for chatting and keeping up with your ‘friends’ – so are you all part of different chat groups on the platform? Have you ever wondered how to create a group chat in messenger?

Creating your own group is a good idea and not just for keeping up with your friends. You can also do the same for more practical purposes, as it could be for meeting purposes or even for running a small business

Whatever might be your reason, you can’t start if you don’t know how to start. So without wasting any time, scroll down to read all about starting your own chat group. 

Chat With Your Friends Group: How To Create A Group Chat In Messenger?

So here we are, trying to find out how to create a group chat in messenger. Without just beating around the bush, let’s get started! It’s relatively easy and simple – you just have to follow the steps mentioned below to find out how to create a group chat in messenger. Scroll down to read about the same! 

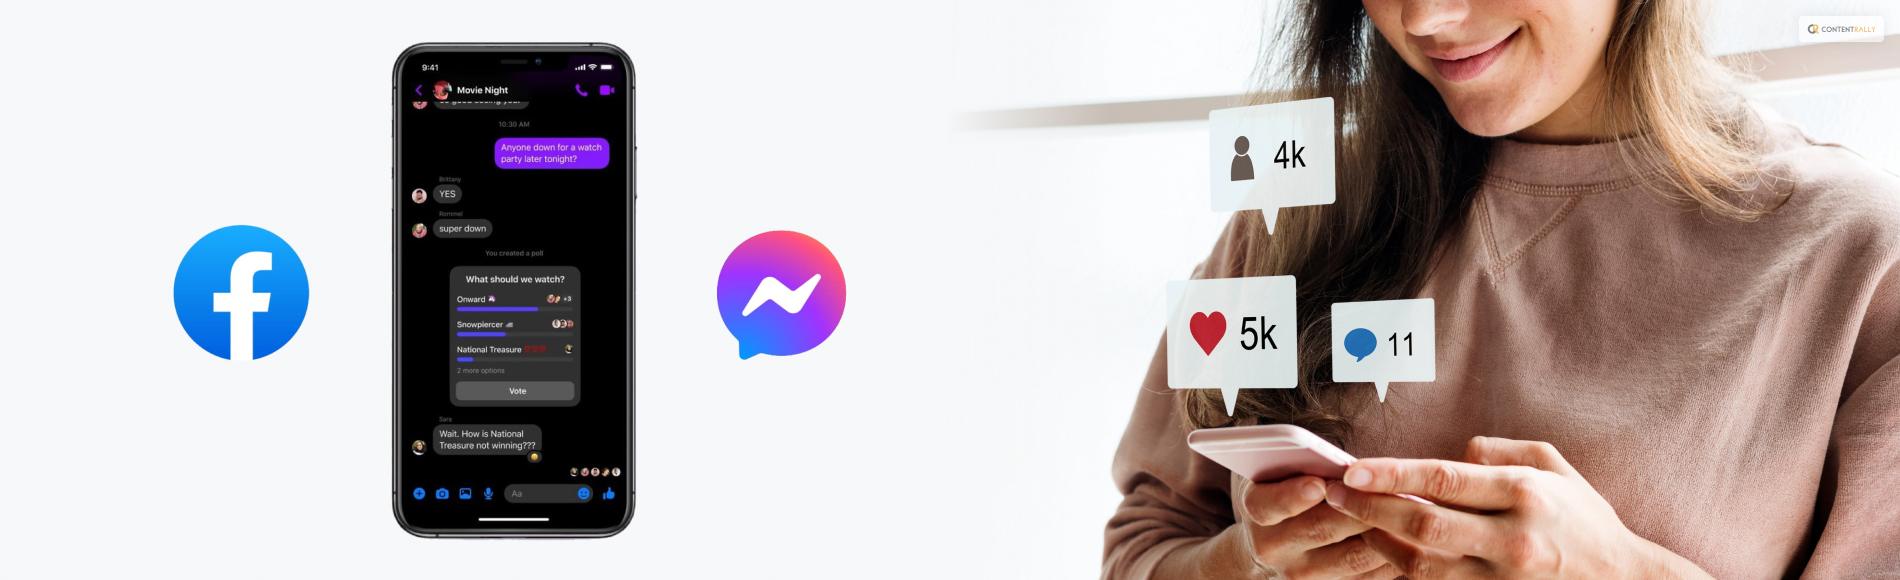
Install And Open Facebook Messenger: 

Don’t try to operate your Facebook messenger from your Facebook app. This is why your chat groups were perhaps not opening. So go to the play store in case you have an Android device, and install Facebook messenger on your device. 

Once you have installed Facebook messenger on your device, you need to open the app and log in with your details, waiting for your Facebook chat to open. Remember, this is the first step in finding out how to create a group chat in Facebook messenger! 

Creating A Chat Group On Facebook Messenger: 

Creating A Chat Group On Facebook Messenger

Once you have opened your Facebook messenger and logged in, just go to ‘Home’ () and then tap on ““. The moment you do so, you can tap on ‘new group.’ Once you do so, you have to find out who you want to message. Then you just have to click on the ‘Start group chat.’ 

That is your answer to how to create a chat group in Facebook Messenger. In case someone has already blocked you on Facebook, then you won’t be able to create a chat group with them on the platform successfully. But how will you know someone has blocked you on Facebook? 

In that case, the best thing that you can do is make a group without people you suspected of blocking you already and then see if you can make the group or not. If you can make the group without these people, then its probably because you have been blocked by others you were planning to add to your chat. 

Read More: What Is Facebook Jail – Overview And Explained

Frequently Asked Questions (FAQs):

Check out the most frequently asked questions related to how to create a group chat in FB messenger, mentioned below.

1. How Do You Create A Group Chat On Messenger?

Ans: Follow the steps mentioned below to create a group chat in your Facebook messenger. 

Tap on the people or person’s name located right on the top of your conversations.
Click on ‘add people’ or even ‘create group’ with the name of your friend. 
Then type or select the people’s names you want to be added to your chat. 
Now click on ‘okay.’

2. Why Can’t I Make A Group Chat On Messenger?

Ans: If the people you are planning to add to your chat group have already blocked you, then your group cannot be created. However, if you are already suspecting that someone has ended up blocking you on Messenger, then in that case, you can try to create a group again. And this time, don’t add them. 

3. How Do I Start And Name A Group Chat On Messenger?

Ans: Follow the steps mentioned below to start, and then name a chat group on Facebook messenger!

Click on your group conversations, the ones you want to customize. 
Tap on your contact names located at the top of your screen.
Tap on ‘edit’ located right on your screen’s corner. 
You can also click on ‘change name’ on the menu that appears on your screen.
Type in your group chat’s name. 

4. Can You Share A Group Chat On Messenger?

Ans: If the admin of your group chats switches on link sharing for any group conversation, you can opt to share that link with everyone else in order to make them join. On the top of the chat, click on your conversation’s name and then click on the ‘invite link.’ Then simply click on ‘tap copy’ while sending the same to someone else. 

And It’s A Wrap!

So now you know how to create a group chat in messenger! That’s great. But what next? Why are you still here? Instead, open the Facebook app now, and try out the processes we just explained. If you don’t try it out on your own, then there’s no way you can learn how this works out. That’s perhaps the best way to learn!

In the meantime, don’t forget to share your thoughts and experiences in the comments below. 

Read Also:

Barsha Bhattacharya is a senior content writing executive. As a marketing enthusiast and professional for the past 4 years, writing is new to Barsha. And she is loving every bit of it. Her niches are marketing, lifestyle, wellness, travel and entertainment. Apart from writing, Barsha loves to travel, binge-watch, research conspiracy theories, Instagram and overthink.

View all posts

Leave a Reply

Your email address will not be published. Required fields are marked *

Related

Pinterest

How to Use Pinterest for Business

Pinterest is one of the most popular social media platforms that widely makes use of images. The site it full of amazing photos and you could be wondering how you can use it to promote your brand. Here are some tips on how to use Pinterest for business. 1. Add Save Button to Your Website If you would like your visitors to act, you must allow them to do so with a lot of ease. When you add a save button to your site, people will be able to pin your content with a single click. This will take place even if you have not installed the Pinterest browser. It will significantly increase the number od content that pinners save from your website. If you choose the automatic buttons, there will be a clickable Pinterest save button on all the images that are on your site. You can also use hover buttons that only appear when a person hovers the mouse over the images. The last option is to add the Pinterest save button to a particular image on your website. 2. Pin Consistency Pinners suggest that you pin at least one thing every day especially during the peak season. For most U.S-based brands, the peak times are in the evenings and over the weekend. The other element that Pinterest highlight to be crucial is consistency. In case you want to post huge number of posts during the week, it is good to divide them up so that you can post a few each day instead of posting all of them at once. If you want to create pins that will coincide with an upcoming event, season, or holiday, be careful to start posting them approximately 45 days in advance. 3. Pay Attention to Great Visuals Pinterest is a largely visual platform and hence you have no choice but to create high-quality imagery. Make sure you have clear, well-composed, and well-lit photos. In case you lack the skills, the time or the tools to create the images by yourself, we have thousands of stock photography sites that have high-quality photos that you can use. Think of the most creative ways of showcasing your brand and products visually. From recent studies on the performance of 50,000 pins that are promoted, Pinterest discovered that lifestyle images tend to outperform the product images. For example, style and fashion pins displaying products that were in real life use had 30% more clickthrough and 170% higher rates of checkout that the ones that were showing the product alone. 4. Don’t Neglect the Words Yes, Pinterest is a highly visual medium but you cannot create serious engagements with great visuals alone. Make good use of the description field by telling viewers what they will exactly get by clicking through the linked content that is on your website. Use relevant keywords so that your pins can appear in the search. However, do this in a helpful and natural manner and don’t practice keyword stuffing. 5. Use Rich Pins Where Appropriate The term rich pins refer to enhanced pins that utilize metadata that is pulled from your website to offer additional information on what pinners will get by clicking on a certain pin. You can find Rich Pins for articles, products, recipes, and apps. Therefore, you will get them for almost all the content you would like to pin or expecting other users to pin from your site. 6. Go Social Pinterest is a social network and not a billboard. Therefore, people will not engage with your pins unless you get engaged yourself. Follow accounts or board from the non-competitive but relevant brands within your niche. Be keen to actively like and also engage with pins that are related to your industry. You may also involve your brand evangelists and employees. You can invite these individuals to contribute to your Pinterest group boards. 7. Improve Results by Using Analytics Pinterest analytics offers critical insights about the kind of content that performs well on your network. Therefore, you may tweak and advance your Pinterest for business outcome over time. You will be able to observe the most popular pins and the ones that drive the highest amount of traffic. You can focus on the specific metrics that are particular to your specific business. You will also view the boards where your pins are included in and this will help you to understand how people are thinking about your products and business. You will get some new ideas on the best way to position your efforts on Pinterest. You will also get some tips on the interests and demographics of people who are interacting with your pins. It will give you valuable insights that will assist you to precisely target your strategy to the right audience. 8. Try the Pinterest Promoted Pins Pinterest ads or promoted pins is an excellent way to allow more people to see your pins. It also helps in creating new exposure to your brand. Promoted pins can give you an exposure that go beyond the payment you make. To know a promoted pin on interest, you will find the word ‘promoted’ below it. However, when a pinner saves the promoted on their personal board, it will become the regular organic pin. Therefore, it strips off the promotional label. 9. Make the Pins More Accessible Pinterest is highly super-visual and relies heavily on images to establish meaning and context. Therefore, users who have low visibility, certain disabilities, or need screen-readers will struggle to use this platform. Therefore, you have to pay more focus on the text. You can use several strategies to make your pins more accessible. It is a good thing to connect with a long list of members from your target audience. Your primary goal should be to make your content accessible to all users. One strategy would be to add context through the descriptions. You can also use strong typography and incorporate color contrasts. Lastly, make sure that you use large texts so that people with visual problems can read with a lot of ease. This article should have answered your questions on how to use Pinterest for business.Read Also:9 Ways To Use Pinterest To Promote Your E-Commerce Store How To Market Your Personal Injury Law Firm On Pinterest

READ MOREDetails
Instagram Marketing Mistakes

Instagram Marketing Mistakes That May Get You Unfollowed

Instagram took only a year and a half to report more than 1 billion active users. Instagram is known to be the most visual of all platforms, and it plays a vital role in the success of small businesses. Instagrammers and consumers visit the platform to comment, like, and engage with established and growing brands like yours.As a brand, besides posting engaging content, you should also use an Instagram growth service to gain organic followers. According to recent studies, Instagram has been shown to have more engagement than Facebook and Twitter.Because of this, Instagram is considered a viable social platform for your marketing. However, there are mistakes that a lot of brands make on their accounts which leads to fewer followers and reduced engagement. Here are some Instagram marketing mistakes to avoid.Top 5 Instagram Marketing Mistakes To Avoid1. Lack of GoalsIf you haven’t set up your Instagram or brand goals, you don't have a plan, which means you have no direction. Lack of focus means zero consistency which is a turn-off to your followers. Consistency helps in building trust with your customers.Additionally, if you don't have clear goals, it shows you don't know what you want from your followers. And your followers will not understand what you require from them, leading to a disconnect that may get you unfollowed. Without a certain goal, even if you plan to buy Instagram accounts in bulk to enhance your engagement won't help you anyway. Therefore, outline your goals before starting your Instagram account. For example, do you want brand exposure or boost sales?2. Duplicating ContentInstagrammers are quick to unfollow accounts that constantly post duplicated pictures and videos. While there might be a good reason to repost a photo or video occasionally, it's good that you keep that to a minimum.Research shows that Instagram users can quickly unfollow and stop interacting with your page, products, or services if you don't have unique or engaging content. Therefore, mix your content up by adding memes, quotes, or videos.3. Lack of EngagementMost consumers abandon brands due to poor customer service. You will lose out if you fail to engage with your Instagram followers. Your followers support you by liking your brand and commenting on your posts. Ignoring their comments by not replying or liking them will make you look disinterested and neglectful. Improve your customer relationship by engaging and communicating with your consumers, and take at least thirty minutes daily to reply to some of these comments.4. Misusing HashtagsOne can easily misuse hashtags on Instagram or mislabel posts with the wrong hashtags. Having promotional hashtags is a way to create awareness of your brand. However, there are several rules you should consider before using your choice of hashtags. While Instagram allows up to thirty hashtags per post, you shouldn’t bombard your posts with tens of hashtags as it can overload your marketing strategy.Similarly, you should be careful not to put too few hashtags. According to the ultimate guide to hashtags, using eleven of them in a post will give you an interaction of about 80% compared to those that only use two hashtags per post.5. Ignoring the Latest TrendsSocial media trends aren't just for influencers and Gen Z. As a brand, you should be aware of Instagram trends and use them in a way that is true to your products or services. However, this doesn't mean you must join every trend. Find those that best fit your brand’s image and then create videos and reels in line with the trends.ConclusionInstagram is easy to navigate. However, when it comes to the marketing part, it can be a hard nut to crack. You can use the platform to generate traffic to your website, build a loyal audience, and grow your followers and brand. By avoiding the above mistakes, you can improve your page and increase your chances of gaining more followers.Additional:Instagram Advertising For Beginners6 Best Practices When Buying Instagram FollowersPicuki Reviews – Popular Instagram Editor & ViewerHow To Improve Your Social Media Branding By Getting More Instagram Followers And Likes

READ MOREDetails
Social Media

How To Protect Yourself On Social Media

Social media can be an excellent people finder tool if somebody wants to be found. The challenge is that it can also be a dangerous place.Many people don't realize that hackers use social media accounts to steal identities and perform other criminal tasks.Everybody should take it upon themselves to understand how to protect their information.7 Ways to Protect Your Social Media PresenceFrom checking your connection to having a strong password, choosing settings, and making intelligent decisions, here are the seven top ways to protect your social media presence.1. Check Your Connection Is SafeHackers can add malware or trojan horses to your account if your PC isn't protected by anti-virus protection. These innovative virus-like programs can steal your login details.Be mindful of accessing social media pages over a WiFi network in a coffee shop or internet cafe. It's easy for hackers to access sites via these open networks.2. Use a Creative PasswordSome bots can guess passwords based on commonly used ones. Never use a person's date of birth or mother's maiden name, as they're easily worked out.A creative password that's harder to hack consists of lower and uppercase letters, numbers, and special characters, with no recognizable words.Consider a password security app that generates random passwords for each login.An extra level of protection is to enable two-factor authentication, for example, a site password and a one-time password (OTP) on your smartphone.3. Manage Privacy SettingsThe default setting for any new social media account is 'public.' This designation means that anyone can see anything posted, and somebody doing a Google search for your name could bring up the post.Popular settings are private, friends only, or custom. Think carefully about your intended audience.4. Approve All TagsFriends love to tag each other, which is one of the social media's many benefits. However, not everyone wants the world to know what they're doing at any given time.Most social media apps have an option for the person to allow or reject a post that includes them.5. Don't Automatically Accept Friend RequestsMany people like to build their friend lists on social media platforms, but there is a danger.Accepting a request from a stranger could open the door to the site being hacked. Always check the profile of the person making the request; if it's brand new with only a profile picture and nothing else, it may be a bot.If a request comes through from someone who's already a friend, it could mean they've been hacked. Before accepting it, contact them via another medium to confirm the new page is legitimate.6. Think Before You PostBefore clicking the 'post' button, ask the question, 'Would my grandmother like this?' If the answer is 'no,' reconsider it.Many people believe once something is deleted from the internet, that's the end of it. Sadly, this isn't true; things can be recovered.Future employers may discover images and comments that paint a person in an unflattering light, so make wise choices.7. Don't, or Delay Sharing Location Data'Check-in' is a popular feature on many social media apps. While it's fun to let everyone know where you are, it also tells others with bad intentions.For example, checking into a shopping mall can let a stalker know where to find you. Alternatively, it can also let burglars know you're not currently home.Most smartphone cameras have a GPS function that stamps the image with the date, time, and location. A photo can give that data away even if you don't use the 'check in' function.Take the Time to Get ProtectedAs hackers get better at accessing people's social media accounts, users can take steps to limit the chance of something happening.Always be sure that the pages are being viewed on a secure network. Use strong passwords that aren't easy to guess, and manage the settings early to decide who can access what.Be vigilant about being tagged and accepting random friend requests. Think carefully about what gets posted, when, and from where.Do these things, and there's a fair chance a hacker will move on to an easier target.Read Also:The Most Common Reasons Why You Cannot Log In To a WebsiteWhat Are Some Best Practices To Prevent Phishing Attacks?How To Prevent A Ransomware Attack

READ MOREDetails