5 Ways To Fix Chromecast Source Not Supported Error

Published on: 01 April 2021 Last Updated on: 27 December 2024
Chromecast source not supported

Modern smart televisions are designed to connect with several external devices in order to enhance our entertainment experiences. And casting videos from your mobile devices to your Tv is one of the most popular options. You also can cast any content from your laptop or computer. But in case your television does not support this feature, you can use streaming devices for establishing the connection. Now, let’s begin to solve the issue “Chromecast source not supported”. 

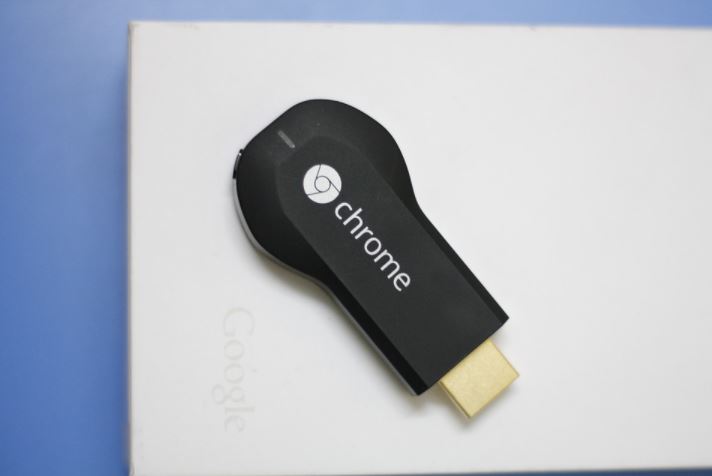
Google Chromecast is a device that fulfills a similar purpose. It is packed with many streaming applications. With the help of this device, you will be able to cast content from the Google Chrome browser as well. And in case you are using this device and facing an issue like Chromecast source not supported, here I will guide you with the techniques to eliminate them. 

Fixing Chromecast Source Not Supported Error 

Here are the ways that you can try to fix the Chromecast source not supported error in your device. There can be several reasons behind this issue, so here are all the solutions for different kinds of reasons that are causing this issue. 

1. Enable Mirroring Service

Suppose you are using The Chrome browser in your system and unable to cast to the Chromecast. Then you need to check whether the Mirror service option is enabled or not. The users mostly recommend this method as it is really effective in solving the source not supported Chromecast issue. 

Here are the steps to enable Mirror Services to eliminate the Chromecast source not supported the issue.

  • Open the search browser, Google Chrome.
  • Into the browser, type chrome://flags.
  • Hit the Enter button.
  • Press CTRL + F on your keyboard for bringing up the Find tool.
  • Type in Mirroring, that we are searching for.
  • Hit the Enter again.
  • Find Mirroring Service option.
  • On the right side, click on the drop-down menu.
  • Now select it as Enabled. 
  • Close the Chrome Browser completely and again Open it so that the changes are saves. 

Now you can check whether the issue is resolved or not. Try to cast something from your system to your television using Google chrome. And check whether the issue is still there or not. 

2. Restart your Chromecast, Wi-fi Router, and Computer

Restarting your Chromecast also can solve your Chromecast source not supported issue. But for added measure, it is also recommended to restart your Wi-fi router and your computer also. This will make sure that if there is an issue that is causing the error will get resolved at the same time. 

Here are the steps to do that,

  • Firstly, you need to power off your TV, with which your Chromecast is connected.
  • Unplug your Chromecast from your television.
  • Also, unplug the power cord of the Chromecast device.
  • Now leave it unplugged for 1 minute at least.
  • Now, you need to power off the router or modem, depending on whatever you are using.
  • Wait for 1 or 2 minutes. 
  • Power on your router or modem.
  • Now is the time to restart your system.
  • After your system restarts back, connect it again with the WiFi. 
  • Give your Chromecast sometime to reset up everything.
  • Now try to cast something and check. 

3. Turn Off all VPN and Ad Blockers

Ad blockers generally block pop-ups and prevent Javascript from running. This sometimes causes the Chromecast source not supported error. So, you can try turning off the add blockers and also any VPN if you are using them. 

Here are the steps to disable those Google Chrome browser extensions.

  • Open Google Chrome browser.
  • Click on the three-dot icon.
  • A drop-down menu will open. 
  • Select More tools.
  • Click on Extensions.
  • The Extension page will open.
  • Search for the add blocker that you are using.
  • To turn off the extension, Toggle the blue switch. 
  • Close your browser completely.
  • Reopen it and try to cast. 

4. Enable the option of Cast Media Route Provider

Though you have enabled Mirroring service options, you also can try enabling the option of Cast Media Route Provider. This will also can solve the Chromecast source not supported error that you are currently facing. 

The process is similar to the enabling process or Mirroring Service. Here are the steps. 

  • Open the Google Chrome search browser.
  • Into the browser, type chrome://flags.
  • Hit the Enter button.
  • Press CTRL + F on your keyboard for bringing up the Find tool.
  • Type in Cast Media Route that we are searching for.
  • Hit the Enter again.
  • Find Cast Media Route Provider option.
  • On the right side, click on the drop-down menu.
  • Now select it as Enabled. 
  • Close the Chrome Browser completely and again Open it so that the changes are saves. 

5. Check The App You Are Using To Cast

There is a reason behind the Chromecast source not supported issue, and that is the app that you are using. Maybe the particular app that you are using for casting is not working properly at that very moment. 

So what will you do in this case? 

You can check by restarting the spp. In case you are trying to cast from your desktop or laptop, you can simply close the app and start it again. But what if you are casting from your Android device? You can restart the app by using the “Application Manager.” before you start the process, there are some things that you should know. 

In case the particular app is not storing your user settings online, everything might get reset after this process. You may also need to log in with your credential once the process is completed. So, just make sure you have all those details. 

  • Open the folder, Apps.
  • Tap the icon, Settings.
  • Open the Application Manager.
  • Scroll down and search for the application with which you are facing casting issues on your TV. 
  • Tap the app.
  • The app menu will open.
  • Tap Force Stop.
  • Go to the Storage Section.
  • Tap on Clear Data.
  • Go to the Cache section.
  • Tap Clear Cache.
  • Now back to your Home screen.
  • Restart the app. 

This will solve the issues if it is caused by the app instability. 

Final Tips

In case you are done with all the above-mentioned steps and the Chromecast source not supported, the error is still there. There are some other ways you can try installing the latest version of chrome. I believe the issue will get resolves. But in case the issue persists. Lastly, you can factory reset the Chromecast device. It will lose all the previous data, and you will also need to log in again with your credentials. 

Read Also:

Content Rally wrapped around an online publication where you can publish your own intellectuals. It is a publishing platform designed to make great stories by content creators. This is your era, your place to be online. So come forward share your views, thoughts and ideas via Content Rally.

View all posts

Leave a Reply

Your email address will not be published. Required fields are marked *

Related

Avast UI failed to load

Top Easy Way To Fix Avast UI Failed To Load Error In 2026

Avast Antivirus is the most famous Antivirus in the world. It is so popular among PC users because it offers both a Free Version and a Premium Version, which can be used in computers such as desktops and laptops. There is an Android version of this application as well. If you are not so tech-savvy, let me first tell you in short what Antivirus is. An antivirus is software that protects your system from viruses, malware, and Spyware. Ever since the Windows 10 update, people have been reporting that they are getting an error message saying Avast UI failed to load. Windows is infamous for providing buggy updates. The same thing was reported in Windows 7 as well as Windows 8. It's quite sad to see that Windows, even after becoming the most used Operating System on the planet, has failed to achieve proper security, and adding to that, most of their updates are quite buggy.  However, they fix the bugs in later updates. But the avast UI failed to load has been bothering people for quite some time now. In this article, we will suggest a few troubleshooting methods, following which you can sort out the issue.  What Causes Avast UI Failed To Load? Here are some of the root reasons listed below for this error. There is a good chance that this error pops up because of some error in the configuration of Windows.  Another reason for showing Avast UI Failed to Load pop up is that you might be using more than one antivirus simultaneously on the same device. The last reason we could think of is if there is any problem with your system's Remote Desktop Services. How Can You Fix Avast UI Failed To Load Issue? In order to fix the "Avast UI Failed to Load" issue, you need to check a few things first. Make sure that you have exited the Antivirus. Restart Avast Antivirus. But still, if the issue is not fixed, you can follow these procedures to say bye-bye to this issue.  Procedure 1: Turn On The Remote Desktop Services What you need to do is press the Windows key and R simultaneously. This will open up the RUN box.  After having that box on your screen, you have to type 'services.msc' in that box and press the enter key. Now check for the Service Page. After finding the Service Page, you have to search for Remote Desktop Services. After you have found the remote desktop services, what you need to do is right-click on it and then select the option of 'Properties.' After clicking on properties, you have to double-click on the button that says start and set the startup type to automatic. After you have done that, click on 'OK" to confirm the changes you have made. Now, you have to close the services page and manually restart your PC, laptop, or whatever you are using. It will complete the process. If you are still facing Avast's problem, UI failed to load, then kindly follow the next procedure closely.    Procedure 2: Try Repairing The Avast Antivirus Software Kindly follow this procedure closely to repair. You have to go to the Control Panel Section. You can find the Control Panel in the settings section of your computer. If you do not know how to open the control panel. Click on the start button and type the control panel. After opening the Control Panel, search for the Program & Features option, find it, click on it, and look for Avast Antivirus software. Now, you need to right-click on Avast; you will get the option to uninstall/change.  Be very careful while doing this, as a single mistake can uninstall Avast from your PC. Select the option to repair after having clicked on change. Now, you need to wait for Avast to repair itself, and after Avast completes its repair, reboot your PC. If the error of avast UI failed to load persists, kindly follow the next procedure. Procedure 3: Uninstall And Reinstall Avast Antivirus Software  If any of the above methods did not work for you, then you try to uninstall Avast Antivirus. To uninstall Avast Antivirus Software, you need to open the Control Panel. You can open Control Panel by merely typing Control Panel in the Run dialog box; another way to open Control Panel is by searching the control panel after clicking on the Start button.  After opening the Control Panel, go to the programs and features section and find the Avast Antivirus software. Right-click on it and select uninstall this time instead of selecting change as you did in the previous procedure.  Please wait for some minutes for Avast Antivirus Software to completely uninstall itself from your computer. Reboot your computer as the final step of the process. Switch back on your computer, download Avast from the official website, and install it again as a whole new software. Make sure you do not do anything else on your computer while Avast Antivirus is being installed, as it puts extra pressure on the computer's RAM. After the installation process, open Avast and check if the Avast UI failed to load the error persists. If it does, kindly follow the next procedure.  Procedure 4: Get The Recognition Issue Fixed If the error of Avast UI failed to load persists, you could follow the last and final procedure.You need to look up from the Avast icon on your desktop and Open the shield's control. In shields control, right-click on the Disable to disable the shields. You will get the option to disable it for 10 minutes to an hour. Disable it for 10 minutes, wait for 10 minutes, and check if the 'avast ui failed to load' issue persists. If the error is still showing, then try out some other methods. Press the Windows Button and R buttons simultaneously. It will open up the Run dialog box. Type cmd in that box so that it opens the Windows Command Prompt Box. Type 'winmgmt/verifyrepository' on the search field and hit the enter button.  If it shows the status as inconsistency, you need to type 'winmgmt/salvagerepository' in the search field and press the enter key to finish the process. If the result shows that the Windows management instrument was consistent, you need to type 'winmgmt /resetrepository.'  After doing that, Windows will send you a message showing that the WMI repository has been rebuilt successfully. Finally, you need to reboot the system and start Avast antivirus, and hopefully, it will not show the error of Avast UI failing to load. We are sure that after trying all these steps, your Avast Antivirus will run just fine. But still, if the error exists, we suggest you contact Avast Customer Care as soon as possible. Procedure 5: Update Your Avast Software Most of the time, what can fix such an error message is a simple update. Fortunately, you can update the app without the hassle of having to re-download the app. Redownloading can be a viable option if you cannot access the interface at all. Here is how you can update Avast Antivirus as well as other Avast applications that offer easy updates to its users. Press the Windows+X keys at the same time, then select the app and features from the context menu. Find the Avast Antivirus or any other app that is causing you to see the UI failure arrow. Click on it, and from teh options that unfold, choose Uninstall. Click the Update button and wait for the software to locate any new updates that might be ready to download. It will automatically install the latest version, which will take quite a bit of time, depending on the configuration of your system. When the repair process is complete, launch the Avast app that you were having trouble with. This should get your app up and running. It is possible that updating the Avast app the way mentioned above will fix the internal corruptions or missing files, thereby restoring the UI. But if you are still facing the same issue, try speaking to Avast Customer Support. Conclusion Avast is one of the best antiviruses in the market. The story of avast goes way back to 1995. Initially, it did not offer the best of services, but they have been improving their services year by year. It's one of the few antiviruses that offer a premium version and a free version as well.  Do not think that the free version has limitations like other antivirus software because it's not so. The free version provides a few premium features, which include a WIFI inspector and ad blocker, etc. However the recent trend of Avast showing that the Avast UI failed to load is not what users are expecting. Whether it's the fault of Avast or Windows 10 is yet to be found out. Rest assured, you can try the above procedures to get rid of the issue. You May Also Like: Is InterServer The Best Web Hosting Platform What Are The Things You Need To Know While Choosing Antivirus Software? How To Allow Chrome To Access The Network In Your Firewall Or Antivirus Settings?

READ MOREDetails
Deepseekplay Com

ChatGPT Might Just Be Replaced By Deepseekplay Com In 2026 And Beyond, Here’s What You Must Know About It

I have talked about a lot of tech delicacies with you guys. And God knows how much I love it. But today, I particularly excited to talk about something. And I am excited because I LOVED this one. Apart from that, this particular AI tool is always buzzing in the news. Some websites, like CNBC, are claiming that this is a huge threat to US dominance! Deepseekplay Com is an AI platform that recently launched a free, open-source large language model. This model, developed by a lab called DeepSeek, took just two months and less than $6 million to create using Nvidia's H800 chips. These developments have raised concerns about whether the United States is losing its edge in artificial intelligence. They also question the large spending by Big Tech on AI models and data centers. In tests by independent sources, DeepSeek's model performed better than: Meta's Llama 3.1 Anthropic's Claude Sonnet 3.5 OpenAI's GPT-4o It showed better accuracy in tasks like problem-solving, math, and coding. What Are The Features Of Deepseekplay Com? This platform is becoming extremely famous, almost the talk of the town, due to its features. So, how can I not talk about it too? Let’s take a closer look: Easy To Use   The website is straightforward and user-friendly. Anyone, including children, can navigate it easily. I absolutely loved the large search bar. Additionally, you will find clear categories that will help you find what you’re looking for quickly. No Account Needed   You don't need to create an account to access the features. This means you can use the site without sharing any personal information. It's perfect for those who prefer privacy. Clean And Fast   The website loads quickly and functions well on all devices. It doesn’t have heavy graphics that can slow down your experience. This ensures a smooth browsing experience whether you're on a computer or smartphone. Wide Range Of Ai Tools   There are many different AI tools available, organized into helpful categories. These include writing assistants, image creators, and tools for business and learning. You can easily find the right tool for your needs. Shows Tool Prices   Each tool shows if it’s free, has a freemium model, or is paid. This clear pricing information helps you understand what to expect. Knowing the cost upfront makes budgeting easier. Updated Regularly   The site is constantly updated with new tools and improvements. This keeps the selection current and useful for users. Regular updates also ensure that older tools remain effective and reliable. How To Get Started With Deepseekplay Com? This platform is just so simple to use that you probably won’t even need a guide. But hey, you know how overprotective I am about you guys! So, let’s just quickly check out the following steps: Firstly, you have to open the site and reach the platform on your browser. This is the point you will notice that each one of the tool cards is displaying its key details. They are pretty crisp, so you will read them at a glance. By now, I suppose you will have a fair idea of what you are looking for. So, you have to use those keywords to get that. Additionally, if you have nothing particular on your mind, you can just browse freely. Why Should You Choose Deepseekplay.com, And Why Are People Doing The Same? One of the many reasons why this platform looks appealing to people worldwide is that it is extremely simple. Additionally, it is quite easy to use. Even if you are in an initial phase of using Artificial Intelligence, this platform will be suitable for you. I like how it doesn’t overcomplicate things. In addition, it will give you an ad-free experience. Also, I really like the explanations this site gives you pretty crisp and easy to understand. There’s a much-needed clarity that most sites miss out on these days. Basically, I want to say that Deepseekplay Com facilitates your time-saving goals. Also, it lets you peacefully look for an AI editor. In fact, you can also use this platform as a debugging tool as well as a keyword research tool. Deepseekplay.com VS Other Platforms:  A Detailed Comparison Now that we have a fair idea about how Deepseekplay.com works and all the good things about it, it's time for a battle. Okay, that was very extreme of me! I just want to show you how this platform stands in comparison with other platforms: FeaturesDeepseekplay ComOther PlatformsLayoutIt is much simpler.Too many long pages that confuse users.Signing UpYou don’t need to create an account here to start.Generally requires you to create an account.Focus On AIComplete focus on AIFocuses on other stuff as wellPricingEach tool here has clear pricing that’s stated.Creates confusion around pricing What Are The Users Saying About Deepseekplay Com? The design of the site is simple yet highly effective. At the top, there's a large search bar. Additionally, it is followed by categories underneath. Also, the tool cards are neatly arranged across the page. It’s actually pretty calming to browse without all those flashy banners. In fact, you won't even have to deal with annoying pop-ups getting in the way. Plus, it’s really fast! The mobile version works perfectly. In addition, the search results pop up in no time. Whether you’re a student checking out tools on your phone or a professional using a tablet, the whole experience is smooth and enjoyable. According to a user named jeckleach007 on TechRepublic, among all the AI tools, this one really stood out for him! It was mentioned that DeepSeek is an incredibly powerful tool for: App modifications Tweaking existing applications Automation A friend of the speaker experimented with DeepSeek and a few other AI tools to modify a popular game, and the results were said to be impressive. He reportedly used it to create a modified APK of the game, which featured new options like unlimited gems and coins. Is Deepseekplay.com Safe? Many users find it refreshing that they don’t need to share their email or any personal information. There’s no sign-up process involved, which means no tracking or any hidden conditions that come with many online services. Users can navigate the site freely without worrying about their data being stored or monitored. You can simply browse, click, and head straight to the official tool site without any hassle. Moreover, the added security of HTTPS encryption keeps your connection safe, even when you’re using public Wi-Fi. This means you can explore and use the tools you need without constantly looking over your shoulder. It’s all about providing a smooth and secure experience for users who value their privacy and want to keep things straightforward. This approach makes it easier for people to access the resources they need. And the best part? They can have it without the usual concerns about their personal information being collected. Additionally, this platform doesn’t use that information in ways they didn’t agree to. Overall, it’s a breath of fresh air in a digital world where privacy can often feel compromised. Can Deepseekplay.com Replace Other AI Tools In The Future? DeepSeekPlay.com is more than just a directory. AI fans can use it to save time, find new tools, and connect with others. It cuts through the clutter and gives you what you need—useful AI tools. There are no ads, no sign-ups, and no complications. The site is clean and updated, making it easy to discover the best in artificial intelligence. If you want to learn about AI or improve your skills, bookmark DeepSeekPlay.com. It could become your main resource for smarter and quicker work, creation, or learning.

READ MOREDetails
how to turn off chromecast

Fix: How To Turn Off Chromecast? – Latest Update 2021

Are you the regular users of the Chromecast devices? Then you already notice sometimes the Chromecast turning off is becoming very troubling. Turning off the Chromecast helps you to hide the connected device’s presence when people start searching in your network. In that respect, the most important question which comes to your mind is how to turn off Chromecast? As Chromecast sometimes gives you more sweat than the usually hot summer weather can. As every one of the users is aware of these facts, the Chromecast does not come up with an on and off switch.  Many users are preferring the Chromecast device showing in their home network while it is not being used. But many of the regular users do not prefer the Chromecast device showing in the home network. How To Turn Off Chromecast In Television? The easiest method of turning it off is just to unplug the device. Or the easiest answer is just to disconnect the wifi connections of the Chromecast. But both of these ways are not the fully authentic and technical way to stop working. Before asking how to turn off Chromecast, you have to learn about the Chromecast turning off technical functions. How to turn off Chromecast on tv is a very common question when you are accessing multiple television connections with the Chromecast. For your better understanding and knowledge, here is the step-by-step guide on how to turn off the Chromecast device from your home network, android phone, and Television. Turning Off The Chromecast By Switching Off The Plug As we told you, switching the power off is the easiest method to turn off the Chromecast devices. Chromecast is coming with a separate power port, which was connected with the main switch. You have to plug in the wall charger to get the connection. If you can unplug the charger from the port, the device is automatically getting disconnected from the network. If the Chromecast device is connected with your television, you can switch off the television. But that move does not turn off the Chromecast device. If you face a problem turning off the main power switch, you can use the aromatic switch to get the operation done automatically. But still, then the Chromecast device is connected with your home wifi networks. And the Chromecast device is still showing in the available connected devices like the android phones. How To Turn Off Chromecast On Android? In many Chromecast devices are getting used in the single house, then most of the time the android phone users are facing more trouble turning off the devices. If you are using the Chromecast devices, then turning off the Chromecast on android is the common question arising in your mind when you are facing the interruption in the middle of your streaming videos.  Most of the users want to turn off the Chromecast to preserve the phone’s safety-related concerning issues. And most of the users are facing problems during the streaming of the video because, in the middle of your streaming video, some content can pop up. You can simply stop the casting by simply enabling the Chromecast device from your android phones. And this is the simple process of how to turn off Chromecast. Step 1: Just click on the image of the Chromecast device from your android phone. Step 2: Open the file of the Chromecast devices. Step 3: Click on the settings of the Chromecast devices options and open the setting options. Step 4: After entering the setting of the disable Chromecast option, let others control your cast media. Step 5: And you can turn off the Chromecast from the android devices. How To Stop Casting To Chromecast? If you want to stop the casting of the Chromecast, as you already know, there are many apps that are getting compatible with the Chromecast. Still, if you are using these apps to operate the Chromecast, then you lose control over the Chromecast. And if the remote control over the Chromecast is disabled, then your manual controls are also limited. How to turn off Chromecast is a common feature of turning off the multiple connectivities of the television. But if you lose control over the Chromecast, the volume bar to pause button everything is in a non-functional state. For these purposes, you can use google chrome. Here is the step-by-step process to stop the casting of the Chromecast. To stop the interference from popping up, casting closer is an essential task. Step 1: Go to the google chrome browser settings. Step 2: Then go to the cast options after opening the browser setting options. Step 3: If you see the Chromecast options in the blue color mode, which means the Chromecast is now in the functional state. Step 4: You have to make it white by disabling the options. Step 5: After disabling the options, then cross the chrome and restart your device. Step 6: After restarting your device, recheck the casting option after opening the browser. Step 7: You can also shut down the Chromecast casting from your google homepage. Bottom Line If you are using the Chromecast in multiple ways and the different devices, switching off the devices and turning off Chromecast is necessary. How to turn off Chromecast is a common question that has multiple ways of solving.  If you ask us why you need to turn off the Chromecast devices, here are the answers. If you want to preserve your device security and are eager to close the outside’s external interference, then turning off the Chromecast is the easiest solution.  When you are connected with the Chromecast devices, you automatically see how many other devices are connected with the network, and this causes interference and trouble in the network. More Resources: Headphones vs Earbuds: How to Choose for the Best Music Experience. Your Guide In Buying Kid-Friendly Gadgets. Alexa Voice Assistant: Why It Succeeds Where Others Fall

READ MOREDetails